Jangri is a very yummy and traditional sweet variety.
Jangri is one of the popular sweet dish available in most of sweet shops in India. We can see many people buying Jangri from the sweet stalls especially for Diwali and other festivals. This is a very simple and easy to make sweet dish at home with all simple ingredients. We just need little patience to get the right shape, otherwise this is one of the easiest dish to make at home.
Quick Video Version
Video with Voice Over
 |
| Jangri |
| Yield | 20 |
| Preparation Time | 1 hour |
| Cooking Time | 1 hour |
 |
| Jangri |
Ingredients:
| Urdal | 1 cup |
| Raw Rice | 2 teaspoon |
| Sugar | 3 Cups |
| Oil | For Frying |
| Kesar color(Saffron Color) | 1/4 teaspoon |
| Orange Essence | 4 Drops |
 |
| Jangri |
Method:
- We can buy Jangri cloth that is available in the shop. Also we can use thick plastic cover. In the bottom middle of the cover, heat the needle and insert the needle in middle of the cover to make a small hole. Soak the urdal and raw rice in water for 1 hour
- After an hour, Rinse the urdal and rice and grind it in grinder by adding very little water like we do for medhuvadai
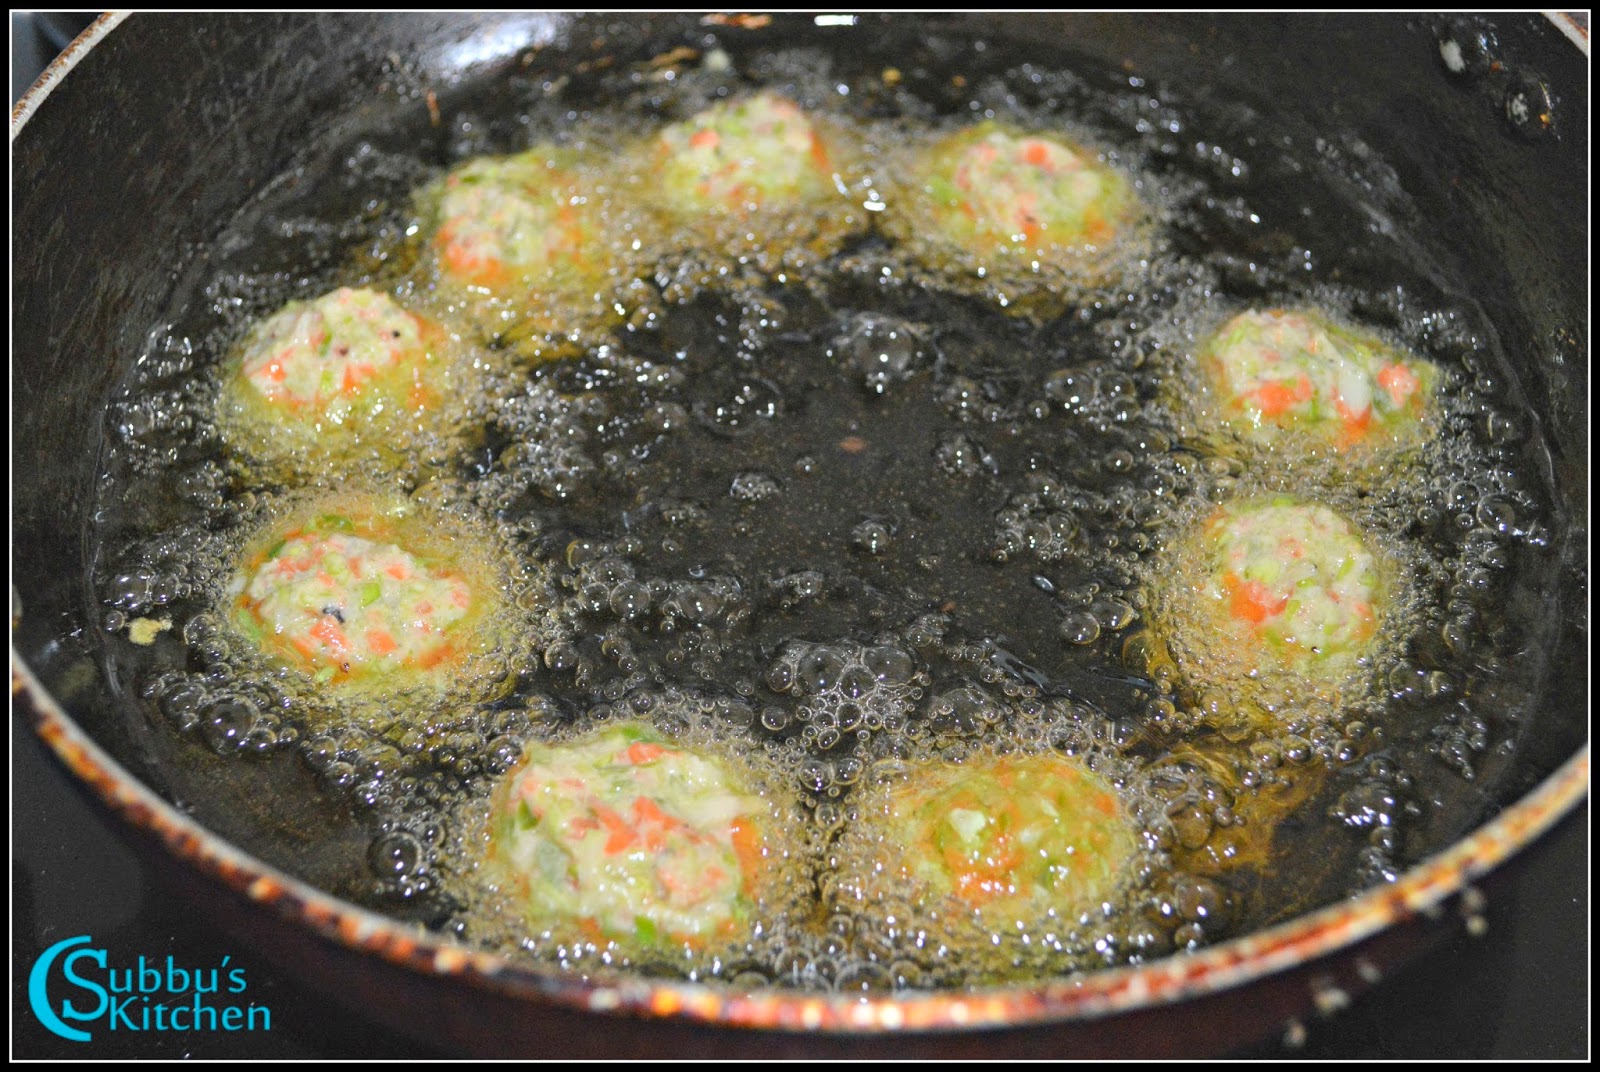
- Take 1 handful of urdal flour and put it in plastic cover. First take a plate and try to squeeze the cover to make jangri pattern. We need to make one circle and then followed by small circles to make a flower like design. Try once or twice in the plate before trying directly in the oil just to be confident enough to proceed with. Heat oil in heavy bottomed pan. When the oil is hot enough, squeeze the plastic cover(like we do it using mehandi cone) so that the urdal flour comes out of the small hole in the plastic cover. Rotate your hand to squeeze the urdal flour in hot oil like a small circle with flower like design just we practised on a plate.
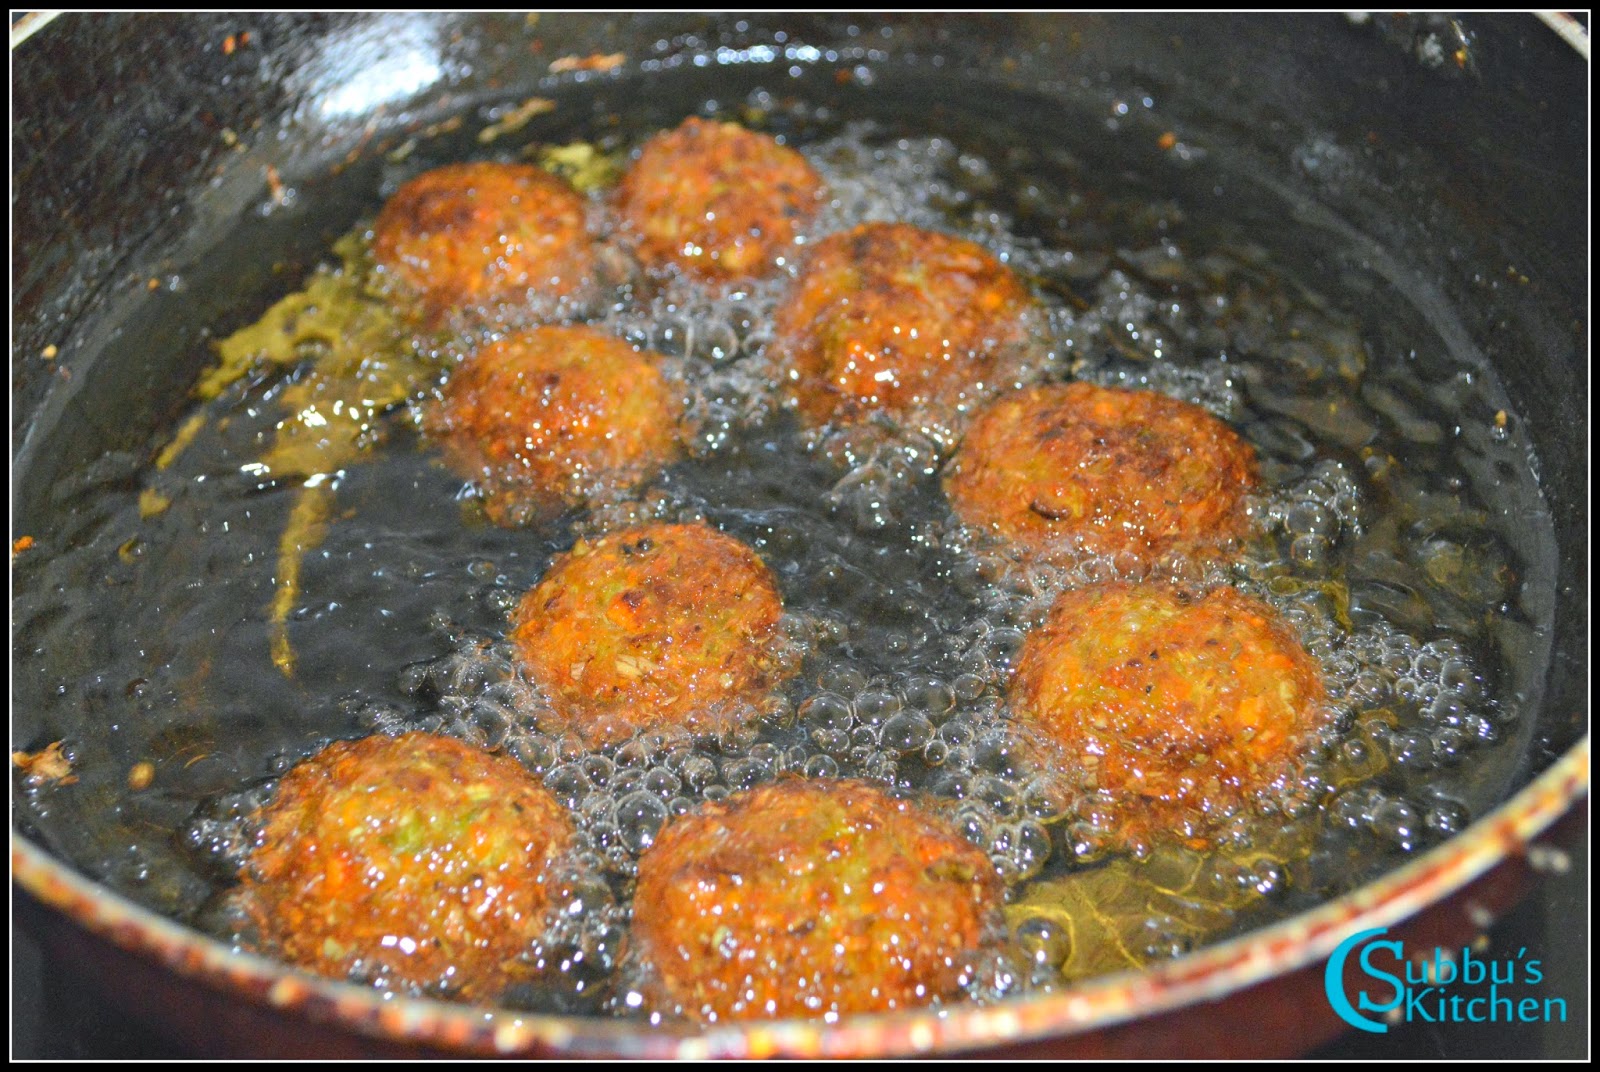
- Let the urdal flour gets fried in oil. When the jangri turns golden brown color and becomes cripsy, remove from flame. Repeat the steps for the remaining urdal flour.
- Heat another heavy bottomed pan, add sugar. Add water so that sugar dissolves in water. Stir the sugar syrup continuously until the syrup is sticking in hands. Now add organge essence and kesar powder and stir it well. Switch off the flame. To prevent the sugar syrup to get crystallized, we can add a teaspoon of lemon juice. If the sugar syrup gets crystallized after some time we can again keep in low flame and add a tablespoon of water and make it dilute again.
- To this sugar syrup, add 5-6 fried jangri and mix it well so that the jangris get dipped in sugar syrup. Leave this for 5-10 mins and then take those jangris out of sugar syrup and place it in a plate. Repeat the steps for the rest of fried jangris
- The delicious tasty Jangri is ready to serve for any occassion especially for the festival of lights(Diwali)
 |
| Jangri |
↧
October 14, 2017, 4:15 pm
Mysorepak is a rich and popular sweet in southern india. Most of us buy mysorepak from sweet shops during festivals thinking this is very hard to make at home. But this is one of the simple and easy sweet you can make under 30 minutes and you will have 20-25 pieces. A rich and delectable sweet to share with your friends and relatives. I have already shared the recipe of krishna sweet mysorepa in my blog. That method needs lots of ghee which melts in our mouth. This version is the crispier version of mysorepak. in this version going to use less ghee and the muysorepak is crunchy and tasty!
Quick Video Version
Detailed Video Version
 |
| Mysorepak |
Preparation and Yield:
| Preparation time | 5 mins |
| Cooking Time | 30 mins |
| Yield | 25 |
| Recipe Category | Sweet |
| Recipe Cuisine | South Indian |
 |
| Mysorepak |
Ingredients:
| Gram Flour / Besan | 1 Cups* |
| Ghee | 1 Cup |
| Sugar | 2 Cup |
*1 Cup = 250ml
 |
| Mysorepak |
Method:
- Take a tray and grease it with ghee
- Heat a pan, add ghee and allow it to melt. Add besan flour little by little and stir well so that there are no lumps. When the besan are nicely mixed with ghee the mixture starts to rise up like milk. When we boil milk, it starts to bubble up and rise up, in the same way, the besan and ghee mixture starts to rise up, this is the time, you need to switch off the flame and remove the pan and keep the mixture aside. If you overcook the mixture, you will have the burning smell of ghee.
- In another pan, add 2 cups of sugar and add water to soak the sugar.When the sugar gets dissolved nicely, stir nicely till you get a one string consistency. When you take a drop of syrup and rub between your thumb and pointer, one string should be formed. You can refer the video for this consistency.
- Once the one string consistency reached, slowly add the besan and ghee mixture and stir continuously till the besan, ghee and sugar and nicely mixed up and incorporated well.
- Slowly the mixture starts to thicken up and starts to roll up and doesn't stick to the sides of the pan. A frothy or foamy layer starts to form on top the mixture, the whole mixture starts to rise up like boiling milk. Immediately switch off the flame and pour the mixture on to the tray and pat it with backside of the ladle
- You can sprinkle a teaspoon of sugar on the patted mixture. Allow it to cool for a minute and then cut into square of diamond shaped pieces
- The crunchy and delicious Mysorepak is ready!
 |
| Mysorepak |
↧
↧
October 12, 2017, 11:54 pm
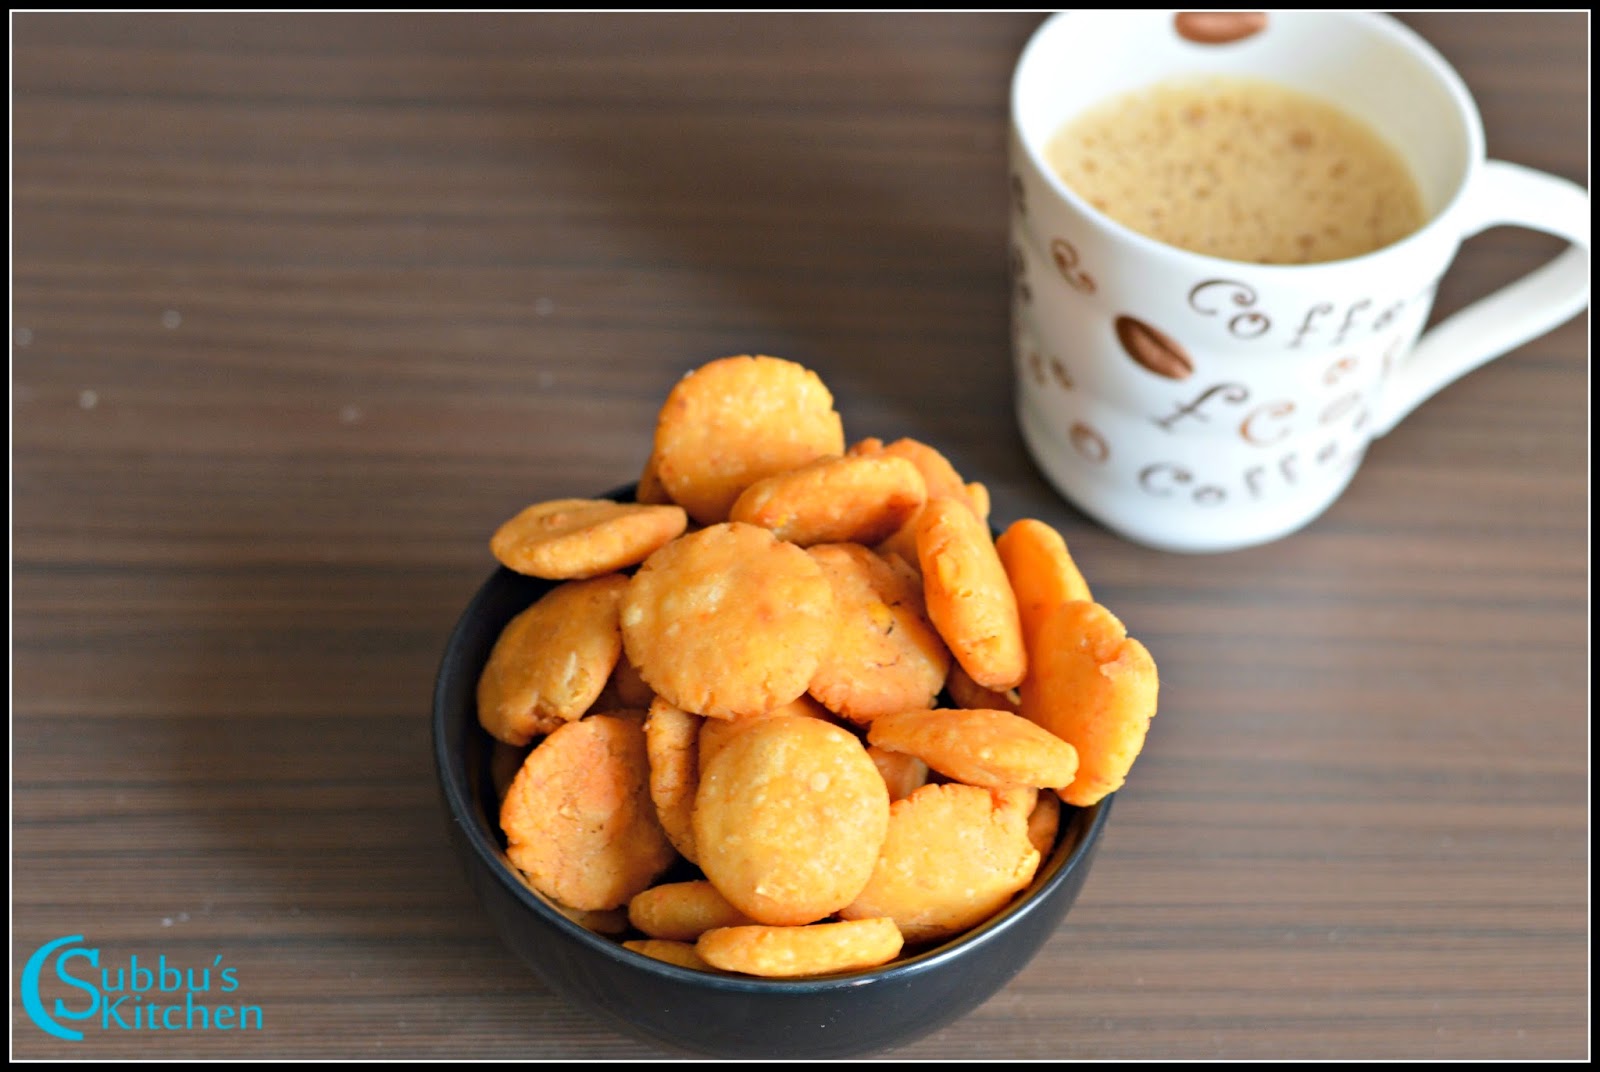
Kara Kara, Muru Muru Buttons, a crispy snack which is so simple to make with all available ingredients at home. A very easy and quick to make dish. No hassle with press and mould. Crispy buttons are made with rice flour and dals. Using homemade rice flour gives a nice texture to the dish, but we can very well use store bought rice flour. Store bought rice flour gives a little more reddish color to the dish. We even do this dish as an evening snack and enjoy with tea / Coffee. Try this simple dish for this Diwali and enjoy the snack!
 |
| Kara Kara Buttons Recipe | Crispy Buttons Recipe |
Preparation and Yield:| Preparation time | 10 mins |
| Cooking Time | 1 hour |
| Yield | 250gms |
 |
| Kara Kara Buttons Recipe | Crispy Buttons Recipe |
Ingredients:
| Homemade Rice Flour | 1 Cup** |
| Urdal | 1 teaspoon |
| Channadal / Bengal Gram dal | 1 teaspoon |
| Moong dal | 1 teaspoon |
| Red Chilli Powder | 1/2 teaspoon |
| Hing | a Pinch |
| Grated Coconut | 2 teaspoon |
| Salt | To taste |
| Oil | For Deep Frying |
**1 Cup = 250 ml
 |
| Kara Kara Buttons Recipe | Crispy Buttons Recipe |
Method:
- Take the dals in a vessel. Rinse them in water and pressure cook them allowing 3-4 whistles. We need nicely mashed dal. Once the dal is cooked, mash it nicely and keep it aside
- Take a mixing bowl and add rice flour, mashed dal, salt, red chilli powder, hing, grated coconut and mix well. Add water little by little and knead it to a nice and stiff dough
- Take a clean white towel and spread it on the floor. Make small gooseberry sized balls out of the dough place it in the towel. Using your thumb, press each ball in the middle to make it flat like a button. Do not press too much. The buttons should be small and little thick.
- Repeat the step for the rest of the dough. Let the buttos dry for couple of minutes in the towel. Meanwhile, heat oil in a pan, when the oil is hot enough, gently add 10-12 buttons to the oil.
- Deep fry the buttons in low flame till they are crispy and turn to golden brown color. Keep the flame low while frying, because the buttons are little thick and hence needs more time to deep fry them. Take the crispy buttons out of the oil and keep in paper towel to drain the excess oil.
- Serve the yummy and crispy Buttons with hot coffee/ tea and enjoy!
 |
| Kara Kara Buttons Recipe | Crispy Buttons Recipe |
↧
October 16, 2017, 10:23 am
Diwali is always special for most of us and every Diwai most of us plan to make some new dishes which can surprise our family and friends. One such recipe is Suryakala, Chandrakala and Lavanga Lathika. This is a 3 in 1 Sweet dish where the outercover and also the filling the remains the same. The shape of the sweet differentiates from one another. As the name suggests, Suryakala is in circular shape like 'Sun', Chandrakala in the shape of a Crescent moon and Lavanga lathika is in rectangular shape with clove on the top.
So making the filling and outercover once and do 3 types of sweet dishes would surely make our effort easy and also we can surprise our family. Lets see how to make this simple dish...
 |
| Suryakala, Chandrakala, Lavanga Lathika Recipes |
Preparation and Yield:
| Preparation time | 30 mins |
| Cooking Time | 1 hour |
| Yield | 20-25 pieces |
 |
| Suryakala, Chandrakala, Lavanga Lathika Recipes |
Ingredients:
| Maida / All purpose flour | 2 Cups* |
| Ghee | 3 tablespoon |
| Cooking Soda | 1/4 teaspoon |
| Salt | a pinch |
| Sugar | 1 Cup |
| Homemade Khova** | 1 Cup |
| Cashews | 4 |
| Almonds | 4 |
| Pistachios | 4 |
| Cardamom Powder | 1/2 teaspoon |
| Oil | For deep frying |
| Lemon Juice | 1/2 tablespoon |
| Cloves | 10 |
*1 Cup = 250ml
** We can also use storebought khova. I have tried this recipe with both homemade khova and store bought and both of them turned out good. If you are buying a sugarless khova then add 1/2 cup of sugar and mix it with khova.
Common Steps for all 3 dishes- First take a mixing bowl and add maida, ghee, salt and cooking soda. Mix well so that the ghee is spread nicely in the flour.
- Add water little by little and make like a soft chapati dough. Cover and keep it aside for 15-20 minutes. Take the khova in a bowl and crumble it nicely
- Add the cashews, almonds and pistachios in a mixer and grind it to a coarse powder
- Add the coarsely ground nuts and cardamom powder to the khova and mix well. This is the stuffing. Take the maida dough and knead it again and make lemon sized balls out of it
- Lets prepare the sugar syrup. Heat a pan and add sugar to it. Add 2 cups of water and bring it to boil.
- When the sugar syrup starts to boil, keep the flame medium and stir till the syrup reaches one string consistency. When you take a drop of sugar syrup and rub between your fingers it should form like a string. At this stage switch off the flame and add the lemon juice and mix well. Adding lemon juice prevents the crystallization of the sugar syrup. Now our sugar syrup is ready.
- Take one maida ball and roll it to a small and thick poori. Roll the poori in such a way that the corners are thin and the center is thick. This is the make sure that the filling doesn't come out while frying the suryakala. The poori should not be so thin then the filling will surely comeout in hot oil. Do not roll too thick also, then it will take more time to fry in the oil. So roll out the poori and Place a small bowl or a lid upside down and press it so that we would get nice circular shaped poori and all the final suryakala would look same in shape and size.
- Press the lid / bowl and remove the excess dough.
Method for making Suryakala:
- For suryakala take 12 balls of the maida dough, we need 2 rolled pooris for each suryakala. Roll the poori as mentioned in the above points (7 & 8)
- Place a teaspoon of filling in the center of one rolled poori. Then apply little water around the edges of the poori. Place other poori on top of the first poori to cover the filling and press gently so that the edges are sealed.
- Then take the stuffed pooris and using your fingers start from one side and gently twist the corners as shown in the figure. Repeat this for rest of the pooris. Heat oil in a pan. When the oil is hot enough, keep the flame medium and add 3-4 suryakala and deep fry them till they turn golden brown color on both the sides.
- Remove the fried suryakala and place it in a strainer or paper plate to drain excess oil. Put the fried suryakala in the sugar syrup and coat it nicely in the sugar syrup on both the sides. Repeat the same for rest of the suryakalas.
- Now our Suryakala is ready to serve
 |
| Suryakala |
Method for making Chandrakala:
- For Chandrakala take 6-7 balls of the maida dough, Roll the poori as mentioned in the above points (7 & 8)
- Place a teaspoon of filling in the center of one rolled poori. Then apply little water around the edges of the poori. Cover one end of the poori with other end so that it would form like a crescent moon or like a semicircle. Seal the edges carefully.
- Then take the stuffed poori and using your fingers start from one side and gently twist the corners as shown in the figure. Repeat this for rest of the pooris
- Heat oil in a pan. When the oil is hot enough, keep the flame medium and add 3-4 Chandrakala and deep fry them till they turn golden brown color on both the sides. Remove the fried Chandrakala and place it in a strainer or paper plate to drain excess oil. Put the fried Chandrakala in the sugar syrup and coat it nicely in the sugar syrup on both the sides. Repeat the same for rest of the Chandrakala .
- Tasty Chandrakala is ready to serve
 |
| Chandrakala |
Method for making Lavanga Lathika:
- For Lavanga Lathika take rest of balls of the maida dough, Roll the poori as mentioned in the above points (7 & 8)
- Place a teaspoon of filling in the center of one rolled poori. Then apply little water around the edges of the poori. Bring one end of the poori to the center covering half of the filling. Bring other end of the poori covering the entire filling
- Then close the 2 edges and form like a rectangle. Insert a clove on the center of the closed edges.
- Heat oil in a pan. When the oil is hot enough, keep the flame medium and add 3-4 Lavanga Lathika and deep fry them till they turn golden brown color on both the sides. Remove the fried Lavanga Lathika and place it in a strainer or paper plate to drain excess oil. Put the fried Lavanga Lathika in the sugar syrup and coat it nicely in the sugar syrup on both the sides. Repeat the same for rest of the Lavanga Lathika .
- Now our Lavanga Lathika is ready to serve
 |
| Lavanga Lathika |
Tasty and Yummy Suryakala, Chandrakala and Lavanga Lathika is now ready to serve. Allow it to cool and store it in a air tight container.
 |
| Lavanga Lathika |
↧
October 20, 2017, 10:34 am
Pav Bhaji is one of the popular Indian Fast Food dish from Maharashtrian cuisine. Pav Bhaji is a spicy mixture of mashed vegetables along with a generous dose of fresh tomatoes, a dollop of butter, consumed with warm bread gently or crispy fried in butter. Pav means bread. Bhaji in Marathi means vegetable dish. Pav bhaji consists of bhaji (a thick potato-based curry) garnished with coriander, chopped onion, and a dash of lemon and lightly toasted pav. The pav is usually buttered on all sides. More than a snack, its quite a meal. The Bhaji makes a good stuffing which fills our tummy nicely. It is a very popular street side food in Maharashtra. This Pav Baji is made in a very broad and heavy bottomed pan. But making this yummy dish in pressure cooker in as one-pot dish is quick and easy. In one shot, we can add all required ingredients and pressure cook for 2-3 whistles to have a quick and yummy Pav Baji within 30 mins.
Video Version
Text Version |
| One Pot Pav Bhaji in Pressure Cooker |
Preparation and Yield:| Preparation time | 10 mins |
| Cooking Time | 20 mins |
| Servings | 4 |
| Recipe Category | Main |
| Recipe Cuisine | Indian |
 |
| One Pot Pav Bhaji in Pressure Cooker |
Ingredients:
| Onion | 1, Finely chopped |
| Chopped Ginger+Garlic | 1 Tablespoon |
| Capsicum | 1/2, Chopped |
| Tomato | 3, Finely Chopped |
| Carrot | 1, Finely Chopped |
| Potatoes | 3, Cubed |
| Green Peas | 1/4 Cup |
| Pav Bhaji Masala | 2 Teaspoon |
| Red Chilli Powder | 1/2 Teaspoon |
| Salt | To taste |
| Water | 3 Cups |
| Butter | 2 Tablespoon |
| Coriander Leaves | For Garnishing |
 |
| One Pot Pav Bhaji in Pressure Cooker |
Method:
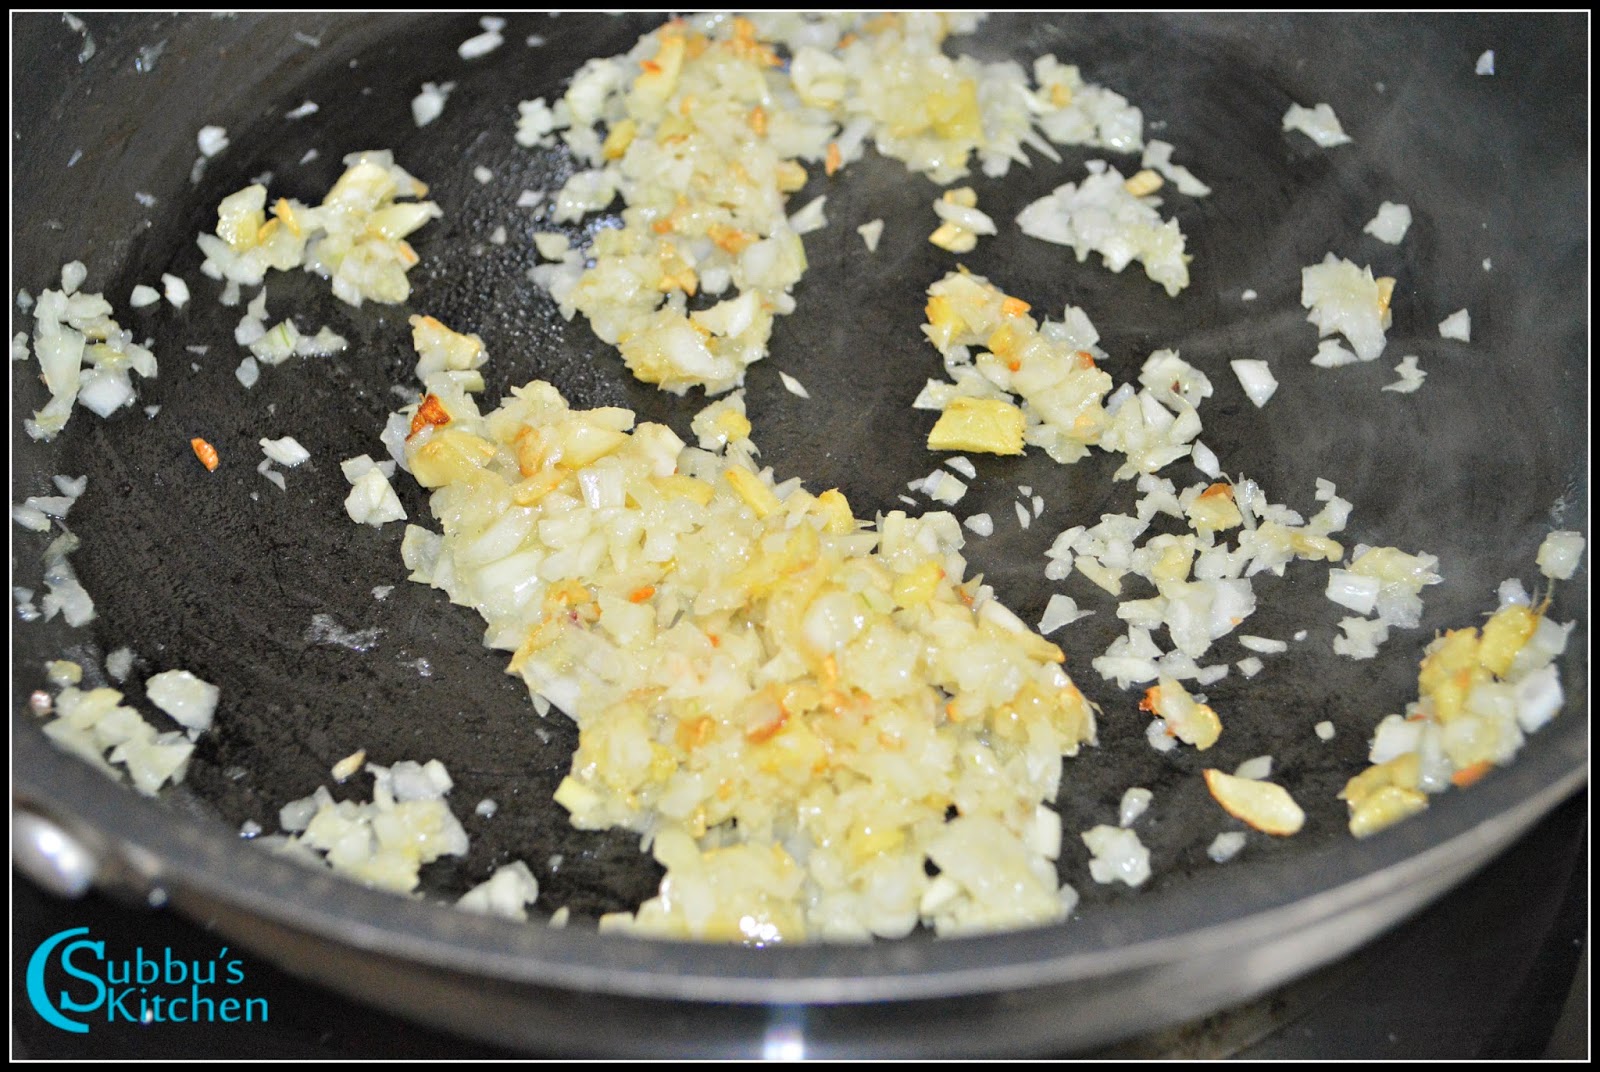
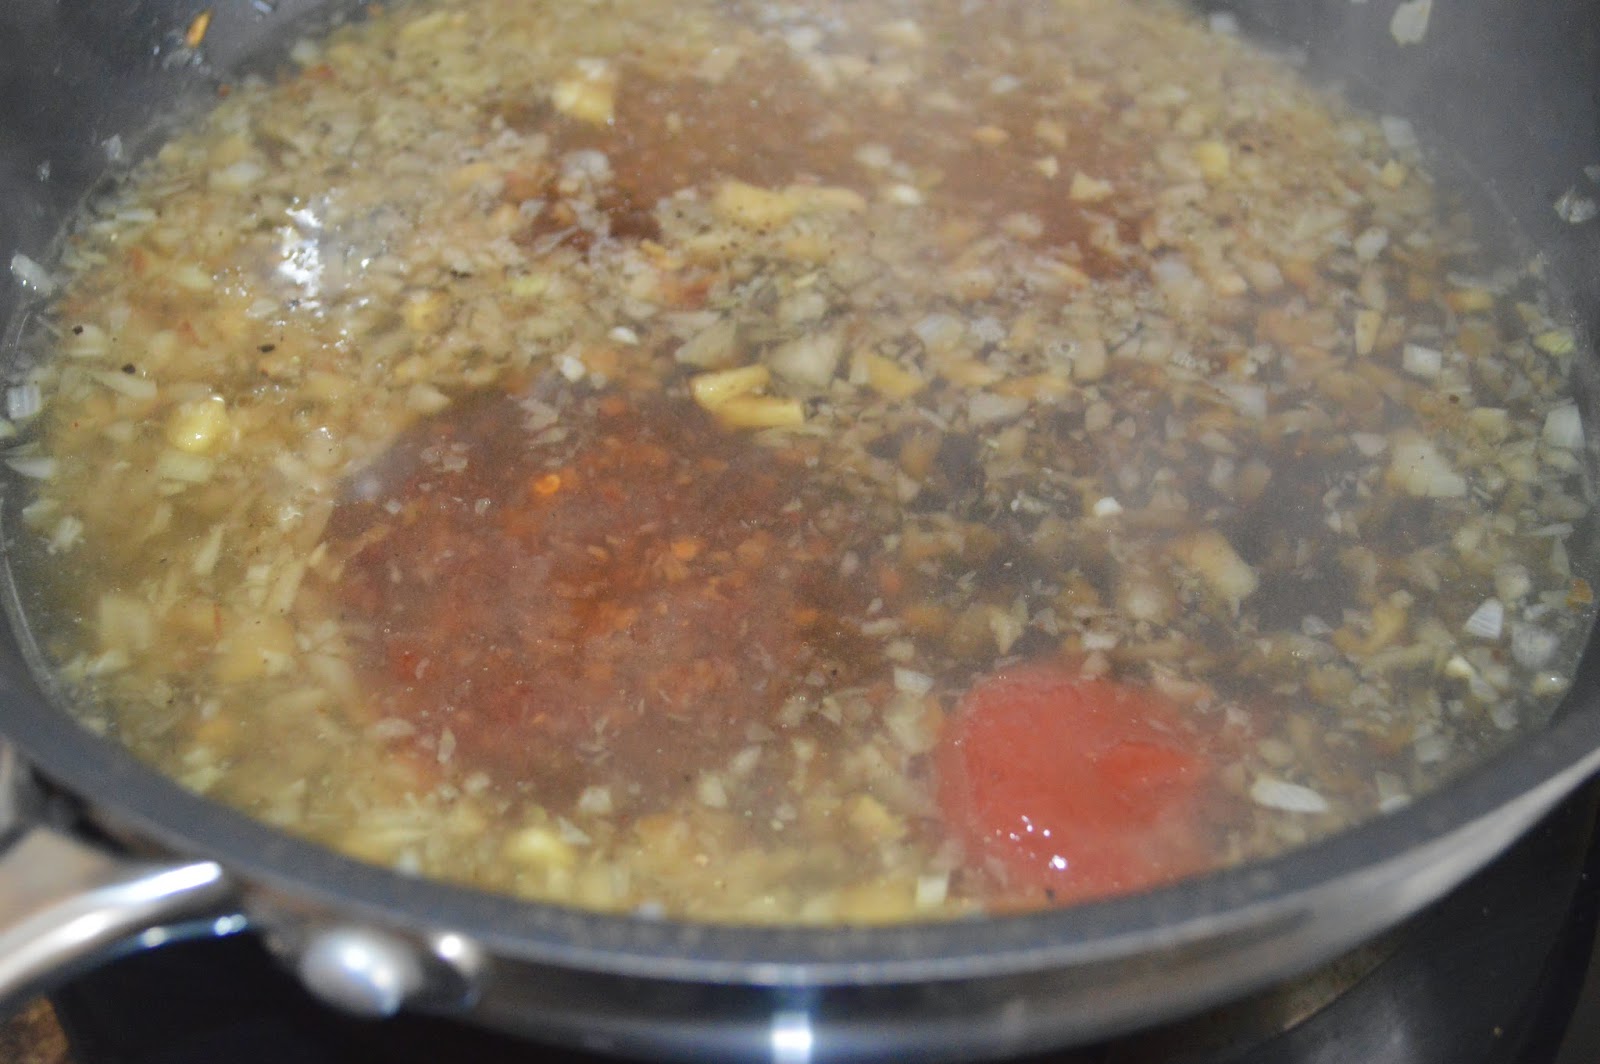
- Heat butter in a pressure cooker. When the butter melts, add onions and sauté the onions in medium flame till translucent. Add chopped ginger+garlic and sauté along with onions
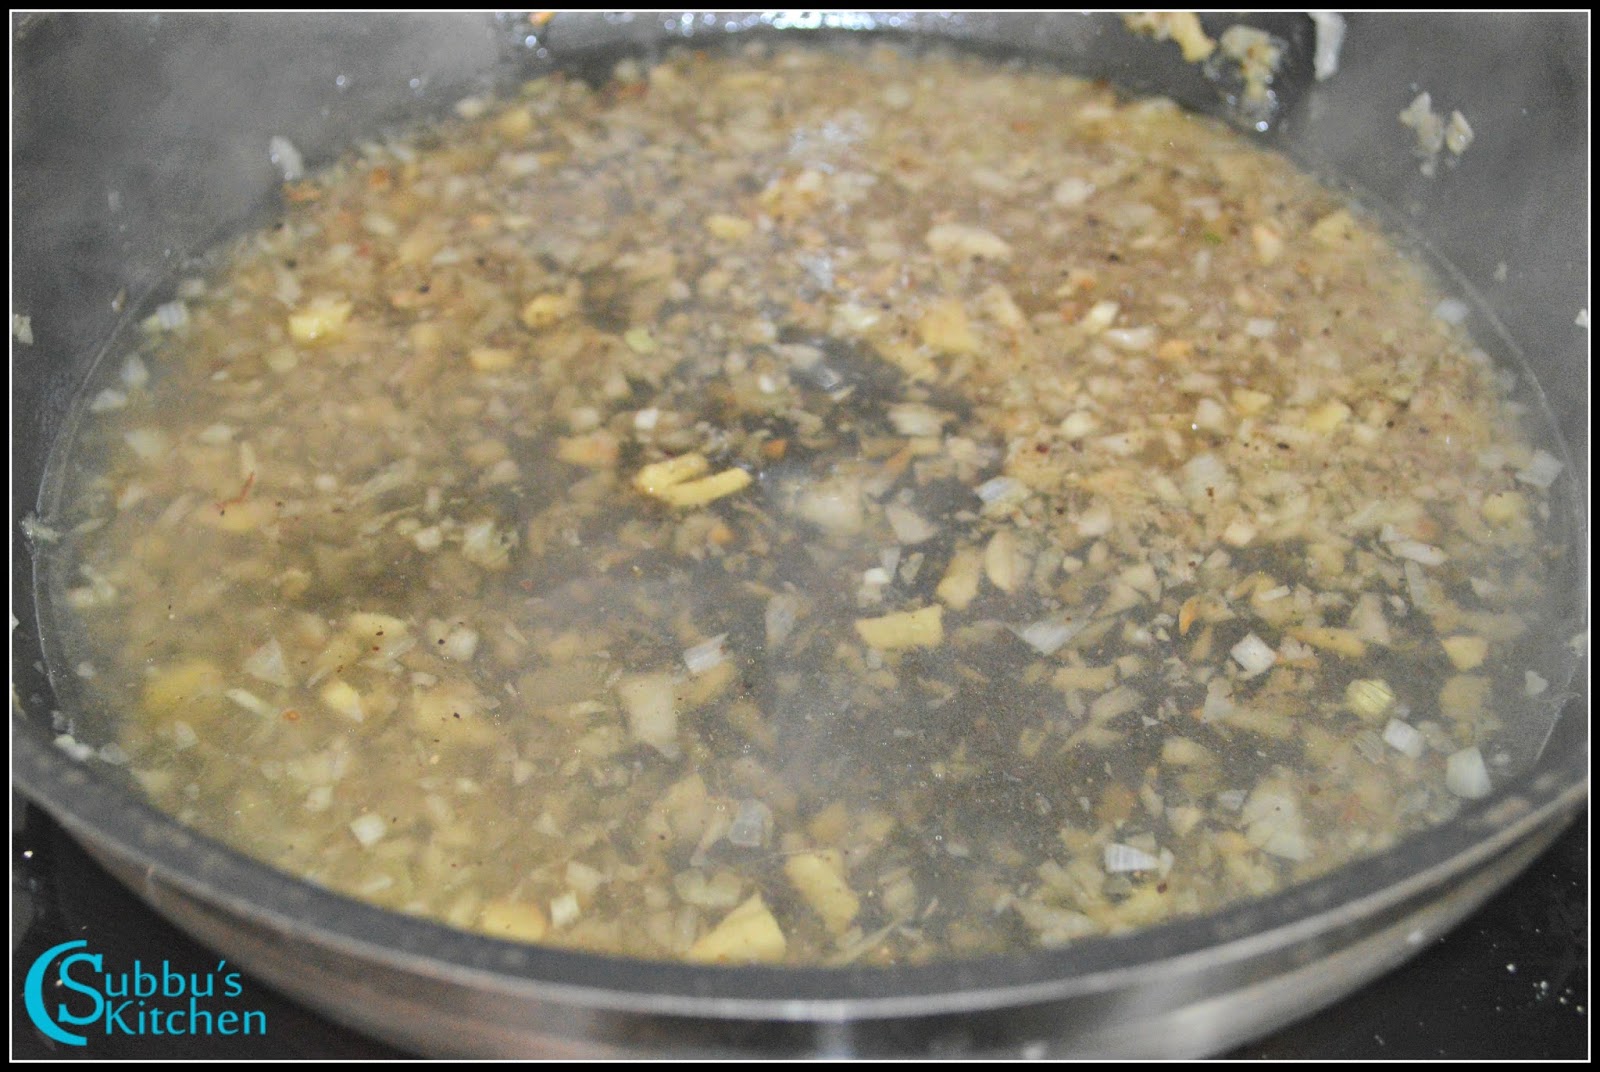
- Add Chopped capsicum to the sautéed onions. Next, we need to add tomatoes.
- Add the chopped carrots, potatoes and green peas and mix well. To this now add the Pav Baji masala, red chili powder, salt and give a good mix.
- Add 3 cups of water and close the pressure cooker with a lid and allow for 3 whistles
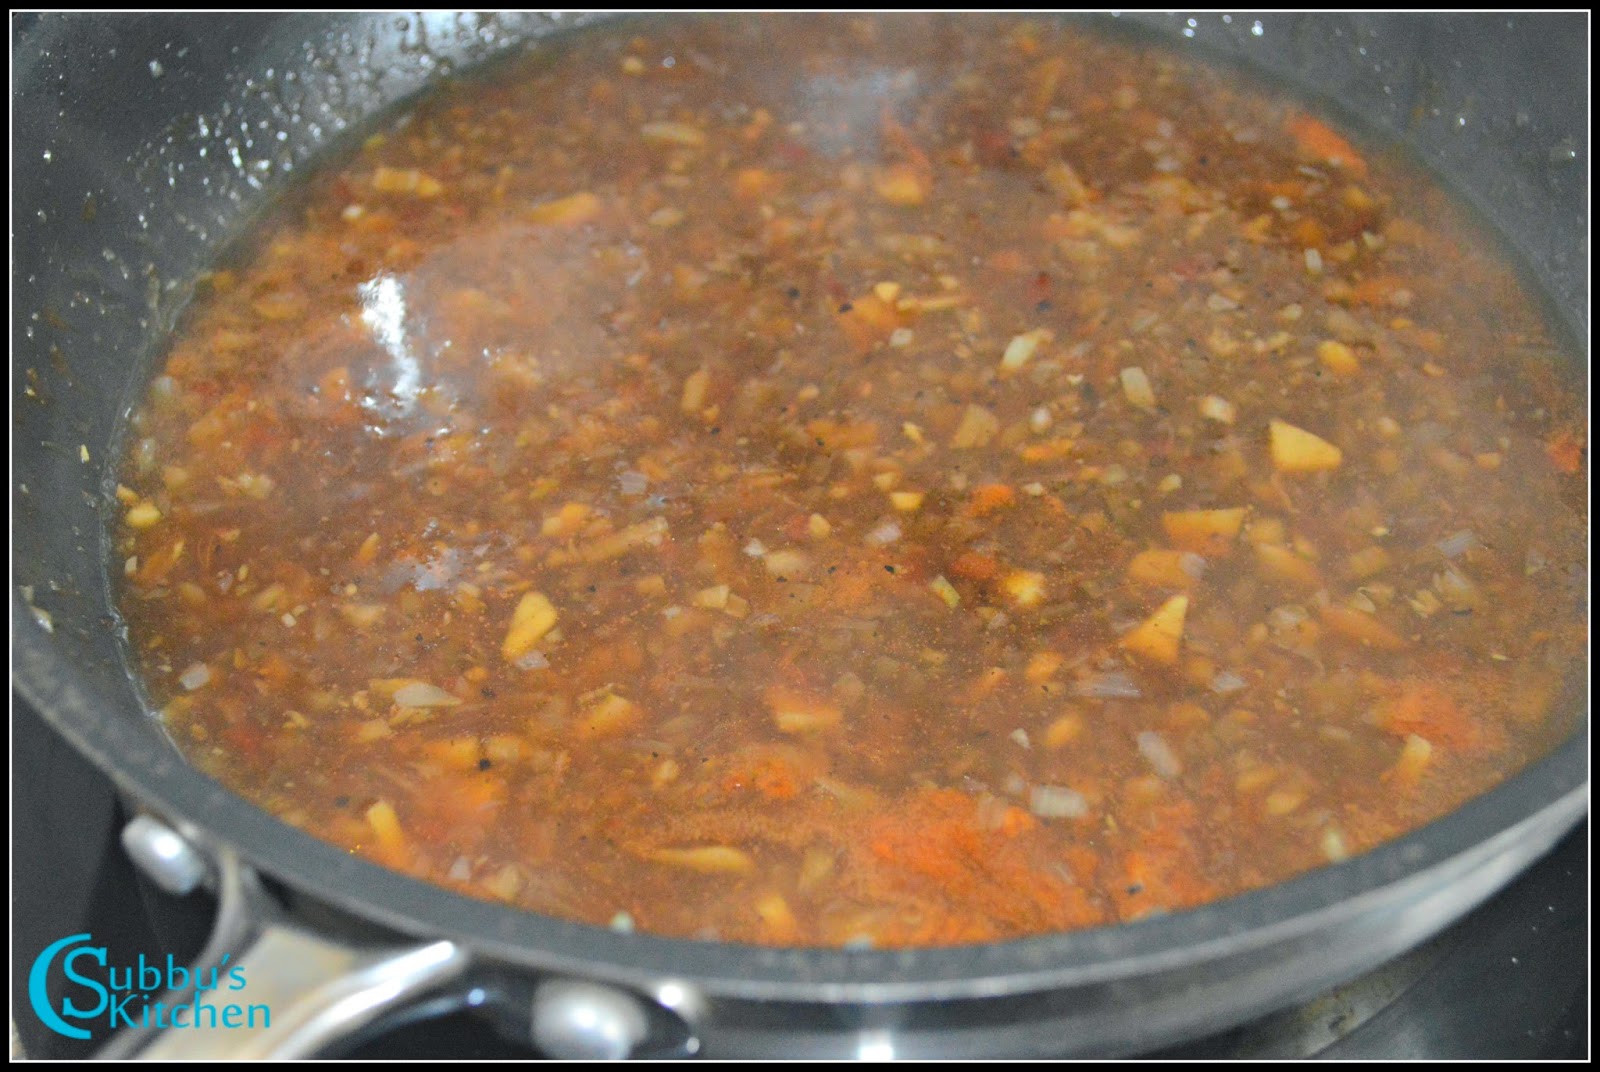
- Allow the steam to escape completely and then open the pressure cooker. Mash the veggies roughly. Finally garnish with coriander leaves
- The delicious Pav Bhaji is ready to serve with Ghee-Sauteed Pav!
 |
| One Pot Pav Bhaji in Pressure Cooker |
↧
↧
October 22, 2017, 4:33 pm
Gujarati Dal healthy and comforting dal recipe made from tuvar dal. In Gujarati cuisine, it is a part of the everyday meal and is mild sweet and tangy compared with any other Indian dals. Indeed, this dal recipe has also the sweet and tangy taste. Tomatoes and lemon juice brings in the tanginess and jaggery adds in the sweetness. Simple and quick to make and perfect to be served with hot steaming rice or rotis!
Video Version
Text version
 |
| No Onion No Garlic Gujarati Dal |
Preparation and Yield:| Preparation time | 5 mins |
| Cooking Time | 20 mins |
| Servings | 4 |
| Recipe Category | Main |
| Recipe Cuisine | North Indian |
 |
| No Onion No Garlic Gujarati Dal |
Ingredients:
| Thoor Dal | 1/2 Cup* |
| Tomato | 1, Finely Chopped |
| Green Chilli | 2, Slit |
| Chopped Ginger | 1 Teaspoon |
| Jaggery | 2 Tablespoon |
| Turmeric Powder | 1/4 teaspoon |
| Salt | To taste |
| Lemon Juice | 2 Teaspoon |
| Coriander Leaves | For Garnishing |
* 1 Cup = 250ml
For Tempering: | Ghee | 1 Tablespoon |
| Mustard Seeds | 1 Teaspoon |
| Cumin Seeds | 1/2 Teaspoon |
| Cinnamon | 1" Stick |
| Cloves | 2 |
| Asafoetida | a Pinch |
| Curry Leaves | Few |
| Red Chilli Powder | 1/2 Teaspoon |
 |
| No Onion No Garlic Gujarati Dal |
Method:
- Take a vessel. Add Thoor dal and add 1.5 cups of water and pressure cook the dal for 3 whistles.
- When the pressure is fully released, open the cooker and take out the cooked dal. Using a hand blender or whisk or even with a back of a ladle, mash the dal nicely. If you want, you can add 1/2 cup of water and mash it nicely
- Take the mashed up dal in a heavy bottomed pan. Add turmeric powder, salt, green chili, tomato, ginger, jaggery and stir well. Keep this in flame and cook in medium flame for 10 minutes
- Meanwhile, in another pan, heat the ghee. Add mustard seeds and allow it to sputter. Then add cumin seeds. Add cinnamon, cloves and curry leaves and saute for few seconds. Then switch off the flame and add asafetida and red chili powder. Add this tempering to the cooking dal and stir well
- Keep in flame for another couple of minutes and then switch off the flame. Finally add lemon juice and garnish with coriander leaves
- The delicious No Onion No Garlic Gujarati Dal ready to serve with hot steaming rice / Rotis
 |
| No Onion No Garlic Gujarati Dal |
↧
October 24, 2017, 7:13 pm
This spicy Garlic Chutney (Lehsun Ki Chutney) is a popular Rajasthani recipe and is usually served along with Dal Batti and Churma, although it can be served paratha, Cheela etc. There are variations we can include and this is my version of spicy Garlic Chutney which is a perfect side dish for Paratha.
Preparation and Yield:| Preparation time | 10 mins |
| Cooking Time | 20 mins |
| Servings | 3 |
| Recipe Category | Chutney |
| Recipe Cuisine | North Indian |
 |
| Spicy Garlic Chutney | Lehsun Ki Chutney |
Ingredients:
| Garlic Cloves | 1 Cup* |
| Red Chilli | 7-8 |
| Cumin Seeds | 1 Teaspoon |
| Salt | To taste |
| Oil | 2 Tablespoon |
| Mustard Seeds | 1 teaspoon |
| Fenugreek Seeds | 1/4 teaspoon |
* 1 Cup = 250ml
 |
| Spicy Garlic Chutney | Lehsun Ki Chutney |
Method:
- Soak the Red chillies in warm water for 10 mins. This will help in getting smooth garlic paste.
- After 10 mins, take garlic cloves in a mixer jar. To that add the soaked red chili along with cumin seeds and grind everything to a smooth paste
- Heat oil in a pan. Add mustard seeds and allow it to sputter. Add fenugreek seeds and sauté it for few seconds.
- Add garlic paste and stir well. The garlic is raw and it needs cooking. So keep the flame in low and cook the garlic paste for 10 mins till the raw smell goes off
- When the garlic is cooked nicely, the chutney becomes thick and the oil starts to ooze out. Switch off the flame
- The delicious Spicy Garlic Chutney is ready to serve with Paratha / Dal Batti or churma etc
 |
| Spicy Garlic Chutney | Lehsun Ki Chutney |
↧
October 25, 2017, 2:24 pm
Moong dal palak cheela is one of the healthiest breakfast recipe. Palak Moong dal Cheela is a nutrition rich tasty savoury pancakes and makes a complete meal. A healthy, nutritious and protein packed breakfast to keep you going for the day. Cheela is also known as “crepes” they are very versatile – many different lentils can be used to make Cheela, a wide range of different vegetables can be used and the spiciness can be adjusted accordingly. Cheela made with besan will also be so tasty, but moong has more nutritional benefits. Also adding palak makes this dish much more healthier. Serve with any chutney of your choice and enjoy!
 |
| Palak Moongdal Cheela | Spinach Moong Crepes |
Preparation and Yield:| Soaking time | 3-4 hours |
| Cooking Time | 20 mins |
| Yield | 15-18 |
| Recipe Category | Breakfast |
| Recipe Cuisine | Indian |
 |
| Palak Moongdal Cheela | Spinach Moong Crepes |
Ingredients:
| Moong Dal | 1 Cup* |
| Finely Chopped Spinach | 1 Cup |
| Finely Chopped Coriander Leaves | 1/4 Cup |
| Salt | To taste |
| Red Chilli Powder | 1/2 teaspoon |
| Turmeric Powder | 1/4 teaspoon |
| Cumin Seeds | 1 teaspoon |
| Green chili+Ginger Paste | 1 Teaspoon |
| Curd | 1/2 Cup |
| Finely Chopped Onion | 1/2 Cup |
| Lemon | 1/2 |
| Oil | for cooking Cheela |
* 1 Cup = 250ml
 |
| Palak Moongdal Cheela | Spinach Moong Crepes |
Method:
- Wash and finely chop the spinach and set it aside
- Soak moong dal in water for 3-4 hours. After 3-4 hours, drain the dal and take it to mixer jar and grind it to a smooth batter
- To the batter, add salt, red chili powder, turmeric powder, cumin seeds, green chilli+ginger paste, curd, chopped spinach and chopped coriander leaves and mix everything well
- Add water to adjust the consistency. Finally add the lemon juice and stir well. Our Cheela batter Ready!
- Heat a tawa. The tawa should be medium hot when you pour the batter other wise the batter will gets stick on the tawa. So when the tawa is medium hot, pour a ladle of batter on the tawa and spread nicely to make a thin crepe
- Add a teaspoon of oil around the crepe and allow it to cook till light brown spots form on the bottom. Flip the cheela and cook on the other side and once done, remove the Cheela from the tawa. Repeat the same for the rest of the batter
- The delicious Palak Moongdal Cheela ready to serve!
 |
| Palak Moongdal Cheela | Spinach Moong Crepes |
↧
October 27, 2017, 4:14 pm
Vada Pav, Classic Mumbai style street food. Deep fried gram flour coated mashed potato balls sandwiched between pav bread. Batata vada also known as Aloo Bonda but it has slight variation of how we prepare aloo bonda in South Indian Style. We make aloo bonda by adding just red chilli powder. But here the main secret ingredient is Garlic-Ginger-Green Chillies. These " 3G's" make this dish extremely tasty and unique than our conventional SouthIndian style Aloo Bonda. This Batata Vada is stuffed inside the Pav Buns which is also called as "Laddi Pav". The Dry Garlic chutney is enhances the flavor of the whole dish. A perfect evening snack!Video Version
 |
| Vada Pav |
Text version
Preparation and Yield:| Preparation time | 15 mins |
| Cooking Time | 45 mins |
| Yield | 10-12 |
| Recipe Category | Snacks |
| Recipe Cuisine | Indian |
First Lets Prepare Batata Vada:  |
| Batata Vada Recipe | Mumbai Style Aloo Bonda Recipe |
Ingredients For Vada Batter:
| Gram Flour | 1 Cups* |
| Corn Flour | 1 tablespoon |
| Turmeric Powder | 1/4 teaspoon |
| Red Chilli Powder | 1/2 teaspoon |
| Salt | To Taste |
| Baking Salt / Bi Carbonate of Soda | 1 generous Pinch |
| Oil | 1 tablepsoon + Frying |
* 1 Cup = 250ml
Ingredients for Filling: | Boiled Potatoes | 3 |
| Green Chillies | 2-3 |
| Ginger | 1 Inch Piece |
| Garlic Cloves | 3-4 |
| Turmeric Powder | 1/4 teaspoon |
| Chopped Coriander Leaves | 1 tablespoon |
| Salt | 1/4 teaspoon |
| Oil | 1 teaspoon |
| Mustard Seeds | 1/2 teaspoon |
| Curry Leaves | few |
 |
| Batata Vada Recipe | Mumbai Style Aloo Bonda Recipe |
Method:
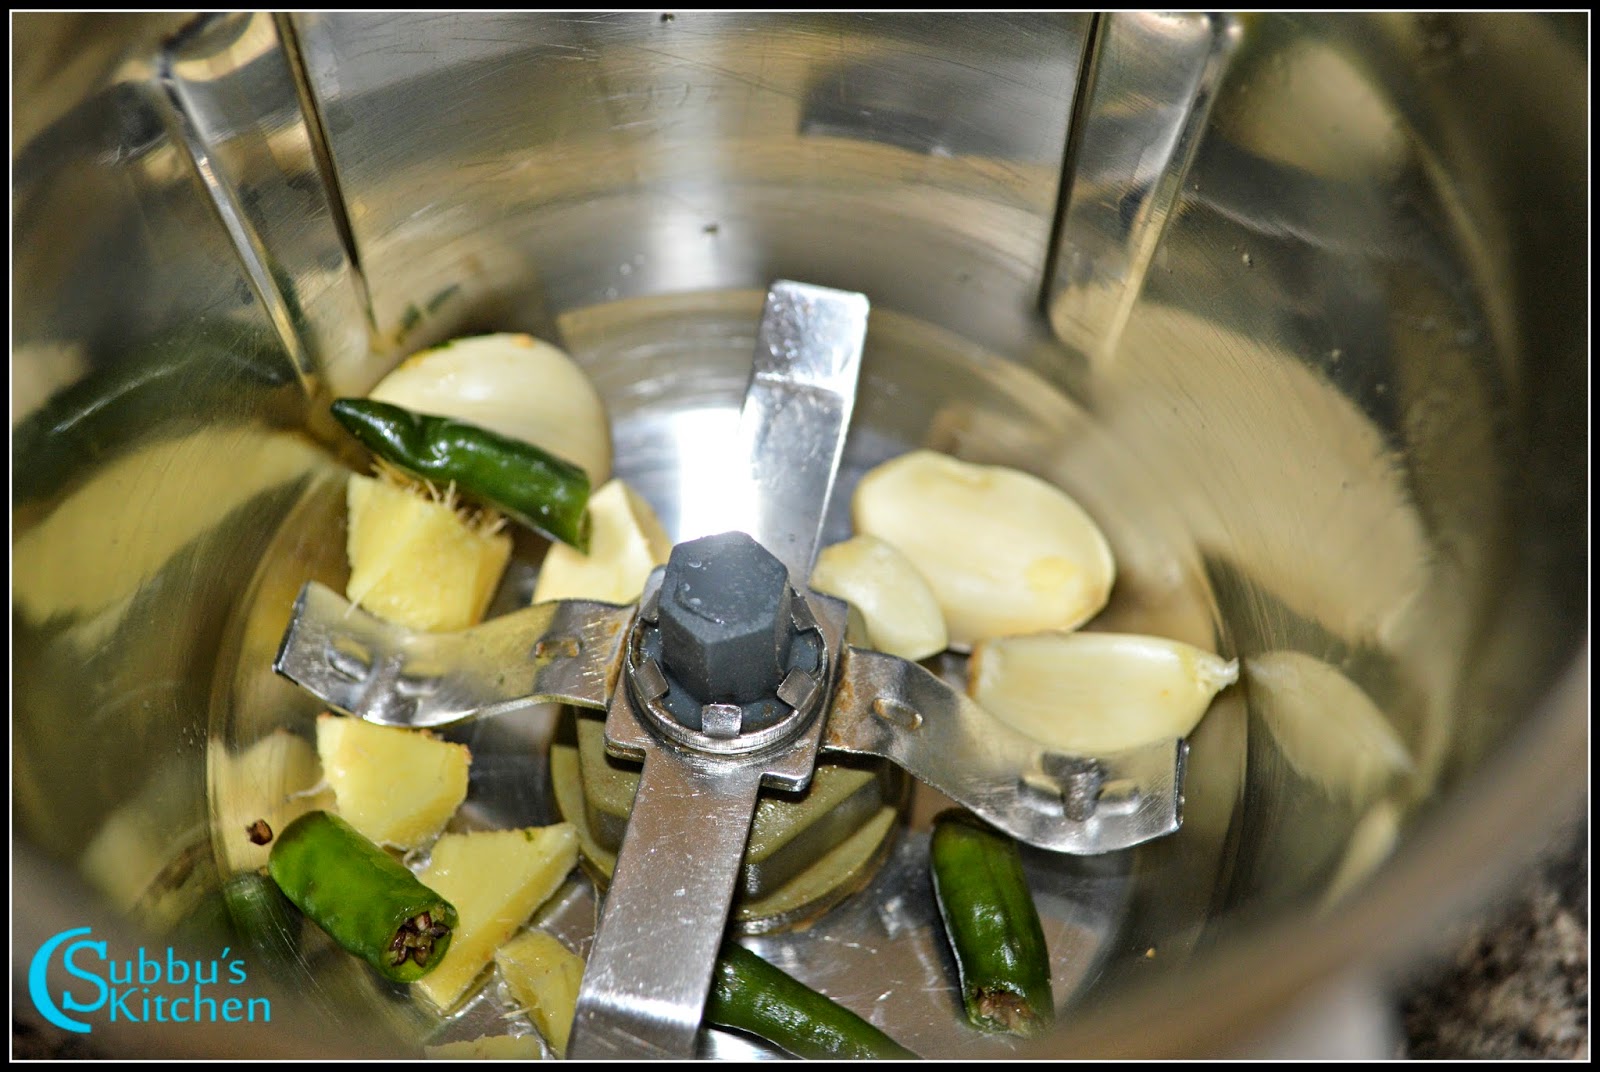
- First lets start with the filling of the vada. Take the green chillies, ginger and garlic cloves in a mixer and grind it to a nice paste. This is the spice mix for our filling.
- Heat oil in a pan, add mustard seeds. When the mustard seeds starts to sputter, add curry leaves and hing and fry for few seconds. Then add the ground ginger-garlic-green chilli paste and saute it for couple of minutes in medium flame.
- I have already boiled the potatoes and mashed it coarsely and kept it aside. Add these coarsely mashed potatoes to the pan and mix well
- Then add turmeric powder, salt and mix well. To the pan, then add finely chopped coriander leaves and mix everything well.
- Our Potato filling is ready. Allow the filling to come to room temperature and make lemon sized balls out of the filling and set it aside
- Now, lets prepare out batter. In a mixing bowl, add besan flour, corn flour and turmeric powder and mix well. Then add red chilli powder and salt and mix well.
- Then add water little by little and mix well and make it like a bajji batter. The batter should not be too thick or too thin. Heat oil in a pan. Just before you fry the dumplings, add a pinch of Bi Carbonate of Soda and a tablespoon of hot oil and mix everything well. Adding soda salt should be at last, just before frying the batata vada. If you plan to make these batata vada for guests, then prepare the dumplings and also the batter without adding soda salt and hot oil and keep it ready. When the guests arrive and they are ready to be treated, then heat the oil and add hot oil along with soda salt and mix the batter .
- Add each dumplings to the vada batter and nicely coat then with the batter using a fork. Fork will help to have a nice coating than using our hand. Then using the fork itself, gently drop each coated dumplings in the hot oil and fry them
- Flip the batata vada on other side and fry them in medium flame till they are crispy and turn golden brown outside. Remove the fried batata vada from oil and place them in paper towel to drain excess oil.
- Yummy and Crispy Batata Vada is now ready!
Lets Prepare Dry Garlic Chutney |
| Dry Ginger Chutney |
Ingredients: | Garlic Cloves | 10 |
| Peanuts | 1/4 Cup |
| Dry Coconut | 2 Tablespoon |
| Salt | To taste |
| Red chilli Powder | 1 teaspoon |
Method:
- Dry Roast Garlic Cloves till light golden brown. We just want to get rid of the raw smell of the garlic. Take these roasted garlic aside
- In the same pan, dry roast the peanuts and take the peanuts aside
- Again add the dry coconut and roast them till golden brown.
- Take all these in a mixer jar and add red chili powder and salt and grind it to a dry powder without adding any water
- Dry Garlic Chutney Ready!
 |
| Dry Ginger Chutney |
Lets Prepare Vada Pav |
| Vada Pav |
Ingredients: | Pav | 1 |
| Dry Garlic Chutney | 1 Tablespoon |
| Green Chutney | 1 Tablespoon |
| Sweet tamarind Chutney | 1 Tablespoon |
| Batata Vada | 1 |
| Roasted Green Chili | For Garnishing |
| Fresh Onions | For Garnishing |
Method:
- Take the Pav and slit it in half. Apply Green chutney on both the half of the bun
- Also apply sweet tamarind chutney on the bun. These chutneys are optional
- Add Dry Garlic Chutney to the bun. Keep a batata vada and gently press it
- Close the bun with other half. Take this in a serving plate
- Serve the Vada Pav with Roasted Green chili & Fresh Onions
- The mouth-watering Vada Pav Ready!
 |
| Vada Pav |
↧
↧
October 31, 2017, 5:20 pm
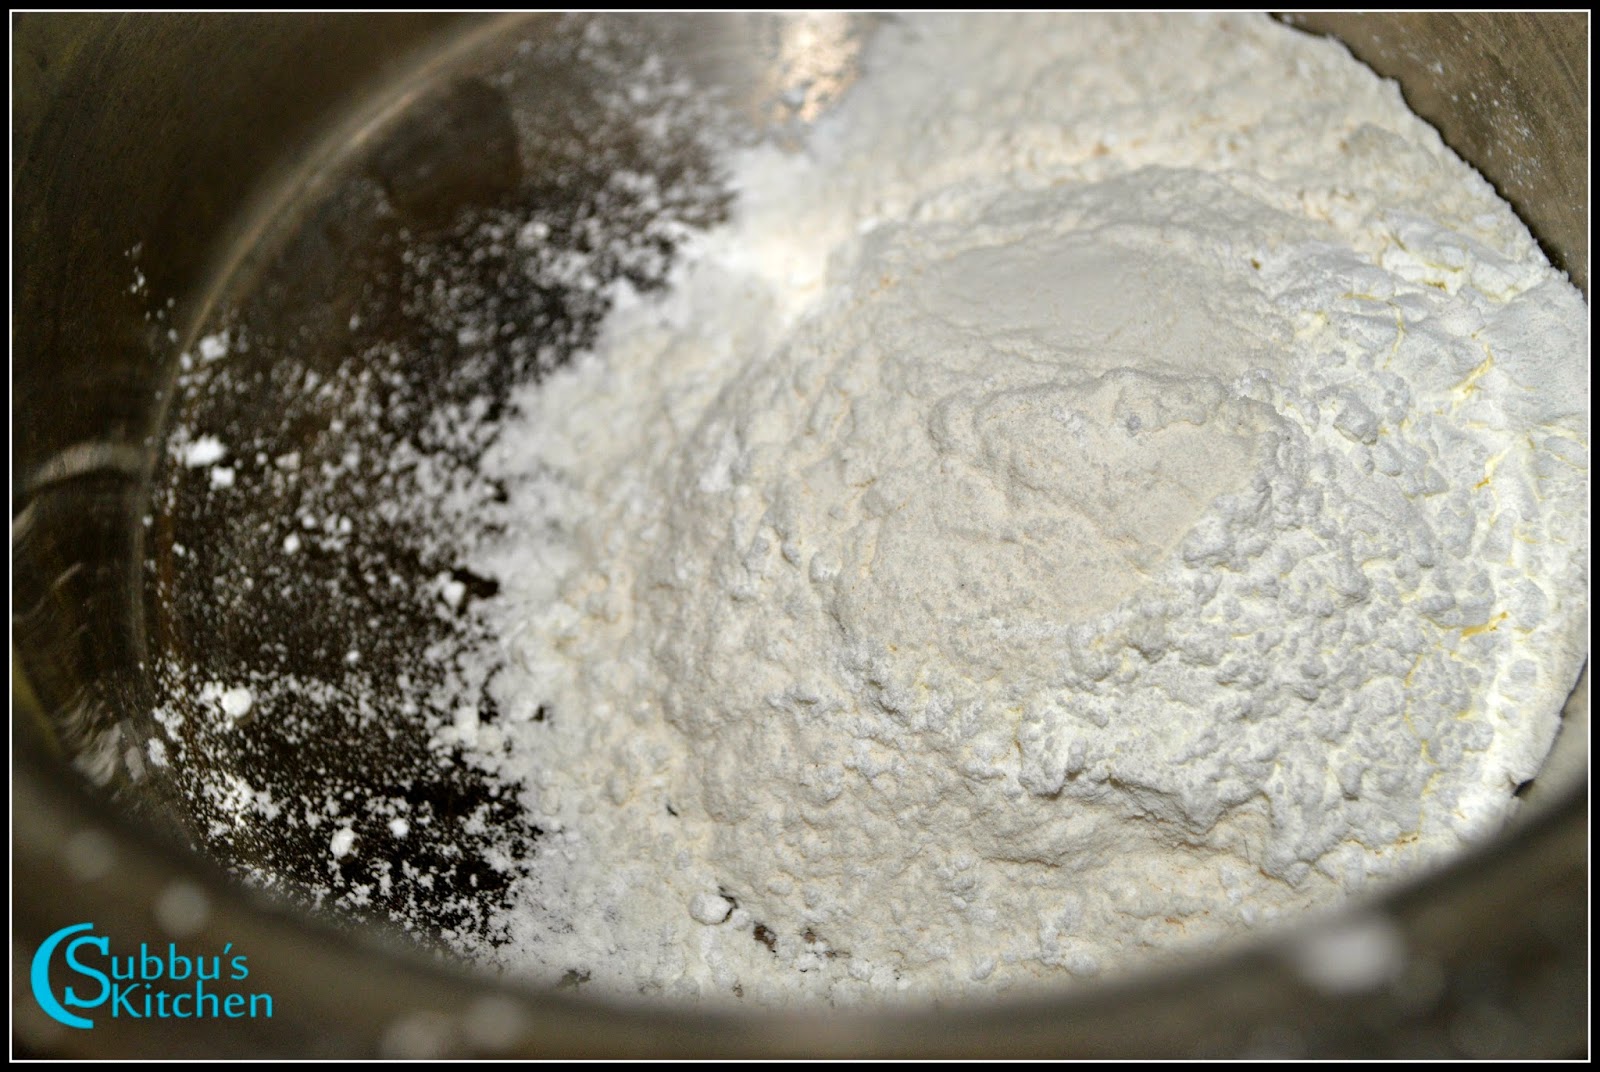
Gobi Manchurian is a famous appetizer and also a famous gravy. Instead of using only Gobi, we can add many vegetables and make it much more richer. This Dry Vegetable Manchurian is a real treat to us. It is so yummy and tasty and a perfect dish for a party to treat our family and friends. Vegetable Manchurian can be done either dry or gravy. Dry Vegetable Manchurian is a perfect appetizer. Chopping vegetables is little time consuming as we need really really finely chopped vegetables. If you have an electric chopper, I would recommend to use it as we will get a very finely chopped vegetables. Once the veggies are finely chopped, then its very quick and easy to make these mouth-watering Vegetable Manchurian. I made this tasty dish very recently for a potluck and got lots of appreciations. Try this version and I'm sure you will all like it :-)
 |
| Vegetable Manchurian | Dry Veg Manchurian Recipe |
Preparation and Yield:| Preparation time | 15 mins |
| Cooking Time | 40 mins |
| Servings | 4-5 |
| Recipe Category | Appetizer |
| Recipe Cuisine | Chinese |
 |
| Vegetable Manchurian | Dry Veg Manchurian Recipe |
Ingredients:
| Cabbage | 100gms |
| Beans | 10 |
| Carrot | 1 |
| Green Capsicum | 1 |
| Onion* | 1 |
| Ginger | 1 inch piecce |
| Garlic Cloves | 3 |
| Green Chilli | 2 |
| Coarse Pepper Powder | 1/2 teaspoon |
| All Purpose Flour | 5 tablespoon |
| Corn Flour | 2 tablespoon |
| Soy Sauce | 1 tablespoon |
| Salt | To Taste |
| Oil | For Deep Frying |
* Spring onions are the better option than the usual big onions
Ingredients For Gravy:
| Spring Onion | 1 Bunch |
| Vegetable Stock / Water | 1 Cup |
| Salt | To Taste |
| Sugar | 1/2 teaspoon |
| Soy Sauce | 1 tablespoon |
| Chilli Sauce | 1 tablespoon |
| Tomato Ketchup / Sauce | 1 teaspoon |
| Chopped Spring Onion Leaves | For Garnishing |
| Corn Flour | 1 teaspoon |
| Oil | 1 teaspoon |
 |
| Vegetable Manchurian | Dry Veg Manchurian Recipe |
Method:
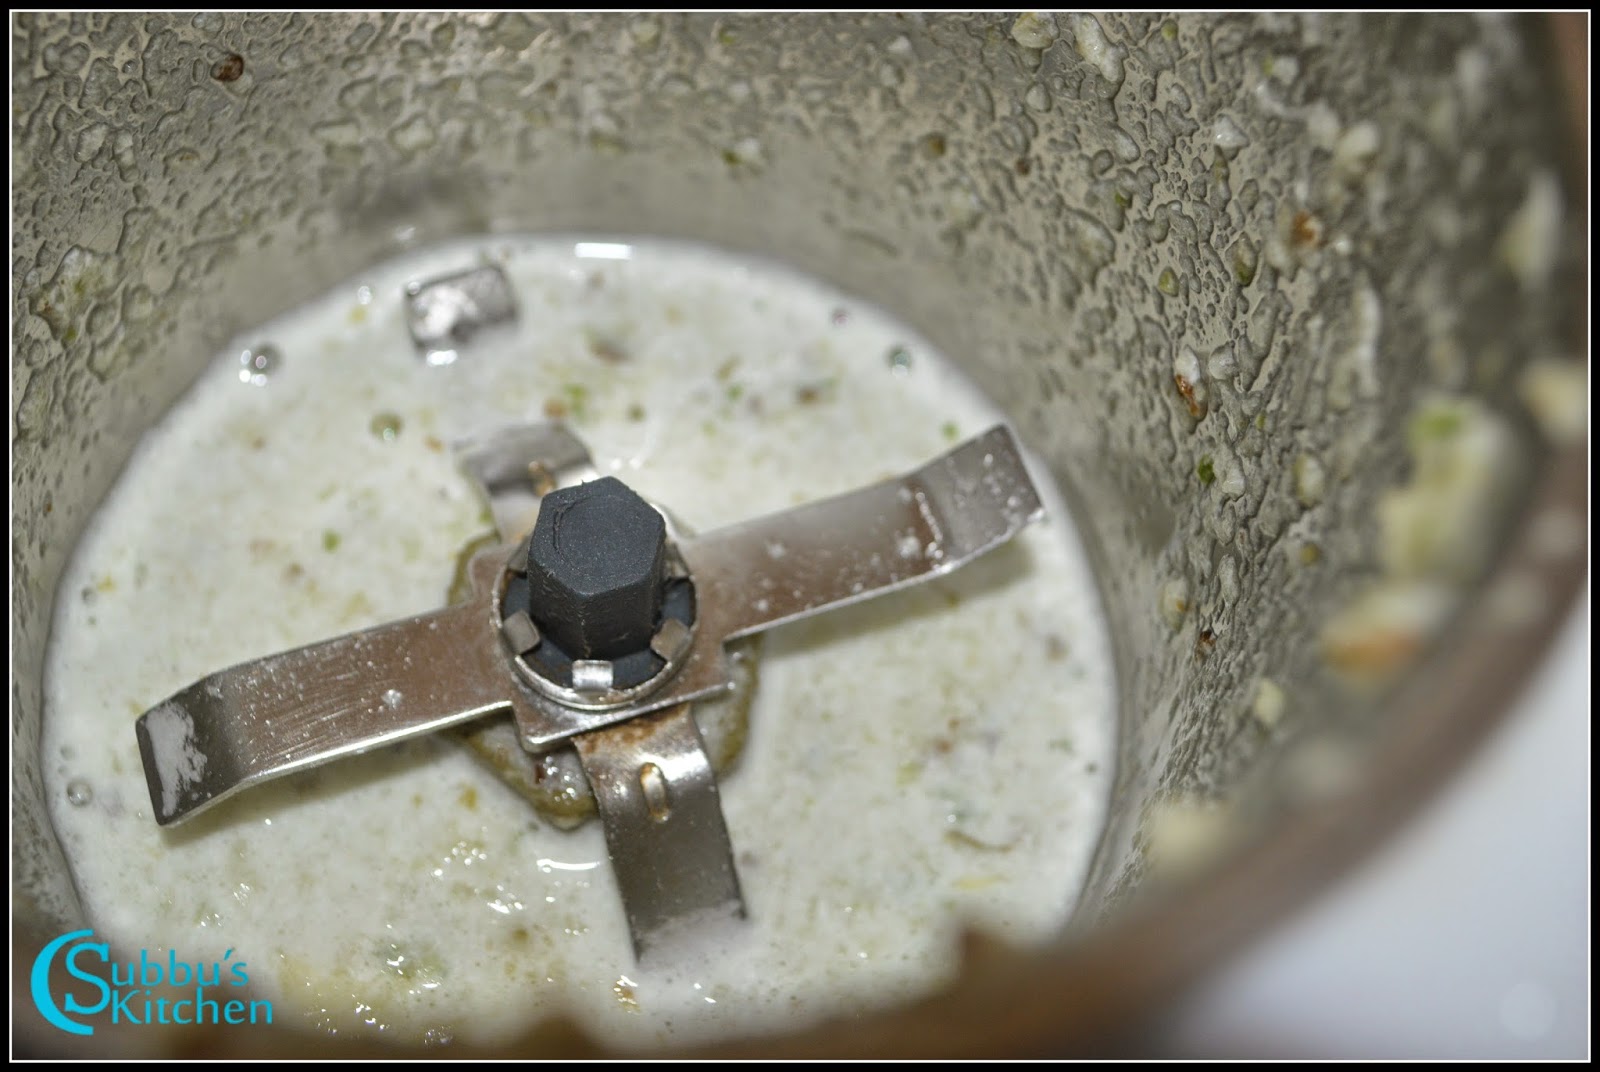
- First lets grind the ginger, garlic and green chilli to a nice paste.
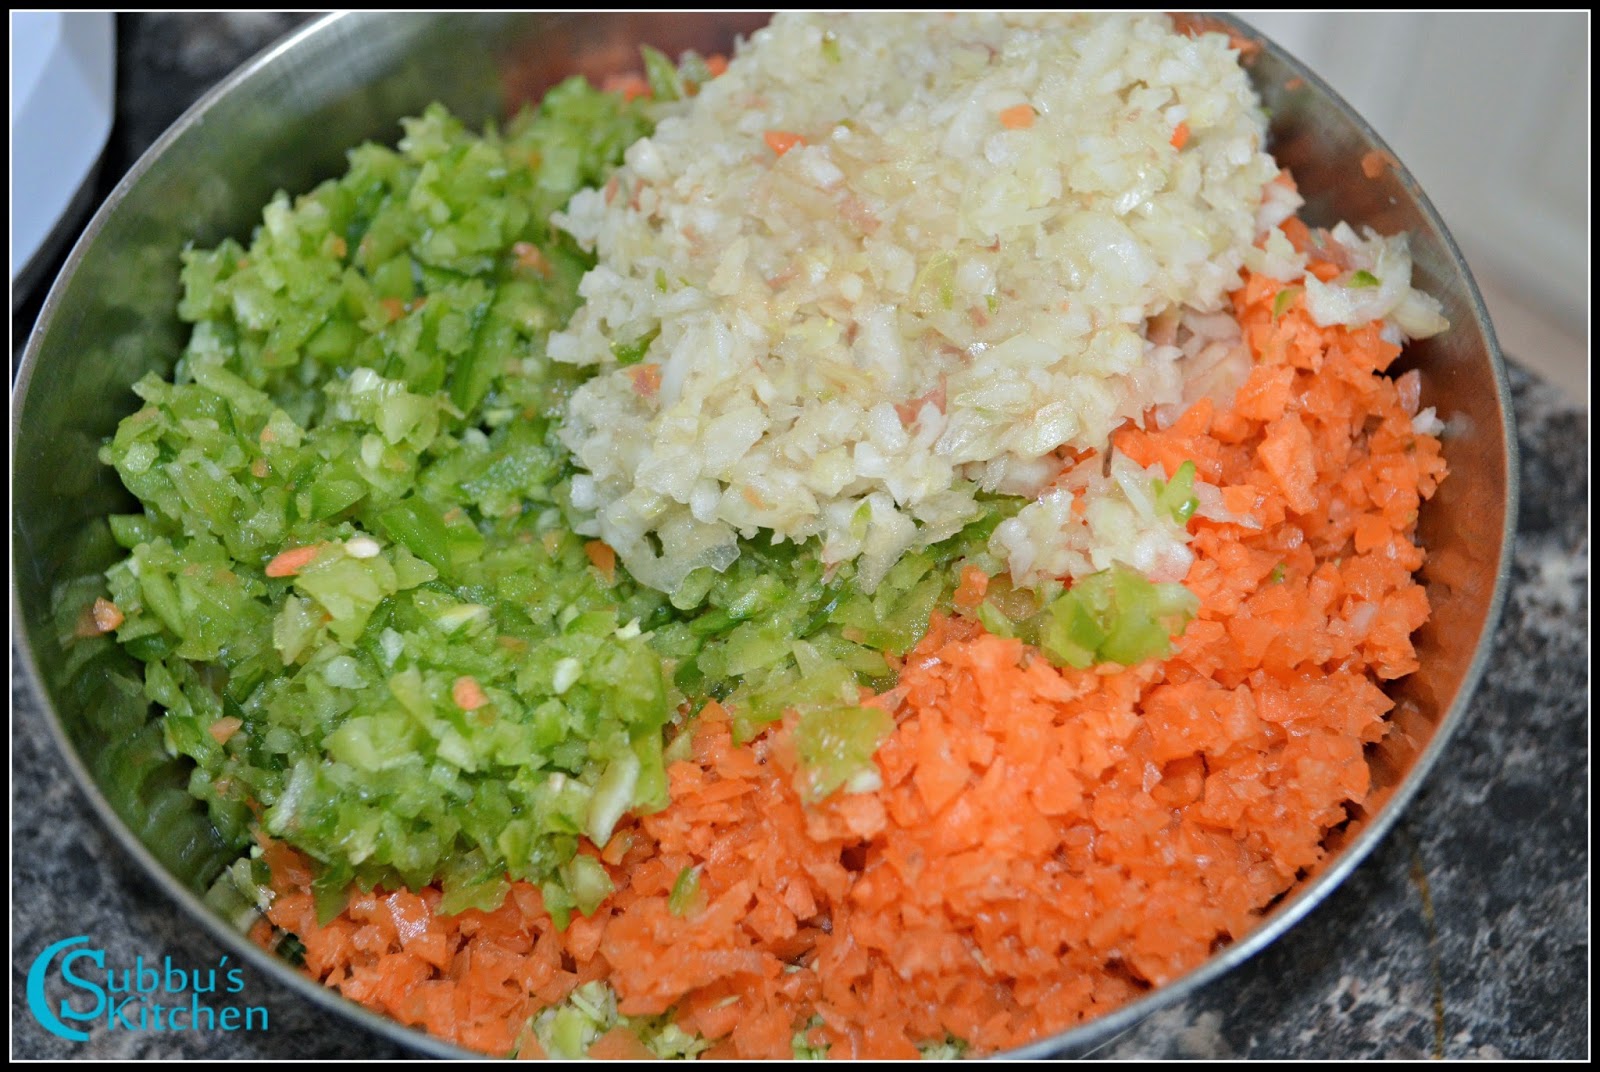
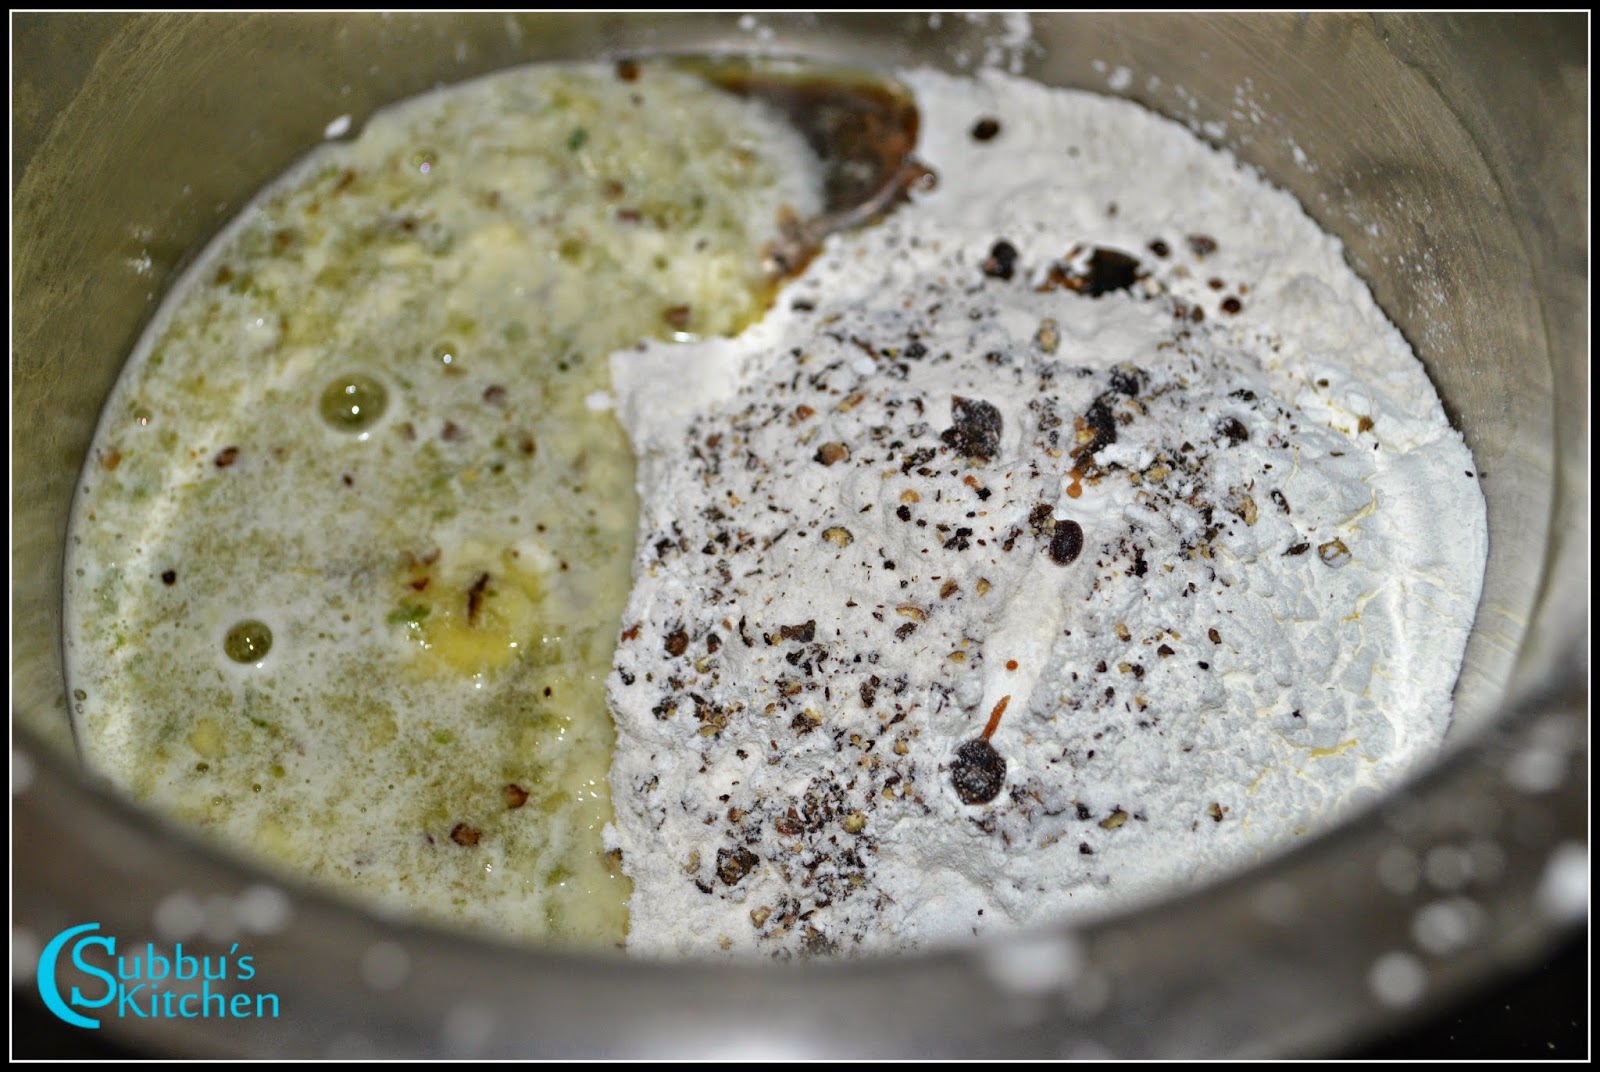
- First finely chop all the vegetables. Take maida and corn flour in a mixing bowl along with the salt
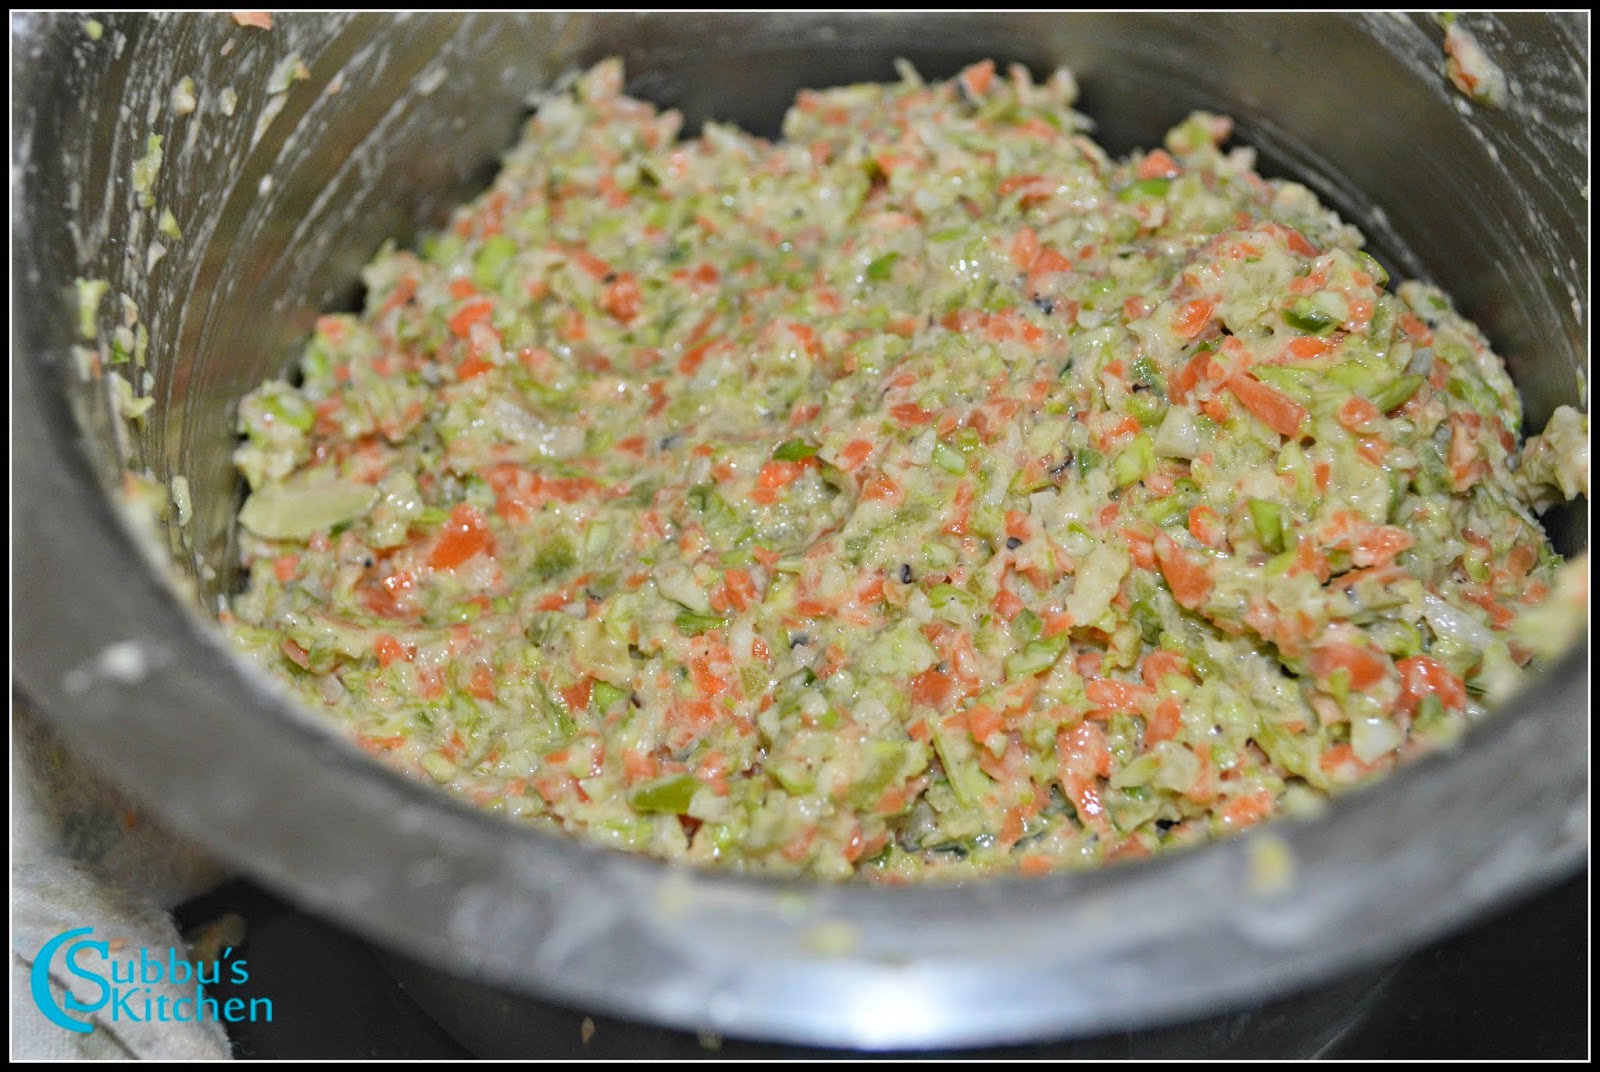
- To the bowl add, ground ginger-garlic-green chilli paste along with soy sauce, coarse pepper and mix well. Then add the finely chopped vegetables and mix well. We generally don't need any water. When we mix the vegetables the moisture in the vegetables are enough to make it like a dough.
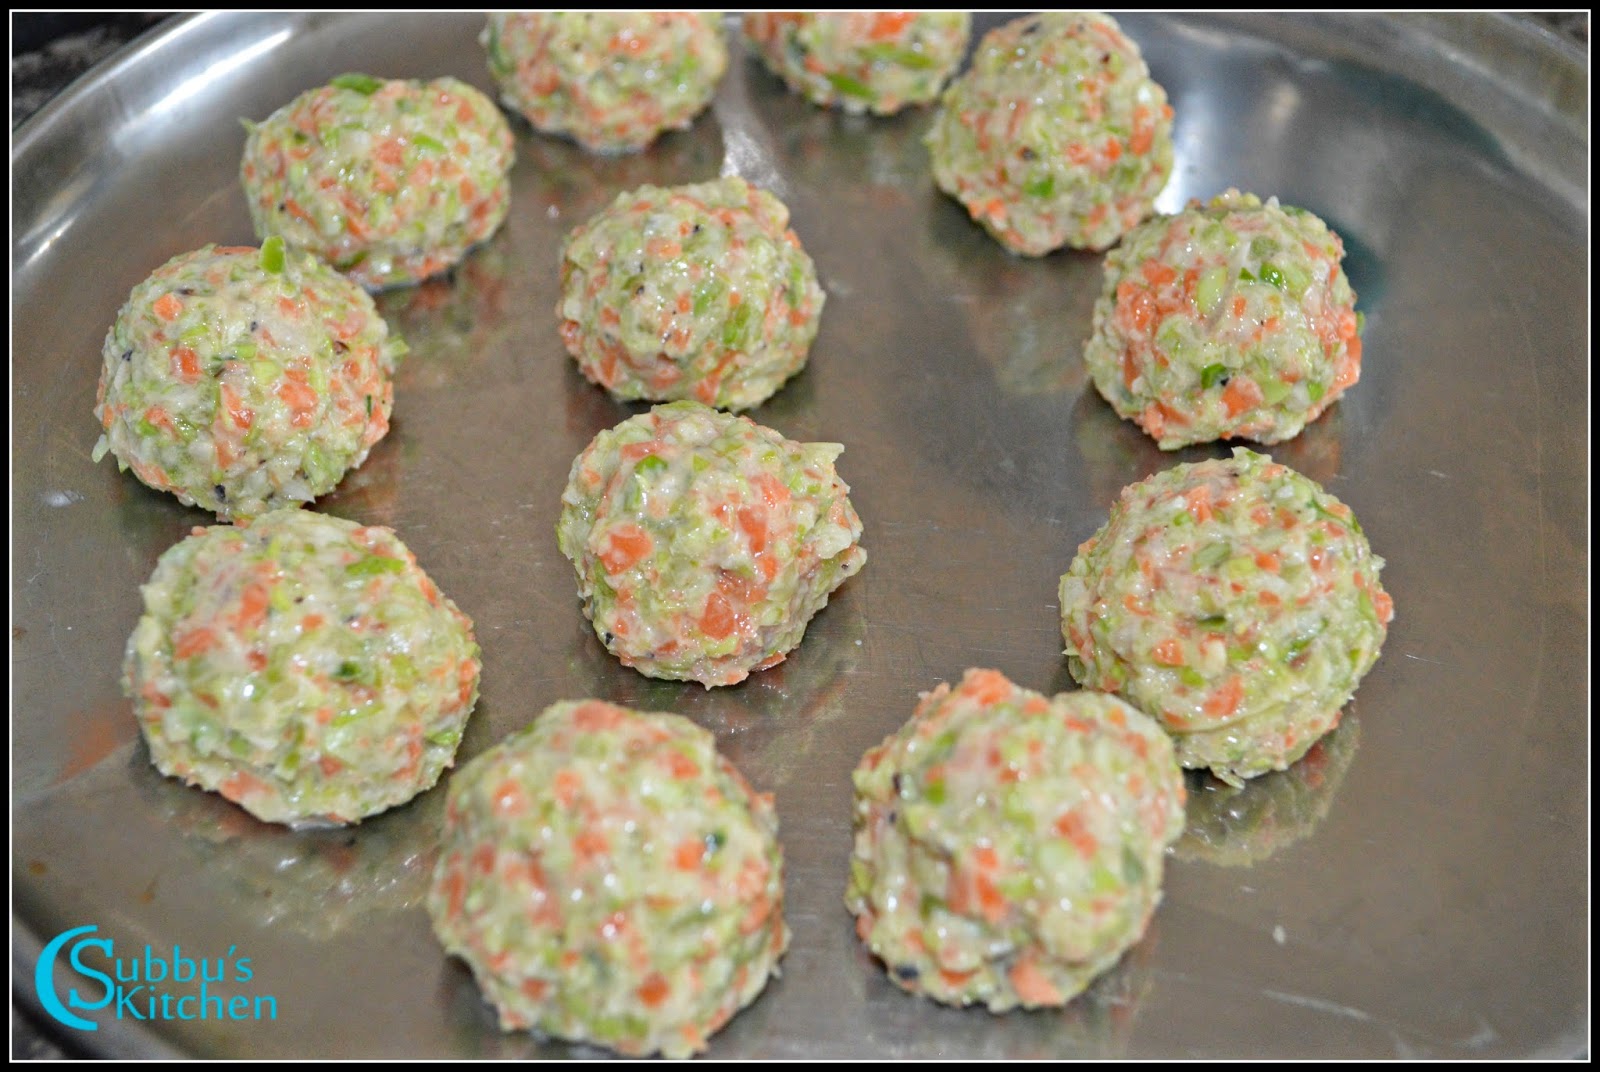
- Make lemon sized balls out of the vegetable mixture and keep it ready to fry them in oil. Heat Oil in a pan and when the oil is hot enough to raise the dough immediately, then gently drop the 3-4 vegetable balls in the hot oil
- Deep fry in medium flame them till the vegetable manchurian balls are golden brown and crisp. Remove them and place it in a paper towel to drain the excess oil. Repeat the step 4 and 5 for the rest of the vegetable mixture. Now our manchurian balls are ready. Lets get started with our gravy
Method for Gravy:- Heat a pan and add oil. When the oil is hot, add finely chopped onions and saute them along with a pinch of salt till the onions turns transparent. Then add the vegetable stock along with salt and sugar. Vegetable stock adds a nice flavour to the gravy instead of plain water.
- When the stock starts to boil, add soy sauce, chilli sauce and tomato ketchup and mix well. Bring the gravy to boil.
- Meanwhile, mix the corn flour with 1/4 cup of water and add it to the gravy. Adding cornflour makes the gravy thick in consistency. Remove gravy from flame. When we are ready for serving, add the fried vegetable manchurian balls to the gravy and heat the gravy for a minute and garnish with chopped spring onion leaves
- Serve the delicious Dry Vegetable Manchurian as Appetizer and enjoy!
 |
| Vegetable Manchurian | Dry Veg Manchurian Recipe |
↧
November 2, 2017, 7:10 pm
Paneer Tikka Dosa, a popular Mumbai Street Food. The tangy & spiciness went so well with the dosa.A perfect example of eating a South Indian preparation with north Indian flavors. I tasted this yummy and tasty Paneer Tikka dosa once in Mumbai when I visited my sister. Street Side vendors make this so casually, seeing them we feel how easy it is but after 3-4 failures, I was able to make the perfect Paneer Tikka Dosa same as the one I tasted! The main secret is the dosa should not be spread so thin, then when we try to mix the paneer with the masala, the dosa will tear apart. Also slow clicking makes the masala to cook as well as retain the dosa in light brown color. After tasting this yummy dosa, I feel like this paneer masala tastes much yummy than the usual Paneer masala we make for side dish for Roti. My daughters love this mouth-watering Paneer Tikka Dosa and they love to munch more and more!
 |
| Paneer Tikka Dosa | Mumbai Street Food | How to make Paneer Masala Dosa |
Preparation and Yield:| Preparation time | 5 mins |
| Cooking Time | 20 mins |
| Servings | 1 |
| Recipe Category | Main |
| Recipe Cuisine | South Indian |
 |
| Paneer Tikka Dosa | Mumbai Street Food | How to make Paneer Masala Dosa |
Ingredients:
| Dosa Batter | 1/4 Cups** |
| Paneer Cubes | 1/4 Cup |
| Coriander Leaves | 2 Tablespoon |
| Ginger-Garlic Paste | 1 Teaspoon |
| Tomato Puree | 1 Tablespoon |
| Kasoori Methi | 1 Tablespoon |
| Red Chilli Powder | 1/2 teaspoon |
| Coriander Powder | 1/2 teaspoon |
| Garam Masala | 1/2 teaspoon |
| Salt | To taste |
| Grated Cheese | 1 Tablespoon |
 |
| Paneer Tikka Dosa | Mumbai Street Food | How to make Paneer Masala Dosa |
Method:
- Heat a tawa, Take a ladle full of dosa batter and pour it in hot tawa and gently spread it nicely to a semi-thick dosa. Add Ghee and cook the dosa in low flame for a minute.
- After a minute, add finely chopped coriander leaves in the middle of dosa. Also add paneer cubes
- Next add ginger-garlic paste, tomato puree and all spices along with salt. Gently mix everything without tearing the dosa
- Make a small well in the middle and add 1/4 cup of water. Add cheese around the well. Again gently mix everything. Keep the flame in very low. Let the masala gets cooked for 5 mins in very low flame If you keep the flame high or medium, the dosa will become dark brown
- After the paneer tikka masala is nicely cooked, we can just fold the dosa and serve or generally in road side shops, they will scrape the paneer and serve as a side dish and then fold the dosa and place it in a serving tray
- The Scrumptious Paneer Tikka dosa is now ready!
 |
| Paneer Tikka Dosa | Mumbai Street Food | How to make Paneer Masala Dosa |
↧
November 5, 2017, 11:02 am
It is a crispy and spicy Indian snack which has an crisp outer layer made of maida and rich filling of mashed potato, peas and spices. Its our popular Street Food. Its a favorite snack generally served with Masala tea and green chutney and tamarind chutney.
 |
| Samosa |
| Yield | 12 |
| Preparation Time | 1 hour 30 mins |
| Cooking Time | 30 mins |
 |
| Samosa |
Ingredients for Samosa outer cover:
| Maida | 2 Cups |
| Carom Seeds / Ajwain / Omam | 1 Teaspoon |
| Ghee | 2 Tablespoon |
| Salt | To Taste |
| Oil | For Frying |
Ingredients for Masala:
| Boiled Potato | 3 big sized |
| Peas | 1/4 Cup |
| Cumin Powder | 1 Teaspoon |
| Garam Masala | 1/2 teaspoon |
| Coriander powder | 1 teaspoon |
| Turmeric powder | 1/4 Teaspoon |
| Red Chilli powder | 1 teaspoon |
| Pepper Powder | 1/2 Teaspoon |
| Chopped Corainder Leaves | 1/4 Cup |
| Chopped Mint Leaves | 2 Tablespoon |
| Salt | To taste |
| Oil | 1 Tablespoon + For Deep Frying |
| Green Chili | 1, Finely Chopped |
| Chopped Ginger | 1 teaspoon |
| Cashews | 2 Tablespoon |
 |
| Samosa |
Method for Outer-cover Dough:
- In a mixing bowl, add maida, carom seeds, salt and mix well. Add Ghee and mix ghee with the maida thoroughly.
- Add water very little by little and knead it to a stiff dough. Stiff dough is very much necessary for samosa, that will help us make stuff the potato filling and close the samosa outer-cover without damaging
- Cover the dough and let it sit for an hour.
Method for Potato Filling:
- Boil, peel and mash the potatoes and keep it aside
- Heat oil in a pan. Add the dry powders and sauté in oil for a minute. Add chopped green chili and ginger and sauté them
- Then add the coriander leaves and the mint leaves to the pan. Along with this, add the boiled and peeled potatoes and give a good mix
- Add Green peas and salt and allow the masala to cook in low flame for couple of minutes and then switch off the flame. Our Potato Filling is ready!
Method for Making Samosa:
- After an hour, knead the dough again for a minute. Take a big lemon size dough and bring the edges together and make it like a ball
- Using a rolling pin, roll out the dough ball to a thin roti. Make sure the center and edges are thin. Using a knife, cut the rolled roti in half
- Take one half, on the long side of the half roti, apply some water. Then take one edge of the long side and twist and stick with the water applied side. Seal the edges. Now you will have a pocket of samosa
- Add 2 teaspoon of potato filling inside the pocket. After adding potato filling, apply water again on the open sides and seal the edges. Refer the video for making perfect standing samosa
- Repeat the steps and make other samosas till the dough and filling are empty
- Allow the samosas to dry out completely for about 20 mins. This is very much important step. Without the samosas getting dry before deep frying, this will prevent the bubbles when we are deep frying the samosas
- Heat oil in a heavy bottomed pan. Gently drop 2-3 samosas in oil and deep fry till they are golden brown and crispy
- Repeat the steps for the rest of the samosas.
- The deep fried Samoas ready to serve!
 |
| Samosa |
↧
November 7, 2017, 12:50 pm
Puli (Tamarind) Sevai is served as an evening tiffin in Tamilnadu. In marriages, for evening snack, Lemon Sevai, Tamarind sevai are commonly served. For Sevai, we traditionally use Sevai Nazhi. But nowadays its complex to use that and hence I have simplified the dish using Ommapodi press and mould. This is much simpler version of making sevai.
The traditional method of using Sevai nazhi is time consuming and complex. Most of us stop making sevai because of its complexity. So this is a quicker and easier version. This tamarind (Puli) sevai is a 2 step process. First we need to make plain Sevai. Then we need to concoct tamarind mixture and mix them both.
 |
| Puli Sevai | Tamarind Sevai |
![]() |
| Traditional Sevai Nazhi |
Preparation and Yield:| Preparation time | 2 Hours |
| Cooking Time | 40 mins |
| Servings | 4 |
| Recipe Category | Main |
| Recipe Cuisine | South Indian |
 |
| Puli Sevai | Tamarind Sevai |
Ingredients:
| Idli Rice ( Parboiled Rice) | 2 Cups* |
| Gingelly Oil | 1 Tablespoon |
| Salt | To taste |
* 1 Cup = 250ml
For Seasoning:
| Gingelly Oil | 1 Tablespoon |
| Mustard Seeds | 1/2 Teaspoon |
| Tamarind | 1 Gooseberry Size |
| Peanuts | 1 Tablespoon |
| Split Urad Dal | 1 teaspoon |
| Bengal Gram Dal | 1 teaspoon |
| Curry Leaves | Few |
| Red Chilli | 4-5 |
| Salt | To Taste |
| Turmeric Powder | 1/4 teaspoon |
| Asafetida | a Generous Pinch |
 |
| Puli Sevai | Tamarind Sevai |
Method:
- Wash and soak parboiled rice for 2 hours. Set this rice aside for 2 hours. After 2 hours, drain the water from rice and take it to mixer jar
- Grind the rice to a smooth batter like dosa batter. Heat a pan. Add the ground batter and start stirring
- Add salt and gingelly oil and keep stirring in medium flame till the batter becomes thick like a dough. Switch off the flame and allow it to cool
- Take ommapodi mould and press. Grease it with oil. Add prepared dough and close it with press lid. Grease oil in idli plates. Squeeze out the press to make like sevai.
- Steam cook the squeezed sevai for 5 minutes. Allow the cooked sevai to cool off completely
- Then crumble the sevai and set it aside.
- Heat oil in a pan. Add mustard seeds and let it sputter. Then, add the split urad dal, bengal gram dal and peanuts and fry it on oil till the dal turns golden brown.
- Add curry leaves, broken chili, turmeric powder and give a good mix. Add tamarind extract along with salt and asafoetida
- Let the tamarind mixture boil nicely till the raw smell of tamarind goes off. Switch off the flame and add the tamarind mixture to the sevai and gently mix to coat the sevai with the tamarind mixture
- The delicious Tamarind(Puli) Sevai is now ready to serve!
 |
| Puli Sevai | Tamarind Sevai |
↧
↧
November 9, 2017, 12:28 pm
Kizhangu Pottalam (Spicy Potato Masala Parcel is a very popular dish in Madurai Nei Mittai kadai (a very small shop near Madurai Busstop). Its a spicy Potato masala packaged inside a lotus leaf (Thamari Ilai). Its so famous among the local Madurai people. People usually bring lunch from home and get this Potato parcel from this famous Nei Mittai Shop and guess what, actually we tend to eat more and more with this small Potato Parcel. This spicy Potato Masal is so tempting and especially with curd rice we would love it so so much. Most of us have the practice of adding besan only for stir-fry potatoes, but here in this masala, the potatoes and mashed up nicely and then mixed with other spices along with besan. This enhances the flavor of the masala. This spicy Potato Masala is a perfect side dish for any variety rices like tomato rice, lemon rice etc... |
| Madurai Kizhangu Pottalam | Spicy Potato Masala Parcels |
Preparation and Yield:| Preparation time | 15 mins |
| Cooking Time | 20 mins |
| Servings | 4 |
| Recipe Category | Main |
| Recipe Cuisine | South Indian |
 |
| Madurai Kizhangu Pottalam | Spicy Potato Masala Parcels |
Ingredients:
| Potato | 3 Big, Boiled, Peeled & Mashed |
| Shallots, Chopped | 1 Cup |
| Green Chilli | 2, Finely Chopped |
| Finely Chopped Ginger | 1 Teaspoon |
| Finely Chopped Garlic | 1 Teaspoon |
| Curry Leaves | Few |
| Red Chilli Powder | 1 teaspoon |
| Salt | To Taste |
| Turmeric Powder | 1/4 Teaspoon |
| Besan / Gram Flour | 2 Tablespoon |
| Finely Chopped Coriander Leaves | For Garnishing |
| Gingelly Oil | 2 Tablespoon |
| Fennel Seeds | 1 Teaspoon |
 |
| Madurai Kizhangu Pottalam | Spicy Potato Masala Parcels |
Method:
- Heat oil in a pan. Add fennel seeds and allow it to sputter. Then, add green chili, garlic, ginger and curry leaves and fry in oil
- Then add the chopped shallots along with turmeric powder, red chili powder and salt and sauté the shallots till they are nicely golden brown
- When the onions are nicely sautéed, add gram flour along with boiled and mashed potatoes and mix everything well. Adjust salt if necessary
- When the masala is combined well with potatoes, garnish with coriander leaves
- Mouth-Watering Madurai special Kizhangu Pottalam ready! Pack it up on a lotus leaf and enjoy this delicious and scrumptious Spicy Potato Masala
 |
| Madurai Kizhangu Pottalam | Spicy Potato Masala Parcels |
↧
November 11, 2017, 8:00 pm
Angaya Podi Recipe is loaded with health benefits. This is one such healthy recipe that is so important among one of the postpartum foods that was regularly served after baby's delivery. Dry turkey berry helps in reducing gastritis, Manathakkali vathal also called Dry Black Night Shade helps as a coolant and is used in treating mouth ulcers and gastritis. Dry neem flowers helps expelling worms in digestive system and is good for skin.Along with that coriander seeds, cumin seeds, dry ginger, peppercorns, carom seeds everything is so nutritious and healthy. This is a simple home remedy for any kind of stomach ailments too.  |
| Angaya Podi |
Preparation and Yield:| Preparation time | 15 mins |
| Cooking Time | 20 mins |
| Servings | 4 |
| Recipe Category | Main |
| Recipe Cuisine | South Indian |
 |
| Angaya Podi |
Ingredients:
| Dhaniya(coriander seeds) | 1 tablespoon |
| Dry Neem flower | 1/4 Cup |
| Sundakaai vathal ( Dry Turkey Berry) | 1/4 Cup |
| Manathakali vathal (Dried BlackNightShade Fruits) | 1/4 Cup |
| Pepper | 1 teaspoon |
| Cumin Seeds | 1 teaspoon |
| Salt | To Taste |
| Carom Seeds | 1/2 Teaspoon |
| Dry Ginger | 1" Piece |
Method:
- Heat a heavy bottomed pan, and add dry neem flower and in low flame dry roast till dark brown. Take this aside
- Add Sundakkai vathal and dry roast till dark brown and take aside
- Add Manathakali vathal and dry roast till dark brown and take aside
- Again in the same pan, add the rest of the ingredients and dry roast till golden brown
- Cool all the roasted ingredients and Grind all the ingredients in a mixer to a nice powder
- Serve the Delicious Angaya podi with hot rice and ghee.
 |
| Angaya Podi |
↧
November 16, 2017, 6:44 pm
Sukku Milagu Thipili kuzhambu is a medicinal and healthy kuzhambu variety. Dry ginger is a very healthy ingredient. For stomach upset or even for acidic issues, dry ginger is the best home remedy. It is used to treat cold, cough, headaches, fever and very good for digestion. Along with Dry ginger, Pepper and long pepper adds even more nutritional value to this kuzhambu. Mix this healthy, tasty and spicy kuzhambu with hot steaming rice.
Video Version
 |
| Sukku Milagu Thipili Kuzhambu | Dry Ginger Pepper Kuzhambu |
Preparation and Yield:| Preparation time | 15 mins |
| Cooking Time | 20 mins |
| Servings | 4 |
| Recipe Category | Main |
| Recipe Cuisine | South Indian |
 |
| Sukku Milagu Thipili Kuzhambu | Dry Ginger Pepper Kuzhambu |
Ingredients:
| Bengal gram Dal | 3 Teaspoon |
| Urad Dal | 2 Teaspoon |
| Coriander Seeds | 1 Tablespoon |
| Peppercorns | 1 teaspoon |
| Red chilli | 3 |
| Dry Ginger | 50gms |
| Long Pepper / Arisi Thipili | 1 Teaspoon |
| Oil | 2 Teaspoon |
Other Ingredients: | Tamarind | 1 Lemon Size |
| Garlic Cloves | 5-6 |
| Shallots | 10 |
| Salt | To taste |
| Grated Jaggery | 1 Tablespoon |
For Tempering | Cumin Seeds | 1 Teaspoon |
| Gingelly Oil | 2 Tablespoon |
| Mustard Seeds | 1 Teaspoon |
| Curry Leaves | Few |
 |
| Sukku Milagu Thipili Kuzhambu | Dry Ginger Pepper Kuzhambu |
Method:
- Soak tamarind in warm water for 10 mins and extract a thick juice and keep it aside
- Heat a teaspoon of oil in a pan. Add bengal gram dal, urad dal, coriander seeds, peppercorns and red chili and fry them in oil till dal turns golden brown color. Take these aside
- Again heat 1 teaspoon of oil in the pan, add long pepper and dry ginger and fry for 3-4 mins in medium flame. Take these roasted ingredients in a mixer jar
- Add cumin seeds and grind everything to a smooth paste
- Heat 2 tablespoon of gingelly oil in a pan. Add mustard seeds and allow it to sputter. Add curry leaves and fry for few seconds
- Next, add garlic cloves and shallots and stir-fry in oil till the onions turn translucent
- Then, add the tamarind extract along with salt and boil the tamarind extract till its raw smell goes off.
- When the tamarind's raw smell goes off, add the ground spice paste and give a good mix
- Keep the flame in low and allow the kuzhambu to boil for 10 mins. Finally add grated jaggery and give a good mix and switch off the flame
- The tasty and healthy Sukku Milagu Thipili Kuzhambu ready to serve!
 |
| Sukku Milagu Thipili Kuzhambu | Dry Ginger Pepper Kuzhambu |
↧
November 17, 2017, 8:11 pm
Pirandai is a creeper that has wonderful medicinal uses and health benefits. It is called "Adamant Creeper | Devil's Back Bone | Veldt Grape" in English and it's botanical name is Cissus quadrangularris and it is called Hadjot in Hindi. Pirandi has multiple health benefits: It treats indigestion, fractures and sprains, is a best worming medicine, treats piles, menstrual problems and is also the best home remedy for ear pain. Many hesitate to use pirandai because of it's itchy nature, but if we properly handle pirandai, we can prevent itchiness in our hands. First always try to pick tender pirandai, young pirandai can be easily broken with hands and as the pirandai ages it thickens. To prevent itching in the hands, smear your hands with a bit of sesame oil before handling pirandai. After collecting pirandai, wash it well and break it at the nodes and remove the nodes too. If the pirandai is tender, you can break it with hands easily into two and pull the fibers apart, like we do for peeling drumsticks.Pirandai thogayal treats all digestion related problems like gastritis, indigestion and lack of appetite. Pirandai thogayal can be made in matter of minutes and tastes really good.Video Version
 |
| Pirandai Thogayal | Pirandai Thuvayal |
 |
| Pirandai Thogayal | Pirandai Thuvayal |
Preparation and Yield:| Preparation time | 10 mins |
| Cooking Time | 20 mins |
| Servings | 4 |
| Recipe Category | Thogayal |
| Recipe Cuisine | South Indian |
 |
| Pirandai Thogayal | Pirandai Thuvayal |
Ingredients:
| Pirandai | 1/2 Cup, Chopped |
| Curry Leaves | 1/2 Cup |
| Urad Dal | 2 Teaspoon |
| Bengal Gram dal | 2 Teaspoon |
| Red Chilli | 3-4 |
| Tamarind | 1 Gooseberry Size |
| Asafoetida | 1/4 teaspoon |
| Salt | To taste |
| Oil | 3 teaspoon |
 |
| Pirandai Thogayal | Pirandai Thuvayal |
Method:
- We need to get tender pirandai for cooking as the thick ones will cause itching in the throat. Before After collecting pirandai, wash it well and break it at the nodes and remove the nodes too. To prevent itching in the hands, smear your hands with a bit of sesame oil before handling pirandai.Scrap or peel the sharp angular edges (all sides) and discard the nodes and leaves. Chop the peeled pirandai into small pieces of 1" length
- Heat a teaspoon of oil in a pan. Add urad dal, bengal gram dal, red chili and asafetida and fry everything till the dal turns golden brown color. Take these aside
- In the same pan, add a teaspoon of oil and add tamarind and sauté till it is tender and soft. Take this aside
- Again in the same pan, add pirandai pieces and stir- fry till it becomes pale green. Also add curry leaves and sauté along with Pirandai
- Take all these fried ingredients to the mixer jar along with salt and grind it to a coarse paste. Add water very little, if needed
- Very healthy and also tasty Pirandai Thogayal is now ready! Mix it with rice and slurp!!!
 |
| Pirandai Thogayal | Pirandai Thuvayal |
↧
↧
November 20, 2017, 6:43 pm
Makai Jajaria, a popular halwa or we can say a Pudding dessert in the regions of Udaipur, Rajastan. A very quick and easy to make dessert using Sweet corn. We can make this awesome dish in microwave or pressure cooker too. I have done in the conventional way. The apartment I live has a diversity of Indians and one of the family is a marwari from rajasthan. They invited me for their little daughter's birthday and after a wonderful dinner, they served a delightful dessert that was a real treat for our taste buds. When I asked her, she told the dessert is called " Makai Jajaria " in their home town and is made with yellow or white corn which grows abundant in that region. She explained me the procedure to do this awesome dish and I tried it and it turned so good. My family and friends enjoyed this yummy sweet. Try this yummy Makai Jajaria (Sweet Corn Pudding / Sweet Corn Halwa) and share your comments!
 |
| Makai Jajaria | Sweet Corn Halwa |
Preparation and Yield:| Preparation time | 5 mins |
| Cooking Time | 20 mins |
| Servings | 4 |
| Recipe Category | Dessert |
| Recipe Cuisine | Indian |
 |
| Makai Jajaria | Sweet Corn Halwa |
Ingredients:
| Sweet Corn | 1 Cups* |
| Mawa / Koya | 1/4 Cup |
| Milk | 1 Cup |
| Sugar | 1/2 Cup |
| Cardamom Powder | 1/4 teaspoon |
| Ghee | 2 Tablespoon |
| Saffron Threads | few |
| Slivered Almonds | For Garnishing |
* 1 Cup = 250ml
 |
| Makai Jajaria | Sweet Corn Halwa |
Method:
- If you are using a fresh corn, just grate the corn and set it aside. If you are using frozen sweet corn, then boil the corn for 3-4 minutes, then take the corn in the mixer jar and grind it to a coarse paste
- Soak saffron threads in a tablespoon of warm milk and keep it aside
- Heat ghee in a pan. Add the coarse/ grated sweet corn and sauté in ghee for 5-6 minutes in low flame
- Then, add mawa and mix well. Add milk and combine everything together. Mawa is optional, we can skip and add 1.25 cups of milk instead of 1 cup milk. Stir everything together.
- Add saffron threads and it will give a natural color and flavor to the halwa. Cook the halwa till it becomes thicker and milk is absorbed
- Add sugar to the thickened mixture and stir well. Adding sugar dilutes the mixture again. Keep stirring till the halwa thickens
- Add cardamom powder and mix well. Keep the flame low and cook the halwa till it becomes thick. When the halwa becomes thick, Switch off the flame
- Garnish with Slivered Almonds and Serve the delicious Makai Jajaria (Sweet Corn Halwa) and enjoy the taste!
 |
| Makai Jajaria | Sweet Corn Halwa |
↧
November 22, 2017, 4:12 pm
Paneer Pulao, an absolute delight for all the paneer and rice lovers. Aroma rich basmati rice is cooked with fried Paneer and stir-fried veggies along with whole garam masala and Indian Spices. This is a quick and easy to make Pulao variety and rich in taste. This is a No Onion No Garlic Paneer Pulao. Serve this yummy dish with your favorite raita and enjoy the dish!
 |
| Paneer Pulao | No Onion No Garlic Paneer Pulav |
Preparation and Yield:| Preparation time | 15 mins |
| Cooking Time | 20 mins |
| Servings | 4 |
| Recipe Category | Rice Variety |
| Recipe Cuisine | Indian |
 |
| Paneer Pulao | No Onion No Garlic Paneer Pulav |
Ingredients:
| Rice | 1 Cup* |
| Paneer | 150gms |
| Green Chilli | 2, Slit |
| Chopped Ginger | 1 Tablespoon |
| Mint Leaves | 1 Fist Full |
| Chopped Carrot | 1/4 Cup |
| Green Peas | 1/4 Cup |
| Mint Leaves | 1 Fist Full |
| Salt | To Taste |
| Water | 2 Cups |
| Cinnamon | 1" Stick |
| Cardamom | 2 |
| Cinnamon | 1" Stick |
| Cardamom | 2 |
| Cloves | 3-4 |
| Peppercorns | 1 teaspoon |
| Bay Leaf | 1 |
| Cashew | 1 Tablespoon |
| Ghee | 2 Tablespoon |
| Chopped Coriander Leaves | For Garnishing |
* 1 Cup = 250ml
 |
| Paneer Pulao | No Onion No Garlic Paneer Pulav |
Method:
- Wash rice and soak it in water for 20mins
- Heat ghee in a pan and add paneer cubes and fry in low flame till it is golden brown color on all sides. Take these Fried Paneer and soak in warm water to return its softness
- In the same pan, add ghee and fry the whole garam masalas (bayleaf, cinnamon, cardamom, cloves, peppercorns) for a minute
- Then add slit green chili followed by ginger and saute for few seconds
- Add cashews and fry till light brown color. Then add green peas and carrots and stir-fry veggies in medium to high flame without burning them for 4-5 minutes
- Then, add the mint leaves along with drained rice along with fry for a minute. After a minute, add Fried Paneer Cubes along with water and salt and give a good mix
- Bring the water to boil and cook the rice till all the water evaporates. Then close the pan with a lid and cook the rice in low flame for 12-15 mins
- Once the rice is cooked and becomes soft, garnish with coriander leaves and serve hot
- Serve the delicious Paneer Pulao with your favorite Raita and enjoy this simple and yummy Rice with your family!
 |
| Paneer Pulao | No Onion No Garlic Paneer Pulav |
↧
November 26, 2017, 12:00 am
Oats Idli an instant, yummy and healthy breakfast dish for all age groups. Sometimes I forget to soak the rice and dal in water to prepare our traditional idli batter and I get annoyed with myself as I will be finding difficult to plan for next day breakfast. After I started making Instant Oats Idli, nowadays I don't even mind if I forget to prepare the traditional batter as Oats Idli is very instant and at the same time it is very healthy compared to our conventional Idli. Oats Idli are great even for kids lunch box.
We can use the mini idli plate and use the oats idli batter and make yummy mini idlis. We can add different vegetables to the batter and make oats idli even more healthier. Lets see the procedure to do
Instant Vegetable Oats Idli...
 |
| Instant Vegetable Oats Idli |
| Preparation Time | 10 mins |
| Cooking Time | 20 mins |
| Servings | 16 Idlis |
 |
| Instant Vegetable Oats Idli |
Ingredients:
| Oats | 2 Cups |
| Rawa / Semolina | 1 Cup |
| Sour Curd | 1.5 Cups |
| Carrot | 1 |
| Beans | 4 |
| Capsicum | 1/2 |
| Green Peas | 1 tablespoon |
| Chopped Coriander Leaves | 1 tablespoon |
| Soda salt (Cooking Soda) | 1/2 teaspoon |
| Salt | To taste |
*Vegetables are as per your choice.
For Seasoning:
| Mustard Seeds | 1/2 teaspoon |
| Green Chilli | 2 |
| Channa dal | 1 teaspoon |
| Cooking oil | 1 Teaspoon |
Method:
- Take a pan and add oats to it. Dry roast the oats till we get a nice aroma and the oats turn slightly brown color. Remove the roasted oats and allow it to cool off and then grind it in a mixer to a nice powder
- Heat oil in the pan and add mustard seeds. When the mustard seeds starts to sputter, add channa dal and fry till the dals turns golden brown color. Add chopped green chillies and saute it for 10 seconds. Add Grated carrot, chopped beas and capsicum along with green peas and saute them in medium flame for 2 minutes
- Add semolina to the pan and roast them for 3 minutes.When the semolina slightly changes its color add chopped coriander leaves and mix well and remove from flame.
- Take the contents in the pan to a bowl and add powdered oats along with salt. To this add sour curd and mix well. .
- Add water to adjust the consistency of the batter like our traditional idli batter. Finally add soda salt and mix well and keep the batter for 5-10 minutes. We can notice lots of bubbles in the batter. The addition of soda salt helps in getting softer and fully idlis. Grease the idli plates with oil and pour the oats idli batter
- Steam cook them for 10 minutes. After the idlis are cooked completely, allow the idli plates to cool off completely. Using a wet spoon, gently remove each idli and place it in a serving plate
- Serve the delicious Instant Vegetable Oats Idli with Tiffen Sambar, Chutney or milagai podi (Gun Powder). I always prefer to have oats idli with milagai podi which is a great combination for this. Enjoy your healthy breakfast and share your comments!!!
 |
| Instant Vegetable Oats Idli |
↧