November 22, 2014, 7:42 am
This week, its a medicinal menu. Somedays we feel stomach upset or dull, those days, this menu will be a gift for us to again regain our strength and makes us feel better and bring us on track. Inji kuzhambu helps to recover from indigestion. Poondu rasam will also help in indigestion. Manathakali keerai has lots of medicinal benefits mainly helps to cure mouth-ulcer and stomach upset. But we need to keep in mind that spinach dishes should be consumed only during daytime. It takes a long time to get digested during night time so try taking spinach during night time.
To make this dish more tastier and healthier, I have included paruppu podi. Paruppu podi with ghee mixed with hot steaming rice is a wonderful delight to the menu. Finally serve this menu with sutta appalam (toasted pappad) and enjoy your lunch!
 |
| South Indian Lunch Menu 19 - Paruppu Podi, Inji Kuzhambu,Manathakali Keerai Kootu, Poondu rasam, Boiled Rice and sutta appalam |
Preparation and Yield:| Preparation time | 20 mins |
| Cooking Time | 45 mins |
| Servings | 4 |
Recipes:
 |
| South Indian Lunch Menu 19 - Paruppu Podi, Inji Kuzhambu,Manathakali Keerai Kootu, Poondu rasam, Boiled Rice and sutta appalam |
↧
November 24, 2014, 1:53 am
Poori with
aloo masala is a popular dish all over India even in all the Indian Restaurants in abroad also. We all love to have
poori masala.
Raagi Poori, A slight twist to the regular poori. We are going to use raagi flour (Finger Millet) along with wheat flour. Raagi is rich in iron and calcium and is one of the healthy millet. Raagi is very good for all starting from infants to the elder people. Raagi will be the first solid dish we give for the babies. It is easy to digest and has lots of medicinal benefits. So instead of having regular poori, lets all do raagi poori from now...
 |
| Raagi Poori Recipe | Finger Millet Poori Recipe | Kezhvaragu Poori Recipe |
Preparation and Yield:| Preparation time | 10 mins |
| Cooking Time | 30 mins |
| Yield | 8 Pooris |
 |
| Raagi Poori Recipe | Finger Millet Poori Recipe | Kezhvaragu Poori Recipe |
Ingredients:
| Raagi Flour (Finger Millet Flour) ** | 1 Cup* |
| Wheat Flour | 1 Cup |
| Ghee | 2 teaspoon |
| Salt | To taste |
| Oil | For Deep frying |
* 1 cup = 250 ml
** Finger Millet Flour is readily available in the market.
 |
| Raagi Poori Recipe | Finger Millet Poori Recipe | Kezhvaragu Poori Recipe |
Method:
- Take the raagi flour (Finger Millet flour) and wheat flour in a mixing bowl. Add salt and ghee and mix well.
- Add water little by little and knead it to a tight dough. For Chapati, its always better to knead the dough for a long time. But for Poori, kneading for longer time is not needed. The dough should be little tight and thick than the chapati.
- Make small balls out of the dough and flatten each ball. Dust the flattened ball with flour and roll it to small and thick poori. Heat oil in a pan, The oil should be smoky hot to fry the pooris. Add rolled poori to the oil and fry them till they are puffy. Flip it once to other side and cook the poori. Do not flip the pooris multiple times as it might absorb more oil.
- Serve the yummy Poori with aloo masala or other gravies and enjoy the healthy dish!
 |
| Raagi Poori Recipe | Finger Millet Poori Recipe | Kezhvaragu Poori Recipe |
↧
↧
November 25, 2014, 3:19 am
Vellai Appam, is one of the important neivedhyam dishes for Thirukarthigai festival. Even it is a traditional for the people of Madurai and other places of TamilNadu to make this Vellai Appam for Diwali Festival. As my mom-in-law is from Tirunelveli, it is a tradition for them to make this Vellai Appam for Tirukarthigai Festival. We can even do this simple and yummy dish as a breakfast or a evening snack. A very simple and easy to make dish.
 |
| Vellai Appam Recipe | How to make Vellai Appam | Vellai Appam for Thirukarthigai |
Preparation and Yield:| Preparation time | 10 mins |
| Cooking Time | 5 mins |
| Servings | 5 |
 |
| Vellai Appam Recipe | How to make Vellai Appam | Vellai Appam for Thirukarthigai |
Ingredients:
| Raw Rice | 1 and 1/4 Cups* |
| Parboiled Rice** | 1/4 Cup |
| Urdal | 1/4 Cup |
| Salt | To taste |
| Chopped Ginger | 1 teaspoon |
| Green Chillies | 2 |
| Curry Leaves | few |
| Chopped Coconut Pieces | 1 tablespoon |
| Whole Black Pepper | 1/2 teaspoon |
| Hing | a Pinch |
| Oil | For frying |
*1 Cup = 250ml
** For Neivedhyam parboiled rice should not be included
Method:
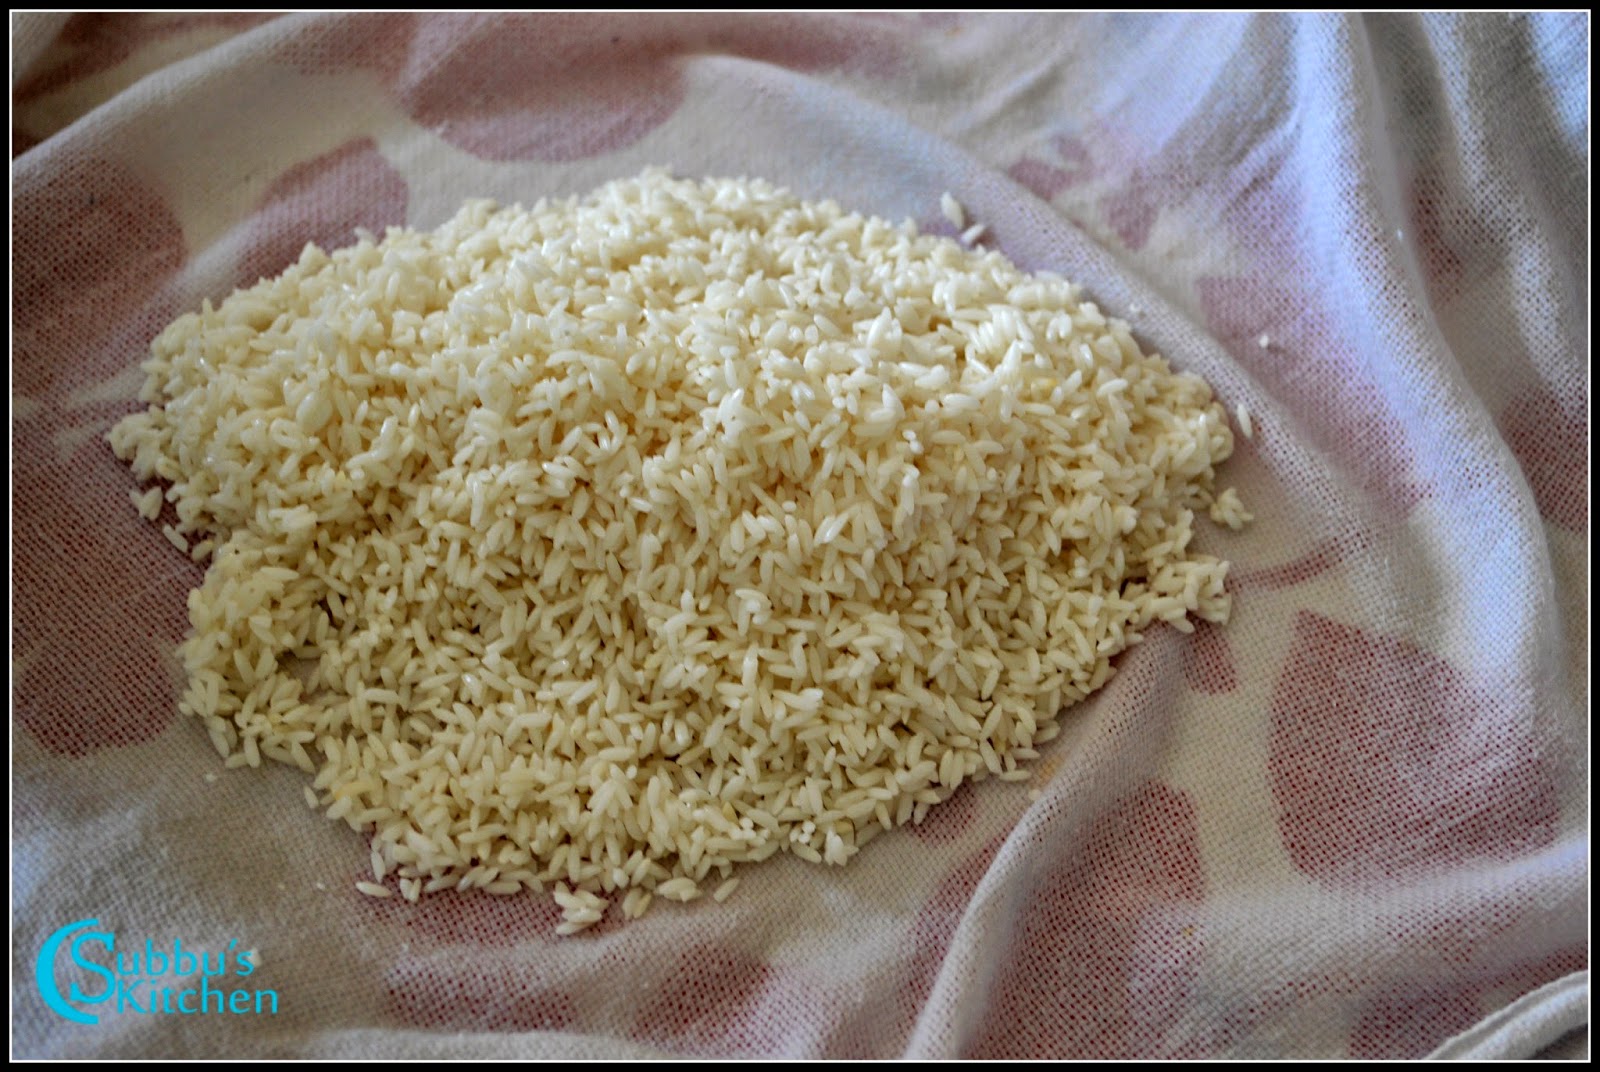
- Wash and soak the rice and dal together for 2 hours. After 2 hours, drain the water and take the rice and dal in a mixer or grinder
- Grind the rice and dal to a nice and smooth batter like a dosa batter. Finely chop the green chillies and add it to the appam batter along with salt, ginger, curry leaves, pepper and chopped coconut pieces and mix well. If you want a sour taste, you can leave the batter aside for about 2 hours to get it fermented. But this is optional. The conventional method of making vellai appam doesn't make the batter fermented.
- Heat oil in a pan. When the oil is hot enough, take a small ladle and take 1 ladle full of appam batter and pour it in hot oil. If the oil is really hot, we can see the appam gets nicely puffed up. With a spatula, gently flip the appam on the other side and fry them. Since the main ingredient is raw rice, the appam will not become red it will be white or little brown. That is speciality of this appam thats why we call this as " Vellai Appam". Remove the fried appam and repeat the step for the rest of the batter.
- The yummy Vellai appam is now ready for neivedhyam or for serving!
 |
| Vellai Appam Recipe | How to make Vellai Appam | Vellai Appam for Thirukarthigai |
↧
November 26, 2014, 5:11 am
Foxtail Millet is another healthy millet variety. Foxtail millet releases glucose steadily without affecting the metabolism of the body. A very healthy millet especially for diabetic patients. We can make variety of dishes using foxtail millet. We should try and use Thinai / Foxtail millet regularly in our kitchen and enjoy its benefits.
 |
| Thinai Urundai Recipe | Thinai Then Laddu| Foxtail Millet Honey Balls Recipe |
Here, I have given here the recipe of
Thinai Urundai (Foxtail Millet Honey Balls). It is much similar to our Maaladu, Rawa laadu but here we are going to prepare in a healthy manner. We are not going to use sugar and ghee, instead we are going to add honey to hold the thinai and make it a ball. Honey is a healthy substitute for sugar. But we can very well use the conventional method of making laddus using ghee and sugar also. We can also use palm sugar or jaggery. We can dissolve palm sugar or jaggery and add that syrup to make balls. A healthy and tasty laddu. We can give this laddu as an evening snack to our kids also!
 |
| Thinai Urundai Recipe | Thinai Then Laddu| Foxtail Millet Honey Balls Recipe |
Preparation and Yield:| Preparation time | 5 mins |
| Cooking Time | 15 mins |
| Yield | 8-10 Laddu |
 |
| Thinai Urundai Recipe | Thinai Then Laddu| Foxtail Millet Honey Balls Recipe |
Ingredients:
| Thinai / Foxtail Millet | 1 Cup* |
| Cardamom Pods | 2 or 3 |
| Honey | 1/4 Cup |
| Cashews | 5 or 6 |
* 1 Cup = 250ml
 |
| Thinai Urundai Recipe | Thinai Then Laddu| Foxtail Millet Honey Balls Recipe |
Method:
- Heat a pan and dry fry the thinai / foxtail millet. You have to fry them in low flame for about 5-7 minutes. Do not make this so brown. Add the fried thinai / foxtail millet to the mixer along with cardamom pods
- Grind the thinai / foxtail millet to a corase powder. We can also grind it to a smooth powder. But balls made out of coarse powder tastes better than the coarse powder. Heat ghee in a pan and add broken cashews and fry them till they are golden brown
- Swtich off the flame and to the pan, then add the coarse Thinai / foxtail millet coarse powder and mix well
- Then add honey to the pan and mix everything well with a spoon. Then take small quantity of Thinai / foxtail millet mixture and roll it to a ball. Repeat the same for the rest of the Thinai / foxtail millet mixture
- The yummy and healthy Thinai / foxtail millet laddu or urundai is now ready to serve!
 |
| Thinai Urundai Recipe | Thinai Then Laddu| Foxtail Millet Honey Balls Recipe |
↧
November 27, 2014, 5:31 am
Generally we make kunukku with left over adai batter. We can make kunukku with peanuts also. This is a very crunchy and tasty evening snack. We just need to plan ahead for the soaking part. Rest of the process is simple and straight forward. Try this crispy Verkadalai Kunukku (Peanut Spice Balls) and share your experience!
 |
| Verkadalai Kunukku Recipe | Peanut Spice Balls Recipe |
Preparation and Yield:| Preparation time | 2 hours |
| Cooking Time | 45 mins |
| Yield | 25 - 30 Kunukku |
 |
| Verkadalai Kunukku Recipe | Peanut Spice Balls Recipe |
Ingredients:
| Roasted and peeled Peanuts | 1 Cup* |
| Raw Rice | 1/4 Cup |
| Urdal | 1/4 Cup |
| Channa dal / Bengal gram dal | 1/4 Cup |
| Salt | To taste |
| Red Chilli | 4 |
| Hing | 1/4 teaspoon |
| Oil | For Deep Frying |
* 1 cup = 250ml
 |
| Verkadalai Kunukku Recipe | Peanut Spice Balls Recipe |
Method:
- Take a mixing bowl and add peanuts, red chillies, urdal, channa dal and raw rice in water for about 2 hours. After 2 hours, drain water from the mixing bowl.
- Add soaked peanuts, dals and rice to the mixer along with red chillies and grind it to a coarse paste.
- Heat oil in a pan. When the oil is hot, make small balls out of the ground paste and gently drop it in oil. Deep fry the peanut balls till they are golden brown and becomes crispy. Remove the fried peanut balls and place it in a paper towel to drain the excess oil. Repeat the step for the rest of the ground paste and fry all the peanut balls
- The crispy and tasty Peanut Spice Balls (Verkadalai Kunukku) is now ready to serve!
 |
| Verkadalai Kunukku Recipe | Peanut Spice Balls Recipe |
↧
↧
November 28, 2014, 5:30 am
Bonda Morkuzhambu or Morkuzhambu with vada is a wonderful dish which is served with hot steaming rice. The morkuzhambu preparation is the same conventional way. For vada / bonda, we have to follow the same procedure of making medhuvada. The only additional step, is soaking the vada in warm water before immersing in morkuzhambu. I usually prepare this bonda morkuzhambu during festival days as we traditionally do the medhuvadai. So lets see how to make this yummy bonda morkuzhambu now...
 |
| Bonda Morkuzhambu Recipe | Morkuzhambu with Vada Recipe |
Preparation and Yield:| Preparation time | 2 hours |
| Cooking Time | 45 mins |
| Servings | 5 |
 |
| Bonda Morkuzhambu Recipe | Morkuzhambu with Vada Recipe |
Ingredients for Bonda:
| Urid dal | 1/4 Cup* |
| Raw Rice | 1/2 teaspoon |
| Green Chilli | 2 |
| Salt | To taste |
| Ginger | 1/2 inch piece |
| Curry leaves | Few |
| Pepper (Optional) | 1/4 teaspoon |
*1 Cup = 250ml
Ingredients for Morzhambu:
| Thick buttermilk or yoghurt | 1 Cup* |
| Turmeric powder | 1/4 teaspoon |
| Salt | To Taste |
* 1 Cup Capacity = 250ml
For Grinding:
| Coriander seeds | 1 tablespoon |
| Channa dal | 2 teaspoon |
| Ginger | 1 inch piece |
| Green Chiilies | 4 |
| Grated Coconut | 1/2 Cup |
For Seasoning:
| Coconut Oil / Cooking oil | 1 teaspoon |
| Mustard seeds | 1 teaspoon |
| Curry leaves | few |
| Red Chillies | 2 |
 |
| Bonda Morkuzhambu Recipe | Morkuzhambu with Vada Recipe |
Method for making bonda / vada:- Wash and Soak the uriddal along with rice in water for about 2 hours. After 2 hours, drain the water from the dal and grind the dal and rice along with green chilli, salt, pepper and ginger to a nice and fluffy paste as we generally do for medhuvada.
- Add curry leaves to the vada batter and mix well. Heat oil in a pan, when the oil is hot enough, take batter little by little and drop it in oil. No need to worry about the shape. Deep fry the vada in medium flame till they are golden brown color.
- Take warm water in a broad vessel. Drop the fried vada / bonda in the warm water. Repeat the step for the rest of the vada/bonda batter. Now our bonda are ready. Lets make our morkuzhambu.
:
- Soak the coriander seeds, channa dal in water for 10 minutes. Drain water from the soaked coriander seeds and channa dal and take them to the mixer along with green chillies, ginger and grated coconut
- Grind all to a nice paste. In a pan or vessel, take the ground paste.
- Add yoghurt, turmeric powder and mix well. Keep the vessel over the flame. When the morkuzhambu starts forming forth and it is about to boil, remove from flame. Add salt and mix well. We can add salt before boiling also but it may dilute the curd so it is better to add salt after switching off the flame.
- Heat oil in a pan and add mustard seeds. When the mustard seeds starts to sputter, red chilli, fenugreek seeds, and curry leaves and then fry for 5 seconds. Add these seasoned ingredients to the morkuzhambu.
- The yummy morkuzhambu is now ready. Add the soaked vada/bonda in the morkuzhambu and mix well.
- Serve the yummy Bonda Morkuzhambu with hot rice and enjoy the delicious dish!
 |
| Bonda Morkuzhambu Recipe | Morkuzhambu with Vada Recipe |
↧
November 28, 2014, 8:32 am
Drumstick Kuzhambu or Sambar is a conventional SouthIndian dish. Drumstick Soup is also one of the popular dish. But many of you rarely heard about Drumstick Rasam. Drumstick rasam is very tasty and yummy rasam variety with a richness of drumstick in tangy tamarind - tomato base. I always freshly ground the rasam powder which adds more flavour to the rasam. Try this drumstick rasam and share your comments!
 |
| Drumstick Rasam Recipe | Murungakkai Rasam Recipe |
Preparation and Yield:| Preparation time | 10 mins |
| Cooking Time | 30 mins |
| Servings | 5 |
 |
| Drumstick Rasam Recipe | Murungakkai Rasam Recipe |
Ingredients:
| Tamarind | 1 lemon size |
| Drumstick | 3 |
| Chopped Coriander Leaves | few |
| Salt | To taste |
| Thurdal | 2 tablespoon |
| Hing | a Pinch |
Ingredients For Grinding:
| Ghee | 1 teaspoon |
| Coriander Seeds | 2 teaspoon |
| Thur dal | 2 teaspoon |
| Pepper | 1 teaspoon |
| Red Chillies | 1 |
| Cumin Seeds | 1/2 teaspoon |
Ingredients For Seasoning:
| Mustard Seeds | 1 teaspoon |
| Tomato | 1 |
| Curry Leaves | few |
| Ghee | 1 teaspoon |
Method:
- Soak the tamarind in water and extract the juice
- Wash and Chop the Drumstick to 2" pieces. Pressure cook half of the drumstick pieces. Also Pressure cook the thur dal and mash it nicely and keep it aside.
- Heat a pan, add ghee and add the grinding ingredients except cumin seedsand fry it till the dal turns golden brown color. Remove the fried ingredients from flame and add it to mixer and also add cumin seeds
- Grind the ingredients to a fine powder and keep it aside. Add the rest of the uncooked drumstick pieces to a sauce pan and add water and allow them to cook
- When the drumstick pieces are half-cooked, add the tamarind juice to a vessel along with salt, curry leaves and hing. When the tamarind extract is getting cooked, take the cooked drumstick pieces from the cooker
- Using a spoon, remove the pulp of the drumstick and add it to the rasam.
- Allow the rasam to boil till the raw smell of the tamarind goes off, add mashed dal and mix well and add 2 cups of water and keep in flame and allow in flame for another 5 minutes. Finally add the ground powder and mix well and when the rasam gets the froth, remove from flame. Heat another pan, add ghee and add mustard seeds and when the mustard seeds starts to sputter, add curry leaves and chopped tomatoes and saute the tomatoes till they are cooked and then add it to the rasam.
- Garnish it with coriander leaves and serve hot with rice
- The yummy and spicy Drumstick rasam is ready to serve
 |
| Drumstick Rasam Recipe | Murungakkai Rasam Recipe |
.
↧
November 28, 2014, 9:14 am
This week, its a special menu. Bonda Morkuzhambu with Ladysfinger along with Drumstick Rasam. Generally it is very easy to make bonda morkuzhambu during festival days as we surely do medhuvadai on special occasions. But we can make it even on normal Sundays. Ladysfinger fry is a perfect accompaniment for morkuzhambu. We can also make Paruppu Usili which is also a best accompaniment but as we are making bonda, we are already adding dal in that so its best to make either ladysfinger fry or other vegetable fry. Any tamarind-tomato based rasam would go nice with this menu. So, I have given here drumstick rasam.
Rasam and morkuzhambu, both requires grinding. Morkuzhambu requires additional effort for making bonda preparation. So the whole menu takes little more time. So with little additional effort, we would present our family with delicious menu. Finally serve this menu with papad and hot steaming rice. Enjoy this menu!
 |
| South Indian Lunch Menu 20 - Bonda Morkuzhambu, Drumstick Rasam, Ladysfinger Fry, Papad and Plain Rice |
Preparation and Yield:| Preparation time | 10 mins |
| Cooking Time | 5 mins |
| Servings | 5 |
 |
| South Indian Lunch Menu 20 - Bonda Morkuzhambu, Drumstick Rasam, Ladysfinger Fry, Papad and Plain Rice |
↧
November 30, 2014, 7:19 am
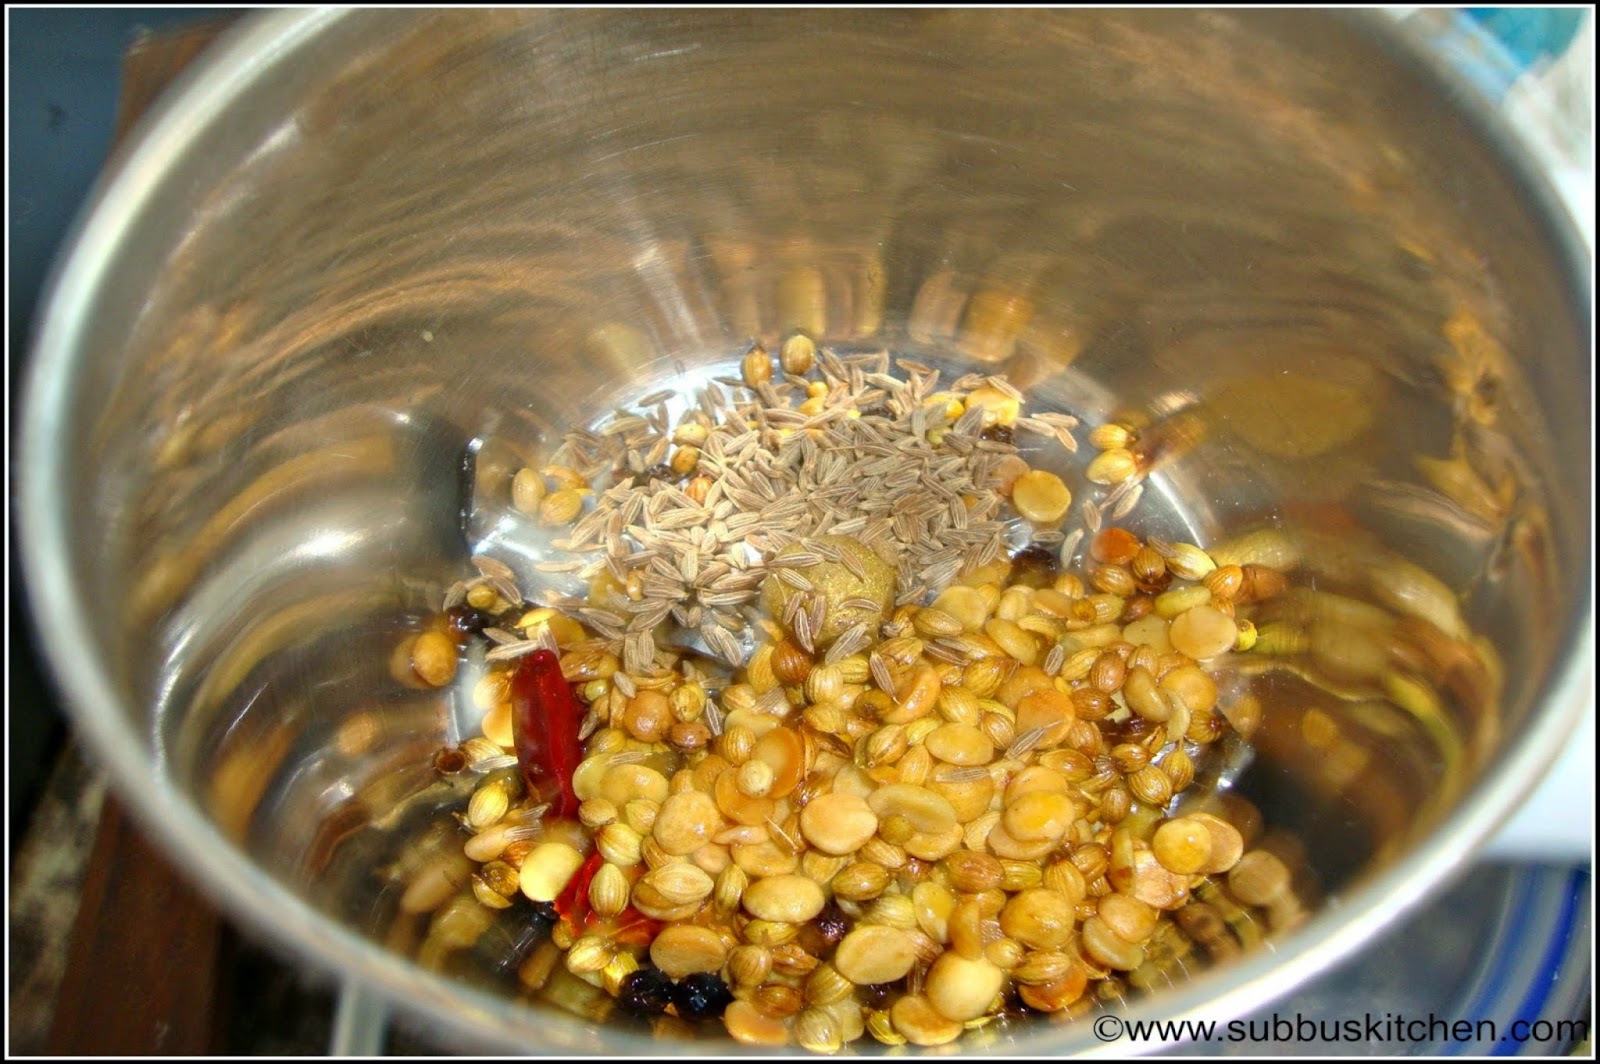
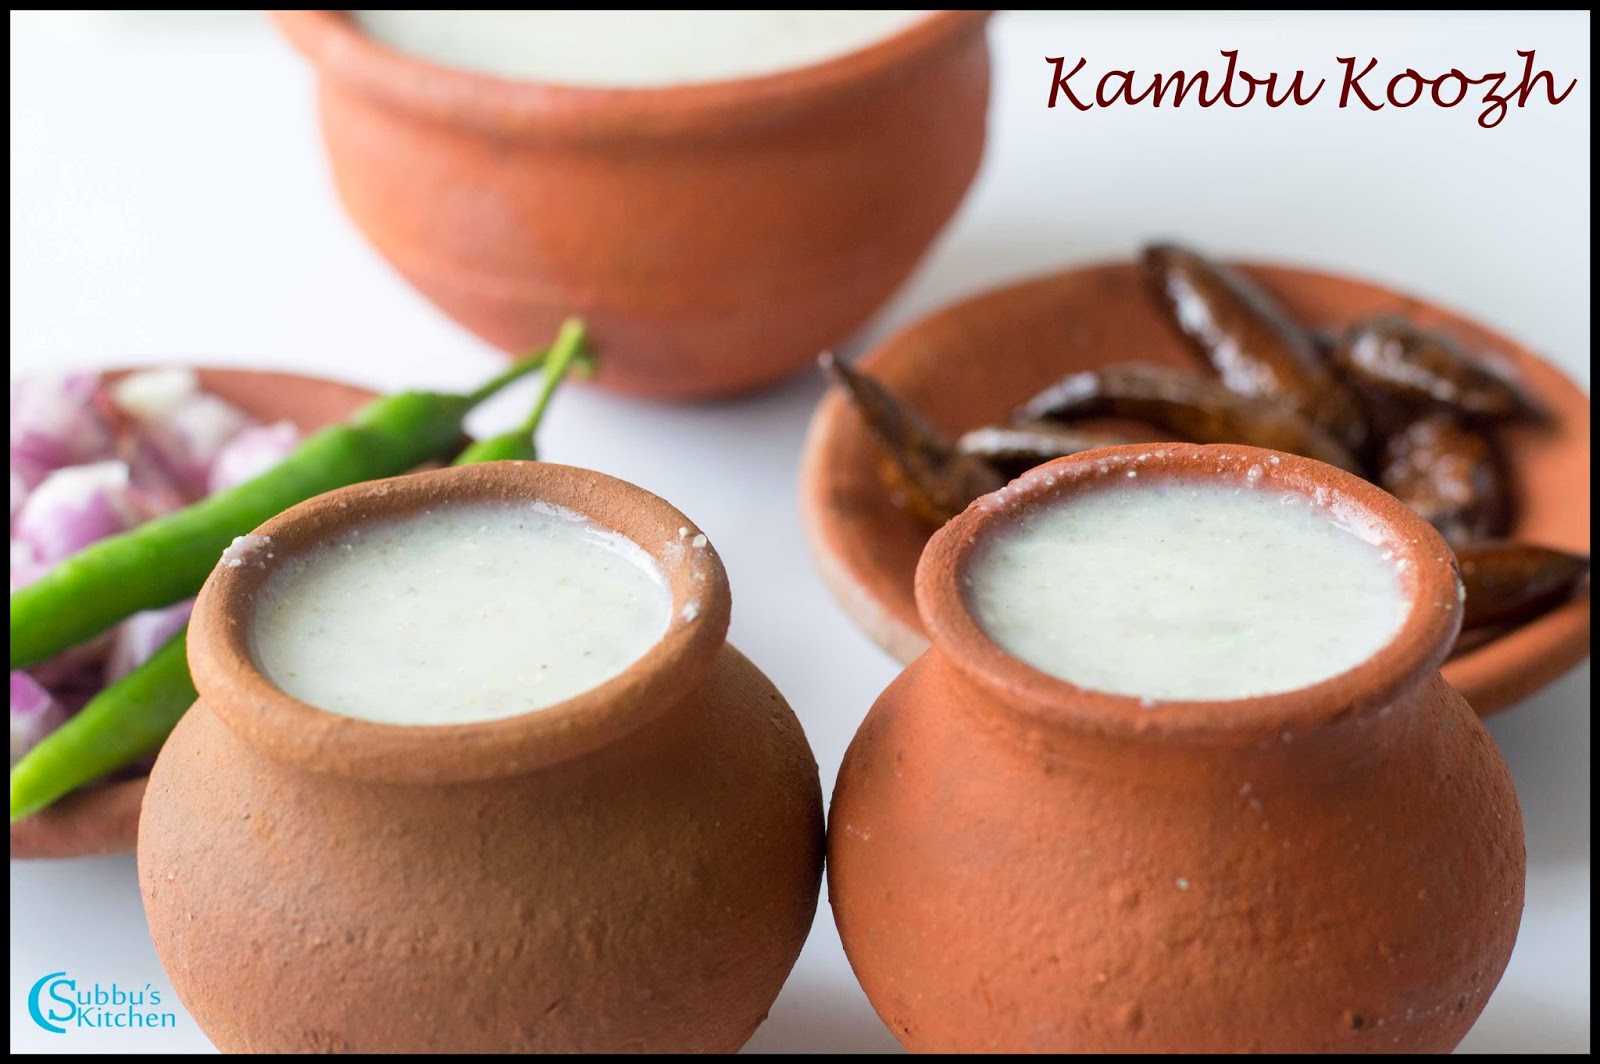
Kambu (Pearl millet) is a great dish for the gluten intolerent people. Apart from offering excellent taste, these millets contain essential mineral and nutrients, which provide the body with a variety of advantages. Consumption of pearl millets helps in minimizing the risk of type 2 diabetes. It is known to have a very high fiber content which makes it healthier. So we should not forget to incorporate the pearl millet in regular diet.
 |
| Kambu Koozh Recipe / Pearl Millet Porridge Recipe / Kambang Koozh Recipe |
This healthy millet is one of the ancient millet used by our ancestors. Mostly all the farmers' main course food would be pearl millet.In tamil we call it as kambang koozh. Either kambu koozh or kambu soru(sadam) is the main food for them. Kambu koozh is not only healthy, it is rich in starch and fiber and protein content so it gives more energy to our body and lower our appetite. After their hard work in the farms under hot sun, a glass of kambu koozh is a gift for the farmers. Such a healthy and refreshing drink should be surely part of our regular diet. We should make this koozh often and drink for breakfast. A glass of
kambu koozh / Pearl Millet Porridge/ Kambang Koozh served with shallots, mor milagai or green chilli is a heavenly dish!
 |
| Kambu Koozh Recipe / Pearl Millet Porridge Recipe / Kambang Koozh Recipe |
 |
| Kambu Koozh Recipe / Pearl Millet Porridge Recipe / Kambang Koozh Recipe |
Preparation and Yield:| Preparation time | 10 mins |
| Cooking Time | 15 mins |
| Servings | 2-3 |
 |
| Kambu Koozh Recipe / Pearl Millet Porridge Recipe / Kambang Koozh Recipe |
Ingredients:
| Pearl millet / Bajra / Kambu | 1/2 Cup* |
| Water | 5 Cups |
| Salt | To taste |
| Green Chilli | 2 |
| Sour Curd | 1/2 Cup |
| Cumin Seeds | 1/2 teaspoon |
| Ginger | 1/2 inch piece |
* 1 cup = 250ml
![]()
Method:
- Take the pearl millet in a mixer and grind it to a little coarse powder. Measure the kambu flour. Take 5 measures of water in a sauce pan and add the kambu flour and mix well
- Keep the flame in medium and stir continuously. Within 5 mintues, the koozh starts getting thicker. Stir continuously to avoid sticking to the bottom of the pan. When the koozh is thick, switch off the flame. Allow the koozh to come to room temperature. We can see the koozh gets further thickened. Now add cold water to the koozh and make it to a drinking consistency. It should be diluted nicely. Cover the koozh vessel with a lid and keep it aside overnight for fermentation. Generally in hot weather, the koozh gets nicely fermented. If you stay abroad and during winter, fermentation process takes more time, so we can also add 1 fist full of mashed cooked rice to the koozh which helps the fermentation process to be quicker. But adding cooked rice is optional.
- The next day morning, the koozh would have nicely fermented. Now take the curd in a mixer along with green chilli, ginger and cumin seeds
- Grind the curd to a nice paste. Add salt to the koozh and mix well. Then add the ground curd to the koozh and give it a nice stir.
- Now healthy and tasty kambu koozh is ready. Serve with chopped onions / shallots, green chillies, Mor Milagai and enjoy the drink!
 |
| Kambu Koozh Recipe / Pearl Millet Porridge Recipe / Kambang Koozh Recipe |
Note:
Fermentation process is optional.. This was the conventional method used by the farmers and villagers as they cant afford for milk / curd. We can prepare the koozh and use it immediately also. We can mix sour buttermilk instead of more water so that the sourness in the koozh is maintained,
Also during fasting days, we can avoid this fermentation and also curd/buttermilk will also be not used and those days, we can add milk to the koozh and have it or we can add lemon juice to the prepared koozh and we could have it. In any ways, this koozh is very very healthy and stuffy.
↧
↧
December 1, 2014, 7:36 am
Vella Seedai or sweet Seedai is one of the important neivedhyam dish for Krishna Jayanthi festival and Thirukarthigai festival. This is one of the trickiest dish. Even for more experienced people, sometimes it wouldn't be a successful attempt. Every time is an experience with this sweet seedai. Beginners may find it difficult in their first attempt. For beginners, you can see this another method for
sweet seedai which will be easy for them for their first attempt. The other method of making sweet seedai would not be crispy. We just need to prepare adhirasam dough but make small balls out of it and make seedai. So you may not go wrong in that.
Coming to this method... This is the conventional method of making Sweet Seedai (Vella Seedai). Though the method is little tricky, if we practice then we would simply love this method as the vella seedai would be very sweet as well as crunchy. We don't have the hassle of any string consistency of the jaggery. Its just the dough consistency we need to be cautious to prevent the seedai from getting dissolved or burst. So now lets focus on how to make this yummy and crunchy vella Seedai.
 |
| Vella Seedai Recipe | Sweet Seedai Recipe |
Preparation and Yield:| Preparation time | 5 mins |
| Cooking Time | 30 mins |
| Yield | 15 Seedai |
 |
| Vella Seedai Recipe | Sweet Seedai Recipe |
Ingredients:
| Homemade Rice Flour | 1 Cup* |
| Uriddal Flour | 1 tablespoon |
| Butter | 1 tablespoon |
| Grated Jaggery | 1/2 Cup |
| Sesame Seeds | 1 teaspoon |
| Grated Coconut | 1 tablespoon |
| Cardamom Powder | 1/4 teaspoon |
| Oil | For Deep Frying |
* 1 Cup = 250ml
 |
| Vella Seedai Recipe | Sweet Seedai Recipe |
Method:
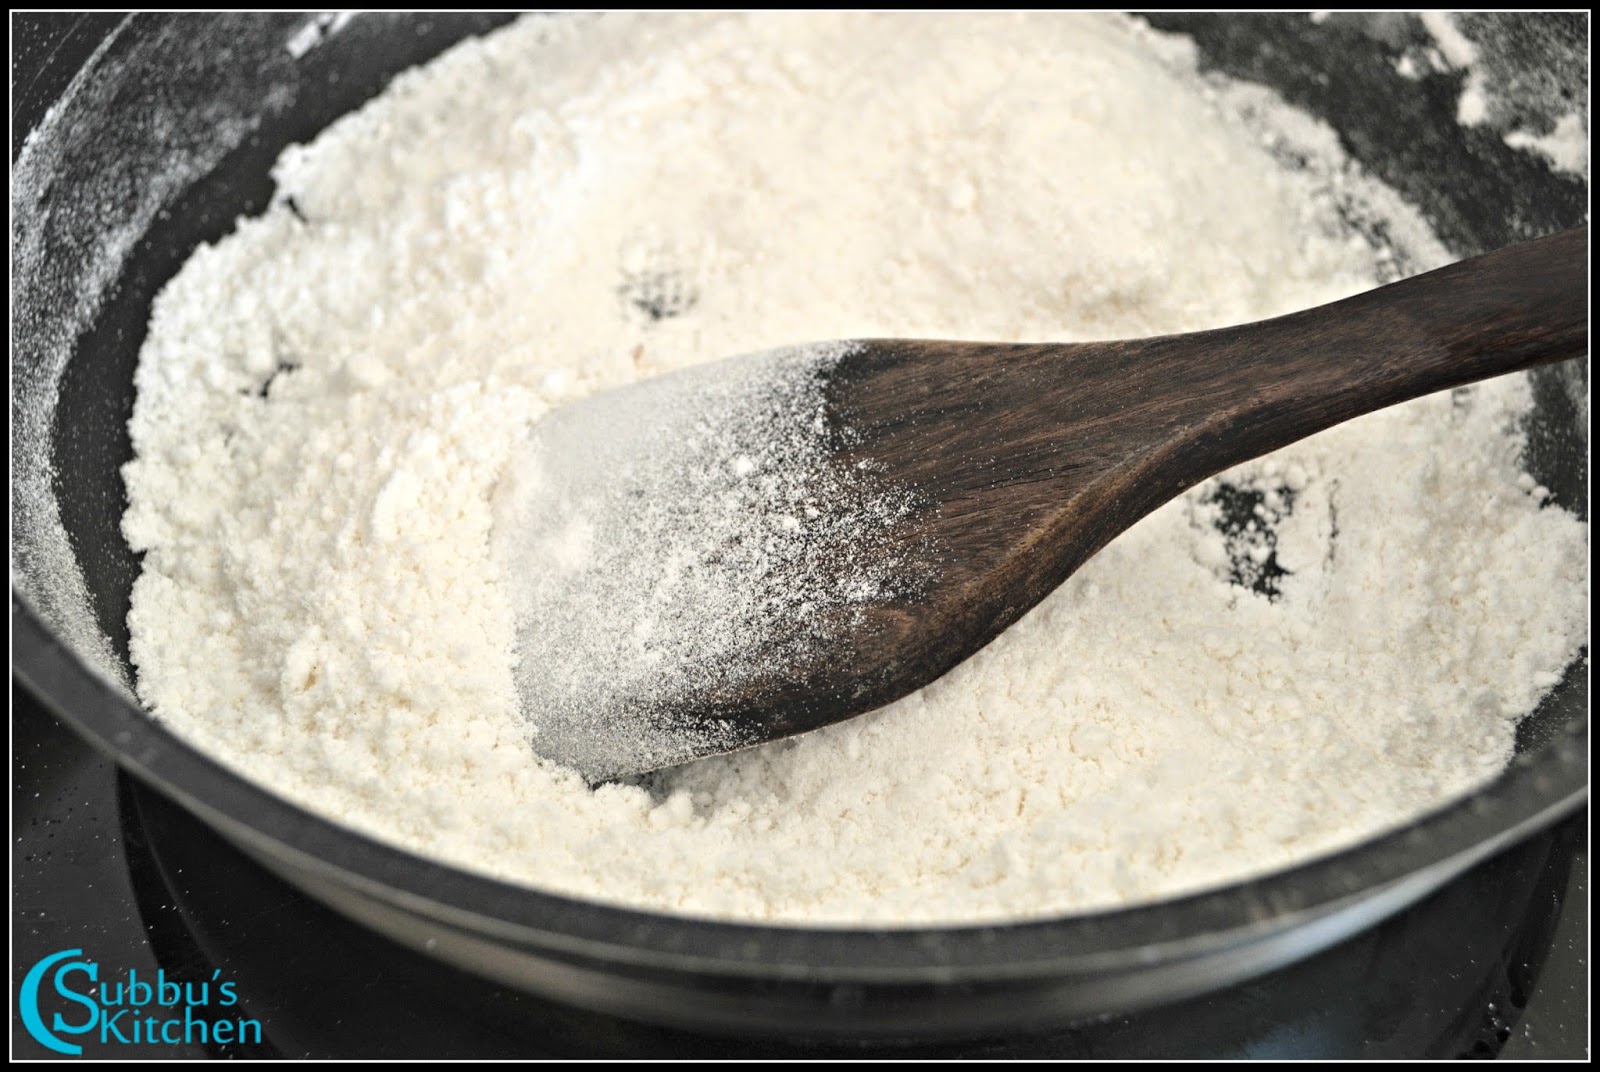
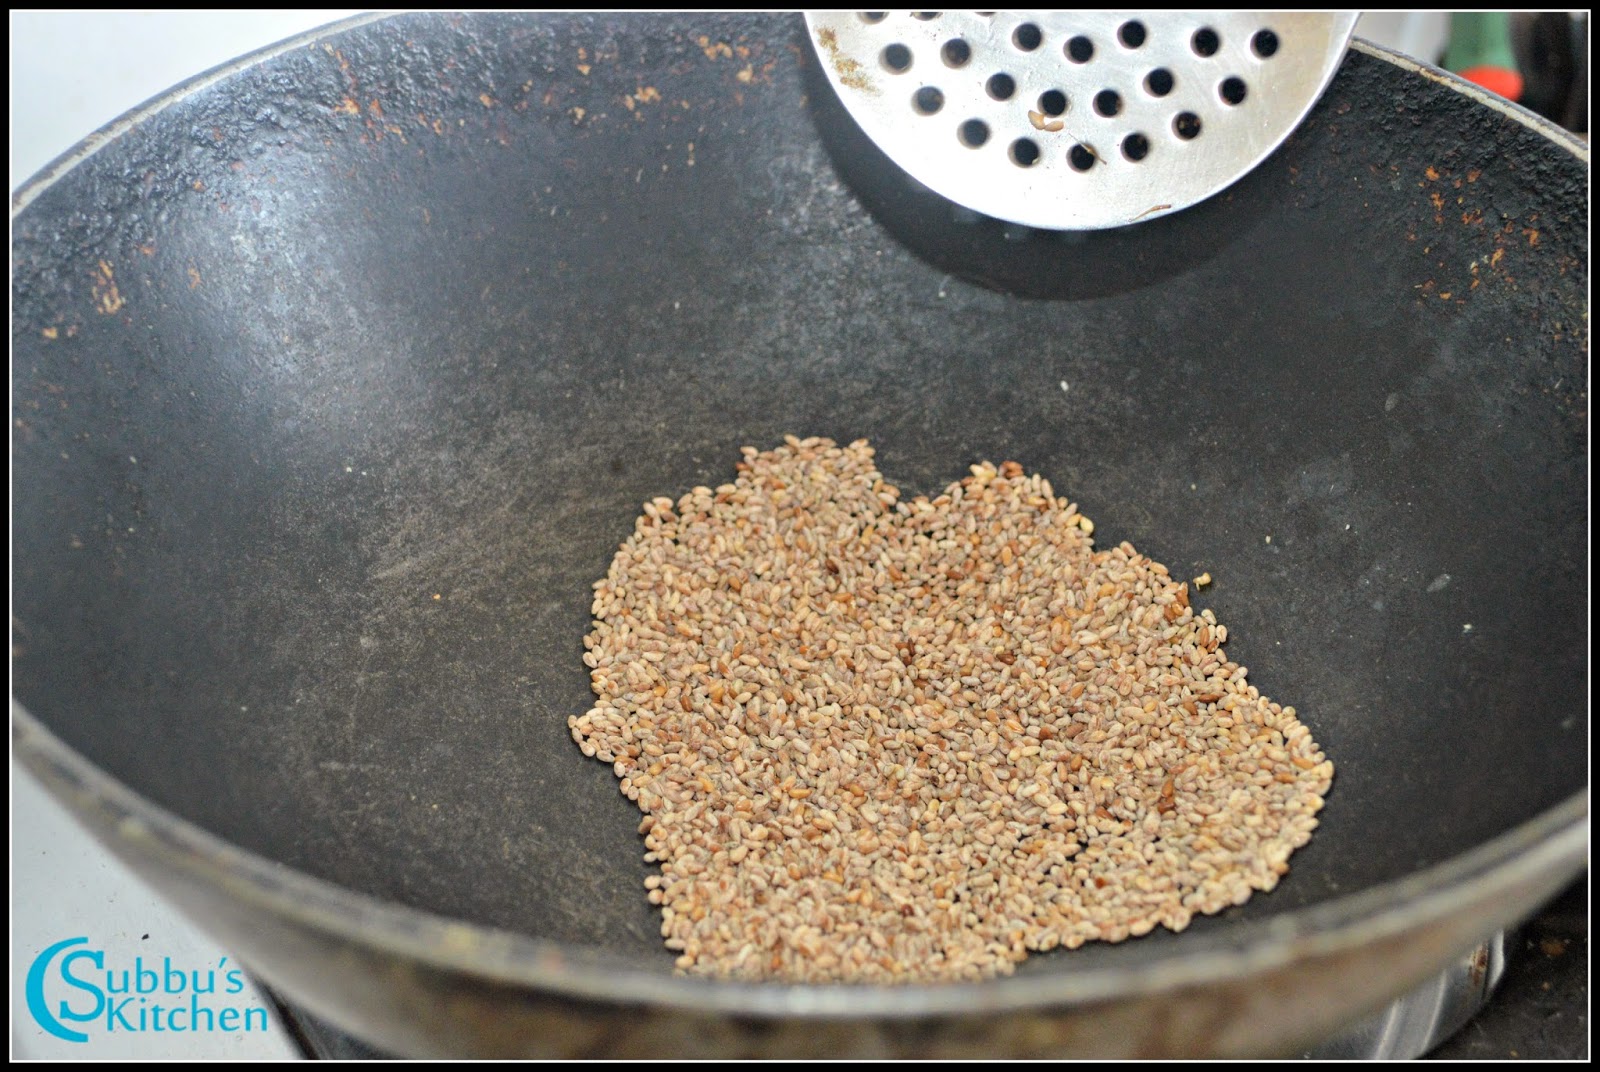
- Prepare the rice flour as given in the link here. Heat a pan and dry roast the rice flour in low flame for couple of minutes. Do not fry the rice flour till they become over burnt. Just heat the flour till they are hot and if you take a pinch of rice flour you should be able to draw or put little kolam. Take the roasted rice flour in a mixing bowl along with uriddal flour. Dry roasting is an important step in vella sedai preparation. Do not use freshly ground rice flour as it contain some moisture which will make the seedai to burst. You can also use store bought rice flour. IF you are using store bought rice flour, then dry roast it for couple of minutes and then sieve it and again dry roast it for another couple of minutes without burning the rice flour.
![]()
![]()
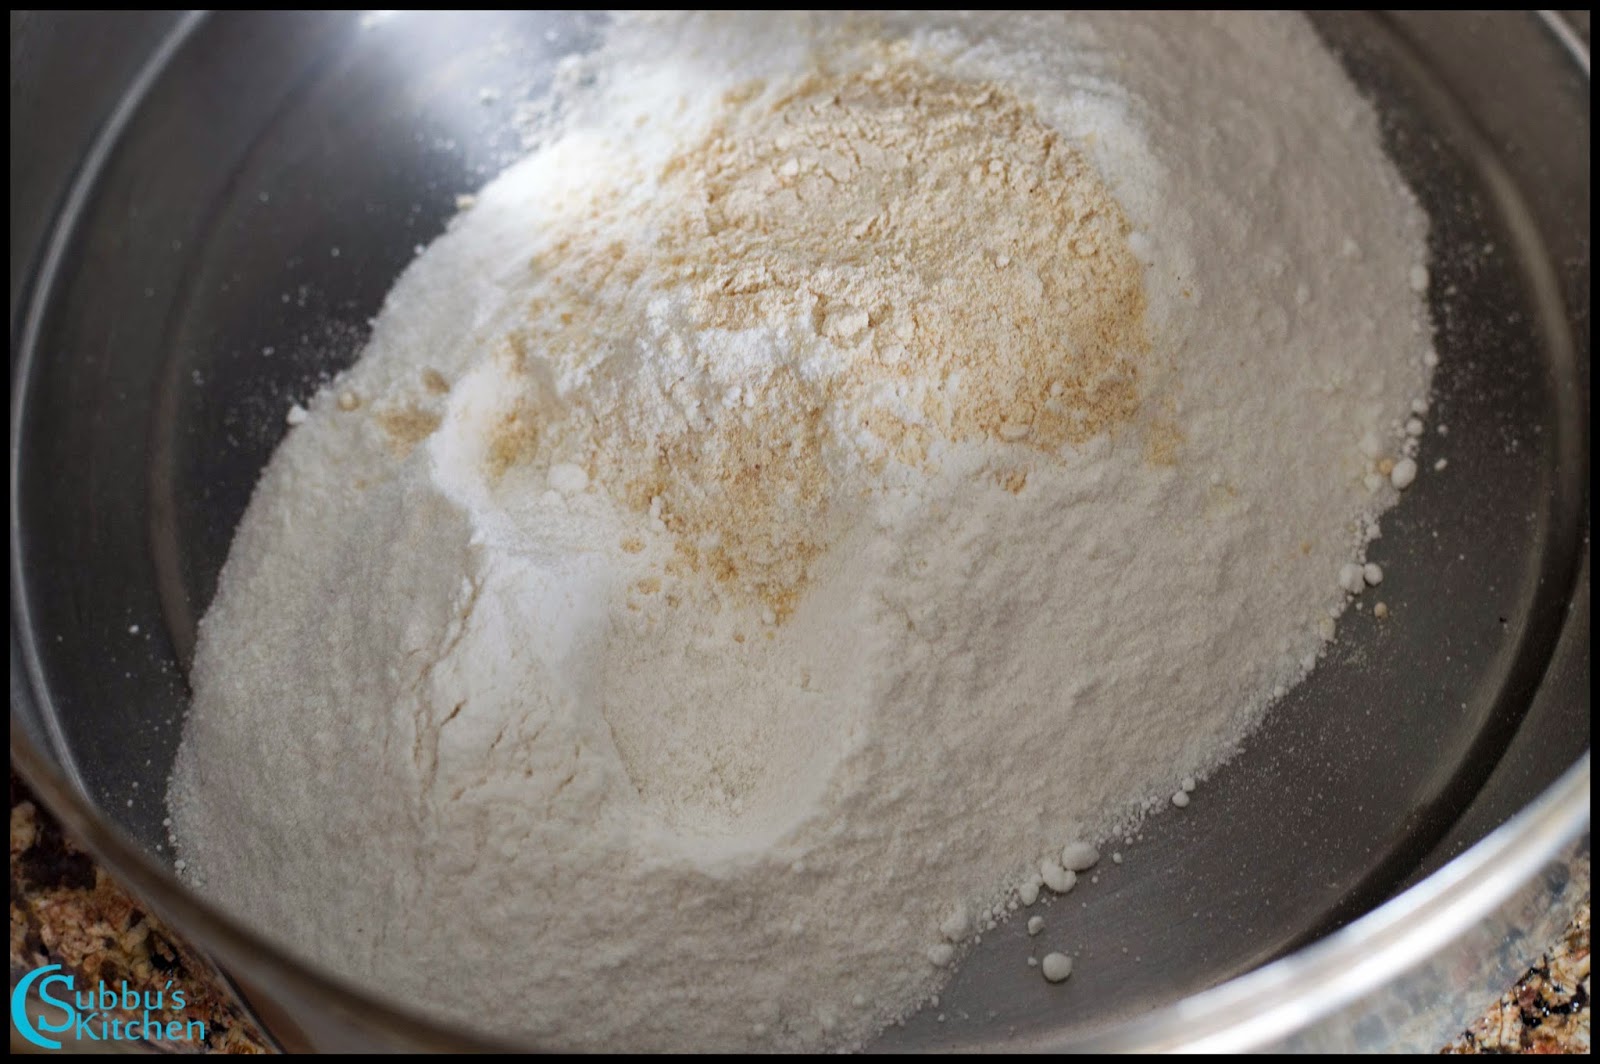
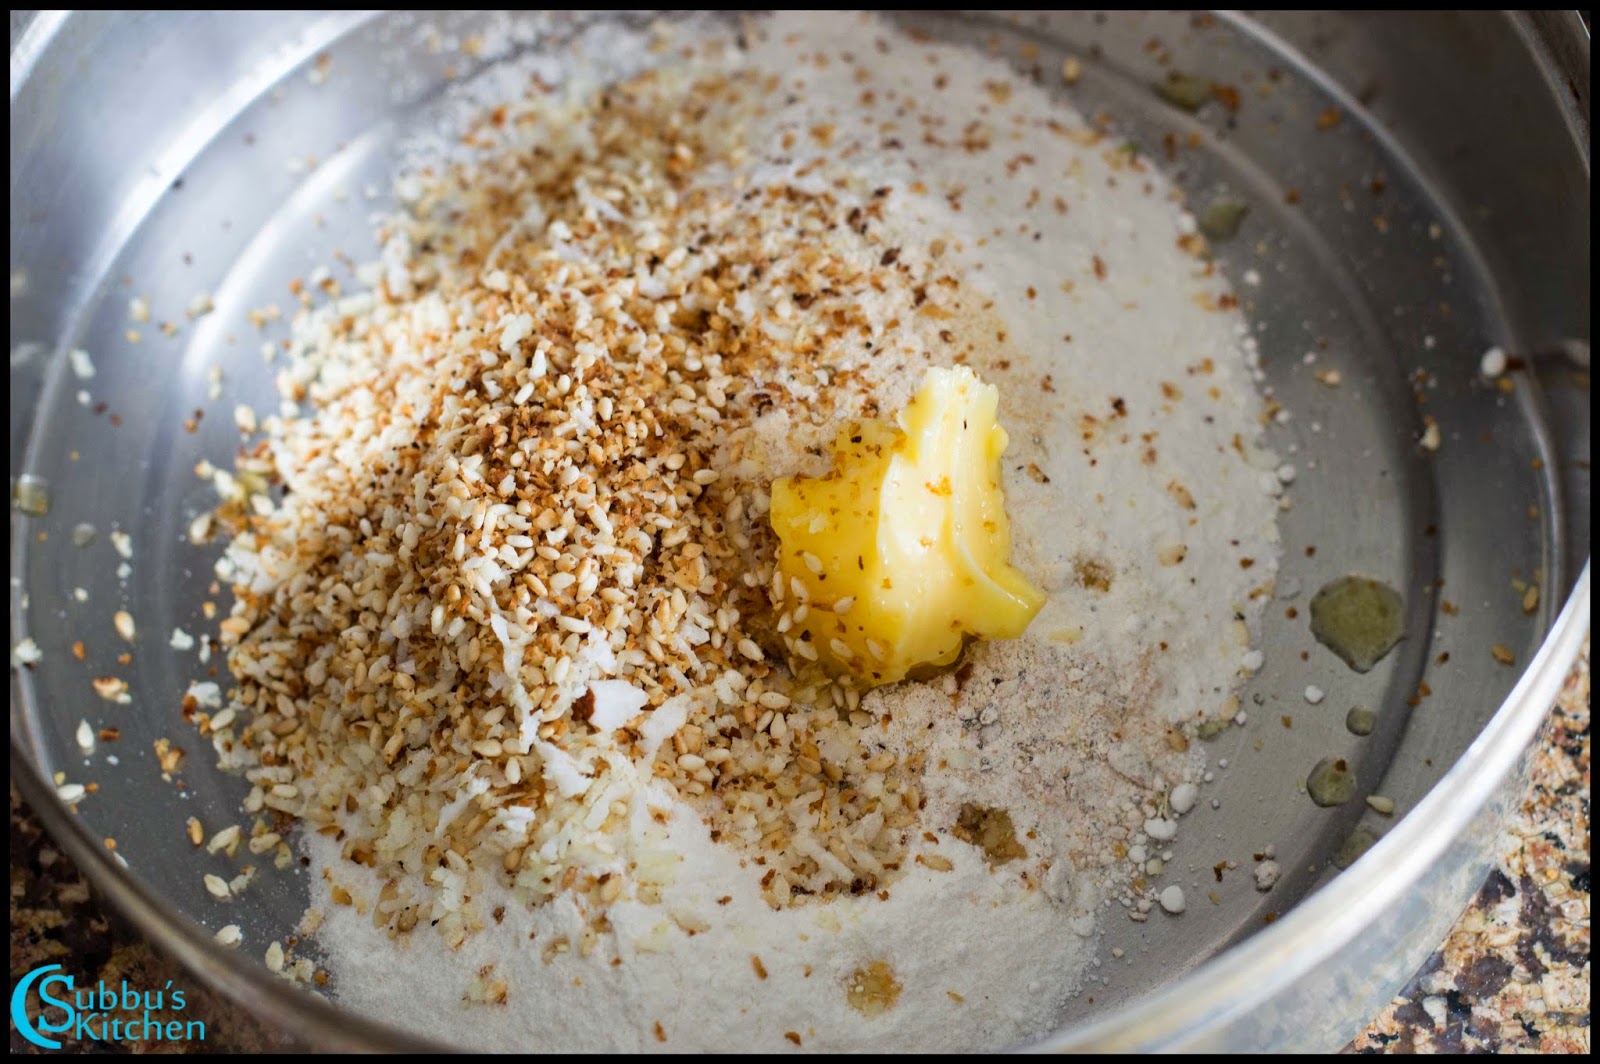
- Take a pan, add sesame seeds and grated coconut and dry fry them till they become golden brown color. Add these fried sesame seeds and grated coconut to the rice flour along with butter. The butter should be in room temperature. Mix everything well.
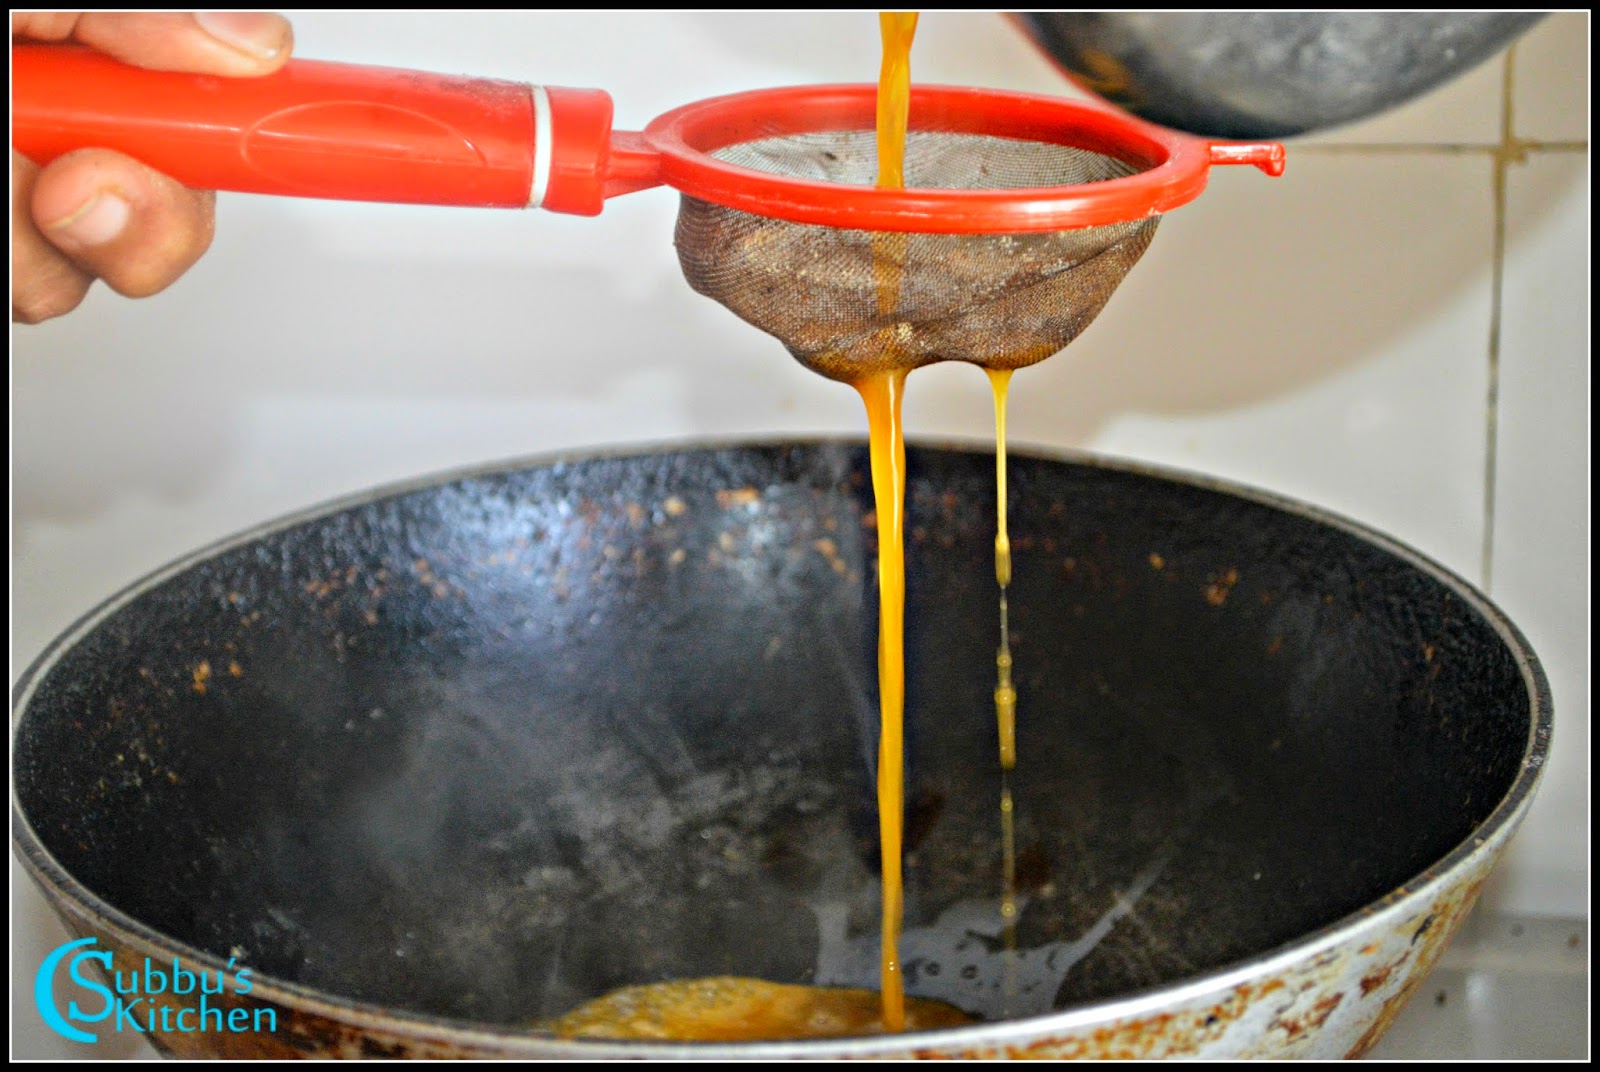
- Take grated jaggery in a bowl and add water just to soak the jaggery. I have added 2 tablespoon of water. Allow the jaggery to boil till it is dissolved. Pass this jaggery juice through a strainer to get rid of sand and other impurities
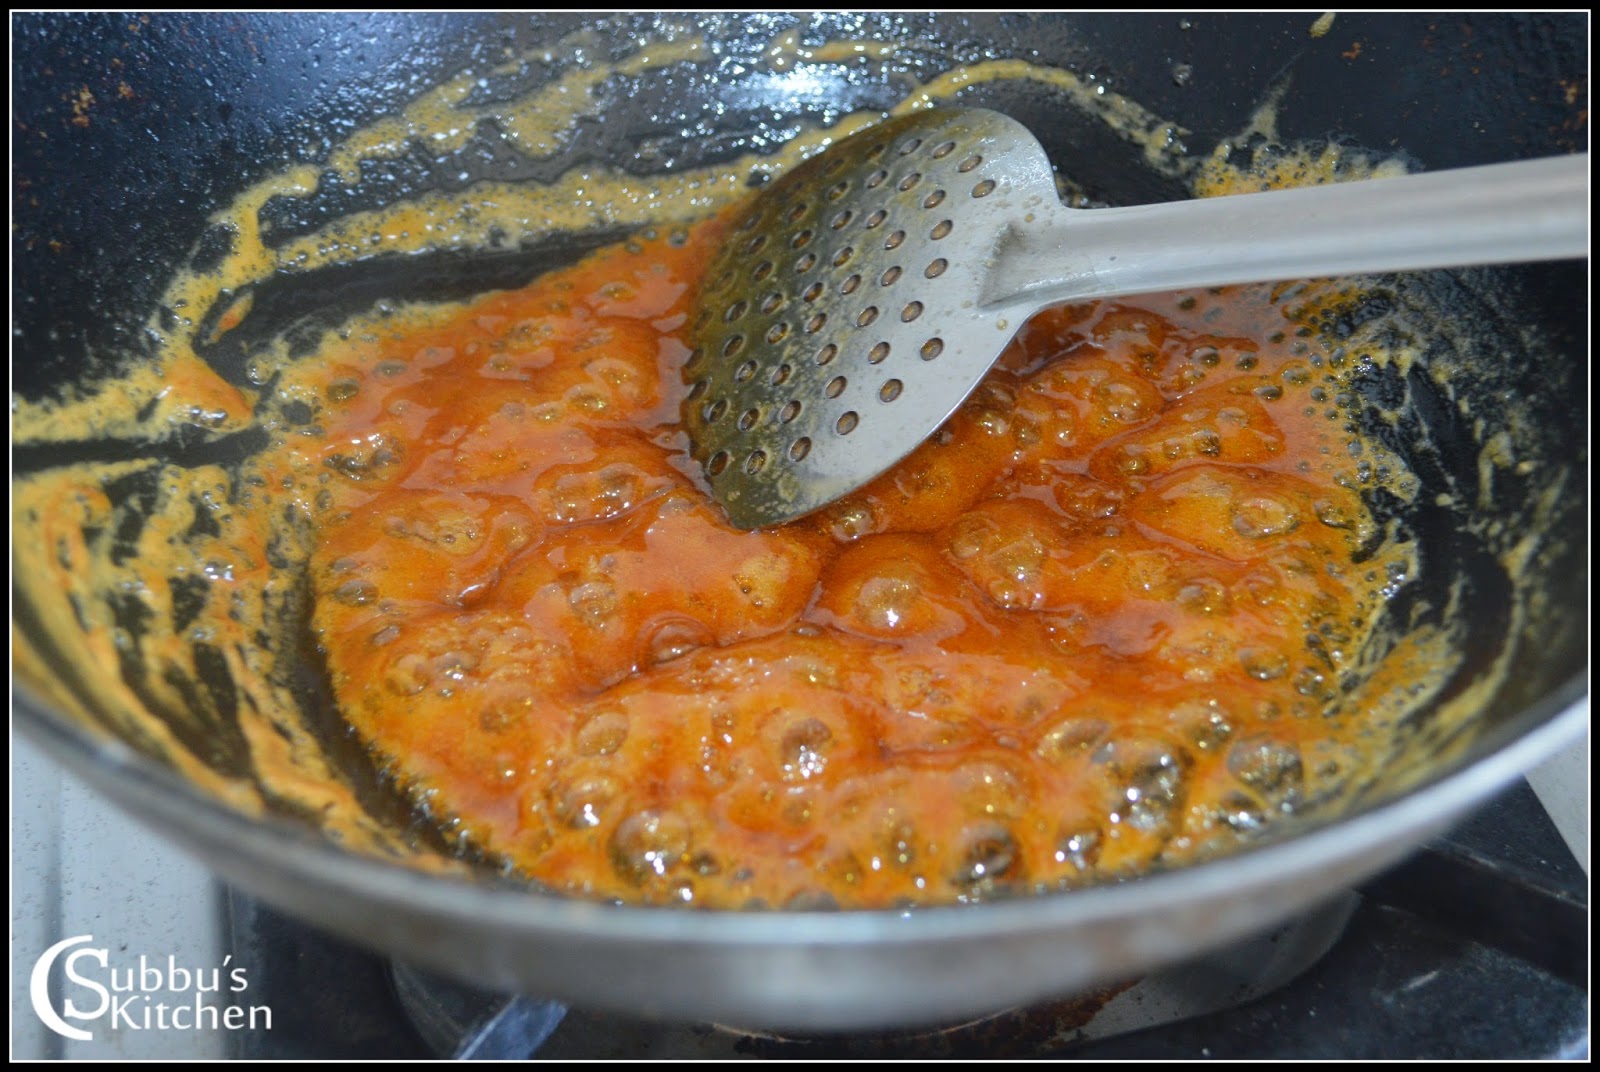
- Add the strained jaggery juice to a pan and keep in flame till it comes a rolling boil. We don't need any string or solid consistency. Add this jaggery juice to the rice flour and mix the rice flour well with a ladle or spoon. Make it to a right dough. If the dough is loose and soft then the seedai will dissolve in hot oil. So when you get a tough pliable dough then stop adding the jaggery syrup. Sometimes we might end up with dry dough where we may need to again sprinkle warm water and make it little soft. If the dough is too dry, then also the seedai will start to dissolve in oil. I have add 2 teaspoon of water to make the dough little soft.
![]()
![]()
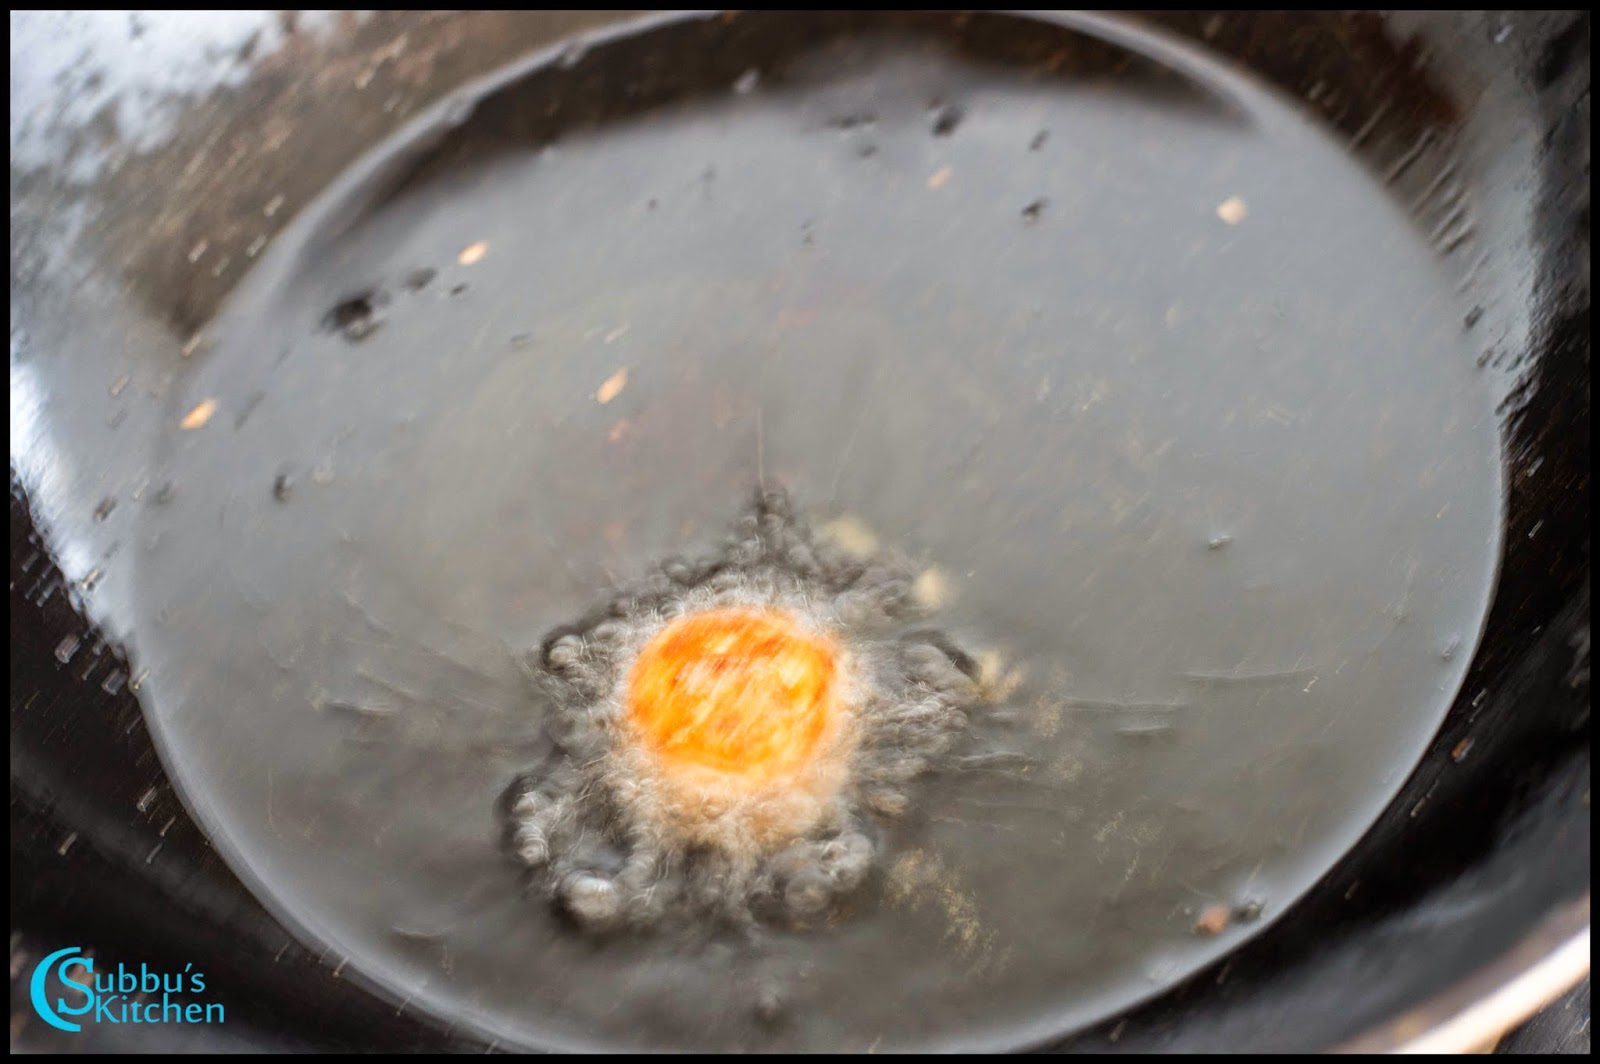
- Make gooseberry sized balls out of the seedai dough. Keep it aside for few minutes before dropping in hot oil. Heat oil in a pan. When the oil is hot enough, just drop a single seedai ball into the oil and in low flame deep fry them. Check if the seedai is not getting dissolved or not getting burst in the oil. If it does we may need to alter the seedai mixture.
- If the seedai is getting dissolved, it may be because of very dry ball and in that case, we need to sprinkle warm water little by little and make the dough little soft
- If the dough is already very soft, then sprinkle rice flour little by little and mix well.
- If the seedai is bursting, then it may be due to the very coarse rice flour or uriddal flour.
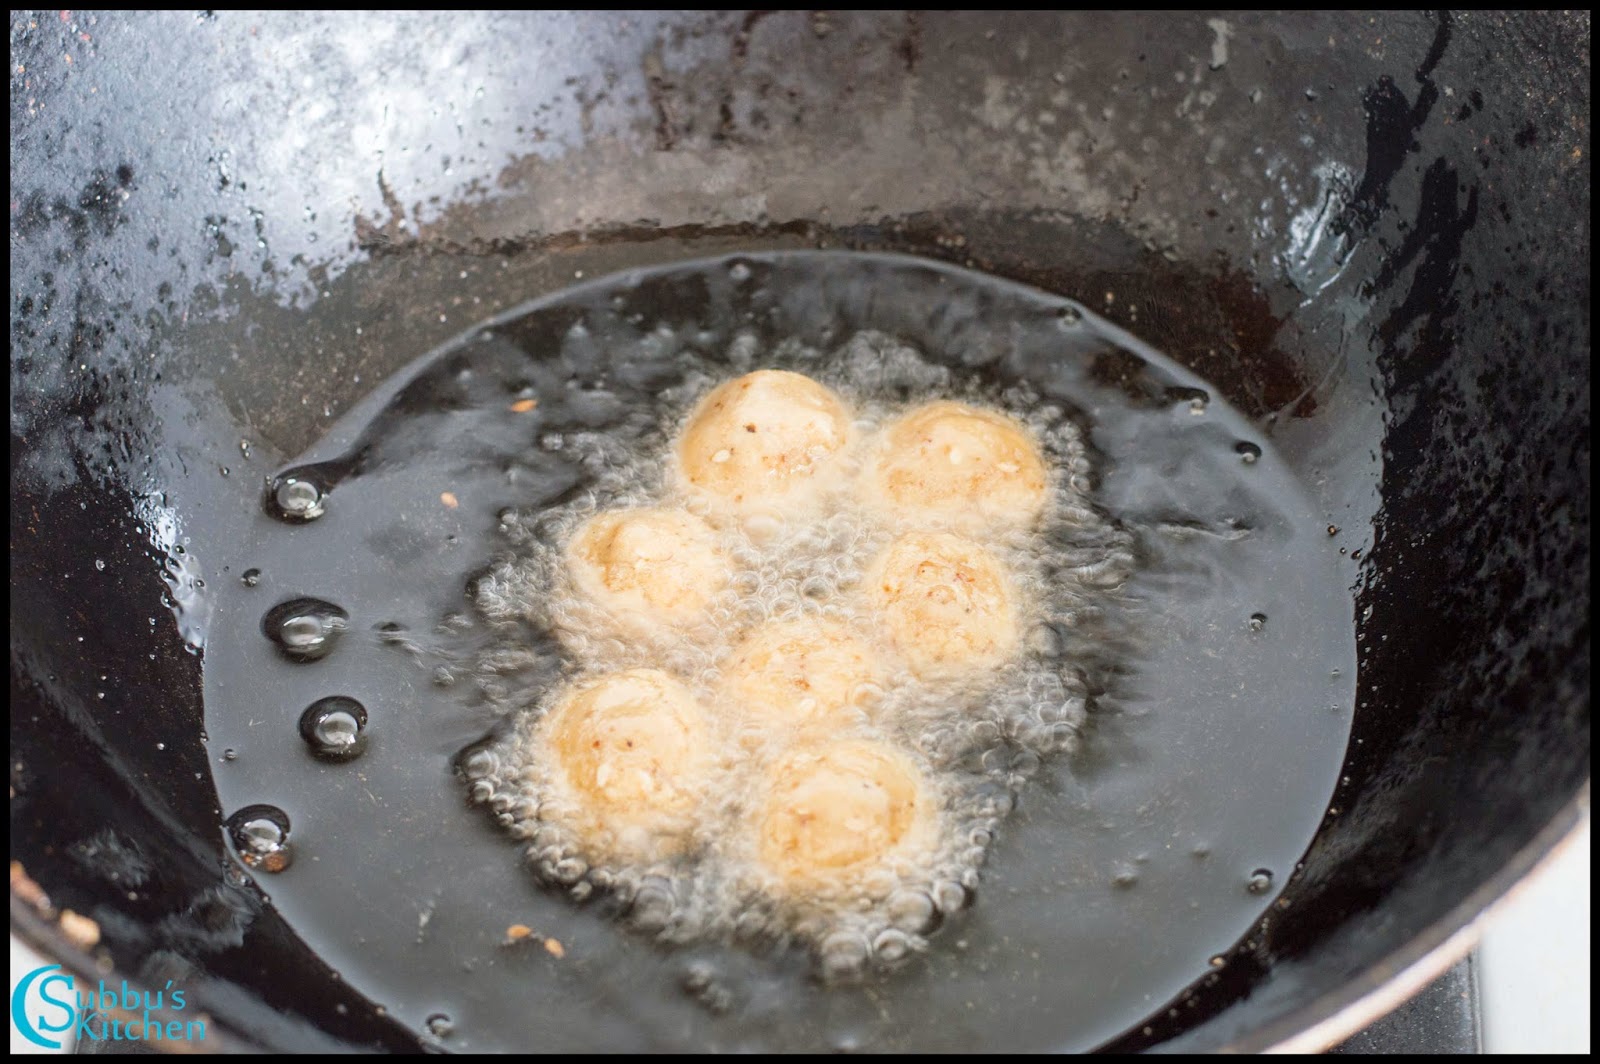
- When you are sure that the seedai is not getting dissolved or burst, then drop 4-5 seedai in one batch and in low flame deep fry them till the seedai are crispy and light golden brown color.
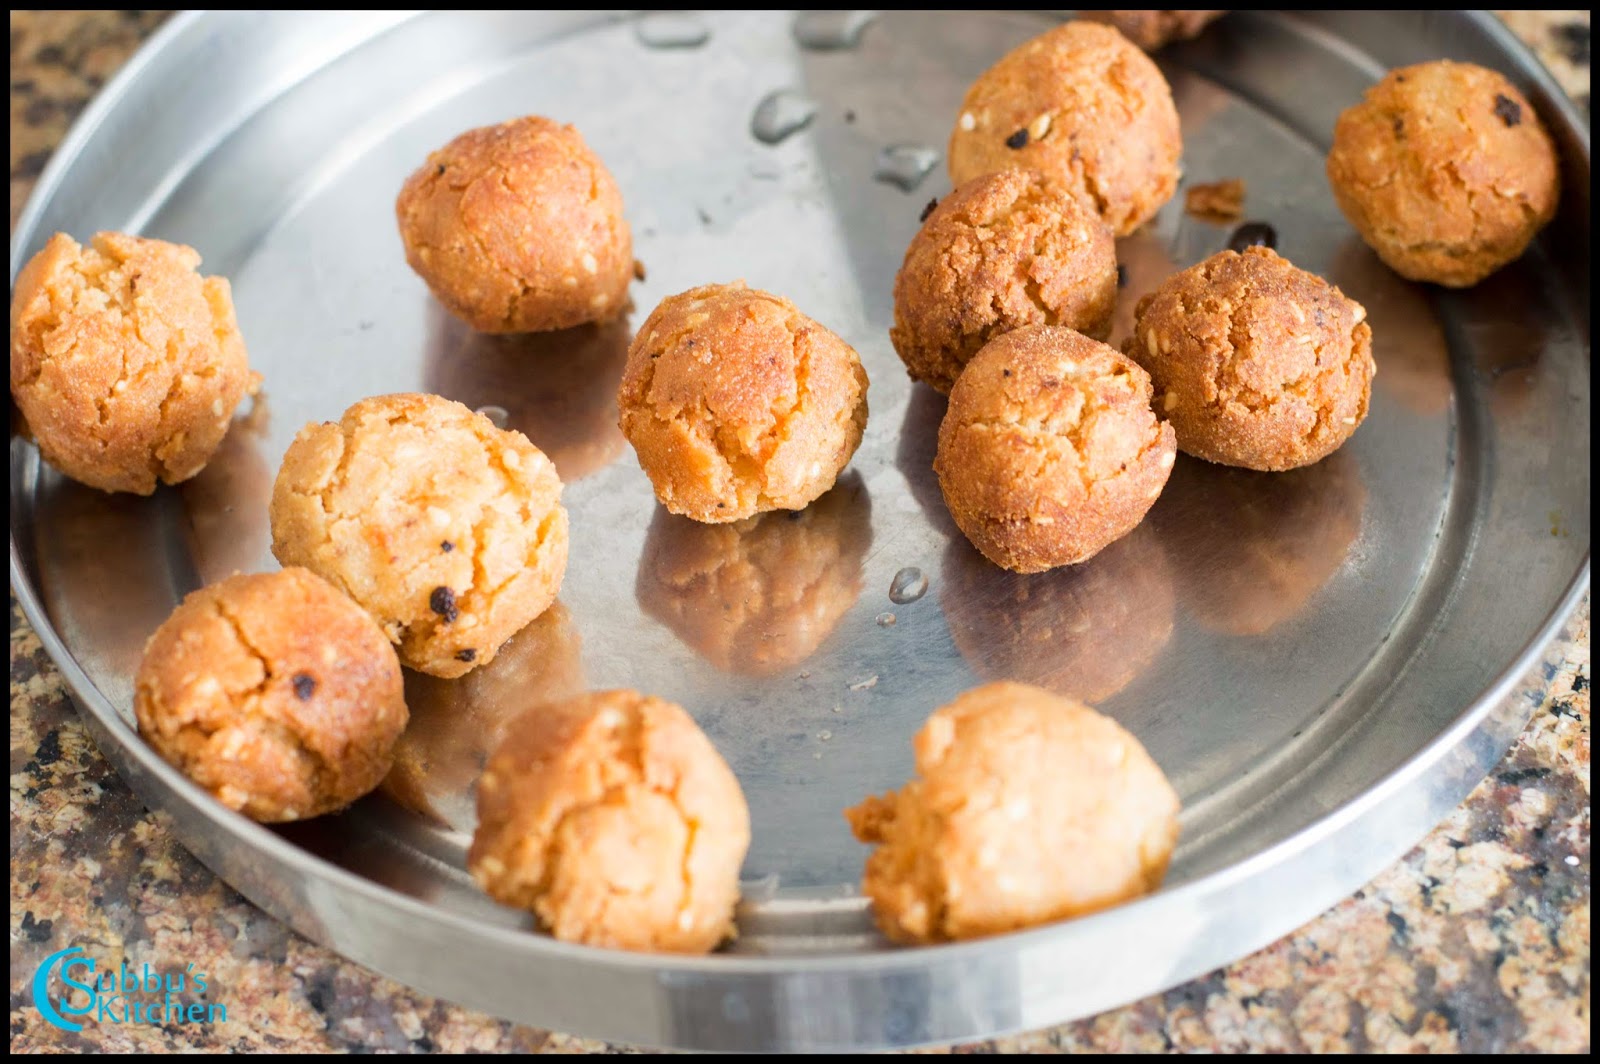
- Remove the crispy seedai from flame and place it in a paper towel to drain the excess oil
- Yummy and crispy vella seedai is now ready for neivedhyam or for serving.
 |
| Vella Seedai Recipe | Sweet Seedai Recipe |
↧
December 1, 2014, 7:37 am
Thirukarthigai/KarthigaiDeepam comes on the tamil month Karthigai on Pournami day(Full moon day). Throughout the month lamps are lit in the front of the house in the evening . On the Thirukarthigai/KarthigaiDeepam day the whole house is decorated with the oil lamps. Thiruvannamalai is famous for Thirukarthigai/KarthigaiDeepam. This year, Thiru Karthigai falls on 5th Dec 2014.
Story behind Karthigai Once Brahma and Vishnu due to the ego started arguing with each other " who is the greatest". Both claimed to be the greatest, instead of doing their duty. At that time the God Shiva appeared in the form of fire and told them whoever finds the top or bottom of the fire is the greatest. Brahma took the form of Annam (a bird) and tried to find the top of the frle pillar. Vishnu took the form of
Varaha( giant pig) and tried to see the bottom of the pillar. As the God has no limit in his size or power, both of them could not see either top or bottom of the fire. When their ego went down and they prayed the God, He appeared before them. The day in which the God appeared as a pillar of fire is
Thirukarthigai/
KarthigaiDeepam.
Lord Shiva appeared as a hill (Arunachala Hill) at Tiruvannamalai in Tamil Nadu. Indeed, the very names `Tiruvannamalai' and `Arunachala' translate as `holy fire hill.' The Shivalinga in the temple here is the agni linga. The tiny lamps lit during the Karthigai festival (Karthigai Deepam) are believed to be the miniature replicas of the fire linga. Every year thousands of devotees from Chennai and elsewhere flock to Tiruvannamalai to see the spectacular Karthigai Deepam there.
This
vradha indicates the non measurable
infiniteness of the God and shows that the God is the light that will drive away our ignorance. Lamps are lit in the houses to pray His "
JyothiSwarupam".
First day of this festival is called as "
Appakarthigai" and the second day is called as "
vadaikarthigai". All devotees will offer
pori,
adhirasam,
vella Seedai,
vetrilaipakku,fruits as
neivedhyam for God Shiva.
In down South of
Tamilnadu and in
Kerala, Hindus will pray god for goodness of their brothers and they will light a elephant lamp(
GajalakshmiVilaku) which marks as a sign of prosperity and wealth. The story behind lighting elephant lamp(
GajalakshmiVilaku) is given below.
Why we light Elephant lamp on Karthigai ?
Once upon a time there lived a King and he had only one daughter. She loved an elephant which grew with her and she considered the elephant as her own brother. After her marriage she missed her brother elephant very much. So for every
Thirukarthigai/
Karthigaideepamoccasion, she will light elephant lamp(
Gajalakshmivilaku) and she will prepare tender coconut, elephant leg size
milaguMilagu Adai,
Pori,
Adhirasam,
Vella Seedai and keep them as
neivedhyam for this festival.
So we on this auspicious
occassion all devotees should chant the following lines
கீட: பதங்கா மசகாஸ்ச வ்ருதா
ஜலே ஸ்த்யேயே விசரந்தி ஜீவா
தருஷ்டவா ப்ரதீபம் ந ச ஜன்ம பாகிந:
பவந்தி நித்யம் சவ பசா ஹி விப்ரா
and also
YaanaiVaazha
ArasanVaazha
Penn Vaazha
PiranthagamVaazha
and put one piece of pori in the lamp and perform the pooja along with neivedhyam.
Click the link below for the Thirukarthigai Neivedhyam Recipes
![Thirukarthigai / Karthigai Deepam]()
↧
December 2, 2014, 6:10 am
Milagai Bajji ( Chilli / Mirchi Bajji) is one of the popular tea time snack in many parts of Southern India especially in Tamilnadu. Most of the office pantries, road side shops, tea stalls, and almost all restaurants serve this crispy and spicy Milagai Bajji. It is a perfect tea time chaat / snack.
 |
| Milagai Bajji Recipe | Chilli Bajji Recipe | Mirchi Bajji Recipe | Stuffed Chilli Bajji Recipe |
In my childhood days, I thought Bajji Milagai would be very hot and spicy and I didn't even dare to taste it. But later when I first tasted, it tastes dainty. Bajji Chilli is very mild like capsicum and it tastes delicious. We can stuff these chillies with our favourite stuffings. I have stuffed the chillies with onions and coriander leaves. We can also stuff finely chopped vegetables and if you like we can even crush peanuts and mix with onions and vegetables and stuff it inside the chilli. A very simple snack but you would love it along with a hot tea / coffee. Try this delicious Milagai Bajji and enjoy your wonderful evening!
 |
| Milagai Bajji Recipe | Chilli Bajji Recipe | Mirchi Bajji Recipe | Stuffed Chilli Bajji Recipe |
Preparation and Yield:| Preparation time | 10 mins |
| Cooking Time | 20 mins |
| Servings | 6 bajji's |
 |
| Milagai Bajji Recipe | Chilli Bajji Recipe | Mirchi Bajji Recipe | Stuffed Chilli Bajji Recipe |
 |
| Milagai Bajji Recipe | Chilli Bajji Recipe | Mirchi Bajji Recipe | Stuffed Chilli Bajji Recipe |
Ingredients:
| Bajji Milagaai / Bajji Chilli | 6 |
| Gram Flour | 1 Cup |
| Rice Flour | 1/2 Cup |
| Salt | To taste |
| Red Chilli Powder | 2 teaspoon |
| Eno Fruit Salt / Soda Salt (Optional) | 1/4 teaspoon |
| Hing | a pinch |
| Oil | For Deep Frying |
| Finely Chopped Onion (Optional) | 1/4 Cup |
| Finely Chopped Coriander Leaves (Optional) | 2 tablespoon |
| Lemon Juice (Optional) | 1/4 teaspoon |
* 1 Cup = 250ml
 |
| Milagai Bajji Recipe | Chilli Bajji Recipe | Mirchi Bajji Recipe | Stuffed Chilli Bajji Recipe |
Method:
- In a mixing bowl, add gram flour, rice flour, red chilli powder, salt, eno fruit salt(optional) and hing and mix well. Add water little by little and make it to a thick batter like idli batter
- Wash and dry the bajji chilli with a towel. Slit the chilli length wise and remove the seeds from the green chillies. Optional - We can stuff the finely chopped onion inside the Chilli to enhance the taste of the bajji. But this step is optional. If you like having the stuffing inside the chilli, then follow this step. Otherwise, skip this step. Mix the chopped onions, coriander leaves and lemon juice and mix well.
- Optional - Stuff each slit green chillies with onion-coriander leaves and keep it aside. Heat oil in a pan, When the oil is hot enough, take one stuffed chilli and dip it in the bajji batter and coat it nicely and then gently drop it in the hot oil.
- Fry the bajji in medium flame till it becomes golden brown and becomes crispy too. Remove the fried bajji and place it in paper towel to drain excess oil. Repeat the step for the rest of the stuffed chillies.
- Serve the crispy and spicy Milagai Bajji / Mirchi Bajji / Chilli Bajji with hot coffee / tea and enjoy the wonderful evening
 |
| Milagai Bajji Recipe | Chilli Bajji Recipe | Mirchi Bajji Recipe | Stuffed Chilli Bajji Recipe |
↧
December 3, 2014, 12:00 am
Maavilakku Mavu (Maa Vilakku Mavu) is an auspicious rice flour lamp made with rice flour and jaggery during Tamil Month Thai, Aadi and also during Karthigai Deepam festival. It is a family custom for many of you to offer Maavilakku during these auspicious occasions. My mother and MIL doesn't have this tradition, but my sister's in-laws has this tradition and she started following. I heard from her that even for Karthigai Deepam, they used to make Maavilakku Mavu deepam along with other diyas. So I learnt from her how to make this auspicious rice flour lamp. |
| Maavilaku Mavu Recipe | Maa Vilakku Mavu Recipe | Karthigai Deepam Recipes |
Also Many people have a tradition of making Foxtail Millet with honey lamp and offer that to Lord Muruga. You can look here how to make Foxtail millet with honey (I have made balls out of foxtail millet and honey, we can make a big ball and make a dent in the middle and pour ghee and lit the lamp.
 |
| Maavilaku Mavu Recipe | Maa Vilakku Mavu Recipe | Karthigai Deepam Recipes |
Preparation and Yield:| Preparation time | 10 mins |
| Cooking Time | 5 mins |
| Servings | 5 |
 |
| Maavilaku Mavu Recipe | Maa Vilakku Mavu Recipe | Karthigai Deepam Recipes |
Ingredients:
| Raw Rice** | 2 Cups* |
| Grated Jaggery | 1 1/2 Cups |
| Cardamom | 2-3 |
| Ghee | 2 tablespoon |
| Cotton Wick | 2 |
* 1 cup = 250ml
** we can also use store bought rice flour, but for neivedhyam it is always good to prepare fresh rice flour.
- Rinse the raw rice in water atleast couple of times. Then add fresh water to the raw rice to soak them well and leave the raw rice to get soaked for atleast an hour. After an hour, drain the water from rice and spread it in a clean white towel to get it dried.
- It could take atleast 5 to 10 minutes to get dried. If you take the rice in your hand, you should feel damp in your palm or fingers. If you are going to prepare larger quantities then drying of rice takes more time. Also, if we are going to grind the rice in a mixer, then we should grind it immediately after the rice got dried. Immediately grinding the dried rice in a mixer helps us to get more smooth rice flour without any lumps. If we leave the dried rice for a long time, then we would not get smooth flour in the mixer. But if we are planning to grind it in a rice mill, then it should not be a problem.
- Grind the rice in the mixer to a nice powder. Normally we don't get any lumps. But we should sieve it couple of time to get a smooth rice flour. If we get any lumps while we sieve, again add the lumps of rice flour to the mixer and grind it again to a smooth flour and again sieve it.
- Repeat the sieve process again and again till we get a smooth and nice rice flour. Now our rice flour is ready. Take the rice flour in a mixer along with grated jaggery and cardamom
- Grind the rice and jaggery. Just give a couple of pulses just to mix the rice and jaggery thoroughly. Do not over grind it as the jaggery will start giving water and the whole mixture would become clumsy. Take the ground rice and jaggery powder in a plate and leave it aside for 10-15 minutes. The jaggery would give a nice wetness to the rice flour and you can easily make a soft dough.
- After 15 minutes, split the rice and jaggery mixture into two portions. Knead the rice and jaggery mixture to 2 balls. Then with our fingers or with any bottle cap, gently press the center of the ball to make a dent. If you feel your rice and jaggery mixture is too dry to make balls or dent, then you can add little ghee and knead the mixture again. You can make a dent and make a shape like a Diya.
- Then we need to decorate the maavilakku with turmeric and kumkum. Noe add Panju Thiri (Cotton Wick) to each of the shaped maavilakku.
- Then pour ghee in the dent made in maavilaku and wet the cotton wick with ghee and then lit the lamp.
- Now our Maavilakku mavu is ready for Pooja / Deepam
 |
| Maavilaku Mavu Recipe | Maa Vilakku Mavu Recipe | Karthigai Deepam Recipes |
↧
↧
December 4, 2014, 12:00 am
AvalPori and Nel Pori are the two traditional neivedhyam dishes prepared on the auspicious occasion of Thirukarthigai/Karthigaideepam. Puffed rice mixed with jaggery syrup along with cardamom and coconut pieces, is a wonderful sweet dish. Apart from Vella seedai, vellai appam, milagu adai, pori urundai is an important neivedhyam for Karthigai Deepam festival. |
| Pori Urundai Recipe | Aval Pori Urundai Recipe | Nel Pori Urundai Recipe |
Many of you have a custom to make these pori urundai like a paruppu thengai too. We make paruppu thengai using Aval Pori. People from Tirunelveli district and also from Nagercoil has a custom, of not making balls out of this puffed rice, instead, we mix the pori and jaggery syrup and keep it as such for neivedhyam.
 |
| Pori Urundai Recipe | Aval Pori Urundai Recipe | Nel Pori Urundai Recipe |
Some of us have a tradition to make only Pori urundai for Karthigai Deepam Neivedhyam, but Tirunelveli custom involves making Milagu Adai, Vellai Appam and Vella seedai also. The procedure given here is same for both Aval Pori and Nel Pori. Happy Karthigai Deepam wishes for all of you!
Preparation and Yield:| Preparation time | 12 Hours |
| Cooking Time | 20 mins |
| Yield | 12 Pori Urundai |
 |
| Pori Urundai Recipe | Aval Pori Urundai Recipe | Nel Pori Urundai Recipe |
Ingredients:
| Aval Pori / Nel Pori | 4 Cups* |
| Grated Jaggery | 1 Cup |
| Finely chopped coconut pieces | 2 Tablespoon |
| Cardamom powder | 1 Teaspoon |
*1 Cup = 250ml
 |
| Pori Urundai Recipe | Aval Pori Urundai Recipe | Nel Pori Urundai Recipe |
Method:
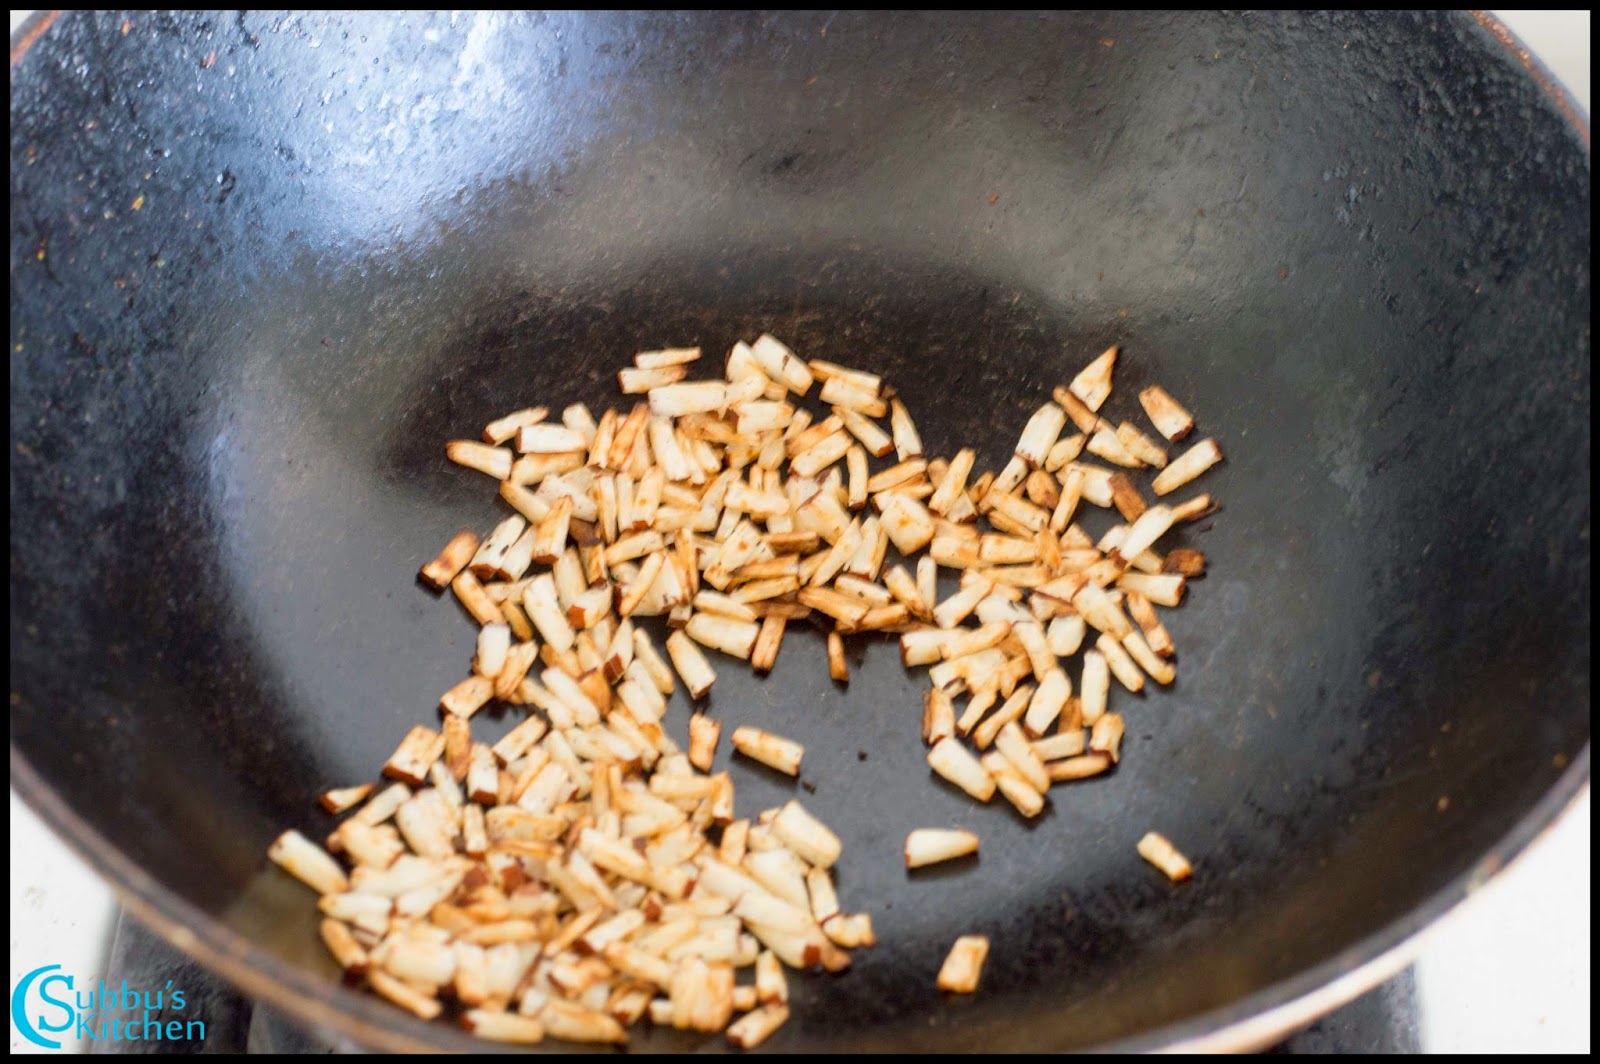
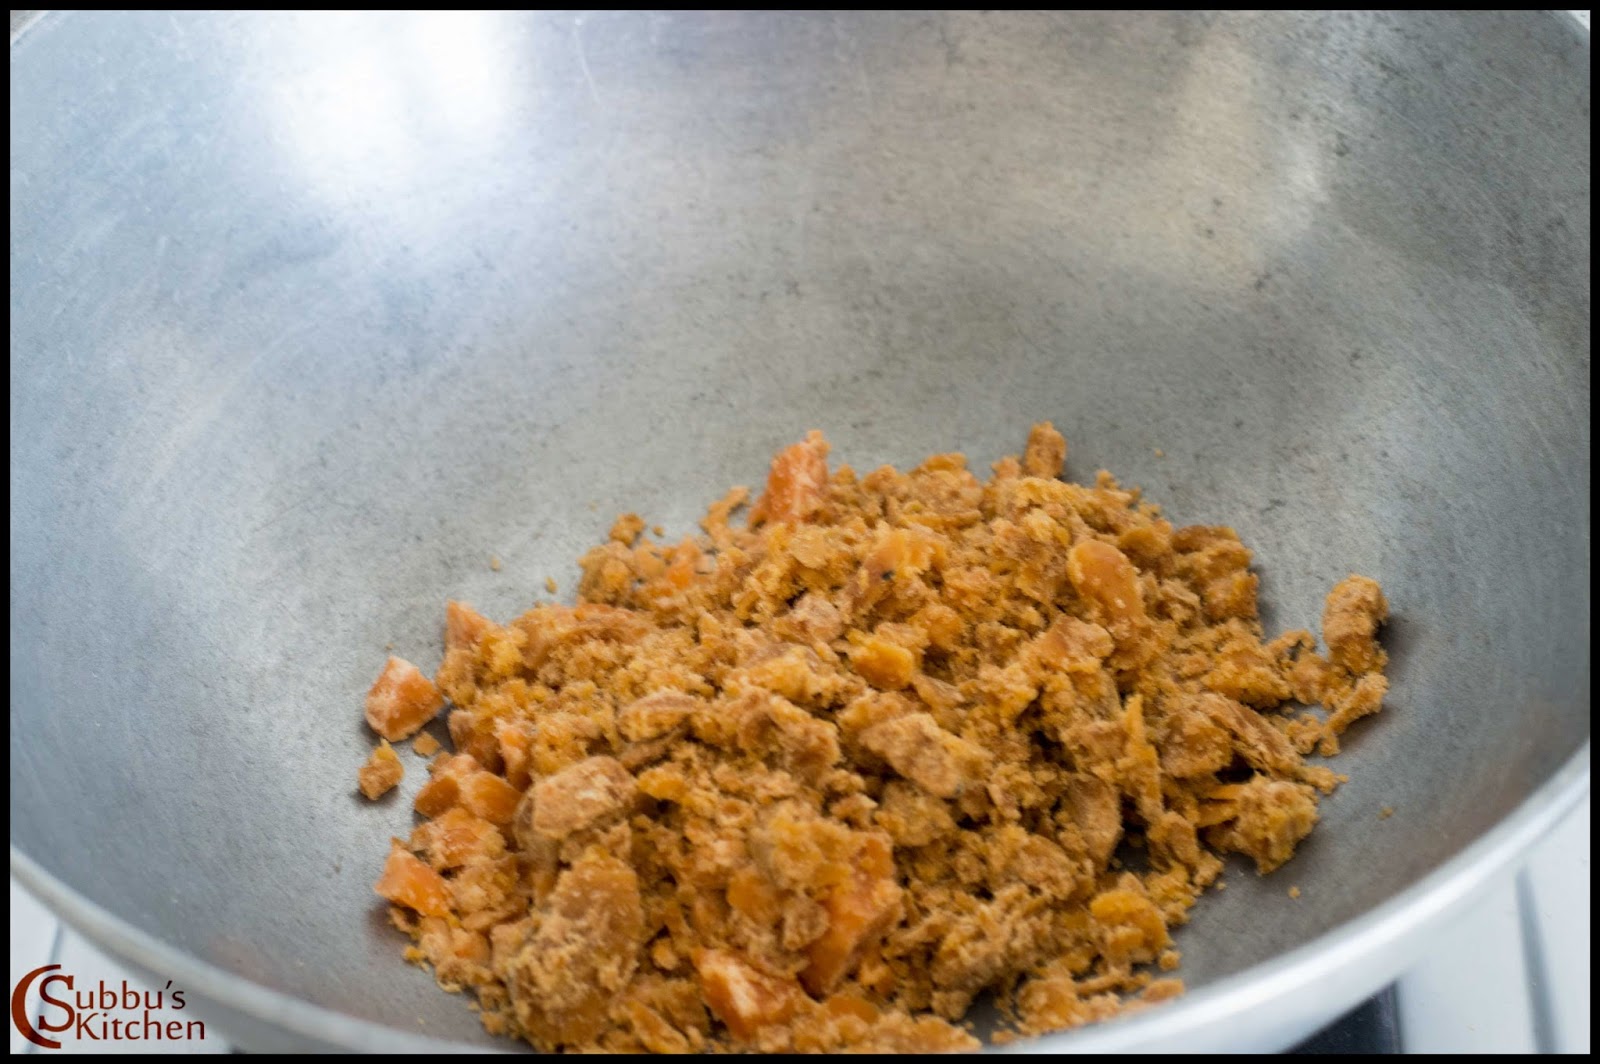
- Heat a pan and add the finely chopped coconut pieces. Dry fry them in low flame till they are dark brown. Dry fry them nicely so that they have no moisture. This will ensure the crispness in the pori urundai. So this is an important step. Do fry the the chopped coconut pieces nicely. You can see the pieces start bursting. Take these fried coconut pieces aside. In a pan add the grated jaggery.
- Add 1/2 cup of water and when it dissolves, strain the jaggery water to remove dirt and sand
- Again boil the jaggery water and keep stirring it until the jaggery comes to stone consistency. This means when we take a drop of jaggery juice and pour it in water, it should not dissolve rather we should be able to make a ball out of it. It should not be very hard as well. This is the right consistency. When you drop the stone ball of the jaggery syrup in a steel plate, you should hear the dropping noise.
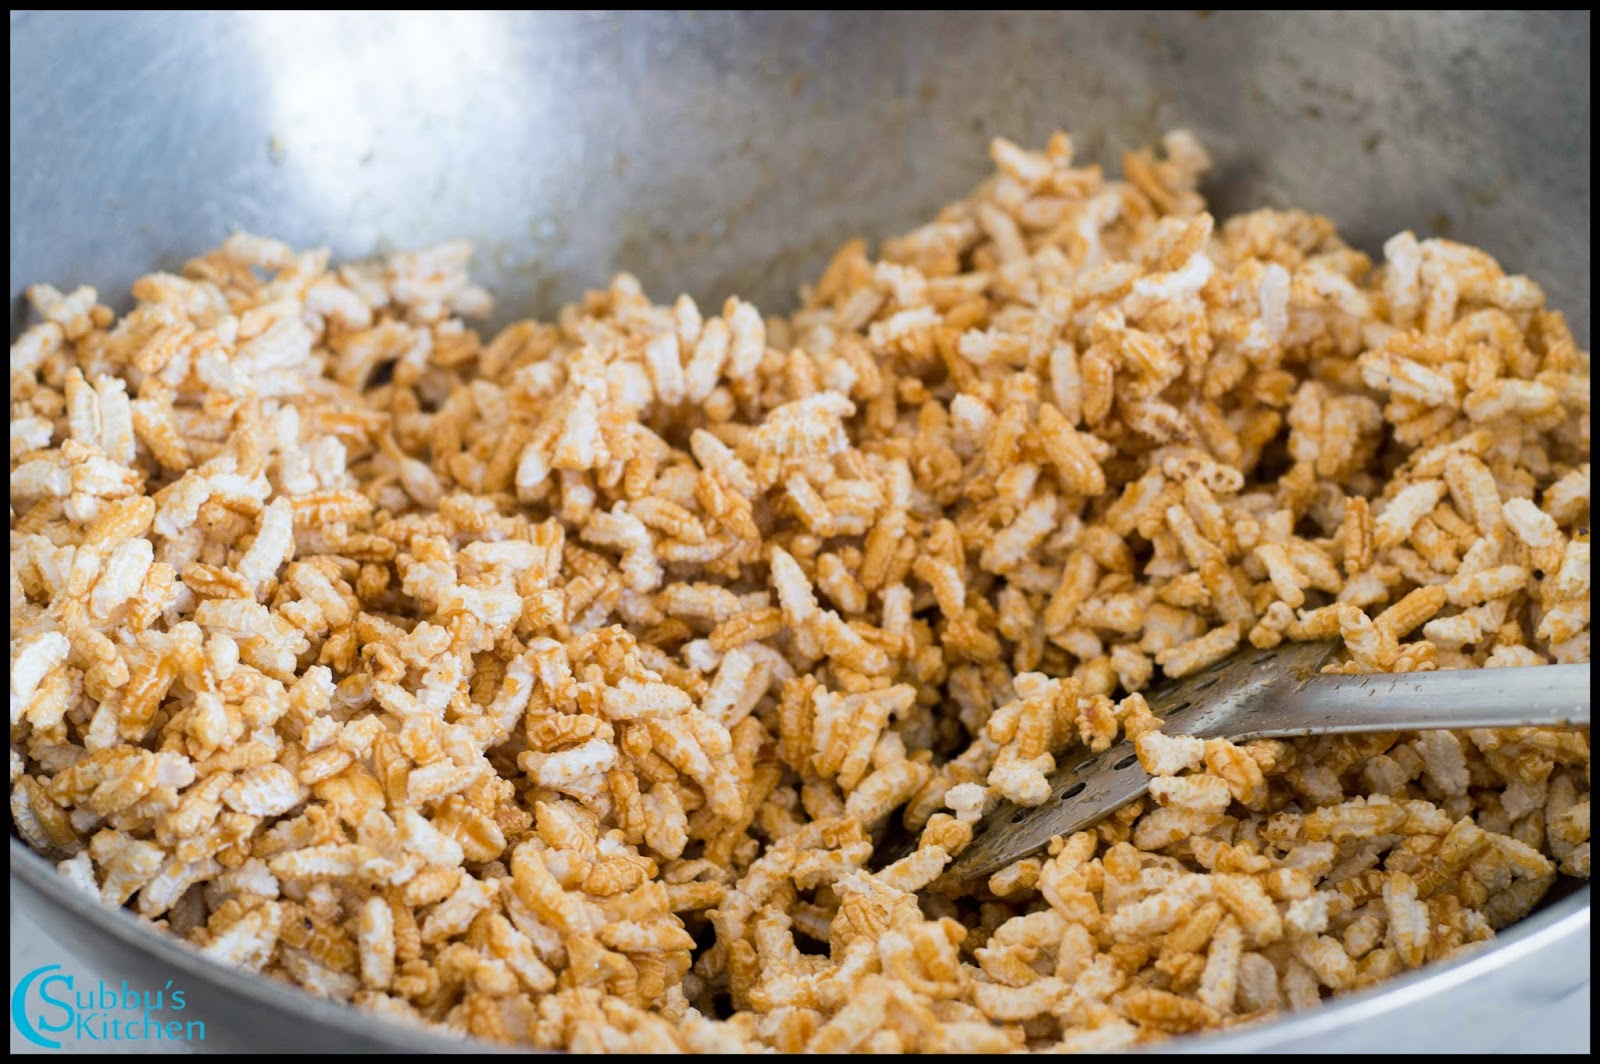
- When you take the jaggery syrup from the bowl, you should be able to roll into a ball and also when you drop it it should make a sound while hitting the ground / plate. This is the right consistency of jaggery syrup. Now remove the jaggery from flame and add Nel Pori / Aval Pori.
- Mix the Aval / Nel Pori with the jaggery syrup nicely and rRemove this pori mixture and pour it in a plate .
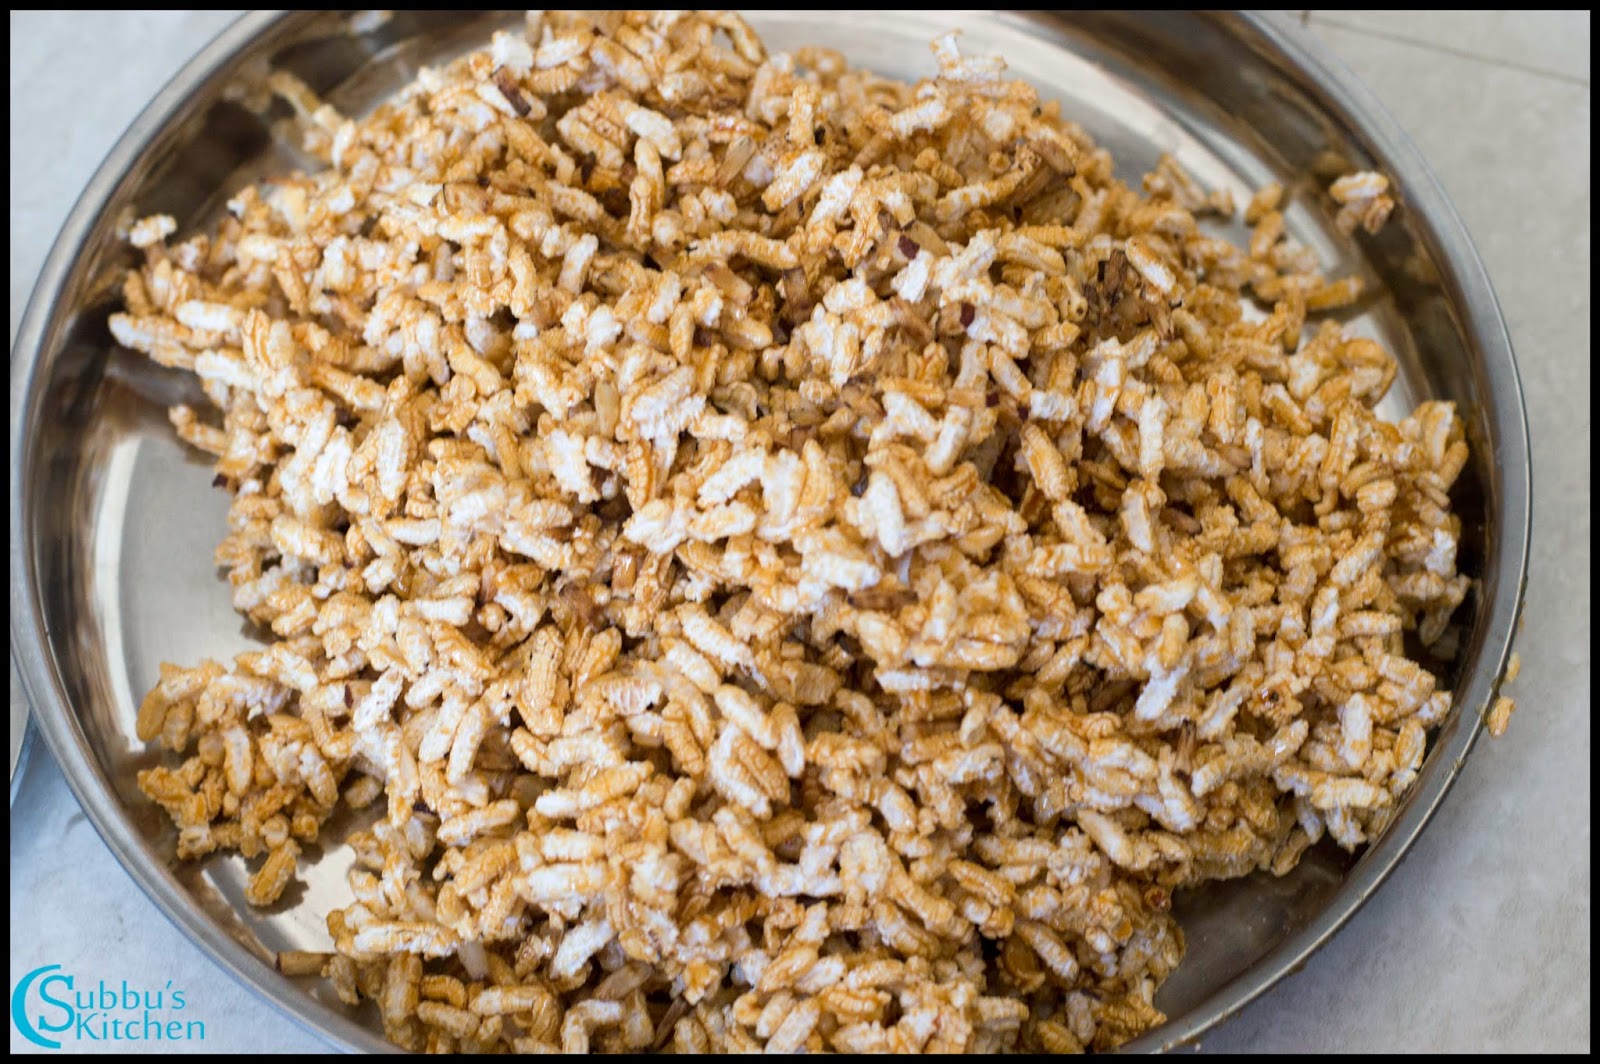
- When you are able to handle the mixed pori mixture in your hand, start making balls out of it. If you feel too hot or sticky, then you can dust your pamls with some rice flour and make balls out of the pori mixture. We can also make paruppu thengai out of the pori mixture as shown in the below picture.
- Repeat the same procedure for the other variety of Pori.
- The delicious Aval & Nel Poriorundai is now ready for neivedhyam.
 |
| Pori Urundai Recipe | Aval Pori Urundai Recipe | Nel Pori Urundai Recipe |
↧
December 5, 2014, 7:39 am
We all are aware the health benefits of Pearl Millet (Kambu / Bajra). We can make many different dishes using Kambu. Kambu Rasam (Pearl Millet Rasam / Bajra Rasam) is one such unique variety. Kambu soaked, cooked and added to tangy tamarind-tomato juice. A wonderful and healthy rasam. Serve this rasam with hot steaming rice. Try this different rasam and share your experience!
 |
| Kambu Rasam Recipe | Pearl Millet Rasam Recipe | Bajra Rasam |
Preparation and Yield:| Preparation time | 1 hour |
| Cooking Time | 20 mins |
| Servings | 4 |
 |
| Kambu Rasam Recipe | Pearl Millet Rasam Recipe | Bajra Rasam |
Ingredients:
| Pearl Millet / Kambu / Bajra | 2 tablespoon |
| Tamarind | 1 small lemon size |
| Tomato | 1 |
| Salt | To taste |
| Curry Leaves | few |
| Hing | 1/4 teaspoon |
| Chopped Coriander Leaves | 2 tablespoon |
Ingredients For Grinding:
| Ghee | 1 teaspoon |
| Coriander Seeds | 2 teaspoon |
| Thur dal | 2 teaspoon |
| Pepper | 1 teaspoon |
| Red Chillies | 1 |
| Cumin Seeds | 1/2 teaspoon |
Ingredients For Seasoning:
| Mustard Seeds | 1 teaspoon |
| Ghee | 1 teaspoon |
Method:
- Wash the kambu and Soak the kambu in hot water for about an hour. After an hour, cook the kambu till they are soft. When they are done, allow it to cool off and grind it to a nice paste
- Soak the tamarind in water and extract the juice
- Heat a pan and fry the grinding ingredients other than cumin seeds and fry them till the dal turns golden brown color. Take these grinding ingredients to the mixer along with cumin seeds and grind it to a nice powder. Keep this rasam powder aside
- Take a sauce pan and add tamarind extract, chopped tomatoes, curry leaves, salt and hing and keep it in flame and allow it to boil for 5 minutes for the tamarind to get rid of its raw smell. Add the cooked and ground kambu to the tamarind juice and bring the rasam to boil. When the tomatoes are nicely done, add 2 cups of water and bring it to boil
- Finally add ground rasam powder and stir well. When the rasam starts to become frothy, swtich off the flame and garnish with coriander leaves. Heat ghee in another pan and add mustard seeds, when the mustard seeds starts to sputter, add the seasoned mustard seeds to the rasam.
- The health and delicious Kambu rasam is now ready to serve!
 |
| Kambu Rasam Recipe | Pearl Millet Rasam Recipe | Bajra Rasam |
↧
December 5, 2014, 8:35 am
This week, another healthy and simple menu. Curry leaves kuzhambu with kambu rasam and snakegourd kootu. This is menu has lots of medicinal benefits along with their wonderful taste. Each dish has its own nutritional benefits. Curry leaves is a very healthy green. We all know it is a great remedy for treating premature hair greyness. Many kids and even the adults have a practice to discard these curry leaves from the dishes. So I would advice you all to make curry leaves kuzhambu atleast once a week, so that we can ensure it is being consumed by our family without being discarded.
Next dish is Kambu rasam, Kambu(Bajra / Pearlmillet) is a protein and fiber rich grain. It has lots of medicinal values and especially good for bringing down the blood sugar thereby a best ingredient for all diabetic patients. So Kambu rasam is also a healthy dish
Finally snakegourd stew. Snake gourd is very high in water content and has a cooling effect on the body. Snake gourd is low in calories, fat-free, and good to include in weight-loss diets.Even diabetics can include safely to reduce weight by getting enough nutrition.It is rich in fiber to keep your digestive system healthy, wards off constipation with ease.
So overall this is a medicinal and healthy menu. Try this menu and keep fit!
 |
| South Indian Lunch Menu 21 - Curry Leaves Kuzhambu, Kambu Rasam, Snakegourd Stew, Rice |
Preparation and Yield:| Preparation time | 1 Hour |
| Cooking Time | 1 hour and 15 minutes |
| Servings | 5 |
Recipes:
 |
| South Indian Lunch Menu 21 - Curry Leaves Kuzhambu, Kambu Rasam, Snakegourd Stew, Rice |
↧
December 7, 2014, 12:00 am
Yet another variety of Idly but very delicious and easy to prepare. A slight variation from the usual idly. The cumin seeds, Ginger powder and pepper gives a distinct flavour to this idly. Try this out and I hope you will start making this regularly as this will be liked by all the family members. The best accompaniment for Kanchipuram Idli is
Kara Chutney. My son love this combination and hence I often do this dish in my kitchen. Try this Kanchipuram Idli and Kara Chutney Combo and share your experience!
 |
| Kanchipuram Idli |
Idli is one of the healthiest breakfast. Even for the infants, toddlers and for the elders idli is one of the harmless dish. It is one of the travel friendly dish too. Instead of making regular idli, we can try this kanchipuram idli. The flavour of cumin-pepper along with ginger powder makes this idli really wonderful and my whole family love having this
Kanchipuram Idli! Try this and delight your family too.
 |
| Kanchipuram Idli |
 |
| Kanchipuram Idli |
Preparation and Yield:| Preparation time | 3 hours |
| Making Time | 35 mins |
| Servings | 5-6 |
 |
| Kanchipuram Idli |
Ingredients:
| Urdal | 1 Cup |
| Raw Rice | 1 Cup |
| Par Boiled Rice | 1 Cup |
| Salt | To taste |
| Cumin Seeds | 1 teaspoon |
| Mustard Seeds(Optional) | 1 teaspoon |
| Pepper | 1 teaspoon |
| Ghee | 1 teaspoon |
| Gingelly Oil | 2 teaspoon |
| Cashew nuts | 10 |
| Ginger powder | 1 teaspoon |
 |
| Kanchipuram Idli |
Method:
- Soak the rice and urdal separately in water for atleast 2 hours. Add fenugreek seeds along with uriddal.
- Rinse and drain the water and grind the rice and urdal in grinder to a thick batter. The batter should not be so smooth.
- Add salt and keep the ground idly flour separately for 12 hours for the batter to undergo fermentation. Next day, you can see the batter has nicely fermented and would have become fluffy and increased its quantity
- To the batter, add ginger powder and mix well. Grind the pepper and cumin seeds in a mixer and keep this aside.
- Pour gingelly oil in a pan and add mustard seeds. When the mustard seeds starts to sputter, add channa dal and fry till the dal turns golden brown color. Next, add curyleaves, cumin-pepper powder and fry for a 10 seconds.
- Add this mixture to the batter and stir the batter well. Now the kanchipuram idly batter is ready. Grease the idli plates with oil. Place roasted cahsews in each mould.
- Pour the idly batter in the idly plates and steam cook it in pressure cooker for about 10 minutes. Allow the pressure to release and then take the idli plates and allow it to cool and then using a wet spoon, remove the idli from the mould and keep it in plate.
- We can also cook these idli in a cake tin or a flat bowl. Take a flat bowl or cake tin and grease it with oil. Pour the kanchipuram idli batter into it till half of its capacity. Steam cook it for 10 minutes. Allow the pressure to fully release and then remove the cake tin and allow it to cool off. Cooking of Idly will take more time than normal idly. Also allow it to fully cool off before cutting the idli.
- Using a knife, loosen the edges and gently flip it off on a flat plate. Cut the idli into desired shapes and relish with your favourite side dishes.
- Delicious Kanchipuram Idli is now ready to serve. Serve with Hot Kara Chutney, milagai podi (gun powder) , chutneys and sambar.
 |
| Kanchipuram Idli |
↧
↧
December 7, 2014, 10:57 pm
Kara Chutney, a popular dish in Chettinad cuisine. kara chutney is a great combination for many SouthIndian Breakfast dishes like Idli, Dosa and many more dishes. But it is perfect accompaniment for Kanchipuram Idli. It is generally served like piping hot with
Kanchipuram Idli. In Pantry, its being served like piping hot and my husband loves the combination of Kanchipuram Idli and Kara Chutney. Try this combination and you would surely love it!
 |
| Kara Chutney Recipe | Hot Spicy Chutney Recipe |
Preparation and Yield:| Preparation time | 10 mins |
| Cooking Time | 15 mins |
| Servings | 3 |
Ingredients:
| Onion | 3 |
| Tomato | 3 |
| Red Chilli | 4-5* |
| Salt | To taste |
| Oil | 2 tablespoon |
| Mustard Seeds | 1 teaspoon |
| Curry Leaves | few |
Method:
- Finely chop the onions and tomatoes and keep it aside. Heat oil in a pan, Add red chillies, chopped tomatoes and onions and saute it along with a pinch of salt. Saute the onions and tomatoes till they are transparent and the tomatoes will become mushy. Take all these in a mixer and grind it to a nice paste
- Heat oil in a pan, add mustard seeds. When the mustard seeds starts to sputter, add curry leaves and fry for 10 seconds. Add the ground chutney and adjust the salt. Allow the chutney to boil in low flame for 10 minutes.
- Serve the piping hot kara chutney with your favourite dishes and slurp!!!
 |
| Kara Chutney Recipe | Hot Spicy Chutney Recipe |
↧
December 10, 2014, 12:45 am
I have already given my another post the health benefits of Foxtail Millet. Foxtail millet helps control Blood sugar levels when consumed on regular. The millet produced a “significant fall (70%) in blood glucose. We need to include these healthy millets regularly in our diet.
 |
| Thinai Pongal Recipe | Finger Millet Pongal Recipe| ,Kangni Pongal Recipe |
Foxtail millet pongal is a very simple and yummy dish. When we think of pongal the first thing comes to our mind is the ghee that is added along with the rice. Generally most of the diet/fitness specific persons and also diabetic patients and elders try to avoid pongal. But with Thinai (Foxtail millet) we can very well consume pongal. Instead of rice we can include thinai,
Thinai pongal (Foxtail Millet Pongal) is made using the same procedure as the conventional pongal. So very simple, yet very healthy pongal. Instead of conventional pongal, try to make thinai pongal in your kitchen often. We can also make pongal using barnyard millet, pearl millet etc.
 |
| Thinai Pongal Recipe | Finger Millet Pongal Recipe| ,Kangni Pongal Recipe |
Preparation and Yield:| Preparation time | 10 mins |
| Cooking Time | 30 mins |
| Servings | 3 |
 |
| Thinai Pongal Recipe | Finger Millet Pongal Recipe| ,Kangni Pongal Recipe |
Ingredients:
| Foxtail millet / Thinai | 3/4 Cup* |
| Moong Dal | 1/4 Cup |
| Whole black pepper | 1 teaspoon |
| Cumin Seeds | 1 teaspoon |
| Salt | To taste |
| Cashew nuts | 4-5 |
| Curry Leaves | few |
| Hing | a Pinch |
| Grated Ginger | 1 teaspoon |
| Ghee | 2 tablespoon |
* 1 Cup = 250ml
 |
| Thinai Pongal Recipe | Finger Millet Pongal Recipe| ,Kangni Pongal Recipe |
Method:
- Heat a pan, add moong dal and fry it till it becomes golden brown color. Take the roasted moong dal and thinai in a vessel. Rinse the thinai and moongdal in water and add 3.5 cups of water to the vessel. Add grated ginger, salt to the vessel and pressure cook it allow it for 5-6 whistles. Allow the pressure to release on its own and then mash the cooked thinai and dal
- Heat ghee in a pan, add cumin seeds. When the cumin seeds starts to sputter, add whole black pepper and fry for some time. Add hing, cashews and curry leaves and fry till the cashews turn into golden brown color.
- Add the mashed thinai and dal to the seasoned ingredients and mix well
- The yummy and healthy Thinai Pongal is now ready to serve!
 |
| Thinai Pongal Recipe | Finger Millet Pongal Recipe| ,Kangni Pongal Recipe |
↧
December 12, 2014, 12:36 am
Yet another yummy Variety rice menu for this week. Very frequently we are doing traditional or conventional sambar or kuzhambu varieties and sometimes we get bored of it. Variety rices relish our tongue whenever we are bored of conventional menu. The first dish that comes to our mind when we think of variety rice is lemon rice or tamarind rice. But instead of conventional rice varieties, Vaangi bath is a wonderful rice variety. The best accompaniment for vaangibath is papad or chips. I have got Onion Vadam (Vengaya Vadagam) from my MIL, It was perfect for vaangibath. Along with vaangi bath, I have made coconut rice with aviyal. This is another combo which is so delicious. Coconut rice would be dry and hence aviyal or other vegetable stew would be a best accompaniment. Finally favourite curd rice with Mor Milagai. Mor Milagai is a wonderful combination for curd rice. This is one of the perfect lunch menu your family would surely love! Try this menu and share your experience!
 |
| South Indian Lunch Menu 22 -Vaangibath, Coconut Rice, Aviyal, Curd Rice, Vadam, Rice |
Preparation and Yield:| Preparation time | 20 mins |
| Cooking Time | 45 mins |
| Servings | 5 |
 |
| South Indian Lunch Menu 22 -Vaangibath, Coconut Rice, Aviyal, Curd Rice, Vadam, Rice |
↧