January 27, 2015, 4:29 pm
Idli is a conventional breakfast dish in Southern Parts of India. Idli is a healthy dish too as we are steam cooking it without adding any oil. Idli is very good even for infants and toddlers. The first solid dish that we start for any infants is Idli. Though Idli is very healthy, many of the kids even adults doesn't like to have Idli. So, to make the Idli more appetizing, we can make many varieties and variations and treat out kids and family. One such variety is Spicy Tawa Idli. Cooked Idlis are tossed in tawa along with capsicum, onion, tomatoes, peas and spice powders that make the whole dish appealing and increase the appetite to have more servings!!!
 |
| Spicy Tawa Idli Recipe |
Preparation and Yield:| Preparation time | 10 mins |
| Cooking Time | 15 mins |
| Servings | 2 |
 |
| Spicy Tawa Idli Recipe |
Ingredients:
| Steam cooked Idlis | 4 |
| Onion | 1 |
| Tomato | 2 |
| Green Capsicum | 1 |
| Green Peas | 2 tablespoon |
| Ginger-Garlic Paste | 1/2 teaspoon |
| Turmeric Powder | 1/4 teaspoon |
| Red Chilli Powder | 1/2 teaspoon |
| Garam Masala Powder | 1/2 teaspoon |
| Chopped Coriander Leaves | 1 tablespoon |
For Seasoning: | Oil | 2 teaspoon |
| Cumin Seeds | 1/2 teaspoon |
 |
| Spicy Tawa Idli Recipe |
Method:
- Cut the steam cooked idlis into medium sized cubes. If you are using left over idlis and the idlis are dry, just soak it in warm water for a minute and then squeeze out the water and the idlis will be soft. Heat oil in a pan, add cumin seeds and when the cumin seeds starts to sputter, add chopped onions, ginger-garlic paste along with a pinch of salt and saute the onions till they change their color
- Then, add chopped tomatoes, green peas and saute the tomatoes till they are mushy and cooked. After the tomatoes are cooked, add finely chopped capsicum, and stir-fry the capsicum just for couple of minutes. Capsicum pieces will be nice if it is crunchy, so don't cover the pan with the lid and also don't stir-fry for more time.
- Also add turmeric powder, red chilli powder, salt and garam masala and toss everything well. Finally add chopped idlis and mix well. Do not mash the idlis.
- Give a gentle mix and finally garnish with chopped coriander leaves and remove the pan from flame
- The delicious Spicy Tawa Idli is now ready to serve!!!
 |
| Spicy Tawa Idli Recipe |
↧
January 28, 2015, 3:15 pm
Biryani is a mixed rice dish made with spices, rice and meat or vegetables. Generally Biriyani is associated with Mughal cuisine of Delhi or it is traditionally associated with the Hyderabadi cuisine. Biryani has a stronger taste of curried rice due to a higher amount of spices than the Pulao. Normally, biriyani is cooked in low flame with layers. Two layers of rice with one layer of vegetable. But we can mix the rice and vegetables and cook it altogether also. This recipe is shared by one of my friend who stays in Hyderabad. She taught me to cook this simple and delicious biriyani. I am not sure about the reason for this name "Nawabi Biriyani":-) Guess it is from some Nawab in Hyderabad :-). When we have unplanned guests, this is one of the dish which could be made easily with available ingredients in our kitchen. Lets see how to cook this simple and tasty dish!!!
 |
| Nawabi Biriyani Recipe |
Preparation and Yield:| Preparation time | 10 mins |
| Cooking Time | 40 mins |
| Servings | 4 |
 |
| Nawabi Biriyani Recipe |
Ingredients:
| Basmati Rice | 1 Cup* |
| Boiled and Peeled Potatoes | 2 |
| Onion | 1 |
| Green Peas | 1/2 Cup |
| Salt | To taste |
| Water | 2 Cups |
| Oil | 2 tablespoon |
* 1 cup = 250ml
For Grinding:
| Mint Leaves | 1/2 Cup |
| Green Chilli | 2 |
| Garam Masala | 1/2 teaspoon |
| Coconut Milk or Plain milk | 1/4 Cup |
| Ginger | 1 inch Piece |
| Garlic Cloves | 2 |
 |
| Nawabi Biriyani Recipe |
Method:
- Soak rice in water for 10 minutes. Chop the boiled and peeled potatoes to medium sized cubes. Wash the mint leaves and add it to the mixer along with other grinding ingredients and grind it to a nice paste. Now our masala for biriyani is ready
- Heat oin in a tawa and add cumin seeds. When the cumin seeds starts to sputter, add thinly sliced onions to the tawa along with a pinch of salt and saute them till they are transparent. Then add cubed potatoes to the pan
- Add the green peas and stir-fry the potatoes till they turn light golden brown color. Then add the ground masala to the pan and saute the masala till the raw smell goes off
- Then add the drained rice to the pan and saute the rice for couple of minutes. Add water to the pan along with salt and bring it to boil.
- When the water starts to boil, keep the flame low and close the pan with a lid and allow the rice to cook in low flame for 20-25 minutes. Gently stir the rice in between without breaking or mashing them.
 |
| Nawabi Biriyani Recipe |
- Now our yummy and fragrant Nawabi Biriyani is ready to serve. Serve with onion raitha or any raithas and enjoy your lunch!!!
↧
↧
January 29, 2015, 1:51 pm
Thepla / Paratha is one of my favourite dish. We can make use many different vegetables and ingredients and make thepla. One such is Sweet Corn. Sweet Corn with coriander leaves and roasted fennel seeds mixed with wheat flour to make flat bread. This sweet corn coriander thepla is a unique variety of thepla with rich flavour of corn and coriander leaves. We can serve this yummy Sweet corn Coriander Thepla with any raitha or chutney or dal.
 |
| Sweet Corn Coriander Thepla Recipe |
Preparation and Yield:| Preparation time | 10 mins |
| Cooking Time | 25 mins |
| Yield | 8 |
 |
| Sweet Corn Coriander Thepla Recipe |
Ingredients:
| Sweet Corn | 1 Cup* |
| Wheat Flour | 1.5 Cups |
| Chopped Coriander Leaves | 1/2 Cup |
| Fennel Seeds | 1 teaspoon |
| Salt | To Taste |
| Oil / Butter | 1/4 Cup |
* 1 cup = 250ml
 |
| Sweet Corn Coriander Thepla Recipe |
Method:
- Take the sweet corn in a sauce pan. Cook the sweet corn by adding 1 tablespoon of water. I have used frozen sweet corn so I have just kept it in microwave for couple of minutes
- Grind the sweet corn to a nice paste. Then heat a pan and dry roast the fennel seeds for couple of minutes
- Take a mixing bowl, add wheat flour, sweet corn paste, fennel seeds, salt and chopped coriander seeds and mix well. Sprinkle warm water little by little and knead the flour to a smooth dough. Cover the dough and keep it aside for 10 minutes
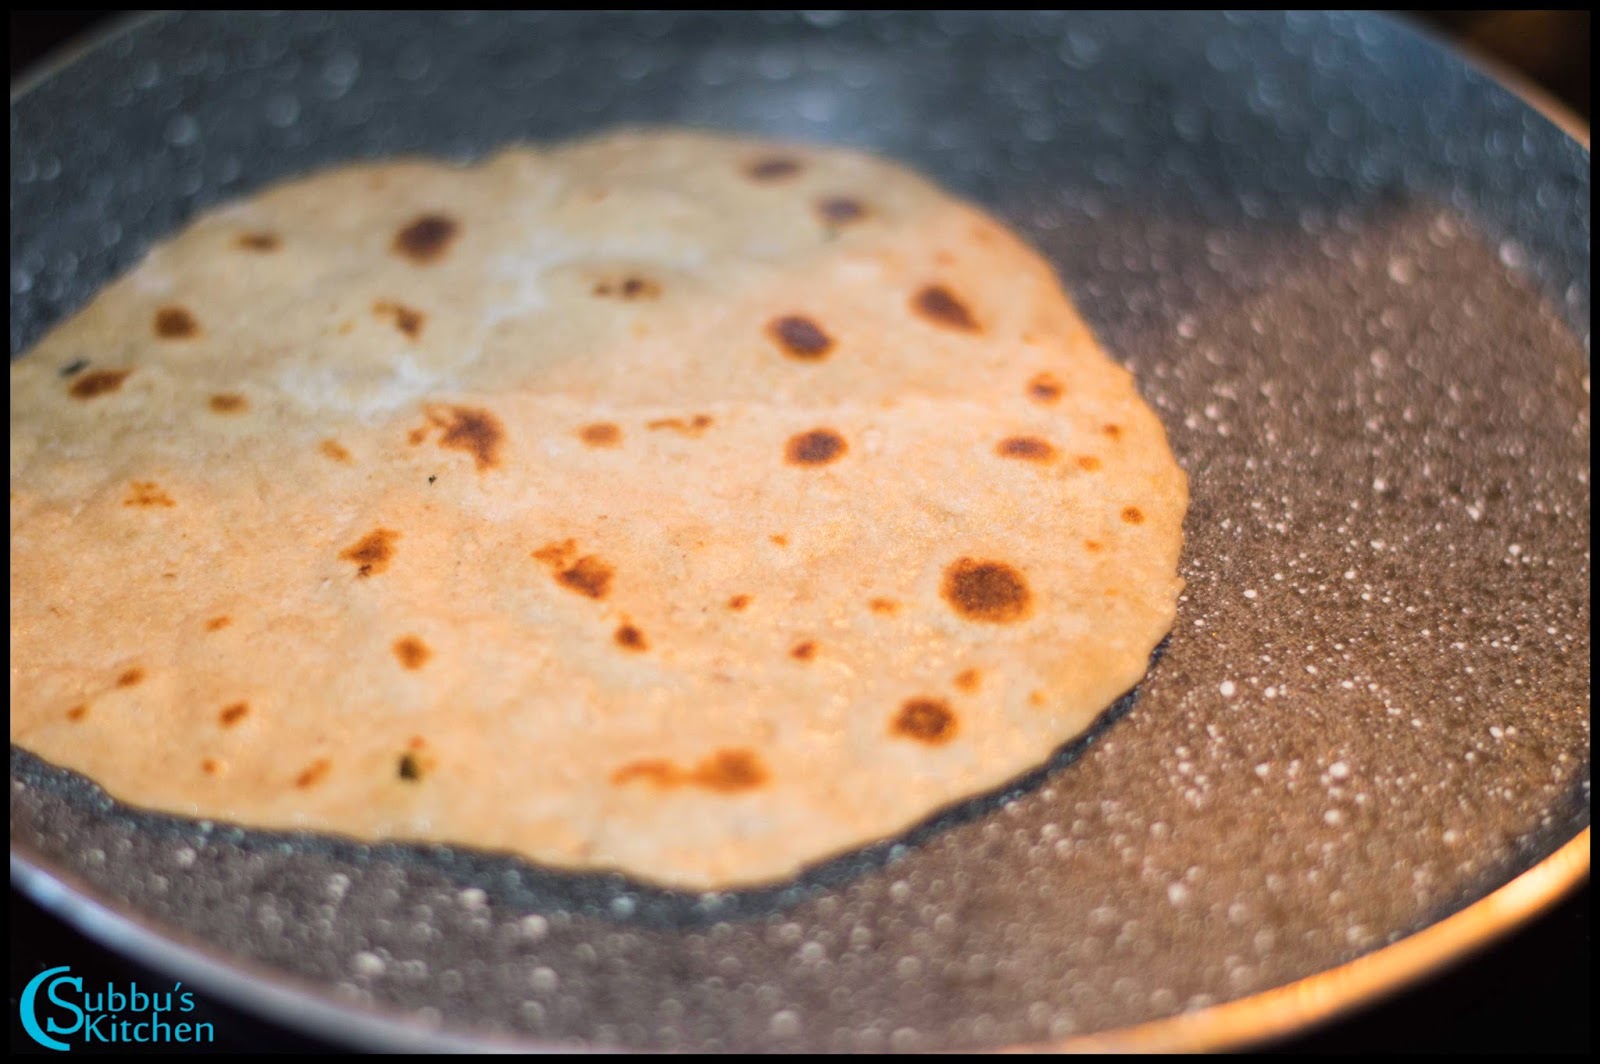
- After 10 minutes, make big lemon sized balls out of the dough. Dust a dough ball with wheat flour and roll it to a slightly thicker paratha. Repeat the same for rest of the dough balls
- Heat a tawa, add a rolled thepla and sprinkle little oil. When the thepla is cooked at the bottom side, flip it off the other side and cook it. Repeat this step for rest of the theplas
- Serve the yummy Sweet Corn Coriander Thepla with raitha / Chutney / Dal and enjoy your food!
 |
| Sweet Corn Coriander Thepla Recipe |
 |
| Sweet Corn Coriander Thepla Recipe |
↧
January 30, 2015, 1:03 pm
Jeeraga kuzhambu is one of the traditional kuzhambu variety. The rich aroma and flavour of cumin seeds adds a scrumptious taste to the kuzhambu. This is a very simple dish made with onion and garlic. Garlic is optional, we can skip garlic and use only onions also. During fasting days, we can skip both onion and garlic and add fried ladys finger to the kuzhambu. A quick and tasty kuzhambu. Serve this yummy Jeera kuzhambu with plain rice along with a teaspoon of gingelly oil or ghee and enjoy your food!!!
 |
| Jeeraga Kuzhambu Recipe | Cumin Seeds Kuzhambu |
Preparation and Yield:| Preparation time | 10 mins |
| Cooking Time | 35 mins |
| Servings | 4 |
 |
| Jeeraga Kuzhambu Recipe | Cumin Seeds Kuzhambu |
Ingredients:
| Tamarind | 1 lemon size |
| Onion | 1 |
| Garlic Cloves | 6 |
| Cumin Seeds | 1 tablespoon |
| Sambar Powder | 2 teaspoon |
| Salt | To taste |
| Grated Jaggery | 1 teaspoon |
For Seasoning:
| Oil | 1 tablespoon |
| Mustard Seeds | 1 teaspoon |
| Fenugreek Seeds | 1/4 teaspoon |
| Curry Leaves | few |
| Red Chilli | 1 |
Method:
- Soak the tamarind in water and extract the juice and keep it aside. Finely chop the onions and garlic and keep it ready
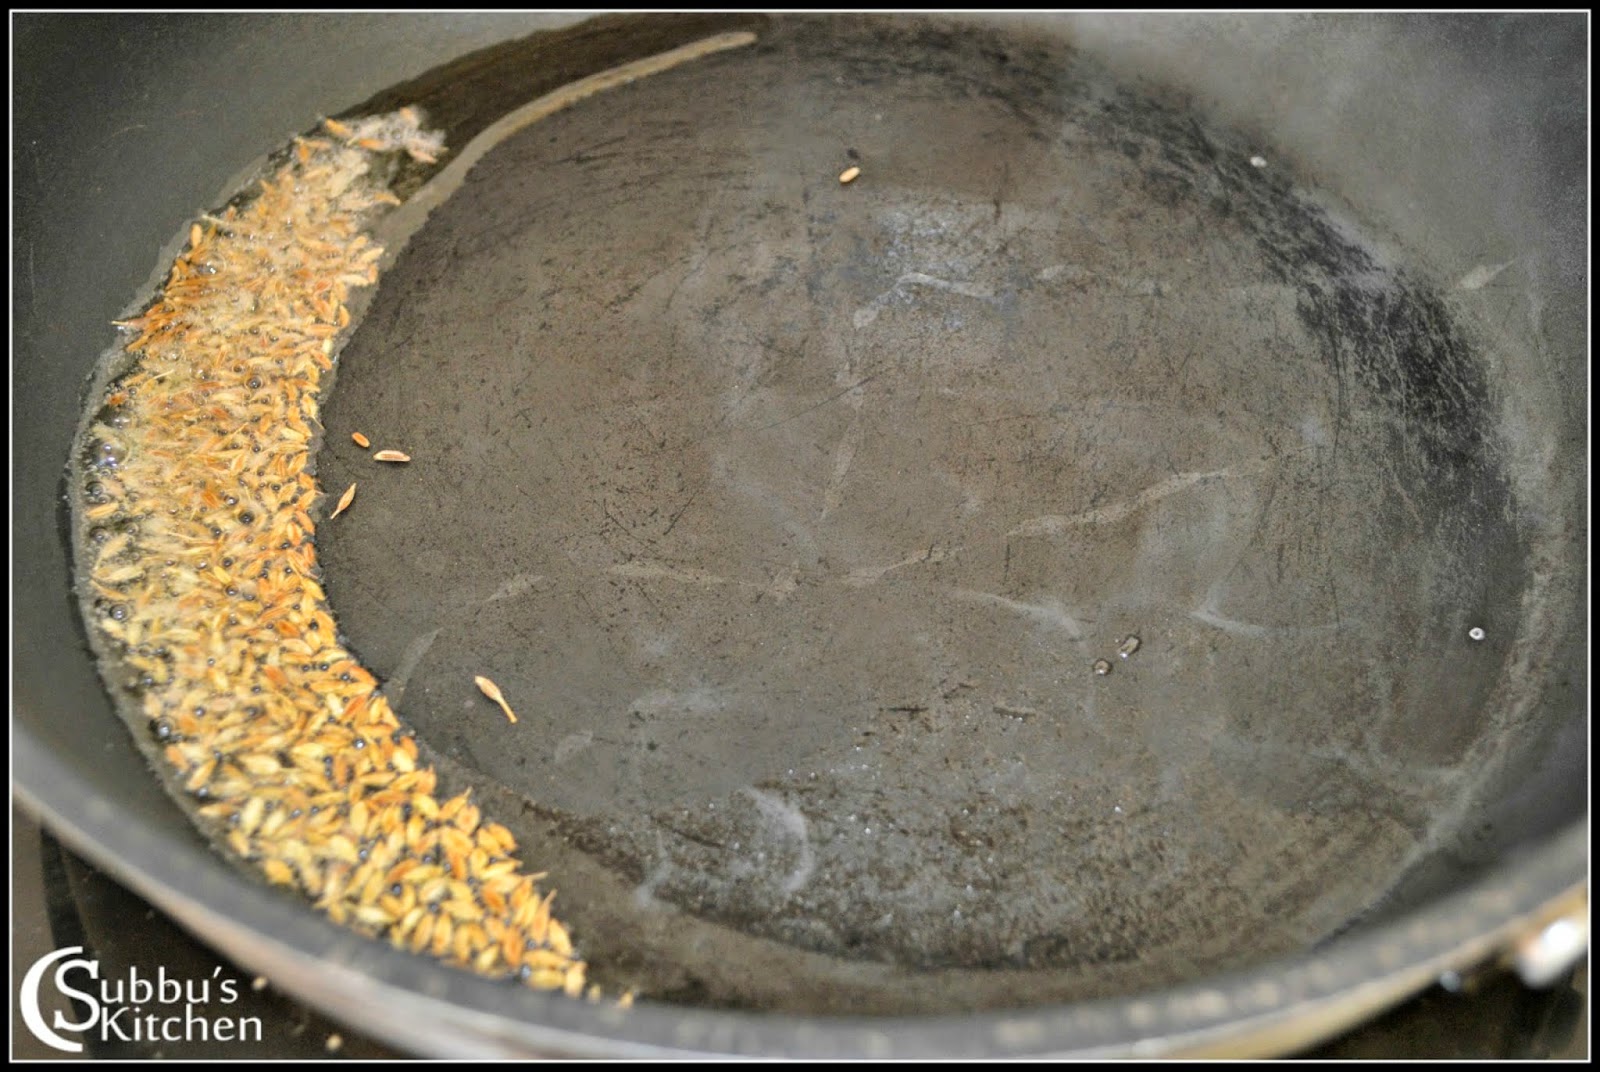
- Heat a pan and add cumin seeds. Dry roast the cumin seeds till they start to crackle. Take this roasted cumin seeds to a mixer and grind it to a nice powder.
- Heat oil in a pan, add mustard seeds. When the mustard seeds starts to sputter, add fenugreek seeds, broken red chilli along with curry leaves and saute them for few seconds. Add thinly sliced onions along with a pinch of salt and saute them till they are transparent
- When onions turn transparent, add sambar powder and mix well. Then add the tamarind extract and stir well. Keep the flame low and allow the raw smell of the tamarind to go off. Then add ground cumin powder and mix well.
- Again allow the kuzhambu to boil in low flame for another 10 minutes. Finally add grated jaggery and mix well and switch off the flame
- Serve the yummy jeeraga kuzhambu and relish with hot plain rice!!!
 |
| Jeeraga Kuzhambu Recipe | Cumin Seeds Kuzhambu |
↧
February 1, 2015, 5:54 pm
Cucumber Dal is one of my favourite dal variety. I like cucumber when we use it in dal or raitha. My MIL makes cucumber stew with coconut and moongdal and it would tastes so delicious.It tastes dainty and cucumber dal is one of the perfect accompaniment for roti / chapati. Even I love to mix paruppu podi with cucumber dal and mix with rice. Instead of making plain dal, cucumber with thoor dal is one of the rich combination. The preparation of the cucumber dal is same as plain dal, so it would be one of the simplest and tastiest dish for any Indian Bread..
 |
| Cucumber Dal Recipe |
Preparation and Yield:| Preparation time | 10 mins |
| Cooking Time | 30 mins |
| Servings | 5 |
 |
| Cucumber Dal Recipe |
Ingredients:
| Cucumber | 1 |
| Thur Dal | 3/4 Cup |
| Green Chilli | 1 |
| Chopped Garlic | 1 tablespoon |
| Onion | 1 |
| Tomato | 2 |
| Turmeric Powder | 1/4 teaspoon |
| Salt | To taste |
| Chopped Coriander Leaves | 2 tablespoon |
* 1 Cup = 250ml
For Seasoning: | Oil | 1 tablespoon |
| Mustard Seeds | 1 teaspoon |
| Cumin Seeds | 1 teaspoon |
| Red Chilli | 1 |
 |
| Cucumber Dal Recipe |
Method:
- Pressure cook the thurdal and keep it aside. Finely chop the onions and tomatoes and keep it aside. Peel the skin of cucumber and chop it to small cubes. Heat oil in a pan, add broken red chilli and saute it for a second. Then add mustard seeds along with cumin seeds.
- When the mustard seeds starts to sputter, add finely chopped garlic and saute it for couple of minutes. Then add finely chopped onions along slit green chilli along with pinch of salt and saute the onions till they are translucent.
- Next, add chopped tomatoes and add mix well. Then add cubed cucumbers to the pan
- Add 1/2 cup of water and cook the tomatoes and cucumber in medium flame for 10 minutes. The tomatoes and cucumbers would be cooked nicely by now. Meanwhile, nicely mash the thur dal and keep it ready
- When the cucumbers are cooked nicely, add the mashed thur dal and mix well. When the dal starts to boil, garnish with chopped coriander leaves and switch off the flame
- Serve the yummy Cucumber dal with any Indian bread!!!
 |
| Cucumber Dal Recipe |
↧
↧
February 2, 2015, 1:37 pm
Narkel Naru (Coconut Ladoos) is a popular traditional Bengali Sweet. It is made of Coconut, milk and sugar or jaggery. This Coconut Ladoos are one of the important Neivedhyam dish for the Bengalis during Durga Pooja. Conventionally this sweet is made of whole fat milk, coconut and sugar or jaggery. But nowadays we all look for instant sweets instead of spending so much of time to make a sweet dish. So instead of using milk, I have used condensed milk. Using condensed milk is a quick way to make this dish. Condensed milk help us to prepare this dish just in 10 minutes. Very quick and yummy dish. My MIL's younger sister is in Kolkata and she shared this recipe with me. Lets see how to make this yummy dish!!!
 |
| Coconut Balls Recipe | Bengali Coconut Ladoo Recipe | Narkel Naru Recipe |
Preparation and Yield:| Preparation time | - |
| Cooking Time | 15 mins |
| Yield | 15 |
 |
| Coconut Balls Recipe | Bengali Coconut Ladoo using Condensed Milk Recipe | Narkel Naru Recipe |
Ingredients:
| Sweetened Condensed Milk | 1 Tin / 400gms |
| Grated Coconut* | 400gms + 2 tablespoon ** |
| Cardamom Powder | 1 teaspoon |
| Ghee | 1 teaspoon |
* We can use dessicated coconut also.
** 2 tablespoon of coconut is for dusting at the end
 |
| Coconut Balls Recipe | Bengali Coconut Ladoo using Condensed Milk Recipe | Narkel Naru Recipe |
Method:
- Heat a pan, add condensed milk along with cardamom powder. I have used dessicated coconut. So we can use it as it is. But if you are planning to use fresh coconut, then saute the fresh coconut in low flame in a pan for 4 to 5 minutes so that its moisture gets evaporated. If you are using dessicated coconut, we don't need to roast the coconut. Add the 400gms of roasted fresh coconut or dessicated coconut to the condensed milk in the pan
- In a low flame, mix everything well. Stir continuously in low flame till the whole mixture gets combined well and rolls like a ball without sticking to the sides of the pan. Switch off the flame
- Allow the whole mixture to cool off. Then grease your hands with ghee and make small lemon sized balls out of the mixture. Take the remaining 2 tablespoon of coconut in a plate. Coat the rolled coconut ladoos in this coconut nicely and keep it aside.
- Repeat the step for the rest of the coconut ladoos. Thats it! Our coconut ladoos are now ready!!
- Serve the yummy Coconut Ladoos / Narkel Naru or keep it for neivedhyam!!!
 |
| Coconut Balls Recipe | Bengali Coconut Ladoo using Condensed Milk Recipe | Narkel Naru Recipe |
↧
February 3, 2015, 7:00 pm
Vegetable Biriyani is one of the rich variety rice in Indian Cuisine. Vegetable rich rice with aromatic spices gives a wonderful flavour for the dish. The main difference between Pulao and Biriyani is that Biriyani has layers. Biriyani has a layer of vegetables sandwiched between 2 layers of rice.
 |
| Vegetable Biriyani Recipe | How to make Vegetable Biriyani |
Generally biriyani is cooked in low flame for sometime so that the layers gets cooked nicely and all the flavours gets nicely absorbed. Its been so long I have been thinking of publishing this recipe. But everytime I was so absentminded and missed to take snap of few steps and hence I have not published. This time, I am so cautious and took all the snaps and hence I am sharing step by step photos and instructions of how to make the popular and hyderabadi style Vegetable Biriyani.
 |
| Vegetable Biriyani Recipe | How to make Vegetable Biriyani |
Preparation and Yield:| Preparation time | 20 mins |
| Cooking Time | 45 mins |
| Servings | 5 |
 |
| Vegetable Biriyani Recipe | How to make Vegetable Biriyani |
Ingredients:
| Basmati Rice | 1 Cups** |
| Mint Leaves | 1/2 Cup |
| Onion | 3 medium sized |
| Carrot | 1 |
| Beans | 10-12 |
| Potato | 2 medium sized |
| Green Peas | 1/4 Cup |
| Basmati Rice | 1 Cups** |
| Ginger-Garlic Paste | 1 tablespoon |
| Broccoli Florets | 1/2 Cup |
| Sour Curd | 3/4 Cup |
| Garam Masala | 3 teaspoon |
| Cardamom Powder | 1 teaspoon |
| Saffron Threads | 10 |
| Green Chillies | 2 |
| Red Chilli Powder | 1 teaspoon |
| Bay Leaf | 3 |
| Shahi Jeera / Cumin Seeds | 2 teaspoon |
| Salt | To taste |
| Oil | 1/4 Cup |
| Ghee | 2 tablespoon |
| Whole Black Pepper | 1 teaspoon |
| Turmeric Powder | 1/4 teaspoon |
 |
| Vegetable Biriyani Recipe | How to make Vegetable Biriyani |
Method:
- Peel and Chop the onions to thin slices. Peel and chop the potatoes into bigger cubes. Peel and carrot into bigger pieces. Chop the beans into half inch pieces. Soak the basmati rice in water for 15 minutes. The onions need to be deep fried in oil till they are golden brown color. Take these onions and keep it in a paper towel to drain excess oil
- Add 1 tablespoon of oil in another pan and add pepper corns and shahi jeera. Shahi jeera has less aroma than the normal cumin seeds and we don't want jeera aroma to dominate much in biriyani. Thats the reason we add shahi jeera. Add chopped carrots and potatoes and saute in high flame for 5 minutes.
- Now, add ginger-garlic paste along with salt and mix well. Then we need to slit green chillies and along with turmeric powder, red chilli powder, 1 teaspoon of garam masala and 1/2 teaspoon of cardamom powder and give it a good mix
- Switch off the flame. Then add green peas and chopped beans. We don't want the vegetables to fully cook. We want the vegetables to be little crunchy and fresh. After adding beans and peas, add curd to the pan. If you don't have sour curd, then you can add 1 tablespoon of lemon juice along with curd.
- Mix the curd and vegetables nicely and add 10-12 mint leaves along with 1 tablespoon of ghee.
- Finally add 1/3rd of the friend onions and mix everything well and cover the pan with a lid. Now our vegetables are ready which forms our 1 layer of biriyani. We now need to concentrate on the rice cooking. Add 2 tablespoon of warm water to saffron threads and keep it aside
![]()
![]()
- Bring 3.5 cups of water to boil. When the water starts to boil, add bay leaf along with 1 teaspoon of shahi jeera and salt. Drain the water from rice and add it to the boiling water. Keep stirring the rice occasionally without breaking the grains. When the rice is 60% cooked, we are going to add half of the rice to the vegetables in the pan. We can take a grain of rice and press it with fingers, If the rice gets little mashed without breaking, then our rice is done. We don't need to cook fully. When this consistency is achieved, using a ladle or spatula, take half quantity of rice and spread it over the vegetables in another pan. Do not drain the water from rice at this stage. Let the remaining rice gets cooked in the water
![]()
![]()
- Spread the half quantity of half-cooked rice gently and nicely so that it forms a layer above the vegetable layer. On top of the spread rice, spread / sprinkle 1 teaspoon of garam masala along with 1/2 teaspoon of cardamom powder. Then sprinkle half of the saffron thread water. Then add 1/3rd of the fried onions to the pan.
- Next, to the pan add broccoli florets. Spread the florets nicely. Again add 10-12 mint leaves. Now our second layer of biriyani is ready. Switch off the flame of the rice and drain the water from rice using a strainer. Now you could see the rest of the half quantity rice is almost 85 % cooked. Add this to the top of second layer of biriyani
- Now add the rest of onions along with rest of garam masala, remaining saffron water and threads along with few mint leaves. Add the rest of the ghee to the sides of the pan and cover the pan with a lid and keep it flame.
- Let the biriyani gets cooked in high flame for 2 minutes, then reduce the flame and cook it for another 10 minutes. After 10 minutes, switch off the flame. Using a spatula, check if you have any water. Generally there wouldn't be any water. But If you have any water, again keep the rice in low flame till all the water are absorbed. Cover the pan with the lid till you serve. While serving, don't mix the rice. Using a flat spatula, gently take the rice from the sides of the pan so that all the layers are nicely piled up.
- Serve the mouth-watering and fluffy Vegetable Biriyani with your favourite raithas and slurp!!!
 |
| Vegetable Biriyani Recipe | How to make Vegetable Biriyani |
↧
February 5, 2015, 12:00 am
Rasavangi is one of the traditional and authentic Tamil Brahmin recipe made using brinjals. We can also make rasavangi with white pumpkin. My MIL used to make this once a week. Simple and easy to make kuzhambu variety. We can mix this yummy Brinjal Rasavangi with hot rice and enjoy with any veg curries... |
| Brinjal Rasavangi |
Preparation and Yield: | Preparation time | 10 mins |
| Cooking Time | 25 mins |
| Servings | 4 |
 |
| Brinjal Rasavangi |
Ingredients:
| Thurdal | 1/2 Cup |
| Brinjal | 1/4 Kg |
| Tamarind | 1 lemon size |
| Turmeric Powder | A Pinch |
| Salt | To Taste |
| Channa dal | 2 tablespoon |
Ingredients for Grinding:
| Red Chilli | 6 |
| Grated Coconut | 1/2 Cup |
| Coriander Seeds | 2 tablespoon |
| Channa dal | 1.5 tablespoon |
| Oil | 1 tablespoon |
For Seasoning:
| Oil | 1 tablespoon |
| Mustard Seeds | 1 teaspoon |
| Urdal | 2 teaspoon |
| Curry Leaves | few |
 |
| Brinjal Rasavangi |
Method:
- Cook the thurdhal in the pressure cooker till it is soft
- Soak the tamarind in water for 10 mins and extract the juice
- Soak the channa dal for 10 mins in water. Finley chop the brinjal vertically and keep it aside.
- Heat oil in pan, add red chilli, coriander seeds, channa dal and fry till the dal turns golden brown color. Take this in a mixer. Add grated coconut along with hing and fry it till the coconut turns golden brown color and add this to the mixer
- Grind all these ingredients in the mixer to a nice paste.
- Add chopped brinjals in a pan and add soaked channa dal and water along with turmeric powder till the brinjal is cooked completely. Once the brinjal is half-cooked, add tamarind juice along with salt and allow the mixture to boil till the raw smell of tamarind goes off and the channa dal is cooked.
- Add the mashed thurdhal and ground paste and stir well and when the rasavangi starts to boil, remove from flame.
- Pour the oil in the pan, add the mustard seeds once the oil is hot. When the mustard seeds begins to sputter, add the urdhal and fry it till it becomes golden color. Add curry leaves and and fry it and add it to the cooked rasavangi.
- Kathirikai(Brinjal) Rasavangi is ready to serve.
 |
| Brinjal Rasavangi |
↧
February 9, 2015, 8:02 pm
Onion and Garlic are essential ingredients in Most of the veg gravies which we prepare as an accompaniment for Indian Breads. Sometimes we might need gravies without onion and garlic and we would be scratching our heads to think what will be the best accompaniment and we land in some simple dal. My sister has a habit of not using onion and garlic and she makes lots of different gravies without these ingredients and most of them were so mouth-watering. She makes Lauki Chana Dal Subzi which is one of the veg gravy without onion and garlic and would be perfect accompaniment for any Indian breads. Generally many people doesn't appreciate much about Lauki (BottleGourd), but Lauki is one of the Nutrition rich vegetable. It has 90% of water in it which eases the digestion. Lauko juice is popular for weight loss. It has vitamins and minerals and has other medicinal benefits too. I don't water to list out all the benefits of Lauki and bore you.. So such a healthy vegetable should be part of our kitchen every week.
Lauki Chana Dal Subzi is one of the easiest and also the tastiest dish which is a perfect side dish for Chapati/ Roti. During Fasting days, this subzi is a gift to us to skip onion and garlic. Nutritional rich Lauki along with protein rich Chana Dal makes our dish healthy. Lets see how to make this dish...
 Chana Dal Subzi Recipe | Bottlegourd Gram Dal Curry Recipe | Surakkai Kadaliparuppu Curry") |
| Lauki (Doodhi) Chana Dal Subzi Recipe | Bottlegourd Gram Dal Curry Recipe | Surakkai Kadaliparuppu Curry |
Preparation and Yield:| Preparation time | 10 mins |
| Cooking Time | 30 mins |
| Servings | 4 |
 Chana Dal Subzi Recipe | Bottlegourd Gram Dal Curry Recipe | Surakkai Kadaliparuppu Curry") |
| Lauki (Doodhi) Chana Dal Subzi Recipe | Bottlegourd Gram Dal Curry Recipe | Surakkai Kadaliparuppu Curry |
Ingredients:
| Chopped Lauki / Doodhi | 2 Cups |
| Channa Dal | 1/2 Cup |
| Green Chilli | 2 |
| Salt | To taste |
| Turmeric Powder | 1/2 teaspoon |
| Tomato | 2 |
| Cumin Seeds | 1 teaspoon |
| Red Chilli Powder | 1/2 teaspoon |
| Cumin Powder | 1/2 teaspoon |
| Coriander Powder | 1/2 teaspoon |
| Garam Masala | 1/2 teaspoon |
| Lemon Juice | 1 tablespoon |
| Chopped Coriander Leaves | To garnish |
| Oil | 1 tablespoon |
Method:
- Soak the chana dal in water for 30 minutes. Wash, Peel and Chop the bottle gourd to 1/2" pieces. After half an hour, drain the water from chana dal and add it to a vessel along with chopped lauki, turmeric powder and salt. Keep this vessel inside a pressure cooker and pressure cook it allowing for 5-6 whistles.
- Heat a pan, add oil. When the oil is hot, add cumin seeds. When the cumin seeds starts to sputter, add chopped green chillies followed by chopped tomatoes. Add all the spice powders along with turmeric powder and salt and cook the tomatoes till they are mushy.
- When the pressure is released from the cooker, open the cooker lid and gently mash the veg and dal slightly with back of a spatula and add the tomato masala and mix well. Switch on the flame and keep it in medium flame and cook the whole masala for atleast 5 minutes. Once the masala is nicely incorporated with the dal and veg, garnish with chopped coriander leaves and switch off the flame
- The yummy Lauki (Doodhi) Chana Dal Subzi is now ready to serve with any Indian breads!
 Chana Dal Subzi Recipe | Bottlegourd Gram Dal Curry Recipe | Surakkai Kadaliparuppu Curry") |
| Lauki (Doodhi) Chana Dal Subzi Recipe | Bottlegourd Gram Dal Curry Recipe | Surakkai Kadaliparuppu Curry |
↧
↧
February 11, 2015, 12:44 pm
Don't be scared of the name
Thavala Dosa and assume that the dosa is made of Frog :-) This is absolutely vegetarian recipe only. My mom used to make this yummy dish for breakfast or even for evening snack when we come back from school. This is similar to
Thavala Adai. A slight twist to thavala ada will become a crunchy thavala dosa. This dosa would taste good only if eaten hot. Crunchiness of the patter along with pepper gives a unique taste to the dish. A best accompaniment for this yummy and crunchy thavala dosa is
Idli Podi or
Spicy Tomato Chutney. This is one of the instant dosa dish too!
 |
| Thavala Dosa Recipe | How to make Thavala Dosa |
Preparation and Yield:| Preparation time | 10 mins |
| Cooking Time | 15 mins |
| Yield | 12 |
 |
| Thavala Dosa Recipe | How to make Thavala Dosa |
Ingredients:
| Raw Rice | 1 Cup* |
| Thurdal | 1/2 Cup |
| Pepper Corns | 2 teaspoon |
| Salt | To taste |
| Sour Curd | 1 Cup |
| Curry Leaves | Few |
Method:
- Add rice, thurdal, pepper corns in a mixer. Grind these to a coarse rawa
- Take coarse powder in a vessel. To that add salt, curd and curry leaves and mix well to make a dosa batter. Leave this batter aside for about 10 - 15 minutes
- After 15 mins, heat a tawa, pour a ladle of thavala dosa batter and sprinkle little oil. Cover the tawa with a lid and let the dosa gets cooked on one side. Then flip the dosa to other side and again cover and cook the dosa. Repeat the same step for the rest of batter.
- Serve the yummy and crunchy Thavala dosa with Tomato Chutney or Idli podi and enjoy your breakfast!
 |
| Thavala Dosa Recipe | How to make Thavala Dosa |
↧
February 12, 2015, 8:08 pm
Cham Cham is a popular Bengali Mithai. It is concocted using freshly prepared chena (cottage cheese). The recipe looks much similar to Rasgulla, but these Cham Cham's are much more tastier than the conventional Rasgullas. We can make many variations of the prepared cham chams.
Here are the different ways of serving
Bengali Cham Cham.
- We can either serve them as plain cham chams garnished with nuts
- We can coat the Cham Cham with dessicated coconut and garnish with nuts
- We can serve the Cham Cham soaked in freshly prepared Malai
- We can slit the Cham Cham and stuff it with Khova and nuts
I have given here the first 3 methods of serving Cham Cham. The last method is simple, we just need to slit the cooked cham cham and stuff it with khova and finely chopped nuts.
Valentine's Day are always special. I always make some special sweet for my hubby :-). This time, I have planned to make these yummy Cham Cham. I am sharing this recipe specially for the occasion of Valentine Day. A perfect dessert to show our love to our beloved ones.
 |
| Bengali Cham Cham Recipe | Malai Cham Cham Recipe | How to make Chum Chum |
Preparation and Yield:| Preparation time | - |
| Cooking Time | 45 mins |
| Yield | 8 |
 |
| Bengali Cham Cham Recipe | Malai Cham Cham Recipe | How to make Chum Chum |
Ingredients:
| Milk | 4 Cups* or 1 litre + 2 tablespoon |
| Lemon Juice | 2 tablespoon |
| Sugar | 2.5 Cups |
| Water | 3.5 Cups |
| Cardamom Powder | 1/4 teaspoon |
| Chopped Pistachios | 1 teaspoon |
 |
| Bengali Cham Cham Recipe | Malai Cham Cham Recipe | How to make Chum Chum |
Method:
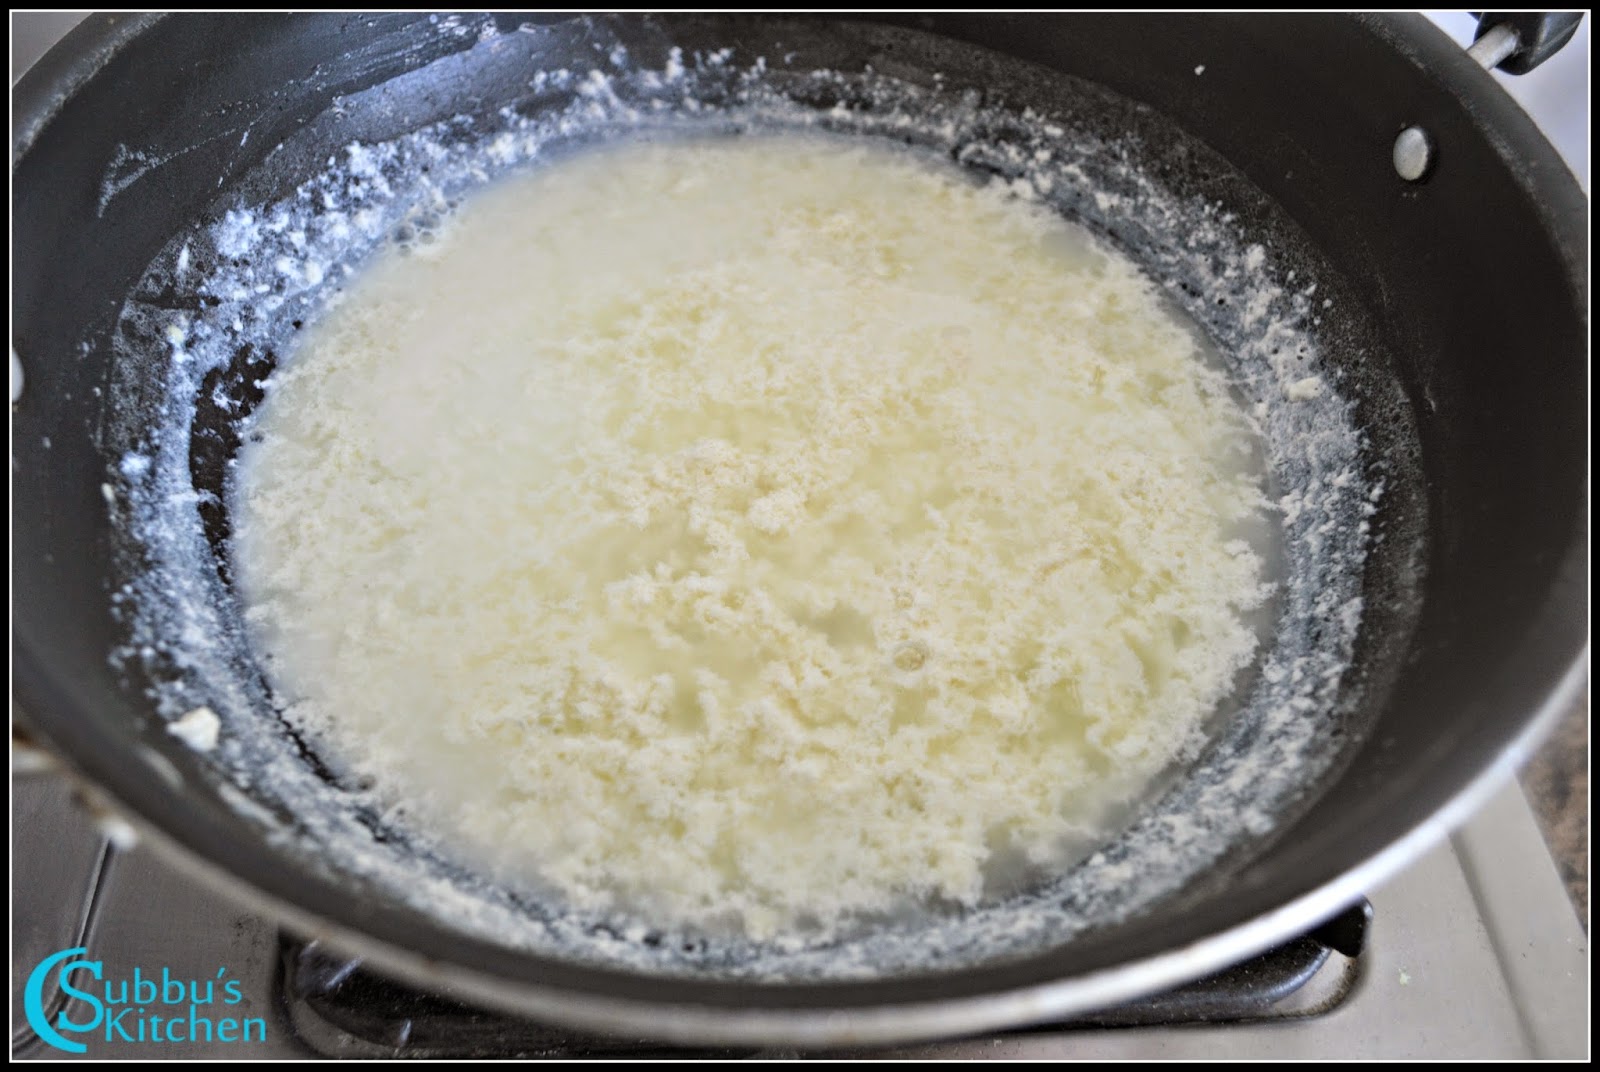
- Heat a pan and add 1 litre of milk to the pan. Keep stirring until the milk starts to boil. We should get nice bubbles in the milk. Also keep stirring till you get bubbles. The stirring will help the fat to fully combine with the milk. If we don't stir, then the fat will separate from the milk and we would not get soft and spongy cottage cheese. Meanwhile dilute the lemon juice with 1 tablespoon of water and keep it ready.
- When the milk starts to boil, switch off the flame and add the lemon juice little by little gradually. When milk starts to curdle, stop adding the lemon juice. Add 1/2 cup of cold water or ice cubes which helps to stop the curdling process. Also the cold water or ice cubes take out the sourness of lemon juice which we have added. Place a muslin cloth or thin cotton cloth over a strainer. Strain the curdled milk through the cloth covered strainer.
- Cover the cloth and squeeze the cloth gently to remove excess water from the cheese. Also show the covered cloth under running water just to ensure the sourness of lemon is removed completely from the cheese. Squeeze the cloth gently and hang it for 30 minutes. In 30 minutes, the hung cloth would have removed most of the moisture from the cottage cheese.
- If you open the cloth, you could see a ball of cottage cheese not completely dry, would have a little moisture and if you touch it would crumble into pieces as shown in the picture. lets knead the cottage cheese nicely using your palm. Knead the cheese for about 7-10 minutes to get soft and spongy Cham Cham. This knead is mandatory and is the main process to get softer Cham Chams
![]()
![]()
- After 10 minutes, the kneaded cheese would be like a dough. make small lemon sized balls out of the cheese dough and then roll it into an oval shape. Make sure the sizes are not too big, because cooking the cheese balls in the sugar syrup doubles its size. Lets heat a cooker or a broad and thick bottomed vessel. Add water and sugar and bring it to boil. When the sugar syrup starts to boil with bubbles, add 2 tablespoon of milk to the boiling sugar syrup. Adding milk to the sugar syrup separates the dust from the sugar and makes it float at the top of the syrup. We can then easily remove the dust using a ladle. This step is optional. If you have clear white sugar, we can skip this. If any dust present in the sugar, it would make the syrup look slightly dull in colour and your Cham Cham would not look good in the dull sugar syrup.
![]()
![]()
- Make sure your sugar syrup is absolutely boiling and add cardamom powder and then drop the cheese balls in the sugar syrup. Cook the cheese balls in the sugar syrup for about 20 minutes with the pan closed with the lid. Gently stir the cheese balls every 5 minutes till they are cooked. You could see the size of the cheese balls gets doubled when they are fully done. Switch off the flame once they are done
- Once the sugar syrup comes to room temperature, gently take the cham cham from sugar syrup and arrange in serving plate and garnish with pistachios
 |
| Bengali Cham Cham Recipe | Malai Cham Cham Recipe | How to make Chum Chum |
- We can also roll the cham cham in dessicated coconut and then arrange in serving plate and garnish with finely chopped pistachios. We can also make a slight twist. While kneading the cheese we can add few drops of saffron color and knead the cheese well and then cook them in sugar syrup and then coat them in dessicated coconut. I have not added color in this recipe. Serve the coconut coated Cham Cham dessert and enjoy this dessert with your beloved Valentine!
 |
| Bengali Cham Cham Recipe | Malai Cham Cham Recipe | How to make Chum Chum |
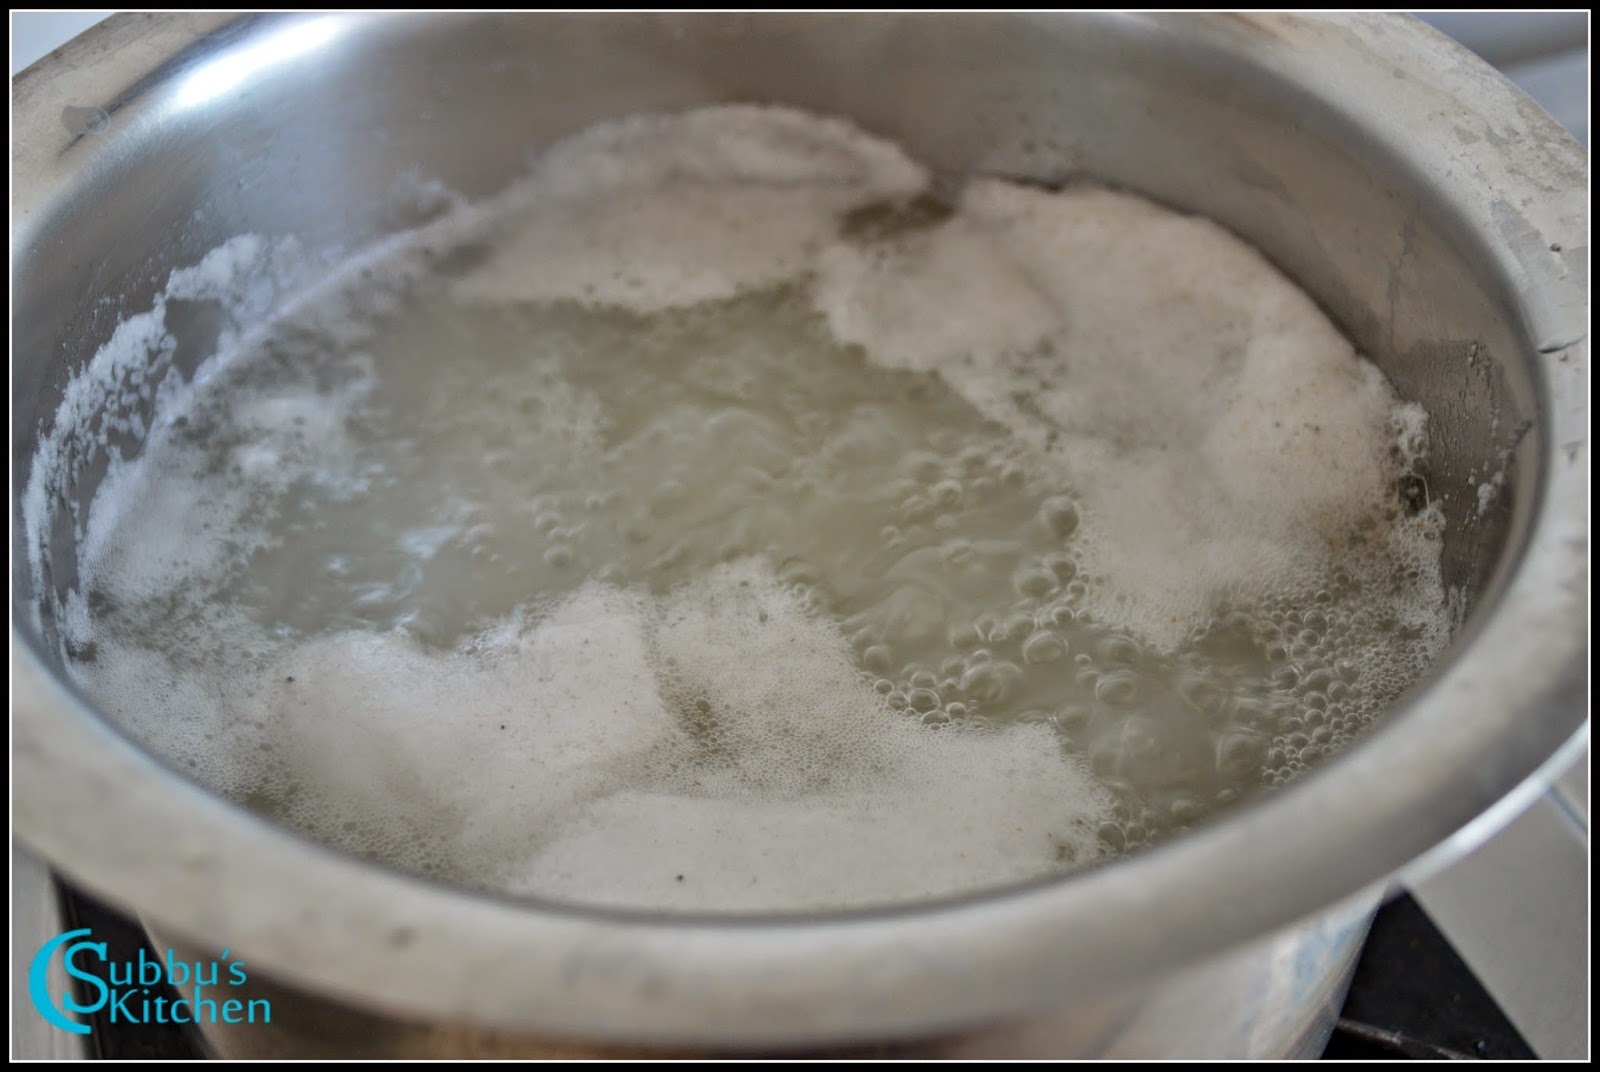
- In a heavy bottomed pan, heat the milk. Stir the milk to avoid overflow. Allow the milk to boil till it becomes thicker and reduces to 1 cup of quantity
- Now add sugar and saffron threads and continuously stir for 5Min's and remove from flame. So our Ras (Evaporated milk is now ready). Allow it to come to room temperature and then refrigerate it.
- Now our malai is ready. Arrange the cham cham's in serving dish and pour the malai over the cham cham and serve the yummy & scrumptious Cham Cham. Enjoy these Cham Cham's with your valentine for this Valentine's Day
 |
| Bengali Cham Cham Recipe | Malai Cham Cham Recipe | How to make Chum Chum |
↧
February 16, 2015, 1:50 pm
We can make many variations of Pulao. SweetCorn Methi Pulao is one such variety. Methi leaves added in Pulao and Biriyani gives a wonderful flavour to the dish. Sweet corn along with methi, together with spices makes this Pulao very scrumptious. This Sweet Corn Methi Pulao is one of the best dish for any parties or occasions. We can serve this yummy pulao with any raitha of our choice. Cucumber raitha is my choice. But conventional onion raitha would also be perfect. Or we can also serve this Pulao with any dal varieties. Lets see how to make this quick and tasty pulao...
 |
| SweetCorn Methi Pulao Recipe |
Preparation and Yield:| Preparation time | 15 mins |
| Cooking Time | 40 mins |
| Servings | 4 |
 |
| SweetCorn Methi Pulao Recipe |
Ingredients:
| Basmati Rice | 1 Cup* |
| Methi Leaves | 2 Cups |
| Sweet Corn | 1 Cup |
| Onion | 1 |
| Green Chilli | 2 |
| Cinnamon Stick | 1 |
| Cloves | 2 |
| PepperCorns | 1/2 teaspoon |
| Cardamom | 2 |
| Bay Leaf | 1 |
| Salt | To taste |
| Water | 2 Cups |
 |
| SweetCorn Methi Pulao Recipe |
Method:
- Rinse and Soak the basmati rice in water for about 10 minutes. Meanwhile slice the onions vertically to thin slices. Remove the methi leaves and wash it nicely.
- Heat oil in a pan, add the whole masalas along with peppercorns and fry for a moment, Add slit green chillies along with thinly sliced onions along with a pinch of salt and saute the onions till they are golden brown
- Now add the methi leaves to the pan. Along with this add the sweet corn to the pan. Mix everything well and stir-fry them for couple of minutes
- Then drain the water from the rice and add it to the pan. Saute the rice for another couple of minutes. Then add 2 cups of waterand salt to the pan and mix well. Keep the flame high,
- When the water is adsorbed fully, reduce the flame to low. Close the pan with the lid and allow the rice to cook in low flame for about 20 minutes. Occasionally mix the rice once or twice using a wooden spatula. After 20 minutes, check the rice and if it is fully cooked, switch off the flame
- Gently remove the rice to the serving bowl without breaking the rice. Serve the yummy and tasty Sweetcorn Methi Pulao with your favourite raitha and enjoy your food!
 |
| SweetCorn Methi Pulao Recipe |
↧
February 17, 2015, 6:51 pm
Thinai (Foxtail Millet) is a nutrition rich millet and I have explained about its benefits in my other
thinai posts. This is one another dish with the healthy thinai. This adai is simple to make and the procedure is much similar to the conventional adai and the only difference is instead of rice we are going to use thinai. Thinai along with dal and spices gives a yummy taste to the adai. I have enhanced its healthiness by adding some vegetables also. Lets see how to make this delicious and healthy
Thinai Vegetable Adai (Foxtail Millet Adai).
 |
| Thinai Vegetable Adai Recipe | Foxtail Millet Vegetable Adai Recipe |
Preparation and Yield:| Preparation time | 2 Hours |
| Cooking Time | 25 mins |
| Yield | 8-10 |
 |
| Thinai Vegetable Adai Recipe | Foxtail Millet Vegetable Adai Recipe |
Ingredients:
| Foxtail Millet | 1 Cup* |
| Channa dal | 1/2 Cup |
| ThurDal | 1/4 Cup |
| Urid Dal | 1/4 Cup |
| Red Chillies | 10 |
| Salt | To Taste |
| Onion | 1 |
| Carrot | 1 |
| Beans | 10 |
| Oil | 1/4 Cup |
* 1 Cup = 250ml
 |
| Thinai Vegetable Adai Recipe | Foxtail Millet Vegetable Adai Recipe |
Method:
- Rinse and Soak the dals and millet separately in water for about 2 hours. Finely chop the onions and other vegetables and keep it ready. After 2 hours, drain the water and add the dals and millets to the mixer along with red chilli, salt
- Grind it for a minute and then add water little by little and grind it to a coarse batter. Now our adai batter is ready. Heat a pan and add oil. Add finely chopped onions along with a pinch of salt and saute the onions till they are transparent
- Add the chopped vegetables to the pan and stir-fry them for couple of minutes. Take these sauted veggies in a separate bowl. Heat a tawa, pour one ladle of adai batter and spread it with back of a ladle to make a thin circle. Pour little oil and keep the flame in low.
- Now sprinkle the saute veggies on top of the adai. Allow the adai to cook in low flame. Then flip it off gently and allow it cook. Again add 1/2 teaspoon of oil and cook in other side till the adai is crispy. Remove the adai from tawa and repeat the same for rest of the batter
- Serve the yummy and crispy Thinai Vegetable adai with jaggery or aviyal and enjoy your breakfast!
 |
| Thinai Vegetable Adai Recipe | Foxtail Millet Vegetable Adai Recipe |
↧
↧
February 18, 2015, 2:35 pm
Paneer is favourite for many of us. We can make many different gravies using Paneer, most popular dishes are Paneer Butter Masala, Mutter Paneer etc. You can refer this link for more Paneer Recipes. Now coming to this wonderful dish. SweetCorn is my favourtie ingredient. Very frequently I use sweet corn in many of my dishes. Even when I prepare carrot rice, capsicum rice and many other rice varieties I love to add sweet corn. Such a delicious sweet corn adds a nice flavour to the masala and adding paneer to this tasty masala enriches the whole dish. It is a perfect side dish for any Indian Breads.
 |
| SweetCorn Paneer Masala Recipe |
This is one of the No-Onion-No-Garlic Recipe. This is a perfect gravy for fasting days also. Many of us always gets confused when we need to cook the gravy without onions and garlic. As the onions play a vital role in adding up a quantity. But here in this recipe, the sweet corn paste along with tomato puree makes the masala rich in taste and quantity. Now lets see how to make this yummy Sweet Corn Paneer Masala recipe... |
| SweetCorn Paneer Masala Recipe |
Preparation and Yield:| Preparation time | 10 mins |
| Cooking Time | 45 mins |
| Servings | 5 |
 |
| SweetCorn Paneer Masala Recipe |
Ingredients:
| Sweet Corn | 1 Cup* |
| Paneer | 250gms |
| Tomato | 3 |
| Green Chilli | 2 |
| Ginger | 1 inch piece |
| Turmeric Powder | 1/4 teaspoon |
| Coriander Powder | 1 teaspoon |
| Red Chilli Powder | 1/2 teaspoon |
| Oil / Butter | 4 tablespoon |
| Cumin Seeds | 1 teaspoon |
| Salt | To taste |
* 1 Cup = 250ml
For Masala: | Peppercorns | 1/2 teaspoon |
| Cinnamon Sticks | 1 inch piece |
| Cloves | 3 |
| Cardamom | 2 |
 |
| SweetCorn Paneer Masala Recipe |
Method:
- Take all the masala ingredients to the mixer and grind it to a coarse powder
- Next, chop the tomatoes roughly and add it to the mixer along with green chillies and half of ginger. Reserve the rest half of the ginger for later use. Grind the tomatoes to make puree
- Next, take the paneer and cut into small cubes. We can also store bought paneer cubes. Heat a pan, add 2 tablespoon of oil / butter, add the paneer cubes to the pan
- In low flame, fry the paneer cubes till they are golden brown on all the sides. Take this fried paneer from pan and keep it in a plate. Again add the rest of oil/butter to the pan. Add cumin Seeds to the pan.
- When the cumin seeds starts to sputter, add the ground masala and rest if ginger and fry for couple of minutes. Then add turmeric powder, coriander powder and red chilli powder and fry for few seconds.
- Then add the tomato pulp which we ground already to the pan. Add salt to the pan and keep the flame low and allow the tomato to cook in low flame for about 6-8 minutes. Meanwhile, cook the sweet corn and keep it ready. I have used the frozen sweet corns and so I have boiled the sweet corns in a microwave for 5 minutes.
- Allow the sweet corns to cool off. Then add it to the mixer and grind it to a nice paste
- When the tomato puree is cooked, add the sweet corn paste to the masala and mix well. Allow the masala to cook again for 3 minutes in low flame.
- Finally add paneer cubes to the pan and garnish with finely chopped coriander leaves and when the masala comes to boil, then switch off the flame
- Serve the yummy and delicious SweetCorn Paneer Masala with any Indian Breads and enjoy your dish!
 |
| SweetCorn Paneer Masala Recipe |
↧
February 19, 2015, 7:05 pm
Oats Thepla / Oats chapati is a healthy Indian Bread. Chapati / Roti made of whole wheat is a healthy substitute for conventional rice. We all are more diet specific nowadays. To cut our daily calories, most of us are looking for healthy substitutes. Oats, Millets are some of the healthy alternatives. Instead of having plain chapati, we can mix oats, carrot, radish, grated cauliflower etc with wheat flour and knead it to chapati dough and make yummy and healthy chapati / thepla. This recipe explains how to make Oats Thepla / Oats Chapati with step by step photos. We can serve this Oats thepla with any veg gravies of our choice.
 |
| Oats Thepla Recipe | Oats Chapati Recipe |
Preparation and Yield:| Preparation time | 10 mins |
| Cooking Time | 25 mins |
| Yield | 10 |
 |
| Oats Thepla Recipe | Oats Chapati Recipe |
Ingredients:
| Whole Wheat Flour | 1.5 Cup* |
| Oats | 1/2 Cup |
| Ajwain Seeds | 1/2 teaspoon |
| Salt | To taste |
| Oil / Butter | 2 tablespoom |
* 1 Cup = 250ml
 |
| Oats Thepla Recipe | Oats Chapati Recipe |
Method- Take a mixing bowl, add whole wheat flour, oats, ajwain seeds, salt and mix well. Ajwain seeds adds a nice aroma to the dish. Add warm water little by little and knead it to a soft dough. Cover the dough with a damp cloth and set it aside for about 15 minutes.
- Make lemon sized balls out of the dough and keep it aside. Dust each ball with flour and roll it to a slightly thicker chapati. Repeat the same for rest of the dough balls
- Heat a tawa, place the oats thepla and allow to cook for 20 seconds. Add little oil to the tawa. Flip the thepla to another side and cook for another 20 seconds. Remove the thepla from the tawa. Repeat the same for rest of the rolled theplas
- Now the tasty and healthy Oats Thepla are ready to serve! Relish with your favourite gravy!
 |
| Oats Thepla Recipe | Oats Chapati Recipe |
↧
February 21, 2015, 5:50 pm
This week, its NorthIndian Lunch Menu at home! I love NorthIndian veg thali. An Indian bread with sabji served along with rice and other dry curries. Raitha would be one of the important dish in any NorthIndian Thali. Unfortunately I did not include that here in this menu. This is one of the simplest menu.
Oats Thepla served with Dal along with Sweet Corn Methi Pulao. This is one of the menu which my daughter love. She is not a lover of Oats. So this way I make sure she eats oats. I love a simple dal tadka for this Oats thepla. This Indian bread along with dal would be served with a rice variety. We can go in for any Pulao / Biriyani. I have opted for Sweet Corn Methi Pulao .
I have given here the links to the individual dishes. We can finish this whole menu in 1 hour 30 minutes and treat our family with this healthy and yummy menu!
 |
| NorthIndian Lunch Menu #3 - Oats Thepla, Sweet Corn Methi Pulao, Dal Tadka |
Preparation and Yield:
| Preparation time | 10 mins |
| Cooking Time | 1 hour 30 mins |
| Servings | 5 |
Recipes:
 |
| NorthIndian Lunch Menu #3 - Oats Thepla, Sweet Corn Methi Pulao, Dal Tadka |
↧
February 23, 2015, 1:57 pm
Sweet Corn Cheese Balls (Cheese Corn Balls) is one of the crispy and yummy snack! I learnt this yummy recipe from one of my friends when I was in UK. My friend made this scrumptious snack during World food day in School. Many of the Britishers also loved this Indian Snack. Especially this is one of the favourite snack for all the kids. Sweet Corn Cheese balls with Tomato Ketchup would be a perfect snack!
 |
| Sweet Corn Cheese Balls Recipe | Cheese Corn Balls Recipe |
Milk and milk products are highly nutritious foods. They contain a unique “package of nutrients” that are an essential part of a healthy eating plan. Consuming milk, cheese and yogurt can boost immunity, lower blood pressure, reduce risk of diabetes, reduce risk for some cancers and help maintain your weight. But nowadays, I have been seeing many kids showing aversions to Milk and milk products. So we should somehow find a way to include the milk products in our day to day food. I usually add cheese to many of the dishes like dosa, pasta etc. so my kids have the cheese without even knowing that its been added. This is one of the dish my kids love and its a best way to add cheese to your kids.
 |
| Sweet Corn Cheese Balls Recipe | Cheese Corn Balls Recipe |
Preparation and Yield:| Preparation time | 15 mins |
| Cooking Time | 35 mins |
| Yield | 20 - 22 |
 |
| Sweet Corn Cheese Balls Recipe | Cheese Corn Balls Recipe |
Ingredients:
| Sweet Corn | 1 Cup* |
| Grated Cheese | 1 Cup |
| Boiled and mashed Potato | 1 |
| Capsicum / Green Bell Pepper | 1/2 |
| Dry Oregano Leaves | 1 tablespoon |
| Pepper Powder | 1/4 teaspoon |
| Red chilli flakes | 1 teaspoon |
| Corn Starch / Corn Powder | 3 tablespoon |
| Salt | To Teaspoon |
| Chopped Coriander Leaves | 1 tablespoon |
| All Purpose Flour | 1/4 Cup |
| Bread Crumbs | 1/2 Cup |
| Oil | For Deep Frying |
*1 Cup = 250ml
 |
| Sweet Corn Cheese Balls Recipe | Cheese Corn Balls Recipe |
Method:
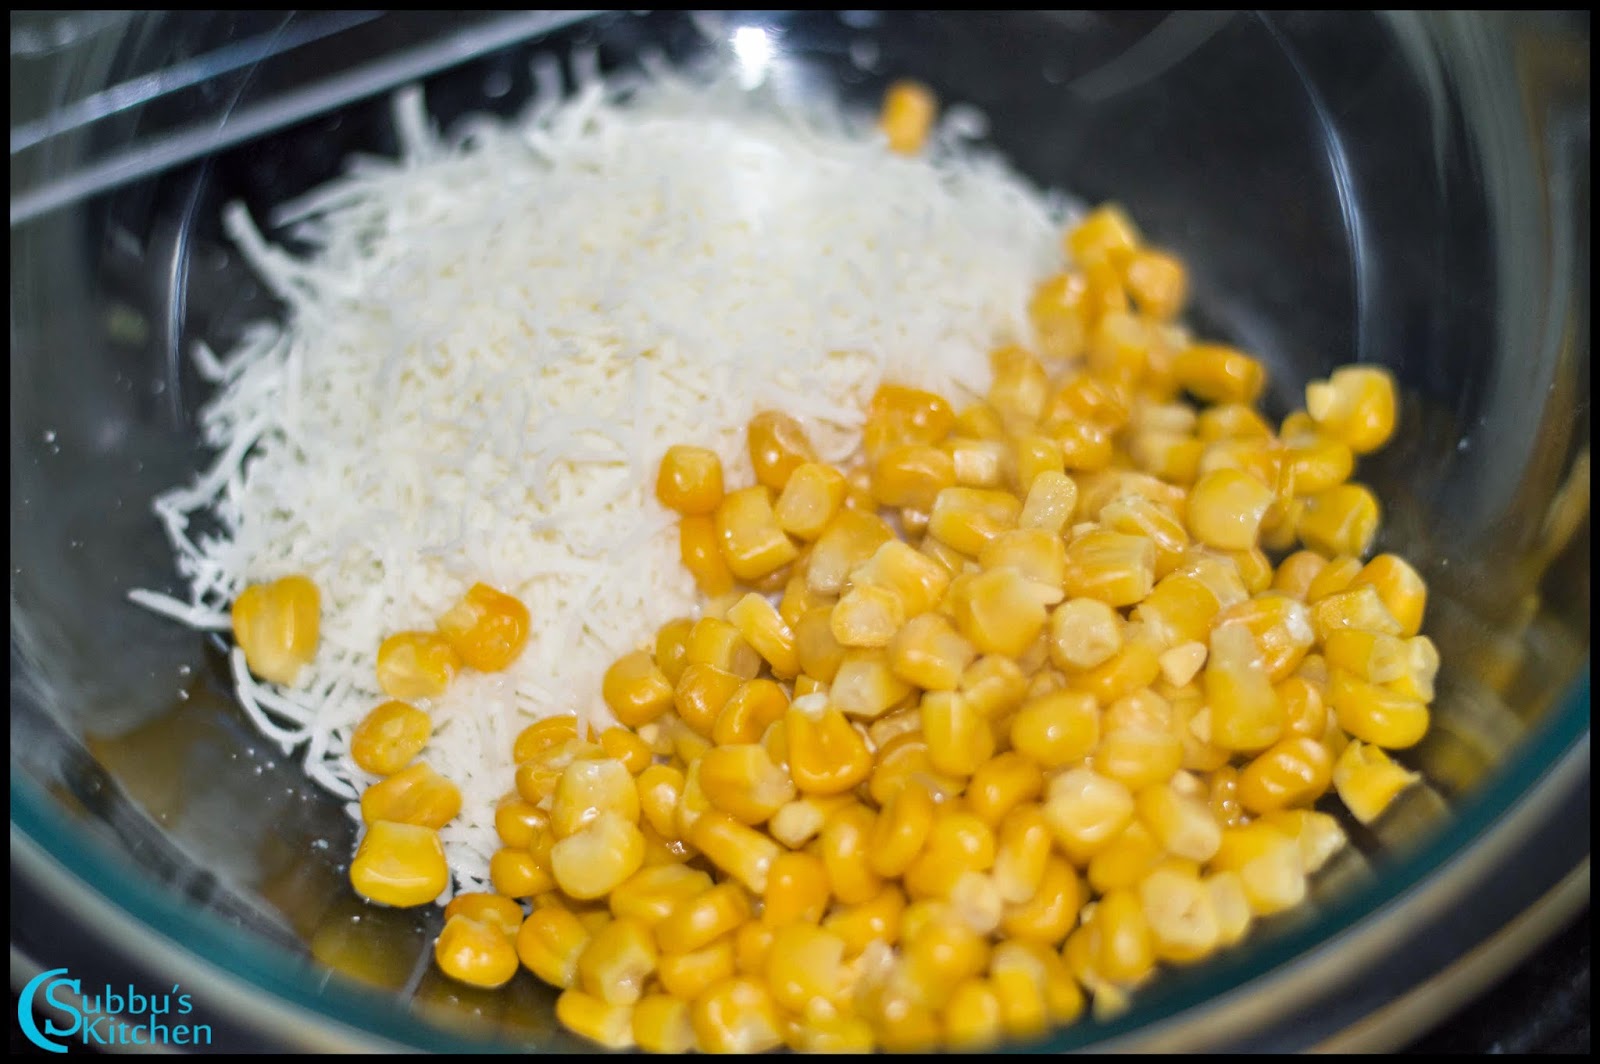
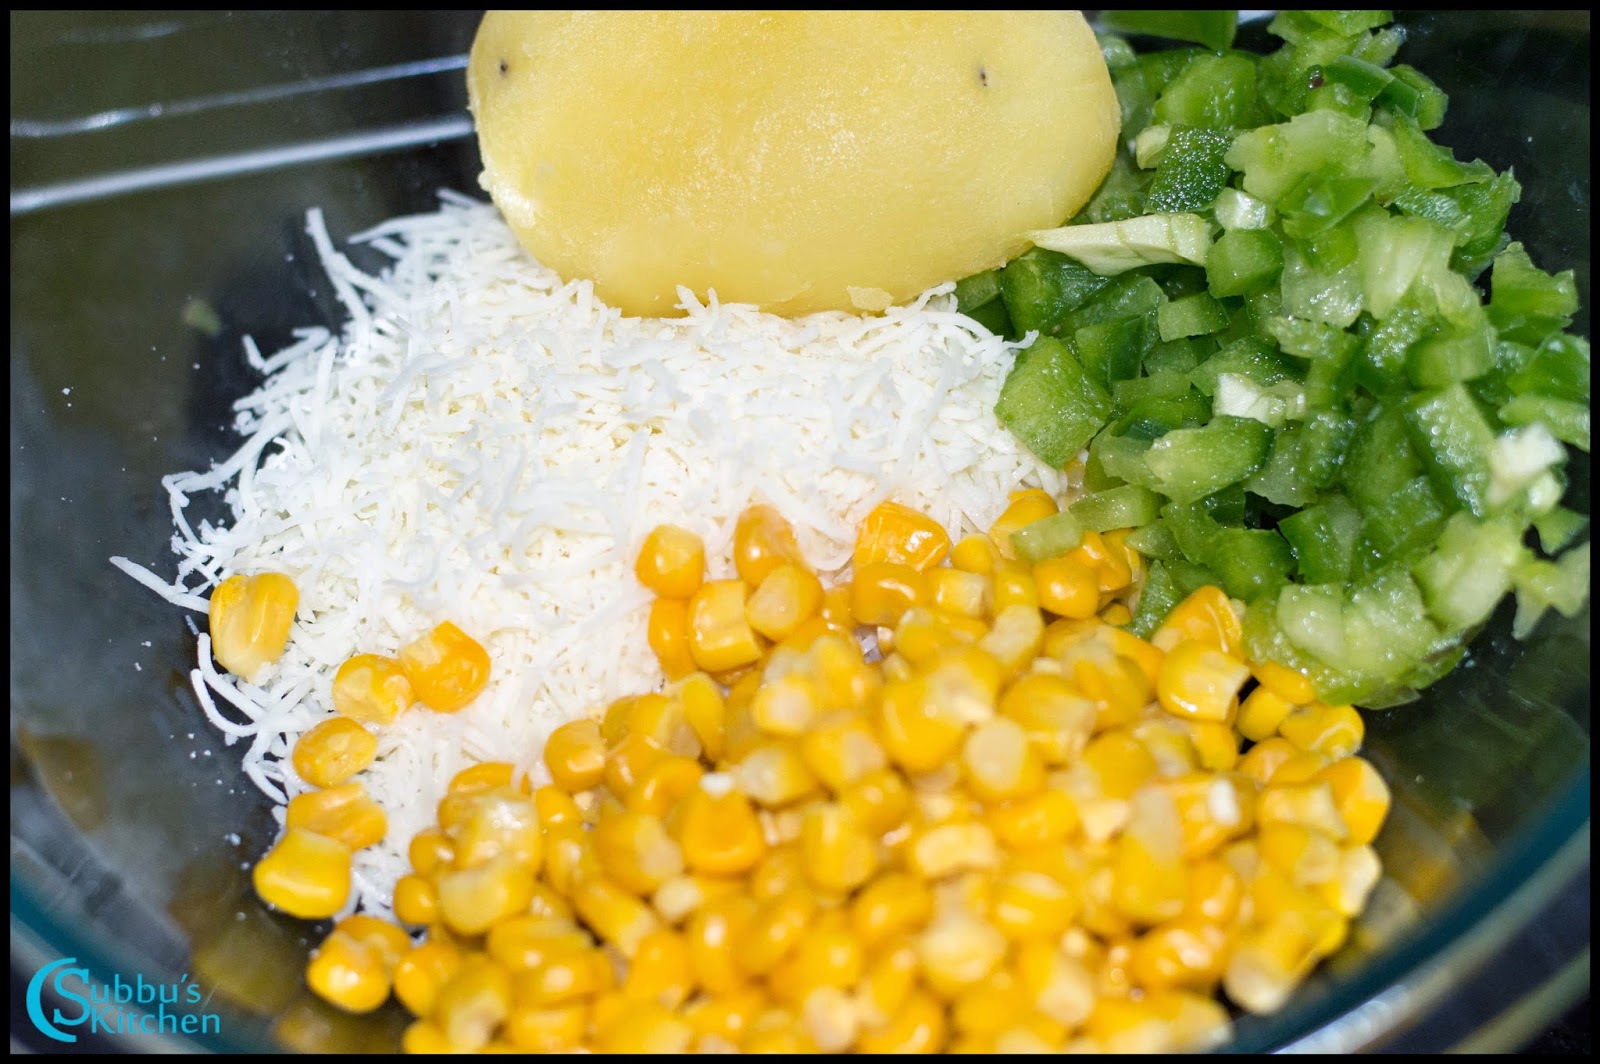
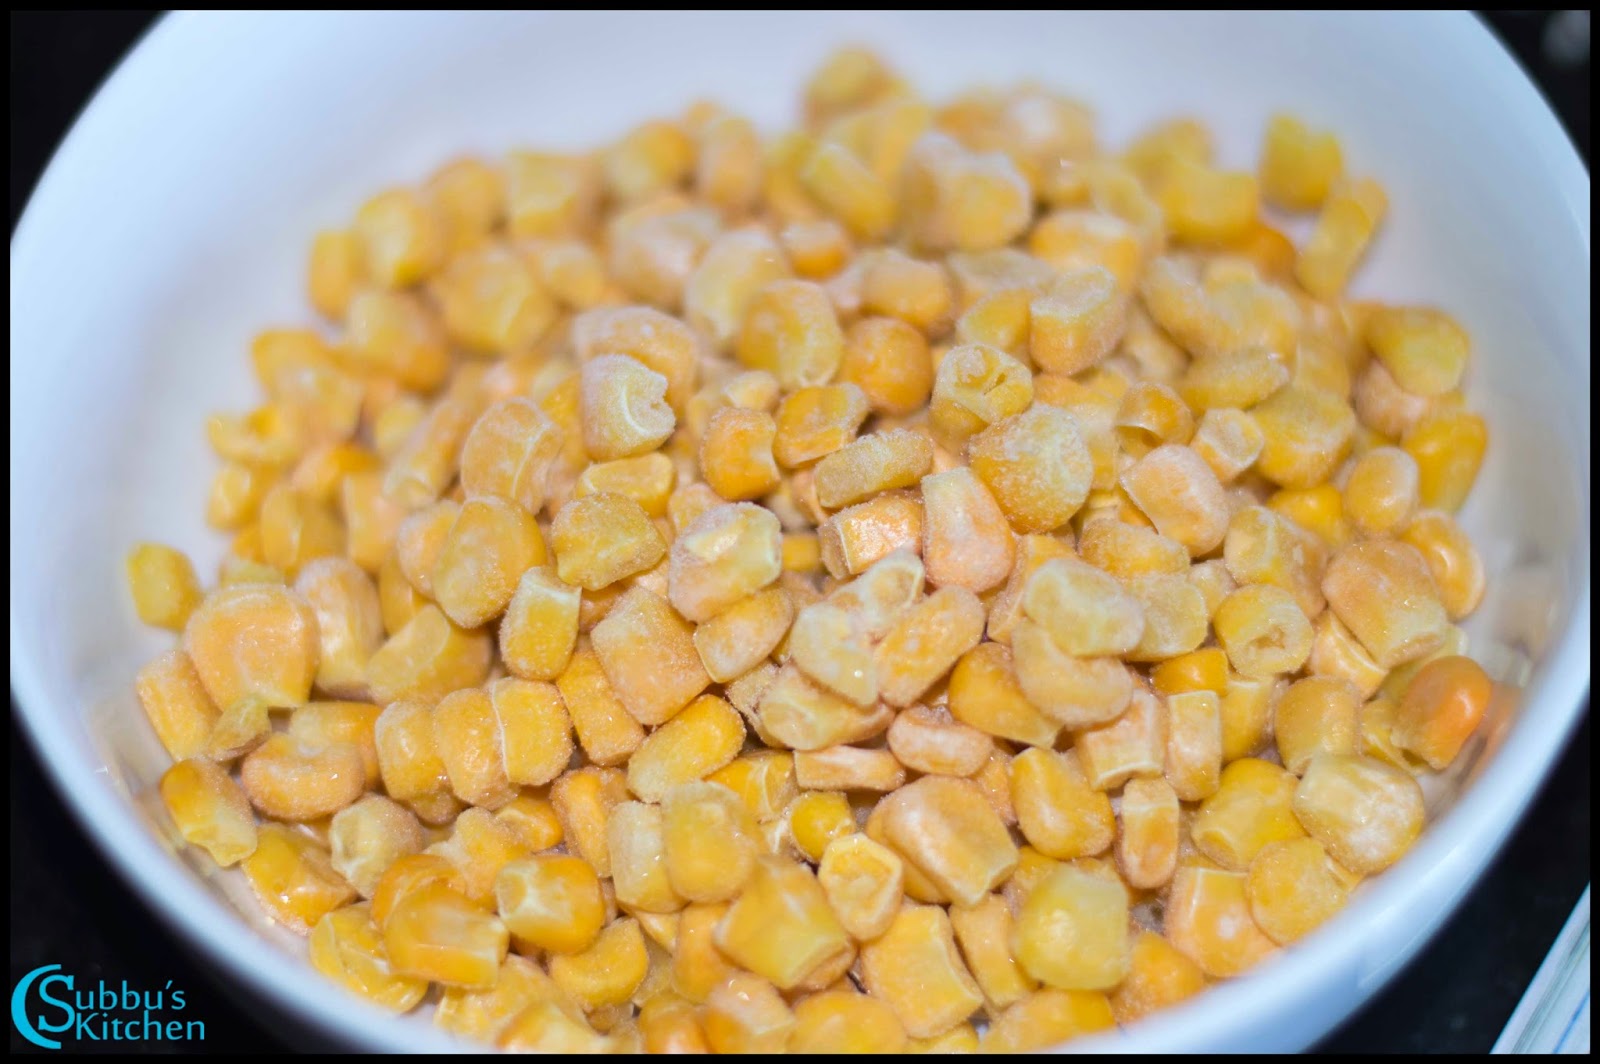
- Boil the sweet corns and set it aside. Finely chop the capsicum and set it aside. Take a mixing bowl and add the boiled sweet corn and grated cheese. I have used the store bought grated cheese. If you have a cheese bar, you can grate it and use it. To the mixing bowl, add boiled, peeled and mashed potato along with chopped capsicum
- Then add the chopped coriander leaves along with red chilli flakes and pepper powder. Then crush the oregano leaves between your palm and add it to the bowl. Next, add corn starch to the bowl along with salt. Make sure you add less salt as the cheese would have some salt in it.
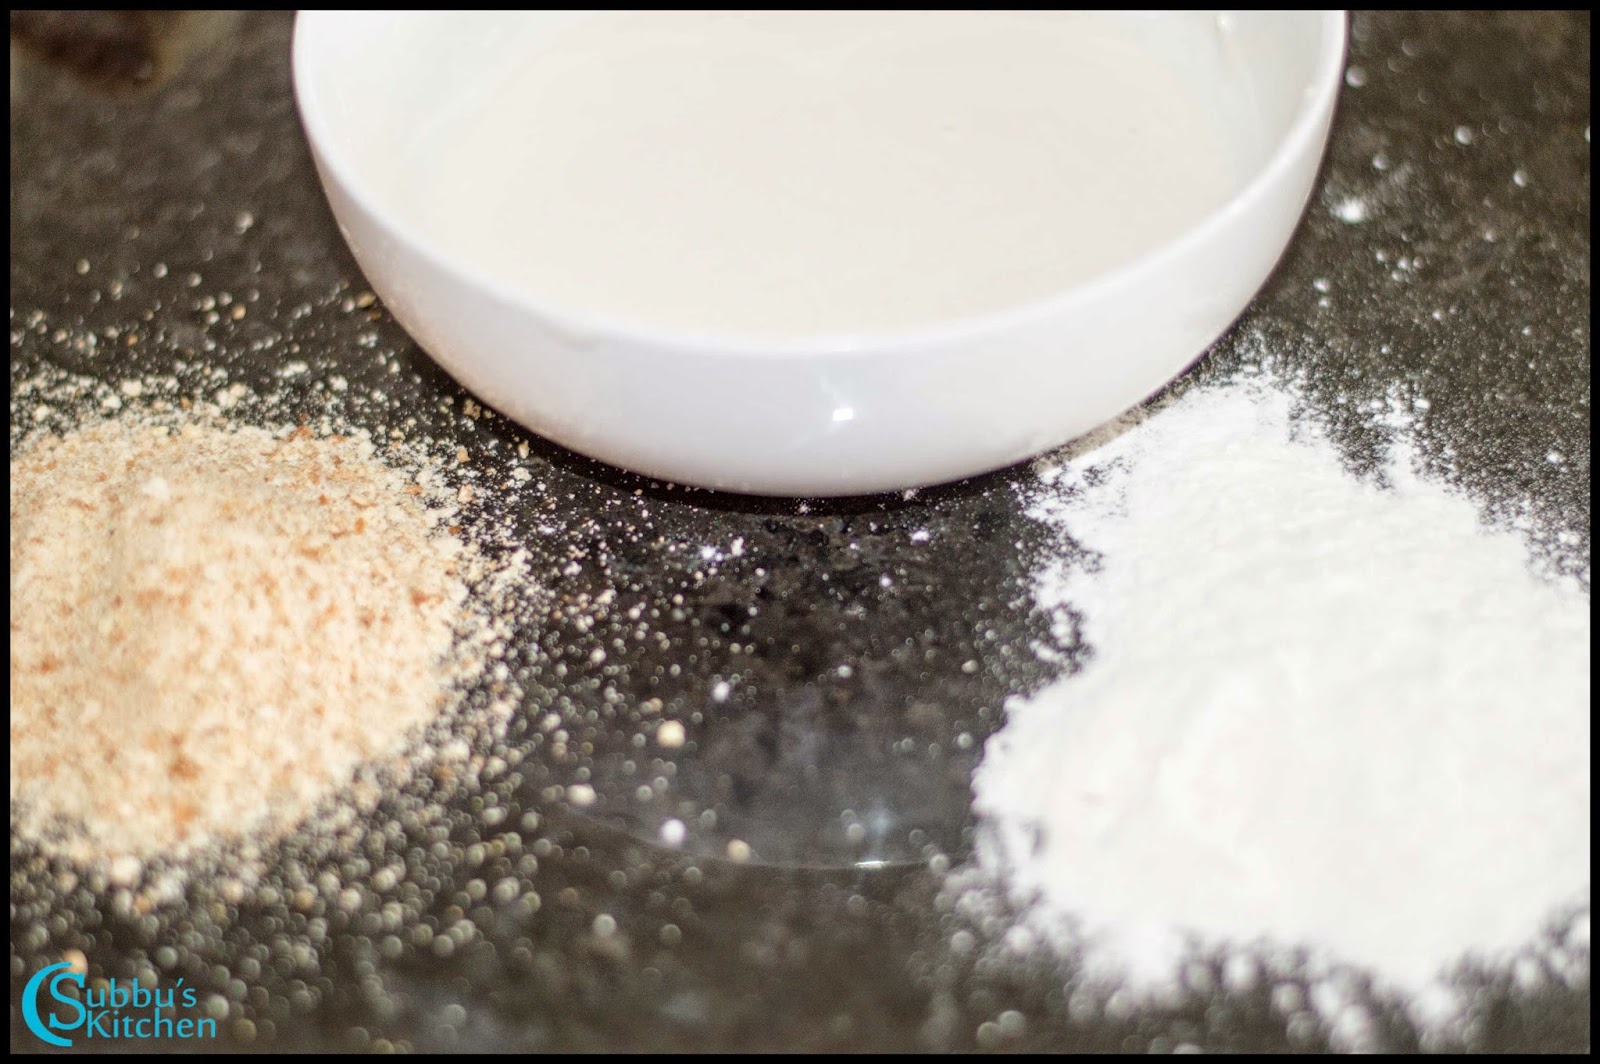
- Mix everything well and make it like a dough. The corn starch is the binding agent in this dish. Grease your fingers and palm with some oil and make small lemon sized balls out of the dough. Now our dumplings are ready. We need an outercovering to make sure the cheese balls are getting nicely fried up in the oil. Take 3 tablespoon of all purpose flour in a bowl and add water little by little and mix it well till it becomes a pouring consistency. Take rest of the all purpose flour in a plate. Take the bread crumbs in a separate plate
![]()
![]()
- Take a dough ball and dust it in flour. Dip the dusted ball in the flour paste and coat it nicely. Then take out the coated ball and dust it with bread crumbs. Coat the dough ball with bread crumbs nicely and make sure the whole ball is coated nicely. If it is not coated well, then the cheese tends to melt and it breaks the balls in the oil. So with more care, coat all the dough balls with maida paste and bread crumbs, Now our dumplings are ready for frying. If you are planning to treat your guests with Cheese Corn balls, then make the dumplings and keep it ready. When your guests arrive, then fry these dumplings and treat them with hot and crispy Sweet corn Cheese balls
- Heat oil in a pan to deep fry the balls. Add 6-8 balls in one batch, Deep fry them in medium heat till all the balls are turn golden brown color. Remove the fried balls and add the next set of batch.
- Repeat this for rest of the dumplings.
- Yummy and crispy Sweet Corn Cheese Balls are now ready. Serve this with Ketchup and enjoy your snack!
 |
| Sweet Corn Cheese Balls Recipe | Cheese Corn Balls Recipe |
↧
↧
February 24, 2015, 3:58 pm
Last week, I went to a Birthday Party hosted by a Punjabi Family. One of the main main course was Naan which was served with Paneer Pasanda. Punjabi's love Paneer and they are expertise in making homemade paneer. Paneer Pasanda is a another scrumptious Paneer gravy. Crumbled or Grated Paneer with chopped nuts and golden raisins mixed together for stuffing. This stuffing is extremely delicious. This stuffing is stuffed inside Paneer triangles and shallow fried and then added to the tomato-onion gravy.
 |
| Paneer Pasanda Recipe |
We can also have the Paneer Pasanda Pakoda served as a snack. We will enjoy each bite of Pasanda pakoda as it has coarsely chopped nuts along with raisins and crumbled paneer. We can even make this filling and coat it with maida paste and dust it with bread crumbs and deep fry them. This will make a yummy and crunchy snack too ! OK... Let me focus on this Paneer Pasanda recipe now...
 |
| Paneer Pasanda Recipe |
Preparation and Yield:| Preparation time | 10 mins |
| Cooking Time | 45 mins |
| Servings | 5 |
 |
| Paneer Pasanda Recipe |
Ingredients for Pasanda:
| Paneer | 250gms |
| Crumbled Paneer | 100 gms |
| Chopped Coriander Leaves | few |
| Salt | To taste |
| Cashews | 5 |
| Pista | 10 |
| Almonds | 10 |
| Raisins | 10 |
| Oil | 1/4 Cup |
| Corn Starch | 1/4 Cup |
| Maida / All Purpose Flour | 1/4 Cup |
Ingredients for Gravy:
| Onion | 1 |
| Tomato | 3 |
| Ginger-Garlic Paste | 1 teaspoon |
| Cinnamon Stick | 1 inch piece |
| Cloves | 3 |
| Cumin Seeds | 1 teaspoon |
| Cashews | 5 |
| Red Chilli Powder | 1/2 teaspoon |
| Coriander Powder | 1 teaspoon |
| Garam Masala | 1/2 teaspoon |
| Salt | To Taste |
| Kasoori Methi | 1 teaspoon |
| Chopped Coriander Leaves | 1 tablespoon |
 |
| Paneer Pasanda Recipe |
Method for making Pasanda:
- Take cashews, almonds and pistachios in a mixer and grind it to a coarse powder.
- Take 100gms of paneer and soak it in warm water for 10 minutes. After 10 minutes, crumble the paneer nicely and take it in a bowl. To the crumbled paneer add chopped coriander leaves. To the mixing bowl now add ground nuts and raisins
- Mix the filling well. The nuts and raisins gets nicely incorporated with the crumbled paneer. Now our filling is ready. Take the remaining paneer. Chop the paneer into slightly thicker triangular pieces.
- Take two triangular paneer and stuff it with the Paneer-nuts stuffing
- Close the triangular paneer pieces nicely. Repeat the steps for rest of the paneer and stuffing
- Heat a pan with oil for shallow frying. In a bowl add corn starch and maida and add water to make it a paste. Coat each paneer triangular stuffins inside the corn-maida paste. The corn-maida paste nicely seals the traingles so that the stuffings doesn't get open up in frying. Gently place 4-5 coasted paneer pasanda in the pan and shallow fry them on both the sides till they are slightly golden brown color and turns crispy. Repeat for rest of the pasanda.
- Now our yummy and crunchy Paneer Pasandas are ready. Lets prepare the gravy!
Method for making Paneer Pasanda Gravy:
- Heat a pan and add oil. When the oil is hot, add cinnamon stick, cloves, cumin seeds. When the cumin seeds starts to sputter, add finely chopped onions along with a pinch of salt and saute it nicely till they are transparent. Then add chopped tomatoes along with red chilli powder, coriander powder, garam masala and salt and mix well.
- Close the pan with a lid and allow the tomatoes to cook and becomes mushy. When the tomatoes are nicely cooked, switch off the flame and allow it to cool, Once the masala is cooled off, grind it to a nice paste. Heat a pan and add the ground masala. Keep the flame low and allow the masala to cook for 5 minutes.
- Then take kasoori methi and crush it between your palms and add it to the gravy. Allow the gravy to boil in low flame for couple more minutes and then garnish with coriander leaves and switch off the flame
- Now our gravy is ready. Take a serving bowl and place 2-3 Paneer Pasanda and pour the gravy and serve it immediately. Do not boil the pasanda with the gravy. Just add the Pasanda right before serving and enjoy the crunchy Paneer Pasanda gravy with any Indian Breads!
 |
| Paneer Pasanda Recipe |
↧
February 25, 2015, 2:41 pm
Radishes are a naturally cooling food. Their pungent flavor and natural spice can help eliminate excess mucus in the body and can be especially helpful when fighting a cold. Radishes can help clear the sinuses and soothe soar throats too. It has more medicinal benefits. Red radishes are mainly used for salads. I have seen many North Indians eating raw Red Radishes. Such a wonderful and healthy vegetable. Usually for Sambar, we use white radish but this time I have used Red Radish. Red Radish adds a nice and unique flavour to the sambar. Lets see how to make this yummy Red Radish sambar...
 |
| Red Radish Sambar Recipe |
Preparation and Yield:| Preparation time | 10 mins |
| Cooking Time | 30 mins |
| Servings | 5 |
 |
| Red Radish Sambar Recipe |
Ingredients:
| Tamarind | 1 lemon size |
| Thur Dal | 1/2 Cup |
| Red Radish | 1/4 Kg |
| Salt | To taste |
| Sambar Powder | 2 tablespoon |
| Chopped Coriander Leaves | 1 tablespoon |
| Hing | a Pinch |
For Grinding:
| Grated Coconut | 2 tablespoon |
| Cumin Seeds | 1 teaspoon |
For Seasoning:
| Oil | 1 teaspoon |
| Mustard Seeds | 1 teaspoon |
| Curry Leaves | Few |
 |
| Red Radish Sambar Recipe |
Method:
- Soak the tamarind in water and extract the juice
- Pressure cook the thurdal and when the dal is cooked, mash it nicely and keep it aside
- Wash and Chop the radishes into small cubes or rings. Heat oil in a pan. When the oil is hot, add mustard seeds. When the mustard seeds starts to sputter, add curry leaves and fry for couple of minutes.
- Add water to pan to cook the radishes. When the radishes are half cooked, pour the tamarind extract to the pan. Add salt, hing and sambar powder and mix well. Keep the flame in medium and allow the tamarind water to boil till the tamarind and sambar powder's raw smell goes off
- Menawhile, take the grated coconut and cumin seeds in a mixer and add little water and grind it to a nice paste and set it aside
- When the radish is cooked completely and the raw smell of sambar powder goes off, then add the mashed dal and ground coconut paste. Keep the flame in low and bring the sambar to boil. Garnish with chopped coriander leaves and switch off the flame
- Serve the Red Radish Sambar with hot steaming rice and any poriyal varieties.
 |
| Red Radish Sambar Recipe |
↧
February 26, 2015, 1:06 pm
Bhapa Doi is a traditional and popular Bengali Dessert. Bhapa means "Steamed" and Doi means "Curd/yogurt". Bhapa Doi is a very delicious Steamed Sweet Yogurt. I am a great fan of Bengali Sweets. Most of the Bengali sweets are made of fresh homemade paneer or with curd. This is one such mouth-watering dessert which is made of condensed milk and yogurt with lots of nuts. A very simple and quickly made dessert. A perfect dessert to treat our family and friends especially on special occasions.
 |
| Bhapa Doi Recipe | Steamed Sweet Yogurt Recipe |
Preparation and Yield:| Preparation time | 10 mins |
| Cooking Time | 25 mins |
| Servings | 5 |
 |
| Bhapa Doi Recipe | Steamed Sweet Yogurt Recipe |
Ingredients:
| Sweetened Condensed Milk | 400gms / 14 oz |
| Milk | 1 Cup* |
| Thick yogurt | 1 Cup |
| Pistachios | 10 |
| Almonds | 10 |
| Cashews | 5 |
| Raisins | 1 tablespoon |
* 1 Cup = 250ml
 |
| Bhapa Doi Recipe | Steamed Sweet Yogurt Recipe |
Method:
- Take almonds, pistachios and cashews in a mixer and grind it to a coarse powder. This step is optional. We can add the nuts as it is also. But making a powder and mixing with yogurt mixture gives a nice taste
- Take a mixing bowl and pour the condensed milk. To the condensed milk, then add the thick beaten yogurt and mix well with a whisk. I have used thick yogurt. If your curd is not thick, just hang the curd in a muslin cloth for about 3-4 hours before making this recipe.
- Add milk to the mixing bowl and stir well with a whisk. Add powdered nuts and mix well
- Now our Bhapa Doi mixture is ready. Generally ramekins is used to bake or steam the Bhapa Doi. But Ramekins are not essential. We can even use the cooker vessel to steam the yogurt.
- Pour the Bhapa Doi mixture to the ramekin moulds. Add blanced and slivered Pistachios in each ramekin.
- Cover each ramekin mould with aluminium foil. This is to make sure water doesn't gets into the ramekins while steaming. Add 2-3 cups of water in a pressure cooker or idli steamer. When the water starts to boil, place the ramekins inside the cooker vessel and close the cooker with a lid and steam cook for 25-30 minutes. After the steam is fully released, allow the bhapa doi is come to room temperature and then keep the ramekins in a refrigerator and keep it refrigerated till you serve.
- Generally Bhapa Doi is served chilled only
- The yummy and chill Bhapa Doi is ready to serve!!! Enjoy the rich dessert with your family and friends!
 |
| Bhapa Doi Recipe | Steamed Sweet Yogurt Recipe |
↧


 Chana Dal Subzi Recipe | Bottlegourd Gram Dal Curry Recipe | Surakkai Kadaliparuppu Curry")
 Chana Dal Subzi Recipe | Bottlegourd Gram Dal Curry Recipe | Surakkai Kadaliparuppu Curry")


 Chana Dal Subzi Recipe | Bottlegourd Gram Dal Curry Recipe | Surakkai Kadaliparuppu Curry")