Quantcast
Channel: Subbus Kitchen
Viewing all 1833 articles
Browse latest View live

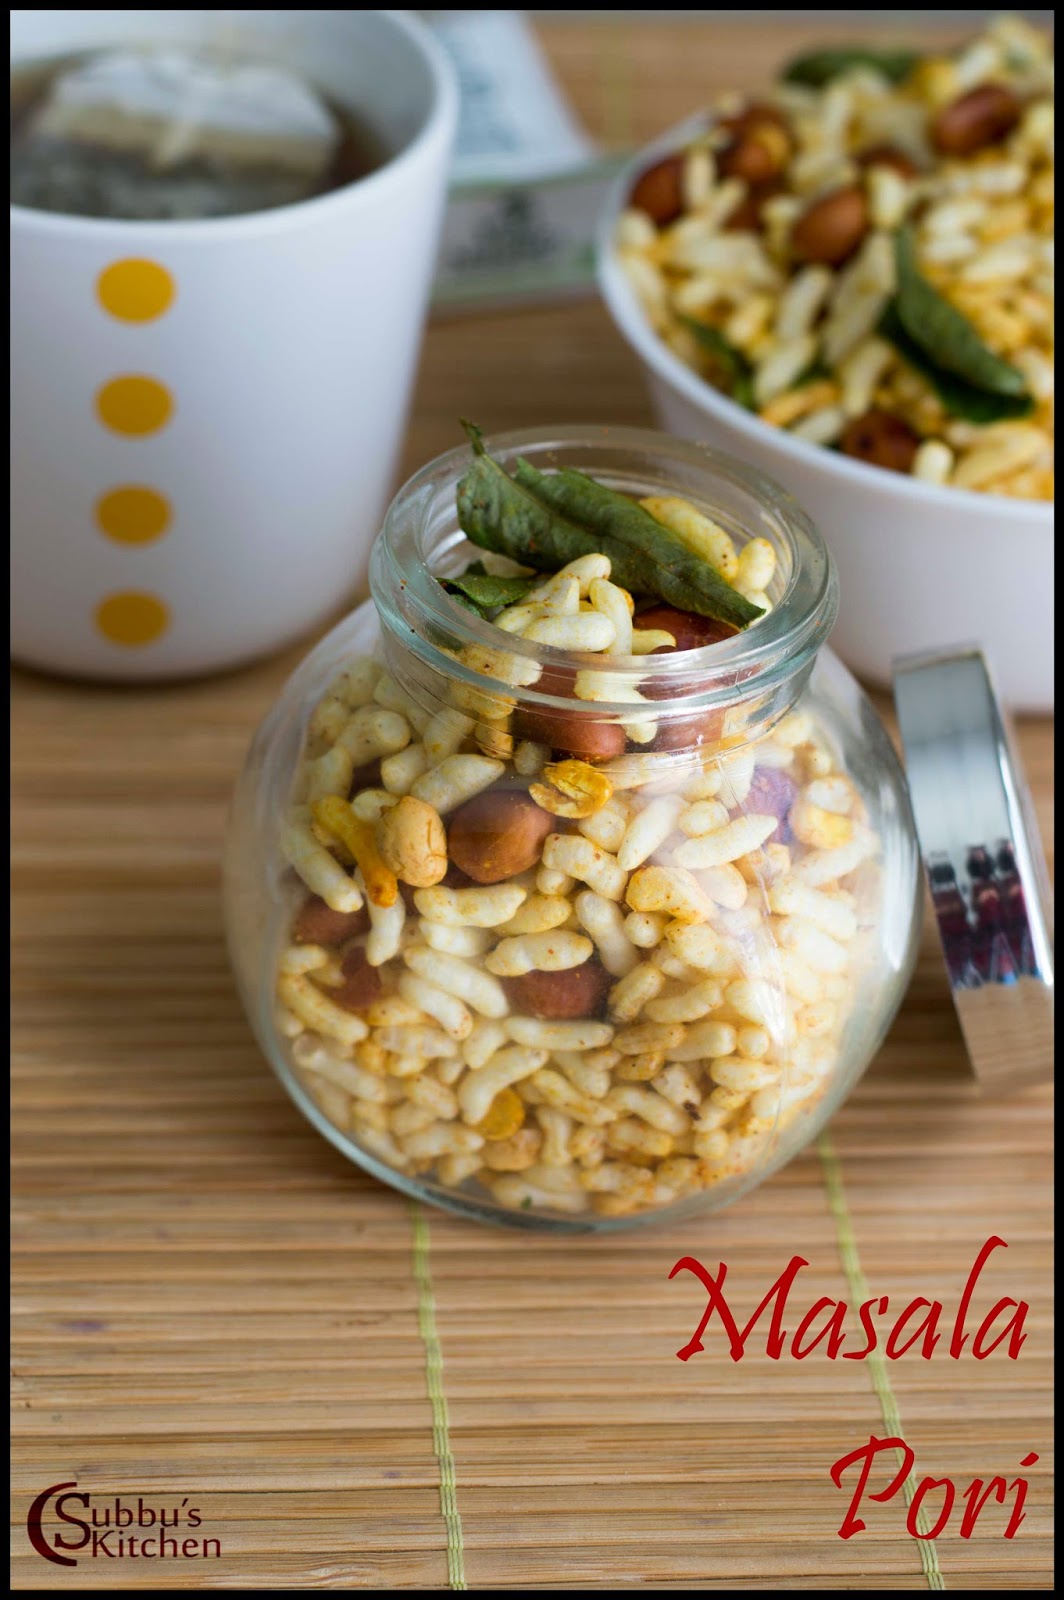
Masala Pori Recipe | Spicy Puffed Rice Recipe

$
0
0
Thinking of tea time snack which is quite simple and easy to make and also healthier? All of us have a carving of eating some snacks especially during weekends or holidays. We would we checking our groceries to find if we have any snacks or if we can make simple snacks with available groceries in home. This yummy Masala Pori is a right option for you... We can concoct this in minutes and also with less oil so it is a very healthy evening snack. Also this would be a great crunchy snack for kids returning from school. Most of us make bajji/bonda or other fried items for a evening. But instead of deep fried snacks, this masala pori would be better option. Lets see, how to make this Kara Kara Muru Muru masala pori...

Masala Pori Recipe | Spicy Puffed Rice Recipe


Nowadays kids are fuzzy eaters. They are not eating a full meal or whole breakfast / dinner. Rather, they eat less quantity of food and within an hour, they start to look for some crisps or snacks. That too, Summer Holidays, we find it very difficult to feed then as they are more idle. Sometimes, we stock many crisps at home still they make choices and annoy us. To tackle the kids, especially during their holidays, we can make this Crispy Masala Pori and store it and atleast once a day we don't need to break our head :-))
Masala Pori Recipe | Spicy Puffed Rice Recipe

Preparation and Yield:
Preparation time-
Cooking Time15 mins
Servings5

Masala Pori Recipe | Spicy Puffed Rice Recipe

Ingredients:
Puffed Rice4 Cups*
Groundnut3/4 Cup
Roasted Gram Dal (Pottukadalai)1/2 Cup
Garlic Cloves5
Curry Leaves1 sprig
SaltTo taste
Red Chilli Powder1 teaspoon
Turmeric Powder1/4 teaspoon
Chaat Masala1/4 teaspoon
Hing1/4 teaspoon
Oil1 tablespoon

* 1 Cup = 250ml
Masala Pori Recipe | Spicy Puffed Rice Recipe

Method:
  1. Heat oil in a pan and add the peanuts and fry them in low flame till they are nicely roasted. Then add roasted gram dal to the pan and then start frying them in low flame

  2. Along with roasted gram dal, add crushed garlic and saute them till the gram dal turns into light red color. Finally add curry leaves and fry for a minutes. Switch off the flame

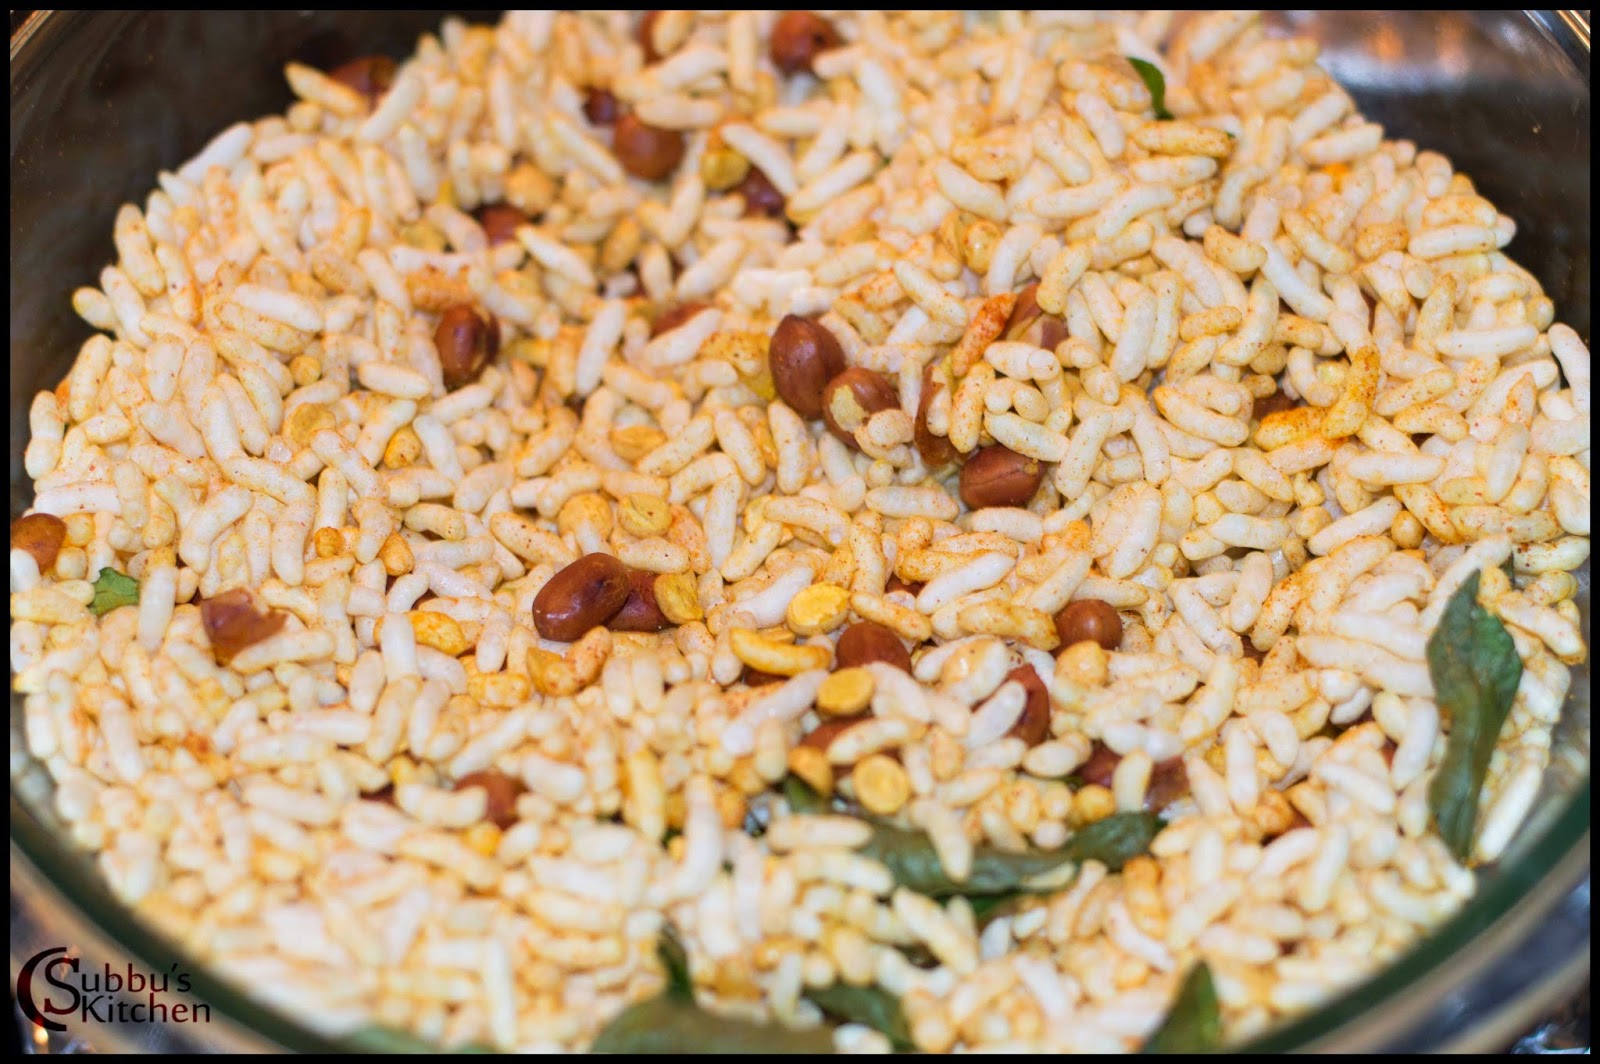
  3. Then, add turmeric powder, red chilli powder, chaat masala, hing and salt and give it a good mix. Finally add puffed rice and give a good mix until all the spice powders are nicely mixed with the puffed rice

  4. Finally store the crunchy masala pori in an air tight container.

  5. Yummy and crunchy Masala Pori is now ready to serve!!!
  6. Masala Pori Recipe | Spicy Puffed Rice Recipe
    Masala Pori Recipe | Spicy Puffed Rice Recipe


Ragi Ladoo Recipe | Finger Millet and Walnut Jaggery Balls Recipe

$
0
0
Ragi is my favourite millet. I try to make many different dishes using Ragi. Ragi Malt, Ragi Puttu, Ragi dosa are some of my favourite dishes. Recently, I made Ragi Banana Cake and my daughters love it so much as Ragi and jaggery go very well together. Ragi with jaggery in any form would be a wonderful dish and so I tried these ladoos. I have added nuts to make it richer and tastier. But, I want this dish to be healthier, so, I have used walnuts instead of cashew nuts. Walnuts are healthier than cashewnuts. Finally jaggery instead of sugar. So, overall the dish is healthier. My mom used to make Maladu or Ravaladdu when we have summer holidays. Ragi Ladoo is also an healthy snack for the kids. The preparation is same as maladu. Lets see how to make this healthy and tasty Ragi Ladoo...

Ragi Ladoo Recipe | Finger Millet and Walnut Jaggery Balls Recipe


Preparation and Yield:
Preparation time-
Cooking Time15 mins
Yield20-22

Ragi Ladoo Recipe | Finger Millet and Walnut Jaggery Balls Recipe


Ingredients:
Ragi Flour1 Cup*
Roasted Gram Dal1/2 Cup
Walnuts1/2 Cup
Grated Jaggery1.5 Cups
Cardamom Powder1/2 teaspoon
Ghee1/4 Cup


Ragi Ladoo Recipe | Finger Millet and Walnut Jaggery Balls Recipe

Method:

  1. First lets dry roast the ragi flour. Ragi flour has a raw smell that will make the dish less appetizing. So, its better to roast the ragi flour and get rid off the raw smell. Heat a pan and dry roast the ragi flour for 8-10 minute in medium flame. Do not increase the flame, the flour may get burnt. So always keep the flame in medium or low. In a mixer jar, take walnuts and roasted gram dal (Pottukadalai), 

  2. Grind the pottukadalai and walnuts to a nice powder. Add this powder in a separate mixing bowl. In the mixer jar, take ragi flour and grated jaggery and give couple of pulse so that the ragi flour and jaggery are nicely mixed and incorporated together

  3. Add this ragi-jaggery powder to the mixing bowl. Mix the nuts and ragi-jaggery mixture nicely. Heat the ghee and melt it and pour it in the ragi mixture. 

  4. Using a spoon, mix the ragi-mixture well. Then start making lemon sized ladoos out of the ragi-ghee mixture. 

  5. Tasty and Healthy Ragi Ladoos are now ready to serve!!! 
  6. Ragi Ladoo Recipe | Finger Millet and Walnut Jaggery Balls Recipe
    Ragi Ladoo Recipe | Finger Millet and Walnut Jaggery Balls Recipe

Wheat Flour Kesari Recipe | Godhumai Mavu Kesari Recipe

$
0
0
Kesari is one of the easiest sweet dish which we can prepare quickly. Rava Kesari is one of the conventional dish the SouthIndians , especially Tamilians make Kesari when they have any special events or guests. Any unplanned visitor, first thing goes to our mind is Semolina and next thing is gram flour. Bajji and Kesari are the two dishes that comes to our mind as they are much simpler, yet tastier. There are lot of variations or varieties we can bring in to kesari. We can make kesari using wheat flour. This is also one of the easiest kesari variety. Everyone would have a good stock of wheat flour at home. Generally we make kesari with sugar. But, this time, to make this dish more healthier, I have used jaggery along with wheat flour. Now, lets see how to make this healthy Wheat Flour Kesari (Godhumai Mavu Vella Kesari)

Wheat Flour Kesari Recipe | Godhumai Mavu Kesari Recipe

Preparation and Yield:
Preparation time-
Cooking Time20 mins
Servings3

Wheat Flour Kesari Recipe | Godhumai Mavu Kesari Recipe

Ingredients:
Wheat Flour1 Cup*
Jaggery1 Cup
Cashew nuts 5-6
Water1.5 Cups
Ghee1/4 Cup
Cardamom Powder1/2 teaspoon

* 1 Cup = 250ml
Wheat Flour Kesari Recipe | Godhumai Mavu Kesari Recipe

Method:

  1. Heat a pan with half of the ghee and add wheat flour to the pan and roast the flour till they are brown color. When the wheat flour turns golden brown, take that out from the pan and set it aside in a plate

  2. Add jaggery to the pan and add water and bring it to boil and allow the jaggery to dissolve completely in water. Strain the jaggery juice using a strainer and again add the strained jaggery juice to the pan and bring it to boil. When the jaggery syrup starts to boil, add roasted wheat flour and stir well. 

  3. Keep stirring till there are no lumps in the kesari mixture. When the roasted wheat flour gets nicely incorporated. Heat another pan and add little ghee and roast the cashews and take them out aside. 

  4. When the kesari mixture gets thicker and gets nicely incorporated and doesn't stick to the sides of the pan, add cardamom powder, rest of the ghee and cashew nuts and again stir them well. Mix them well and switch off the flame. Take out the kesari in a serving bowl

  5. The delicious and healthy Wheat Flour Kesari is now ready to serve!!!
  6. Wheat Flour Kesari Recipe | Godhumai Mavu Kesari Recipe
    Wheat Flour Kesari Recipe | Godhumai Mavu Kesari Recipe

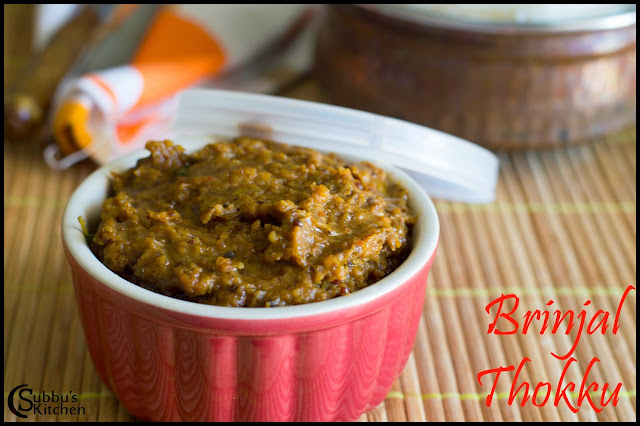
Kathirikkai Thokku Recipe | Brinjal Thokku Recipe

$
0
0
Thokku, a thick gravy made with tomatoes or any veggies along with spices. Any variety of thokku is a great travel friendly dish. I have already shared few thokku recipes like, Bittergourd Thokku, Tomato Thokku, Coriander Leaves thokku etc. Now, this recipe is about Brinjal Thokku (Kathirikaai Thokku). Many of us doesn't like Brinjal very much. But since this is a thokku and we are going to grind the brinjal, everyone will surely love this appetizing thokku. We can mix this thokku with hot steaming rice or we can use this thokku as an accompaniment for any Indian breads or even for Idli / Dosas. We can make this thokku and store it in air tight container with a top layer of oil and it would have a shelf life of a week.


Kathirikkai Thokku Recipe | Brinjal Thokku Recipe


Preparation and Yield:
Preparation time10 mins
Cooking Time20 mins
Servings5

Kathirikkai Thokku Recipe | Brinjal Thokku Recipe

Ingredients:
Tamarind1 small lemon sized
Brinjal1/2 Kg
Turmeric Powder1/2 teaspoon
SaltTo taste
Gingelly Oil1 teaspoon


For Grinding:
Oil1 teaspoon
Urid Dal2 teaspoon
Thur Dal2 teaspoon
Red Chillies6
Peppercorns5-6
Sesame Seeds1 teaspoon
Fenugreek Seeds1/4 teaspoon

For Seasoning:
Gingelly Oil1 teaspoon
Mustard Seeds1 teaspoon
Curry Leavesfew
Hinga Pinch
Method:

  1. Soak the tamarind in water and extract the juice and keep it aside. 

  2. Wash and Finely chop the brinjal and soak it in water to avoid de-coloring. Heat oil in a pan. Add the grinding ingredients and saute them till the dals turn golden brown color. 

  3. Add these fried ingredients to the mixer and allow it to cool off. Heat oil in a pan and add the chopped brinjal along with turmeric power and salt and saute the brinjal in oil 

  4. When the brinjals are nicely cooked and mushy, switch off the flame. When the brinjal is cooled completely, add the cooked brinjal to the mixer and grind it to a nice paste

  5. Heat oil in a pan, add mustard seeds. When the mustard seeds starts to sputter, add chopped curry leaves, hing and fry for couple of seconds. To this, now, add tamarind extract along with salt and allow it to boil for 5 minutes to get rid of raw smell.

  6. When the raw smell of tamarind goes off, then add the ground Brinjal spice paste to the pan and mix well. Keep the flame in medium and allow the thokku to cook in oil for 2 minutes or till the oil gets oozes out from the thokku. 

  7. The delicious Kathirikkai Thokku is now ready to serve!!!
  8. Kathirikkai Thokku Recipe | Brinjal Thokku Recipe
    Kathirikkai Thokku Recipe | Brinjal Thokku Recipe

Coconut Poli Recipe | Thengai Purana Poli Recipe | Wheat Flour Poli Recipe

$
0
0
Thengai Purana Poli is one of my favorite sweet. Whenever, I go to Grand Sweets, I would love to get coconut Poli. I generally make dal poli using sugar or jaggery. This is the first time, I made this coconut poli in my kitchen. Generally, we make poli using Maida (All purpose flour). But, I made this yummy Coconut poli using wheat flour. I have used the same procedure as we do for parathas. Generally for parathas, we make dough out of wheat flour and then we make stuffing and stuff the wheat flour dough balls with stuffing and roll them and cook them to make parathas. The same procedure goes here too. Wheat flour poli tastes yummy like maida flour poli and it is healthy too. So lets see how to make this yummy and healthy Coconut Poli (Thengai Poli) using wheat flour...


Coconut Poli Recipe | Thengai Purana Poli Recipe | Wheat Flour Poli Recipe


Preparation and Yield:
Preparation time1 hour
Cooking Time45 mins
Yield12

Coconut Poli Recipe | Thengai Purana Poli Recipe | Wheat Flour Poli Recipe

Ingredients:
Wheat Flour2 Cups*
Grated Coconut1 Cup
Grated Jaggery1 Cup
Salta pinch
Turmeric Powder1/2 teaspoon
Gingelly Oil2 tablespoon
Ghee 1/4 Cup

* 1 Cup = 250ml
Method:
  1. Take a mixing bowl and add wheat flour along with turmeric powder and salt. Add water little by little and knead it to soft and smooth dough. Also add gingelly oil and knead the dough atleast for 5 minutes. By now, you can feel how soft the dough is. Cover the dough with a damp cloth and leave it aside for an hour. Be generous in oil and also the more the dough is set aside, softer will be the poli

  2. Now lets prepare our filling. Heat a pan and add grated coconut and jaggery and mix well. Keep the flame low, and stir continuously. The jaggery gets dissolved in heat of the pan and it will get nicely incorporated with grated coconut. Then add cardamom powder and ghee and mix well.  I have used light color jaggery and hence  the color of the puranam is very light. If you have pagu vellam (Dark brown jaggery), then the puranam would be having a nice color. But my puranam is very tasty and yummy.

  3. When the puranam gets nicely thick and rolls like a ball without sticking to the sides of the pan, switch off the flame. If you keep the puranam for a very long time in flame, then the puranam would become like a candy. So once the mixture gets nicely incorporated and if you take a small quantity of puranam with your wet hands, you should be able to roll like a ball. This is the correct consistency to switch off the flame. Now our filling is ready. Take the dough and knead it for couple more minutes. Make lemon sized balls out of the dough. Take one ball and place it on a plastic cover or a banana leaf greased with oil. Using your fingers, spread the dough ball to make a small circle. 

  4. Place a lemon sized ball of puranam in the center of the rolled dough. Close the dough so that the stuffing is nicely stuffed inside the dough. Again, grease your fingers with little oil and spread the stuffed dough ball gently to a thin poli. Repeat this step for the rest of dough and stuffing.

  5. Heat a tawa, and add one rolled poli to the tawa. Apply little ghee and allow the poli to cook on the bottom side in low flame for 30 seconds. Gently flip the poli and cook it on the other side for another 40 seconds. Repeat the same for rest of the rolled polis

  6. Scrumptious Thengai Poli (Coconut Poli) using wheat flour is now ready to serve!!!
  7. Coconut Poli Recipe | Thengai Purana Poli Recipe | Wheat Flour Poli Recipe
    Coconut Poli Recipe | Thengai Purana Poli Recipe | Wheat Flour Poli Recipe

Sweet Potato Spicy Curry Recipe | Sakaravelli Kizhangu Podi Pota Poriyal Recipe

$
0
0
Sweet Potato is one of the nutritional rich root vegetable. They do have more sugar like white potatoes, but they are less in calories and are fat free. Sweet potatoes are one of the best sources of vitamin A. My mom used to steam cook the sweet potatoes and peel the skin and mix some jaggery and used to give to me when I return from school. I love sweet potato with jaggery. It is one of the simplest and healthy sweet. Even for toddlers, it is highly recommended to give mashed sweet potato because of its nutritional values.  I have already posted few recipes of sweet potato dishes which you could try and relish. This is another curry variety. Already, I have posted Sweet Potato Masala Curry and Sweet Potato Stir Fry. This is also one of the poriyal variety but for spice, we are going to freshly grind spice and add that podi to this healthy veggie.  Try this yummy Sweet Potato Spicy Curry and share your comments!!!

Sweet Potato Spicy Curry Recipe | Sakaravelli Kizhangu Podi Pota Poriyal Recipe


Preparation and Yield:
Preparation time10 mins
Cooking Time35 mins
Servings4

Sweet Potato Spicy Curry Recipe | Sakaravelli Kizhangu Podi Pota Poriyal Recipe

Ingredients:
Sweet Potato250gms
Turmeric Powder1/2 teaspoon
SaltTo taste


For Grinding:
Channa Dal1 tablespoon
Coriander Seeds1 tablespoon
Red Chilli 2
Oil 1 teaspoon

For Seasoning:
Oil1 teaspoon
Mustard Seeds1 teaspoon
Split Urid Dal1 teaspoon


Sweet Potato Spicy Curry Recipe | Sakaravelli Kizhangu Podi Pota Poriyal Recipe

Method:

  1. Heat oil in a pan, add grinding ingredients and saute them in oil till the dals turn golden brown color. Remove these fried ingredients and add it to the mixer and grind them to nice and smooth powder. Our spice powder is now ready.

  2. Wash and peel the sweet potatoes and chop them into small cubes. Take the chopped sweet potatoes in a sauce pan and add water to soak the potato and add turmeric powder and salt and keep it in flame and allow it to boil. Allow the sweet potatoes are cooked and becomes tender and soft

  3. Drain excess water from cooked sweet potatoes using a strainer. Heat oil in a pan and add mustard seeds. When the mustard seeds starts to sputter, add split urid dal and fry till the dals turn golden color. 

  4. Add the cooked sweet potatoes to the pan and mix well. Then add the ground spice powder and give it a good mix. 

  5. Stir-fry the potatoes in medium flame for a couple of minutes and then switch off the flame.

  6. Sweet Potato Spice Curry is now ready to serve!!! Serve with any rice or roti and enjoy the dish!!!
  7. Sweet Potato Spicy Curry Recipe | Sakaravelli Kizhangu Podi Pota Poriyal Recipe
    Sweet Potato Spicy Curry Recipe | Sakaravelli Kizhangu Podi Pota Poriyal Recipe

Paneer Pepper Masala Recipe | Cottage Cheese in Pepper Gravy Recipe

$
0
0
Paneer Pepper Masala, yet another yummy Paneer Gravy and a wonderful accompaniment for any Indian Breads! Crushed Peppercorns sauted in ghee adds a nice and rich flavour to the whole dish. Cottage cheese in pepper gravy is one of the famous dish in many of the Indian Restaurants. I have seen many foreigners ordering either paneer in pepper gravy. A nice and simple dish that goes well with any Indian breads. This time, I served this yummy gravy with Methi Pulao and my family enjoyed the combo. Even with vegetable pulao or plain jeera rice, this Panner Pepper Masala (Cottage Cheese in Pepper Gravy) would be a best accompaniment. 


Paneer Pepper Masala Recipe | Cottage Cheese in Pepper Gravy Recipe


Preparation and Yield:
Preparation time10 mins
Cooking Time45 mins
Servings4

Paneer Pepper Masala Recipe | Cottage Cheese in Pepper Gravy Recipe

Ingredients:
Paneer (Cottage Cheese)250gms
Onion2
Tomato3
Ginger1 inch Piece
Green Chilli1
Garlic Cloves
Yogurt / Curd1/4 Cup
Bay Leaf1
Cinnamon Stick1
Cloves5
Cardamom4
Red Chilli Powder1/2 teaspoon
Crushed Pepper Corns1/2 tablespoon
Coriander Powder1 teaspoon
Turmeric Powder1/4 teaspoon
Kasoori Metho- 1 tablespoon
Oil1 tablespoon
Cashews5-6
Ghee2 tablespoon


Paneer Pepper Masala Recipe | Cottage Cheese in Pepper Gravy Recipe


Method:
  1. Finely slice the onions and chop the tomatoes and set it aside in a plate
  2. Take the green chilli, garlic and ginger in a mixer jar and grind it to a nice paste by adding little water.

  3. I have ground the  whole peppercorns to a coarse powder. It is very important to have freshly crushed pepper corns instead of the store bought pepper powder to make this dish really delicious and spicy. Heat a pan and add oil. Add the whole masalas like Bay leaf, cinnamon, cloves and cardamom and saute them all in oil for couple of minutes

  4. Then add finely sliced onions and saute them along with a pinch of salt till the onions turn translucent. Then add the ground green chilli-garlic-ginger paste and saute it for another minute. Then add the finely chopped tomatoes and mix well 

  5. Allow the tomatoes to cook nicely till they get nicely mushy. Then add red chilli powder, coriander powder, salt and turmeric powder and mix well. Allow the onion-tomato gravy to cook for another minute and then switch off the flame. 

  6. Allow the tomato-onion gravy to cool off completely and then add it to the mixer along with cashew nuts and grind it to a nice and smooth paste by adding a cup of water. Heat ghee in a pan, and add crushed pepper corns and fry in medium flame for 2-3 minutes. Frying pepper in ghee is the main step which add a nice and rich pepper flavour to the dish. 

  7. Next, add ground tomato-onion paste and and allow it to boil for 5 minutes in low flame. Then, add crushed kasoori methi and  stir well. Then add yogurt and mix well. We can also add fresh cream which will add a nice flavour and texture. Then, add the cubed paneer and mix well. Adjust salt if needed. Allow the paneer pepper masala is boil for 5-6 minutes in low flame and then switch off the flame. For extra flavour, we can finally garnish the masala by sprinkling crushed peppercorns. 

  8. Serve the delicious Paneer Pepper Masala is now ready to serve with any Indian breads!!!
  9. Paneer Pepper Masala Recipe | Cottage Cheese in Pepper Gravy Recipe
    Paneer Pepper Masala Recipe | Cottage Cheese in Pepper Gravy Recipe

Methi Pulao Recipe | Vendaya Keerai Pulao Recipe

$
0
0
Fenugreek seeds and leaves are strongly aromatic and flavorful. Seeds are bitter in taste but lose their bitterness if roasted slightly. Fenugreek leaves are a rich source of vitamin K as well. The herb is also useful for mouth ulcers and boils. Its leaves are also applied directly for relieving sores and boils. Methi leaves are also used for fever. It may also help in removing the bad taste in mouth that people often report after consuming medications or after recovering from fever.Knowing the medicinal benefits of methi and methi seeds, it is time to include this healthy food in our diet. Most of us are already using methi. There are many delicious dishes with methi leaves. Methi Pulao is one such dish. My daughter loves this methi leaves compared to other spinach varieties. She really enjoyed this pulao as it is mild in spices and has a nice flavour of methi leaves incorporated into the pulao. Lets see how to make this simple and delicious Methi Pulao...


Methi Pulao Recipe | Vendaya Keerai Pulao Recipe


Preparation and Yield:
Preparation time15 mins
Cooking Time40 mins
Servings4

Methi Pulao Recipe | Vendaya Keerai Pulao Recipe

Ingredients:
Basmati Rice / Raw Rice1 Cup*
Methi Leaves1 Cup
Green Chilli2
SaltTo taste
Water2 1/4 Cup
Onion1
Crushed Peppercorns / Pepper Powder1/4 teaspoon
Butter / Oil2 tablespoon
Cumin Seeds1 teaspoon
Fennel Seeds1/2 teaspoon

* 1 Cup = 250ml
Methi Pulao Recipe | Vendaya Keerai Pulao Recipe


Method:

  1. Finely slice the onions and set it aside. Rinse the rice twice and soak the rice in water for 15 minutes.
  2. Heat buttter or oil in a pan. Add cumin seeds and fennel seeds and allow it to crackle. Add thinly sliced onions along with a pinch of salt and saute the onions till they are light brown in color
  3. Wash the methi leaves twice or thrice and then add it to the pan. Saute the methi leaves with a pinch of turmeric powder and salt for 3-4 minutes. 

  4. Then, drain the water from the rice and add the rice to the pan. Saute the rice for couple of minutes

  5. Add water to the pan. Add salt to the water and mix well. Bring the water to boil. Allow the methi pulao to cook in high flame till all the water is absorbed. 

  6. When the water is fully is absorbed, add pepper powder and give a gentle mix and then keep the flame very low and allow the rice to cook for about 15-20 minutes. Do not mix the rice very frequently while cooking as it may make the rice mushy.  When the rice is fully cooked, switch off the flame

  7. Serve the delicious Methi Pulao with your favourite raitha or dal and enjoy the dish!!!
  8. Methi Pulao Recipe | Vendaya Keerai Pulao Recipe
    Methi Pulao Recipe | Vendaya Keerai Pulao Recipe

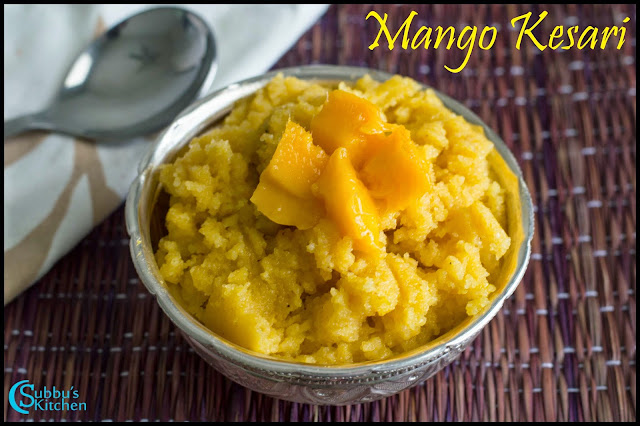
Mango Kesari Recipe | Mambazha Kesari Recipe

$
0
0
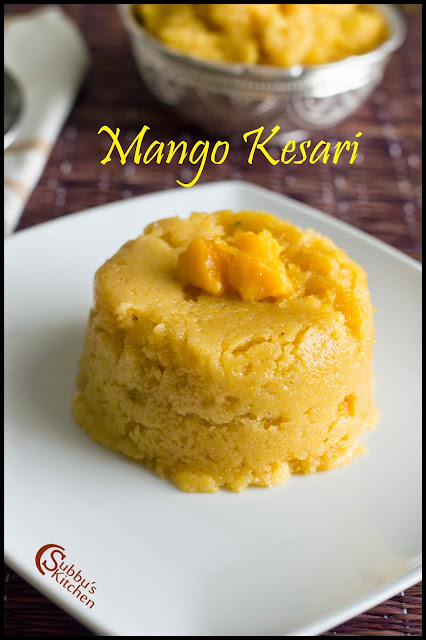
Another yummy kesari variety is Mango Kesari. Got fresh mangoes from market yesterday. Immediately, mango kesari comes to my mind. Personally, I like Pineapple and mango kesari very much. The fruit tinge and flavour enriches the whole kesari. Instead of plain rawa kesari, try Mango or Pineapple kesari and you will surely love the fruit taste. The procedure for making mango kesari is same as conventional rawa kesari. Just we need to reduce the sugar and add mango pulp. So, this dish doesn't require any special expertise. Enjoy this yummy and special mango dish this summer. A best treat for your kids in their summer vacation.


Mango Kesari Recipe | Mambazha Kesari Recipe


Preparation and Yield:
Preparation time10 mins
Cooking Time25 mins
Servings5

Mango Kesari Recipe | Mambazha Kesari Recipe


Ingredients:
Semolina / Rawa1 Cup*
Mango Pulp1 Cup
Water3 Cups
Sugar1 Cup
Cardamom Powder1/2 teaspoon
Ghee1/4 Cup
Cashew nuts8-10

* 1 Cup = 250ml
Mango Kesari Recipe | Mambazha Kesari Recipe

Method:
  1. Heat 1 teaspoon of ghee in a pan and add broken cashews and fry them till they are light golden color. Remove the roasted cashews and take it in a plate. Again add 2 teaspoon of ghee in a pan and add semolina and roast the semolina in ghee till you get a nice aroma and turns light brown in color. Take the roasted semolina in a plate separately

  2. To the pan, add water and bring it to boil. When the water starts to boil, add roasted semolina little by little and keep stirring

  3. Allow the semolina to cook completely till it is soft. Then, add sugar and mango pulp and stir well. 

  4. Sugar dilutes the mixture. But stirring continuously, makes the kesari to become thicker quickly. Add cardamom powder and mix well

  5. When the whole mixture gets thicken, add remaining ghee and mix well. Finally, add roasted cashews and mix well. Switch off the flame

  6. Tasty and yummy, Mango kesari is now ready to serve
  7. Mango Kesari Recipe | Mambazha Kesari Recipe
    Mango Kesari Recipe | Mambazha Kesari Recipe

Lacha Paratha Recipe | Layered Indian Bread Recipe

$
0
0
Lacha Paratha, Multi Layered Indian Bread made of whole wheat flour. We all are aware of Kerala Parotta which is a multi layered dish made of all purpose flour.  Lacha Paratha is much similar to Parotta, we are going to make a multi layered paratha but the main variation is the flour. Here we are going to use wheat flour / Atta instead of plain flour. So this is much healthier compared to parotta. Also, Parotta needs more expertise in kneading, rolling and making layers. But Lacha Paratha is much simpler, yet more tastier than parotta. We can serve raitha, dal or any gravy as an accompaniment for this yummy Lacha Paratha. This is one of the great potluck dish or Party dish. These parathas are soft and we can just warm them before serving. An absolute tasty and softy Indian bread with multi- layers. I am sure you would love to try this Lacha Paratha and share your experiences..

Lacha Paratha Recipe | Layered Indian Bread Recipe


Preparation and Yield:
Preparation time15 mins
Cooking Time45 mins
Yield8

Lacha Paratha Recipe | Layered Indian Bread Recipe


Ingredients:
Wheat Flour2 Cups* + 1/4 Cup for dusting
SaltTo Taste
Oil3 tablespoon 
Oil / Butter1/4 Cup for cooking Paratha
Sugar1/2 teaspoon

* 1 Cup = 250ml
Lacha Paratha Recipe | Layered Indian Bread Recipe

Method:

  1. Take a mixing bowl and add wheat flour, salt and add water little by little and make it to a smooth and soft dough. Then add 2 tablespoon of oil and knead well. Cover the dough with a damp cloth and set it aside for 15 minutes

  2. After 15 minutes, in a clean surface or chopping board, keep the dough. Grease our hands with oil and knead the dough again for couple of minutes. Make equal sized big lemon sized balls (twice the size of lemon) . I got 8 balls out of the dough.

  3. Take each dough ball and flatten with your fingers and dust it with flour. Using a rolling pin, roll the dough ball to a 10 inch diameter thin roti. Pour 1/2 a teaspoon of oil on the rolled roti and spread it with your fingers.

  4. Wash your hands and then sprinkle some flour and spread it evenly. Now, hold the roti and fold it alternatively till the end. 

  5. Again apply little oil on the top of the folded paratha. Slowly and gently, roll the paratha from one end till the other end and gently tuck in the other end on he bottom of the rolled paratha as shown in the picture.

  6. Flatten the rolled paratha and then dust it in flour

  7. Again using a rolling pin, roll the paratha to a 6 inch diameter paratha. Repeat the same for the rest of the dough balls. You can see the beautiful layered paratha after you roll it. Heat a tawa and add rolled layered paratha and cook on one side till you see bubbles. 

  8. Flip the paratha to other side and apply some oil / butter. Again flip it on the other side and apply oil. Flip it again and again till the paratha is cooked completely and are nicely brown in color. Repeat the same for the rest of the rolled lacha paratha. 

  9. The multi-layered Lacha  Paratha is now ready to serve! Relish with your favourite raitha or dal varieties and enjoy the dish!!!
  10. Lacha Paratha Recipe | Layered Indian Bread Recipe
    Lacha Paratha Recipe | Layered Indian Bread Recipe

Sambar Powder(Sambar Podi/Masala)

$
0
0
Sambar Podi (Sambar Powder), is an important ingredient in most of our Kitchen, especially South Indian Kitchen. Sambar Powder is very handy and is helpful to make quick sambar and even for poriyal varieties, it would give a nice flavour. Even to make simple tomato rice, adding this sambar powder gives a unique taste compared to other masalas. If we need to make sambar for more persons, then it would be a good option to grind the sambar powder freshly and make Araithuvita Sambar instead of sambar made using sambar powder. But for a family of 4, Homemade sambar powder is the best option. Making homemade sambar powder is very simple. If you are in India, then we have mill and hence we can dry all the ingredients under sun and grind them all in a mill. But, people staying abroad has no option of mills. So we can heat all the ingredients separately in a pan and then grind them all in a mixer to a fine powder. Now, lets see how to make homemade Sambar Powder...

Sambar Powder(Sambar Podi/Masala)


Preparation and Yield:
Preparation time2 mins
Cooking Time20 mins
Yield500gms

Sambar Powder(Sambar Podi/Masala)

Ingredients:
Red Chillies350gms
Coriander Seeds350gms
Channa dal (Bengal Gram Dal)1/2 Cup
Thur Dal1 Cup
Fenugreek Seeds2 teaspoon
Peppercorns3 tablespoon
Cumin Seeds1 tablespoon
Turmeric Powder*1 tablespoon

* 1 Cup = 250ml
* Generally Virali Manjal (Turmeric Sticks) are used. But, if, we are grinding it in home, then we can use turmeric powder. 
Sambar Powder(Sambar Podi/Masala)

Method:
  1. If have a nice summer, then dry all the ingredients under the sun. If, we need to make sambar powder during winter or if we are staying abroad, then we have an alternate option of dry roasting each ingredients in a pan. Take a pan and add red chillies. Heat the red chillies in medium flame till they are hot. Do not burn them. Take these hot red chillies in a plate and set it aside. In the same pan, add coriander seeds and saute them till they are hot. Remove these roasted coriander seeds and add it to the plate having red chillies

  2. Next, heat up the peppercorns and take it aside. Then, add channa dal and dry roast it till they are hot. 

  3. Next, dry roast the thurddal till hot and finally dry roast the cumin seeds . Allow all the  dry roasted ingredients to cool off. 

  4. Grind all the roasted ingredients to a nice powder in a mixer or you can also grind them all in a mill. If you are grinding it in home in a mixer, then do not overload the mixie. Grind it in little quantity and then mix them all.

  5. Allow the ground sambar powder to cool off completely and then store it in an air-tight container. Do not use wet spoon or wet hand to have a good shelf life. 
  6. Sambar Powder(Sambar Podi/Masala)
    Sambar Powder(Sambar Podi/Masala)

Avakkai Pickle Recipe | Cut Raw Mango Pickle Recipe | Hot Mango Pickle Recipe

$
0
0
Cut Mango Pickle / Avakkai Pickle is one of the popular Pickle Variety in South India. Mango Pickle are always so delicious and yummy, especially most of us like avakkai pickle. Most of us think that making avakkai pickle is complex, but, this is one of the easiest pickle. In India, during mango season, we can ask the mango sellers to chop the mangoes for avakkai pickle. The main trick is that the mangoes need to be cut with the seed. Generally, we fine chop the mangoes without the seed for mango pickle, but for this avakkai pickle, we need to chop the mangoes to bigger cubes along with the seed. Chopping part is the little complex part when you stay abroad where you can't find anyone to chop for you. But in India, the sellers will surely chop and give it to us which would make our procedure simple. For any pickle, mustard, hing and fenugreek seeds play an important role. In Avakkai Pickle, the mustard plays the main part. We need to add more mustard seeds powder compared to other pickle.

Other important ingredients for any pickle is Oil. We should be little generous in oil to have a long shelf life. The spice and oil plays an important role in shelf life of the pickle. My MIL always advice me that, we should be generous in adding sweetner like sugar or jaggery while making sweets / desserts and also we should not be scared to add generous amount spice and oil to pickle. A bowl of curd rice with one piece of avakkai pickle is a heavenly dish, especially during hot summers.  Lets see how to make this Avakkai Pickle...


Avakkai Pickle Recipe | Cut Raw Mango Pickle Recipe | Hot Mango Pickle Recipe


Preparation and Yield:
Preparation time10 mins
Cooking Time15 mins
Yield250gms

Avakkai Pickle Recipe | Cut Raw Mango Pickle Recipe | Hot Mango Pickle Recipe

Ingredients:
Raw Mango2 Big Size
Red Chilli Powder1/3 Cup * 
Salt1/3 Cup *
Turmeric Powder1 teaspoon
Hing1/2 teaspoon
Mustard Seeds Powder3 tablespoon
Fenugreek Powder1/2 teaspoon
Gingelly Oil1/3 Cup
Chick Peas1/4 Cup

* 1 Cup = 250ml
Avakkai Pickle Recipe | Cut Raw Mango Pickle Recipe | Hot Mango Pickle Recipe


Method:
  1. Wash and pat dry the mangoes. The mangoes should be absolutely dry for this pickle. If you get chopped mangoes for this pickle, then you can ignore this step. If you are planning to chop it on your own, then chop the mangoes into medium sized cubes along with the seed. Take the chopped mangoes in a mixing bowl. Then, add salt and give it a good mix

  2. Mix thoroughly so that the mangoes are nicely mixed with the salt. Cover the mixing bowl with a lid and set it aside for 1 day. Next day, you can see the mangoes have nicely released water. Toss the mangoes well. 

  3. Add red chilli powder, turmeric powder, hing, mustard powder and fenugreek powder. I have made a fine powder of mustard in the mixer. Also, I have dry roasted fenugreek seeds and then grind it to an nice powder in he mixer. We don't need to roast the mustard seeds. Just take the mustard seeds and grind it to a powder in the mixer. Mix everything well. Finally, add chick peas and gingelly oil and give the pickle a good mix with a clean dry spoon. Cover the bowl with a lid and set it aside for 5 days. Give the pickle a mix once a day for atleast 5 days. 

  4. After 5 days, you can enjoy the real taste of avakkai pickle with all the spices nicely incorporated and the mangoes will be soft and tender. Store the pickle in an air-tight container and use only dry spoon to have a long shelf life. The spice and oil plays a very important role in shelf life. 

  5. Serve the spicy and hot Avakkai Pickle with curd rice or roti and enjoy your dish!!!
  6. Avakkai Pickle Recipe | Cut Raw Mango Pickle Recipe | Hot Mango Pickle Recipe
    Avakkai Pickle Recipe | Cut Raw Mango Pickle Recipe | Hot Mango Pickle Recipe

Tomato Onion Chutney

$
0
0
Tomato Onion Chutney is one of the most popular chutney variety in South India and is served as an accompaniment for Dosa / Idli. Always, in restaurants, Idli / Dosa / Uthappam are served with Sambar, Tomato Onion Chutney, Mint-Coriander Chutney and Coconut Chutney. My daughter always call tomato onion chutney as Red Chutney and she always think this is very spicy especially when served in restaurants. In home, she love this tomato chutney as I cautiously add less spice and she enjoy the combination of dosa and tomato onion chutney. Tomato Onion Chutney is one of the simplest and perfect accompaniment for Idli / Dosa. I have made a small variation by adding a pinch of fenugreek powder. Fenugreek powder gives a very appetizing flavour to the chutney. Try this Tomato Onion Chutney and share your comments...

Tomato Onion Chutney

Preparation and Yield:
Preparation time10 mins
Cooking Time20 mins
Servings3

Tomato Onion Chutney

Ingredients:
Onion2
Tomato3
Red Chilli3
Urdal1 tablespoon
Fenugreek Powder1/4 teaspoon
Mustard Seeds1 teaspoon
Curry Leavesfew
Oil1 tablespoon
SaltTo taste


Tomato Onion Chutney


Method:
  1. Peel of the onion and chop it into big size. Chop the tomatoes. Pour the oil in the pan and fry the red chillies and urdhal. When the urdhal color changes to light brown, take these fried ingredients to the mixer and then add the chopped onions and tomatoes and saute them till the tomatoes are nicely mushy and onions turn translucent. As tomatoes are already tangy, I did not add tamarind. But, if your tomatoes are not tangy, then you can add a pinch of tamarind while grinding.

  2. Take these onion-tomato to the mixer and grind these in a mixer to a fine paste along with salt  and fenugreek powder and take the contents in a bowl

  3. In the pan pour the oil and add the mustard seeds once the oil is hot. When the mustard seeds sputter add it to the ground chutney.
  4. Vengaya/Onion chutney is ready to serve with idly or dosa.
  5. Tomato Onion Chutney
    Tomato Onion Chutney


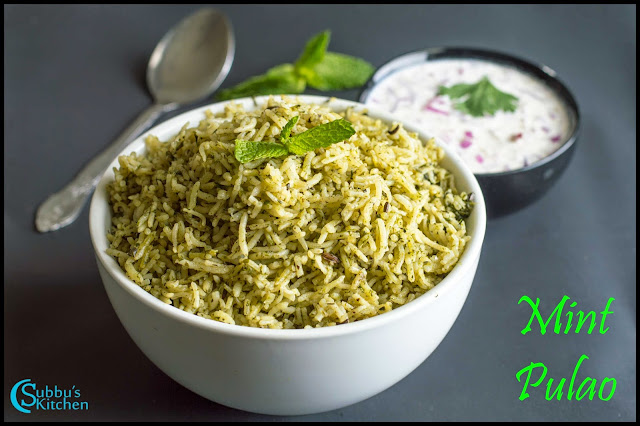
    Mint Coriander Leaves Pulao Recipe | No Onion No Garlic Mint Pulao Recipe

    $
    0
    0
    One of my friend made this yummy no onion no garlic Mint Coriander Leaves Pulao for a pooja. It was so yummy. Whenever, we do pulao, we usually add onion and garlic. But this mint coriander leaves pulao tasted so good without onion and garlic. With mild spices and rich aroma of mint and coriander leaves gives a good flavour to the pulao. When I make plain mint rice, my kids are not that much interested. But they enjoyed this Mint-coriander Pulao so much. Relish with your favourite Raitha and curry!!!

    Mint Coriander Leaves Pulao Recipe | No Onion No Garlic Mint Pulao Recipe
    Mint Coriander Leaves Pulao Recipe | No Onion No Garlic Mint Pulao Recipe 


    Preparation and Yield:
    Preparation time15 mins
    Cooking Time45 mins
    Servings4

    Mint Coriander Leaves Pulao Recipe | No Onion No Garlic Mint Pulao Recipe
    Mint Coriander Leaves Pulao Recipe | No Onion No Garlic Mint Pulao Recipe 

    Ingredients:
    Basmati Rice1 Cup*
    Mint Leaves1/2 Cup
    Coriander Leaves1/2 Cup
    Green Chillies2
    Chopped Ginger1 teaspoon
    SaltTo taste
    Water2 1/4 Cup


    For Seasoning:
    Oil1 tablespoon
    Cumin Seeds1 teaspoon
    Cinnamon Sticks2
    * 1 Cup = 250ml
    Mint Coriander Leaves Pulao Recipe | No Onion No Garlic Mint Pulao Recipe
    Mint Coriander Leaves Pulao Recipe | No Onion No Garlic Mint Pulao Recipe 
    Method:

    1. Wash and soak the basmati rice in water for 15 minutes. Heat a teaspoon of oil in a pan, and add chopped ginger and saute it for couple of minutes

    2. Then wash and add the mint and coriander leaves to the pan along with green chillies and saute them for 3-4 minutes. Take all these fried ginger, chilli and mint and coriander leaves to the mixer and grind it to paste and set this aside

    3. Heat the remaining oil in a pan and add cumin seeds. When the cumin seeds starts to sputter, add cinnamon stick and saute it couple of seconds. Then add the ground mint paste and saute it for couple of minutes. 

    4. Next drain the water from the basmati rice and add the rice to the pan. Saute the basmati rice along with mint paste and spice for a minute. 

    5. Add 2 cups of water to the pan along with the salt and mix well. Keep the flame high and bring the water to boil. 

    6. When the water is fully absorbed, keep the flame in low and close the pan with a lid and cook for another 20 minutes in very low flame till the rice is nicely cooked and becomes fluffy and then switch off the flame

    7. Serve the delicious Mint Coriander Leaves Pulao with your favourite raitha!!!
    8. Mint Coriander Leaves Pulao Recipe | No Onion No Garlic Mint Pulao Recipe
      Mint Coriander Leaves Pulao Recipe | No Onion No Garlic Mint Pulao Recipe 

    Kopparai Thengai Idli Milagai Podi Recipe | Dry Coconut Idli Milagai Podi Recipe

    $
    0
    0
    Idli Milagai Podi, is one of the popular accompaniment for Idli & Dosa in Southern India. Idli Milagai Podi is made with red chillies and dal. This is very simple. Just making a slight inclusion or variation, you could make Dry Coconut Idli Milagai Podi which would be much more tastier compared to plain Idli Milagai Podi. The main ingredient that is additional to the conventional idli Milagai powder is Kopparai Thengai (Dry Coconut). The wonderful aroma and taste of the dry coconut makes this podi so yummy. But make sure you use dry coconut. The fresh grated coconut would not be a right choice for this recipe as it has moisture, the shelf life will also be less. Kopparai Thengai Idli Milagai Podi (Dry Coconut Idli Milagai Podi) is a best accompaniment for Idli, dosa or even for Upma. This podi has a good shelf life like our conventional Idli Podi. Store this podi in an air-tight container and use only dry spoon to have a long shelf life.

    Kopparai Thengai Idli Milagai Podi Recipe | Dry Coconut Idli Milagai Podi Recipe
    Kopparai Thengai Idli Milagai Podi Recipe | Dry Coconut Idli Milagai Podi Recipe


    Preparation and Yield:
    Preparation time-
    Cooking Time15 mins
    Yield500gms

    Kopparai Thengai Idli Milagai Podi Recipe | Dry Coconut Idli Milagai Podi Recipe
    Kopparai Thengai Idli Milagai Podi Recipe | Dry Coconut Idli Milagai Podi Recipe

    Ingredients:
    Dry Coconut Pieces / Dessicated coconut1 Cup*
    Bengal Gram Dal1 Cup
    Urid Dal1 Cup
    Hing1/2 teaspoon
    Red Chilli2 Cups
    SaltTo taste

    * 1 Cup = 250ml
    Kopparai Thengai Idli Milagai Podi Recipe | Dry Coconut Idli Milagai Podi Recipe
    Kopparai Thengai Idli Milagai Podi Recipe | Dry Coconut Idli Milagai Podi Recipe

    Method:

    1. If you have kopparai thengai (Dry coconut), you can chop them into pieces and pulse it in the mixer and take it in a bowl. You can also use dessicated coconut. Heat a pan, add dry coconut to the pan and in medium flame, dry roast the coconut gratings till you get a nice aroma. You don't need to make it brown. Take the roasted coconut in a plate.

    2. Add bengal gram dal to the pan and dry roast them till they are slightly golden brown. Take this aside in the same plate where you have roasted coconut. Then, to the pan, add urid dal and roast the urid dal till the dal turns slightly golden color. At this stage, add hing and give a quice saute and then remove the dal from the pan and take this also in the same plate. 

    3. Then to the pan, add red chillies and dry fry them for couple of minutes. Do not burn the chillies. Take the chillies to the plate and allow all the roasted ingredients to cool off.  Then add all of them in a mixer along with salt and grind it to a coarse powder. 

    4. Store the Dry Coconut Idli Milagai Podi in an air-tight container and while serving Idli, dosa or upma, add 1 tablespoon of this kopparai thengai podi and add gingelly oil and mix well and relish the Thengai Milagai Podi with Idli / dosa / upma.
    5. Kopparai Thengai Idli Milagai Podi Recipe | Dry Coconut Idli Milagai Podi Recipe
      Kopparai Thengai Idli Milagai Podi Recipe | Dry Coconut Idli Milagai Podi Recipe


    Mango Besan Burfi Recipe

    $
    0
    0
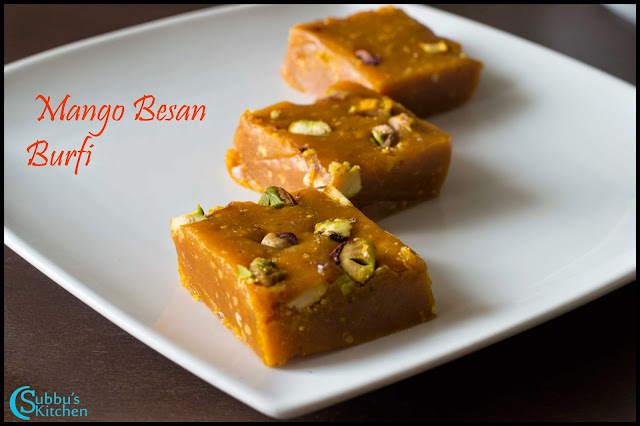
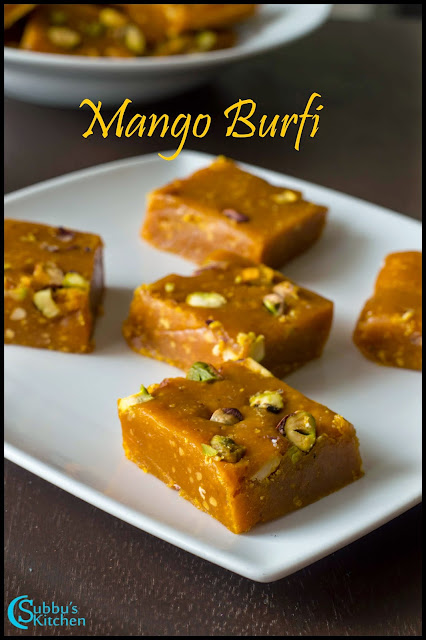
    The only thing we all love in summer is the seasonal eatables like Mango, water melon, ice creams, tender coconut etc. I got fresh ripe and yummy mangoes from market yesterday. Its so sweet and yummy and I immediately decided to make Mango Besan Burfi. This is a scrumptious burfi made of mango pulp, besan and sugar. Besan helps to make the mango-sugar mixture to thicken up so that they form a whole mass and we would be able to cut into cubes. We can also use milk powder or khova instead of besan. But believe me, adding besan makes our process easier. Lets see how to make this Mango Burfi...

    Mango Besan Burfi Recipe
    Mango Besan Burfi Recipe 


    Preparation and Yield:
    Preparation time10 mins
    Cooking Time00:45:00
    Yield18-20

    Mango Besan Burfi Recipe
    Mango Besan Burfi Recipe 

    Ingredients:
    Mango Pulp 2 Cups*
    Besan / Gram Flour1 Cup
    Sugar1 3/4 Cup
    Cardamom Powder1/2 teaspoon
    Ghee3 tablespoon
    Cashews6-7
    Pistachios10

    * 1 Cup =250ml
    Mango Besan Burfi Recipe
    Mango Besan Burfi Recipe 


    Method:
    1. I have taken 2 ripe mangoes and washed it and peeled it and chopped the mangoes and ground it to a nice and thick pulp. You can also use store bought mango pulp. I have greased a rectangular tray with little ghee and set that aside. Heat a pan and add 1 teaspoon of ghee and roast the besan till it becomes nicely brown in color and you will get a nice aroma. Take the roasted besan in a plate and set it aside. In the pan, now, add mango pulp along with sugar and start stirring the mango-sugar mixture

    2. The mango-sugar mixture will starts to thicken. For me, it took nearly 15 minute for the mango pulp to get thicken. When the mango-sugar mixture gets nicely thicken, add the roasted besan and mix well without any lumps

    3. Add the rest of ghee and stir continuously till the ghee is nicely incorporated into the burfi mixture. Add cardamom powder and mix well.

    4. In 10 minutes, you can notice the burfi mixture started to become a whole mass without sticking to the sides of the pan and roll like a ball. You can also see the mixture starts to become frothy. This is the correct stage to switch off the flame. Pour the burfi mixture to the greased tray and pat it with a ladle so that they are evenly spread. Add chopped cashews and pistachops and pat the mixture nicely. Set this tray aside in refrigerator for about 2 hours.This burfi takes more time to set. So be patient and then take the tray out of fridge after couple of hours 

    5. Make rectangular pieces or cubes and store the burfi in an air-tight container. 

    6. Yummy Mango Besan Burfi is ready to serve!!!
    7. Mango Besan Burfi Recipe
      Mango Besan Burfi Recipe 

    Rasam Powder(Rasam Podi)

    $
    0
    0
    Home made Rasam Powder is always fresh and aroma rich than the store bought rasam powder. We can make fresh powder each time we make rasam, but that would be tiresome especially when we are in hurry. So homemade rasam powder would be so helpful to make instant rasam. We can easily make rasam powder at home as the ingredients needed for making rasam powder are readily available in our kitchen. Lets see how to make rasam powder at home.
    Rasam Powder(Rasam Podi)
    Rasam Powder(Rasam Podi)


    Preparation and Yield:
    Preparation time5 mins
    Cooking Time15 mins
    Yield500 gms

    Rasam Powder(Rasam Podi)
    Rasam Powder(Rasam Podi)


    Ingredients:
    Red Chillies2 Cups
    Coriander Seeds1 Cup
    Thur Dal
    1/2 Cup
    Peppercorns1 teaspoon
    Cumin Seeds1 tablespoon


    Rasam Powder(Rasam Podi)
    Rasam Powder(Rasam Podi)


    Method:
    1. Heat a pan and add each ingredient separately and fry them till they are warm. If you are in a sunny country, then we can spread all the ingredients in a paper and dry it under sun for couple of hours and then grind it to a nice powder in a mill


    2. But, if you are making rasam powder at home, you can fry them in a pan till they are warm and then grind it to a nice powder in a mixer

    3. Store the rasam powder in an air-tight container and use only dry spoon to have a longer shelf life. Do not use wet spoon or wet hand. 

    4. Homemade Rasam Powder is now ready to serve
    5. Rasam Powder(Rasam Podi)
      Rasam Powder(Rasam Podi)

    Aloo Methi Recipe | Aloo Methi Method II

    $
    0
    0
    Aloo Methi is one of the yummy curry variety that goes well with Pulao, Fried rice or any Indian Breads. I have already published one version of the aloo methi recipe. This is one variation of doing aloo methi. Aloo Methi is a delicious dish made with potatoes, fenugreek leaves, and a combination of spices. We tend to add kasoori methi in most of the veg gravies which gives a nice flavour to the dish. Fresh Methi leaves added in sambar, dal or potatoes gives a wonderful taste and flavour to the whole dish. Relish any Indian Breads or Pulao with yummy Aloo Methi and enjoy with your family...

    Aloo Methi Recipe | Aloo Methi Method II
    Aloo Methi Recipe | Aloo Methi Method II 


    Preparation and Yield:
    Preparation time10 mins
    Cooking Time20 mins
    Servings2
    Recipe CategoryMain
    Recipe CuisineSouth Indian

    Aloo Methi Recipe | Aloo Methi Method II
    Aloo Methi Recipe | Aloo Methi Method II 


    Ingredients:
    Potatoes5-6
    Fresh Fenugreek Leaves1 Cup
    Green Chilli2
    SaltTo taste
    Turmeric Powder1/2 teaspoon
    Coriander Powder1 teaspoon
    Garam Masala1/4 teaspoon
    Oil1 tablespoon
    Cumin Seeds1 teaspoon


    Method:
    1. Pluck the leaves from fenugreek leaves and wash it twice or thrice, We don't need to chop the fenugreek leaves. we can use the whole leaves as such, Take these washed fenugreek leaves in a plate aside. Peel the skin of potatoes and chop them into medium sized cubes. Soak the cubed potatoes in water to prevent the dis-colourisation. 

    2. Heat oil in a pan and add cumin seeds. When the cumin seeds starts to sputter, Add chopped green chillies and saute it for couple of seconds. Then add cubed potatoes and toss them well.

    3. Then add turmeric powder and coriander powder and mix well. 

    4. Next, add washed fenugreek leaves to the pan and give it a good mix. Then sprinkle some water along with salt and cover the pan with a lid and allow the potatoes to cook till they are soft and tender. 

    5. Occasionally mix the curry once or twice so that the potatoes are not getting burnt or getting stuck to the bottom of the pan. But do use a wooden spatula or silicon spatula to make sure not to mash the potatoes. When the potatoes are nicely cooked, add garam masala and switch off the flame

    6. The delicious Aloo Methi is now ready to serve!!! 
    7. Aloo Methi Recipe | Aloo Methi Method II
      Aloo Methi Recipe | Aloo Methi Method II 

    NorthIndian Lunch Menu #6 - Aloo Methi, Roti, Mint Pulao, Onion Raitha

    $
    0
    0
    Last week end, I made this simple menu and it was a big hit in my family. So thought of sharing this yummy and simple lunch menu with you all. This is a North Indian Lunch Menu with Aloo Methi, Roti, Mint Pulao, Onion Raitha. Very simple and easy to make menu but very delicious. Aloo Methi is one of the easiest dry curry and everyone starting from kids to adults everyone love it because of its nice flavour of methi leaves. Then mint coriander leaves pulao. This is another easier rice variety you can make with fresh mint and coriander leaves. So, if you watch closely in this menu, you are going to use all fresh leaves like methi, mint and coriander leaves which in turn makes your whole menu much healthier. Always, making kids eat the greens is one of the complicated task for many of us. With this menu, atleast once in a week or 2 weeks, we can ensure that they are in-taking more greens in their diet. 

    Making Aloo Methi & Mint Coriander Pulao is very easy.  We need extra preparation time for greens. Plucking the leaves and washing them is going to consume more time, but after doing the initial preparation, rest of the work becomes very easy. This is just a simple menu. You can enrich it by replacing plain rotis to some Paratha variety and also you can make some rich gravies as an additional accompaniment for roti. Also you can include curd and plain rice or you can serve curd rice with pickle. 


    NorthIndian Lunch Menu #6 - Aloo Methi, Roti, Mint Pulao, Onion Raitha
    NorthIndian Lunch Menu #6 - Aloo Methi, Roti, Mint Pulao, Onion Raitha


    Preparation and Yield:
    Preparation time25 mins
    Cooking Time1 hour 20 mins
    Servings4
    Recipe CategoryMain
    Recipe CuisineNorth Indian

    Recipes:
    Aloo MethiMint Pulao

    NorthIndian Lunch Menu #6 - Aloo Methi, Roti, Mint Pulao, Onion Raitha
    NorthIndian Lunch Menu #6 - Aloo Methi, Roti, Mint Pulao, Onion Raitha

    Carrot Poriyal Recipe (Conventional Method)

    $
    0
    0
    Carrots are rich in Vitamin A. They are very good for our eye sight. But because of its sweetness, many kids doesn't like when we add carrots to dishes, they always try to escape. But if you wash and peel the carrots and give it to them, most of the kids love it. This is one of the simplest way to make carrot poriyal and this goes well with any kuzhambu / sambar or rice varieties. 

    Carrot Poriyal Recipe (Conventional Method)
    Carrot Poriyal


    Preparation and Yield:
    Preparation time10 mins
    Cooking Time20 mins
    Servings2
    Recipe CategoryMain
    Recipe CuisineSouth Indian

    Ingredients:
    Carrots1/2 Kg
    Turmeric Powder1/4 teaspoon
    SaltTo taste
    Grated Coconut2 teaspoon


    For Seasoning:
    Oil1 teaspoon
    Mustard Seeds1teaspoon
    Red Chilli2
    Split Urid Dal1 teaspoon

    Carrot Poriyal Recipe (Conventional Method)
    Carrot Poriyal

    Method:
    1. Wash the carrots and peel the skin and chop them finely 

    2. Set the chopped carrots aside. Heat oil in a pan, add mustard seeds. When the mustard seeds starts to sputter, add split urid dal and fry them till they are golden brown. Then add broken red chillies and saute for couple of seconds

    3. Add chopped carrots to the pan and give a good mix. Then add turmeric powder and salt and give a mix. Sprinkle 1/4 cup of water and cover the pan with a lid and allow the carrots to cook in medium flame. 

    4. Occasionally stir in the carrots till they are nicely cooked and become soft and tender. When the water is fully absorbed and the carrots are cooked completely, add grated coconut and mix well

    5. Healthy and yummy Carrot Poriyal is now ready to serve!!!
    6. Carrot Poriyal Recipe (Conventional Method)
      Carrot Poriyal

    Viewing all 1833 articles
    Browse latest View live