Quantcast
Channel: Subbus Kitchen
Viewing all 1833 articles
Browse latest View live

Basil Thogayal Recipe | Basil Thuvayal

$
0
0
Basil herb is the king of herbs. This is one of the ancient and popular herbal plants.Basil leaves has disease preventing and health promoting properties.Basil leaves are known to have anti-inflammatory and anti-bacterial properties too.  Basil is a highly fragrant plant whose leaves are used as a seasoning herb for many different types of foods like pasta, salad. My close friend, made basil chutney and she told that basil chutney is too delicious and she shared the recipe with me. I got fresh basil leaves from market and was about to make the chutney, but my husband asked me to make Basil Thogayal like we make thogayal with mint or coriander leaves. So I combined my friends recipe and conventional thogayal and come up with this recipe. I am dedicating this recipe to my friend!!! We can mix the basil thogayal with rice and enjoy the food. I have a tablespoon of basil thogayal left and I added it to pasta in the evening and it tasted divine. Try this Basil Thogayal and share your comments and suggestions.

Basil Thogayal Recipe


Preparation and Yield:
Preparation time5 mins
Cooking Time10 mins
Servings2
Recipe CategoryThogayal
Recipe CuisineSouth Indian

Basil Thogayal Recipe

Ingredients:
Basil Leaves3/4 Cups*
Mint Leaves1/4 Cup
Red Chilli2
Peppercorns10
Urid Dal1/2 tablespoon
Garlic Clove1
Almonds 3-4
Tamarinda Pinch
SaltTo taste
Oil1 teaspoon


Basil Thogayal Recipe

Method:
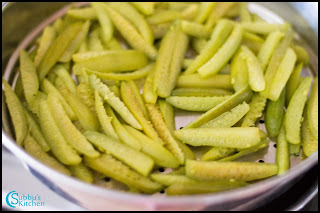
  1. Heat oil in a pan, add urid dal, red chillies and peppercorns and fry them till the urid dal turns golden brown color. Switch off the flame. Wash the basil leaves and mint leaves nicely and keep it aside

  2. Add the fried ingredients to the mixer along with almonds, garlic clove, tamarind and salt. Add the basil leaves to the mixer and grind everything together to a coarse paste. Do not add too much of water. The thogayal should be thick.

  3. Mix the thogayal with hot steaming rice along with a teaspoon of ghee or gingelly oil and slurp!!!
  4. Basil Thogayal Recipe
    Basil Thogayal Recipe


SouthIndian Lunch Menu #28 - Mambazha Mor Kuzhambu, Vazhaipoo Paruppu Usili, Jeera Rasam, Curd and Rice

$
0
0
This is one of my favourite Lunch Menu! Mor Kuzhambu with Paruppu Usili and jeera rasam along with curd, papad and rice. In summer season, we get yummy rice mangoes. So instead of plain mor kuzhambu, I made Mambazha Mor Kuzhambu. Always Paruppu Usili and ladysfinger fry is a perfect accompaniment for Mor kuzhambu. I got Banana Flower from market and decided to make Vazhaipoo Usili which would be a perfect accompaniment for Mango Mor Kuzhambu. 

Next comes the Rasam. Instead of plain tomato rasam, to make the menu perfect and richer, I made Jeera Rasam. Believe me, it adds more taste to the menu. Mor kuzhambu is little less in spice which will be compensated in Paruppu Usili and Jeera rasam. Finally comes curd and plain hot rice. This would be a perfect meal for a weekend. We can always make plain mor kuzhambu or we can also make bonda Morkuzhambu. Also, we can substitute vazhaipoo paruppu usili with beans or cluster beans.  Try this menu this weekend and share your experience.


SouthIndian Lunch Menu #28 - Mambazha Mor Kuzhambu, Vazhaipoo Paruppu Usili, Jeera Rasam, Curd and Rice


Preparation and Yield:
Preparation time25 mins
Cooking Time1 Hour
Servings4
Recipe CategoryMain
Recipe CuisineSouth Indian

Ingredients:
Coriander Leaves1 Cups**
Mint Leaves1 Cup
Green Chilli2
SaltTo taste
Sugar1/2 teaspoon
Chaat Masala Powder(Optional)1/4 teaspoon
Lemon Juice1/4 teaspoon


Recipes:

Mango Mor KuzhambuVazhaipoo Usili

Jeera Rasam

SouthIndian Lunch Menu #28 - Mambazha Mor Kuzhambu, Vazhaipoo Paruppu Usili, Jeera Rasam, Curd and Rice

Beans Poriyal

$
0
0
Beans is rich in Protein. Non-Vegeterians have lot of options to consume protein rich food. But Vegeterians have very limited variety and beans is one among them. This is one of the conventional method of making beans poriyal. We can also make Beans Thuvaran, Beans Paruupu Usili, Beans Poricha kootu. A simple beans poriyal is a very good accompaniment for any SouthIndian Kuzhambu varieties.
Beans Poriyal
Beans Poriyal

Preparation and Yield:
Preparation time10 mins
Cooking Time20 mins
Servings3-4
Recipe CategoryPoriyal
Recipe CuisineSouth Indian

Ingredients:
Beans1/2 Kg
Turmeric Powder1/4 teaspoon
SaltTo taste
Grated Coconut2 teaspoon
Urid Dal1/2 tablespoon


For Seasoning:
Mustard Seeds1 teaspoon
Split Urid Dal1 teaspoon
Red Chilli1
Oil1 teaspoon

Beans Poriyal
Beans Poriyal

Method:
  1. Wash and finely chop the Beans and keep it aside

  2. Heat the oil in the pan, add mustard seeds and when the mustard seeds starts to sputter add the urdhal and fry till it becomes golden brown. Add broken chilli and then add chopped beans

  3. Sprinkle some water and add turmeric powder along with salt and allow the beans to cook completely

  4. When the beans is fully cooked and becomes soft and tender, add grated coconut and mix it well and remove from flame

  5. The yummy beans poriyal is ready to serve
  6. Beans Poriyal
    Beans Poriyal

Kalakand Recipe | Instant Kalakand Recipe using Ricotta Cheese

$
0
0
Kalakand is a popular Indian dessert using condensed milk and cottage cheese (Paneer). There is one another way to make kalakand using store bought Ricotta Cheese. This method is quite simple and quicker version compared to conventional method. I have used microwave oven to make this dish.  This is one of the easiest and tasty dessert. A great party dessert too. We can also follow the conventional method of using milk and paneer. That would take more time and little complex also. This method of doing Kalakand is quite straight forward. 

Kalakand Recipe  | Instant Kalakand Recipe using Ricotta Cheese
Kalakand Recipe  | Instant Kalakand Recipe using Ricotta Cheese


Preparation and Yield:
Preparation time5 mins
Cooking Time15 mins
Setting Time2 hours
Yield15
Recipe CategoryDesserts
Recipe CuisineIndian

Kalakand Recipe  | Instant Kalakand Recipe using Ricotta Cheese
Kalakand Recipe  | Instant Kalakand Recipe using Ricotta Cheese

Ingredients:
Sweetened Condensed Milk1 tin / 14oz
Ricotta Cheese1 can / 15oz
Cardamom Powder1/2 teaspoon
Chopped Pistachios1 tablespoon
Chopped Almonds1 tablespoon


Kalakand Recipe  | Instant Kalakand Recipe using Ricotta Cheese
Kalakand Recipe  | Instant Kalakand Recipe using Ricotta Cheese

Method:
  1. Take a microwave safe mixing bowl, and add ricotta cheese to it. Next, pour the condensed milk to the mixing bowl

  2. Using a whisk or ladle, mix both the cheese and condensed milk nicely so that there are no lumps and the mixture is smooth. Keep the mixing bowl inside the microwave oven and cook it for 5 minutes. After 5 minutes, carefully remove the mixing bowl. You can see the mixture has slightly thicken up. Stir the kalakand mixture and keep it again in microwave oven and cook for 4 minutes

  3. After 4 minutes, the kalakand mixture would have become more thicker. Again stir once nicely and keep in microwave again and cook for another 3 minutes. One more time, give a good stir and cover the bowl with a lid which has a small opening or close the lid in a criss cross way and keep it again in microwave and cook for couple of more minutes. We have are using the lid so that the vapour has room to escape at the same time, the water would be absorbed quickly and the mixture would get dried up

  4. You can see the kalakand mixture would have nicely dried up. There will not be any moisture. If you still see little water again cook for 2 minutes. This depends on the power of the microwave. For me, it took 14 minutes to get a dried kalakand mixture. Then, I added cardamom powder and mixed well. Add this kalakand mixture in a square tray or a normal box.

  5. Using a spoon or back of spatula, nicely pat the mixture so that they are uniformly spread. Add chopped pistachios and almonds and again pat it with a spatula or spoon so that they are nicely combined with the kalakand. 

  6. Keep the tray inside the fridge and allow it to set nicely for couple of hours. After 2 hours, take out the tray and using a knife cut the kalakand mixture to square or diamond pieces. Gently take the corner piece and the rest of the pieces will slide out nicely. 

  7. Soft and tasty Kalakand is now ready to serve!!!
  8. Kalakand Recipe  | Instant Kalakand Recipe using Ricotta Cheese
    Kalakand Recipe  | Instant Kalakand Recipe using Ricotta Cheese

Kuzhambu Vadam Recipe

$
0
0
Kuzhambu vadam is a traditional papad variety which is used as an ingredient in kuzhambu. Sometimes, we would be short of veggies to be added in the the kuzhambu. At that times, we would add manathakalikai vathal, sundakkai vathal or kuzhambu vadam. Nowadays many of us are buying these kuzhambu vadam from shops and just using it. But we can make these kuzhambu vadam at home itself. Generally we make papad/appalam in Tamil month Masi (February) as it is just the beginning of summer. We tend to make lots of papads at that time and we use it for the next 1 year. The same way, we can make these kuzhambu vadam in lots and store it in air-tight container and fry them and use it whenever we need. These kuzhambu vadam tastes yummy when added to kuzhambu. Now, lets see how to make this kuzhambu vadam...

Kuzhambu Vadam Recipe


Preparation and Yield:
Preparation time2 hours
Making Time20 mins
Yield100gms
Recipe CategoryPapad
Recipe CuisineSouth Indian

Kuzhambu Vadam Recipe


Ingredients:
Urid dal1 Cup*
Red Chillies6-7
Hing1/4 teaspoon
SaltTo taste

* 1 Cup = 250ml
Kuzhambu Vadam Recipe

Method:
  1. Wash and soak the dal in water for couple of hours. After 2 hours, drain the water and add it to the mixer along with red chillies, salt and hing

  2. Grind everything to a nice and thick dough. Do not add water. The batter should be very thick, so that we could easily take in hands and make place it in plastic cover. Spread a Plastic sheet or white cloth in open place where you get nice sun light. Take gooseberry sized batter and keep it on plastic cover. Keep the batter in regular spaces and dry them in hot sun for 3-4 days.

  3. I have dried it for 4 days in hot sun and the vadam had become nicely dried up and becomes crispy. Fry these in hot oil till they are brown in color and crispy and crunchy. Store it in air-tight container and add it to kuzhambu whenever you need. I have made the conventional kuzhambu and added it to the kuzhambu and it tasted so yummy with kuzhambu.

  4. Try this yummy Kuzhambu Vadam and share your comments!!!
  5. Kuzhambu Vadam Recipe
    Kuzhambu Vadam Recipe

Palakottai Kuzhambu Recipe | JackFruit Seeds Kuzhambu

$
0
0
Jackfruit is one of the yummy fruit many of us like to slurp! Got fresh jackruits from market yesterday. After eating the yummy fruit, I saved the seeds. My mom used to make use of these jackfruit seeds and use it in sambar / kootu. I planned to make jackfruit seeds kuzhambu. A normal vathakuzhambu / pulikuzhambu would be much more tastier if you add jackfruit seeds. Initially the jackfruit seeds would be little wet. Just dry them up in sun or we can even dry roast them little to remove the skin off. Then we would be cooking the seeds and using them in kuzhambu. Lets see step by step how to make this wonderful yummy Palakottai Kuzhambu (Jackfruit Seeds Kuzhambu).

Palakottai Kuzhambu Recipe | JackFruit Seeds Kuzhambu


Preparation and Yield:
Preparation time15 mins
Cooking Time20 mins
Servings4
Recipe CategoryMain
Recipe CuisineSouth Indian

Palakottai Kuzhambu Recipe | JackFruit Seeds Kuzhambu

Ingredients:
Tamarind1 lemon size
Palakottai / Jackfruit Seeds8-10
Sambar Powder1 tablespoon
SaltTo taste
Hing1/4 teaspoon


For Seasoning:
Oil2 tablespoon
Mustard Seeds1 teaspoon
Fenugreek Seeds1/4 teaspoon
Curry Leavesfew

Method:
  1. Soak the tamarind in water and extract the juice

  2. Heat a pan and add jackfruit seeds and dry roast the seeds till they are warm. Remove the seeds from flame and chop each seeds into halves. 

  3. Remove the outerskin of the jackfruit seeds. Add the peeled jackfruit seeds in a bowl and pressure cook it and allow 2-3 whistles. Set these cooked jackfruit seeds aside. Heat a pan and add oil. When the oil is hot, add mustard seeds and when the mustard seeds starts to sputter, add fenugreek seeds and fry till the fenugreek seeds turns red color. Add curry leaves and fry for few seconds.

  4. Add sambar powder to the pan and fry in the oil for few seconds. Then add cooked palakottai to the pan and fry them for just seconds. 

  5. Add tamarind extract to the pan along with salt and hing and allow it to boil in medium flame till the raw smell of the tamarind juice goes off. Allow the kuzhambu to boil for 10 minutes in low flame. Add 1/4 cup of water and again bring the kuzhambu to boil and switch off the flame

  6. Yummy Palakottai kuzhambu is now ready to serve with hot steaming rice. Mix a spoon of gingelly oil or ghee with rice and mix palakottai kuzhambu, Hmmmm yummy yummy!!!
  7. Palakottai Kuzhambu Recipe | JackFruit Seeds Kuzhambu
    Palakottai Kuzhambu Recipe | JackFruit Seeds Kuzhambu

Carrot Beans Poriyal

$
0
0
This is one of the poriyal variety my FIL would always love to have. He loves the combination of beans and carrot. Its really a very yummy and healthy poriyal variety. Many kids doesn't like beans or carrot poriyal. This is one of the way to get them eat both of the healthy vegetables and I am sure they would surely love it. We can also add finely chopped cabbages or potatoes which would add more taste to the dish. This Carrot Beans Poriyal is a very simple and healthy accompaniment for any rice varieties, especially with all kuzhambu / rasam varieties.

Carrot Beans Poriyal

Preparation and Yield:
Preparation time15 mins
Cooking Time20 mins
Servings4
Recipe CategoryPoriyal
Recipe CuisineSouth Indian

Carrot Beans Poriyal


Ingredients:

Carrot1/4 kg
Beans100gms
SaltTo Taste
Red Chili1
Turmeric Powder1/4 teaspoon
Grated Coconut2 Teaspoon


For Seasoning:

Oil1 Teaspoon
Urdhal3/4 Teaspoon
Mustard1 teaspoon

Carrot Beans Poriyal


Method:
  1. Finely chop the vegetables and keep it aside. Heat oil in pan, and add mustard seeds. When the mustard seeds starts to sputter, add the urdhal and fry till it turns golden brown color. Now add broken chilli and fry for a while

  2. To this add the chopped vegetables and add some water to cook and also add turmeric powder and required salt.

  3. When the vegetables are cooked completely add the grated coconut and mix it well

  4. Now the delicious yummy carrot beans poriyal is ready to serve with sambar or any type of kuzhambuvarities
  5. Carrot Beans Poriyal
    Carrot Beans Poriyal


Onion Pakoda Recipe

$
0
0
Onion Pakoda is a yummy, crispy evening snack. A cup of tea/Coffee with spicy onion pakoda is a wonderful combination. Onion Pakoda is one of the popular evening snack in many fast food shops / pantries / restaurants. We can make many variations of pakoda like Oats Pakoda / Semiya pakoda / Cashewnuts pakoda / peanuts pakoda. Whatsoever new variations we make, the conventional onion pakoda is always a big hit in my family. Especially, during cloudy / rainy days, a cup of hot coffee / tea with a bowl of onion pakoda would make the evening more wonderful.

Onion Pakoda Recipe
Onion Pakoda Recipe


Servings4
Preparation Time5 mins
Cooking Time20 mins 
Recipe CategoryMain
Recipe CuisineSouth Indian

Onion Pakoda Recipe
Onion Pakoda Recipe

Ingredients:
Onion2 medium sized
Gram (Besan) Flour1/2 Cup
Rice Flour1/4 Cup
Coriander Leaves1 tablespoon chopped
Curry Leavesfew
Saltto taste
Red Chilli Powder1/2 teaspoon
OilFor Frying


Onion Pakoda Recipe
Onion Pakoda Recipe

Method:
  1. Finely chop the onions lengthwise and keep it aside. Take a bowl and add besan flour, rice flour and salt, red chilli powder and mix well . 

  2. Add  onions, coriander leaves, curry leaves and mix well with hand. Do not add water. Try to mix the flours and coat them in the onions with hand pressure. If you feel very dry, just sprinkle very little water and mix well

  3. Heat oil in a pan for frying the pokoda. Add 2 teaspoon of hot oil to the pakoda mixture and mix well. When the oil is hot enough, take one hand full of pakoda mixture and gently drop it in oil. Do not add them as a bunch, try to split them while adding it in oil.  Gently mix them with spatula and keep the flame in medium and fry them evenly on all sides. When the onions are fried nicely and the pakodas are crispy, remove them flame and place it in a paper towel to remove excess oil. Repeat the same steps for remaining pakoda mixture

  4. The yummy crispy onion Pakoda is ready to serve.
  5. Onion Pakoda Recipe
    Onion Pakoda Recipe


Kovakkai Vathal Recipe | Ivy Gourd Fryums Recipe | Dondakaya Vathal Recipe

$
0
0
Kovakkai vathal (Ivy Gourd Fryums) is a very new variety of vathal (Fryums) for me. I have never tasted before. My MIL has tasted this yummy & crunchy vathal in one of the marriages in Kerala. She liked it so much and she instructed me to do this vathal. As this is a good summer season here in US, I planned to make variety of vathal. I was checking with her for other vathal like ladysfinger, bittergourd and she gave the recipe along with this kovakkai vathal. Even, she has not tried it yet. But believe me, I followed here instructions and it turned out so tasty and crispy. My kids love it so much than the conventional ladysfinger and bittergourd vathal. I would strongly recommend all to try this to enjoy this wonderful vathal. The procedure is very straight forward and simple. 

Kovakkai Vathal Recipe | Ivy Gourd Fryums Recipe | Dondakaya Vathal Recipe

Preparation and Yield:
Preparation time15 mins
Cooking Time15 mins
Yield100 gms
Recipe CategoryPapad
Recipe CuisineSouth Indian

Kovakkai Vathal Recipe | Ivy Gourd Fryums Recipe | Dondakaya Vathal Recipe

Ingredients:
Kovakkai / Ivy Gourd1/2 Kg
Turmeric Powder1/4 teaspoon


Method:
  1. Wash the kovakkai nicely. Slice each kovakkai length-wise into 4-6 pieces. Take the kovakkai pieces in a sauce pan and add water to soak them along with turmeric powder and salt and keep it in flame

  2. Allow the kovakkai to cook for about 5 minutes. We generally don't cook ladysfinger or bittergourd for vathal as they tender in nature. But for kovakkai and cluster beans, we need to cook them a little before allowing them to dry. Also we need salt to get incorporated and cooking them for 5 minutes, allow the salt to get incorporated to the slightly cooked kovakkai. After 5 minutes, I switched off the flame and drained the water. I allowed the kovakkai to come to room temperature. I have taken a plastic cover and spread it nicely in the place where I get plenty of sun light. Then I spread the cooked kovakkai in a plastic cover. Allow the kovakkai vathal to dry completely under sun for 2-3 days. Everyday, during sunset, remove the kovakkati vathal and store it in air-tight container. Dry them under sun till they are crispy and you would be able to bream them. Always store them in air-tight container to retain in the crispiness. It took 3 days for my vathal to become crispy and dry. After that, I fried them in hot oil and stored the fried Kovakkai Vathal in an air-tight container. 

  3. Relish the crunchy and tasty Kovakkai vathal with any rice varieties or even as is and enjoy!!!
  4. Kovakkai Vathal Recipe | Ivy Gourd Fryums Recipe | Dondakaya Vathal Recipe
    Kovakkai Vathal Recipe | Ivy Gourd Fryums Recipe | Dondakaya Vathal Recipe

Kothamalli Kuzhambu (Coriander leaves Kuzhambu)

$
0
0
Coriander leaves are very good for health. These are stimulant and tonic. They strengthen the stomach and promote its action, relieve flatulence, increase secreation and discharge of urine and reduce fever. It is highly beneficial in deficienceis of vitamin A,B1,B2,C and iron. Here is the recipe made of kothamalli leaves kuzhambu (coriander leaves kuzhambu). This is very good for health and can stay for two, three days.

Kothamalli Kuzhambu (Coriander leaves Kuzhambu)


Preparation Time10 mins
Cooking Time20 mins 
Servings4
Recipe CategoryMain
Recipe CuisineSouth Indian

Kothamalli Kuzhambu (Coriander leaves Kuzhambu)

Ingredients:
Coriander Leaves1 Bunch
Red Chilli4
Coriander Seeds2 teaspoon
Fenugreek Seeds1/2 teaspoon
Cumin Seeds1/2 teaspoon
Peppercorns1/2 teaspoon
Hinga generous Pinch
Tamarind1 small lemon size
Onion1 medium size
Garlic Cloves2
Tomato1 medium size
SaltTo taste
Oil1 tablespoon


For Seasoning:
Oil1 teaspoon
Red Chilli1
Mustard Seeds1 teaspoon
Curry LeavesFew

Method
  1. Soak the tamarind and extract the juice

  2. Wash and chop the coriander leaves. Chop the onion, tomota and Garlic flakes. Heat the pan and pour two teaspoon of oil. Once the oil gets heated then add the cumin seeds, fenugreek seeds,black pepper, coorinder seeds, red chilli and fry them in the oil till its color changes to light brown. 

  3. Add the onion and garlic and fry them till its color changes to light brown. Add the tomato now and keep on frying them. 

  4. Add the coriander leaves to the mixture now and continue frying for 2 minutes in the medium flame. Switch off the flame and allow the mixture to cool. Grind the mixture in the mixer. Add water if required while grinding and grind it to a nice paste. Set this ground coriander spice paste aside.

  5. Add the one teaspoon oil in the pan and once the oil gets heat then add the mustered seed. Once the mustered seeds starts pops up, add the asafotodia, red chilli and the curry leaves. Then add tamarind extract along with salt and allow it to boil till the raw smell of the tamarind goes off. 

  6. Add ground coriander-spice paste to the tamarind extract and keep the flame medium and allow the kothamalli kuzhambu is boil for 5 -8 minutes. Switch off the flame once the kuzhambu becomes thick.

  7. The healthy Kothamalli Kuzhambu (Coriander leaves Kuzhambu) is ready to serve with hot steaming rice.
  8. Kothamalli Kuzhambu (Coriander leaves Kuzhambu)
    Kothamalli Kuzhambu (Coriander leaves Kuzhambu)


Sweet Poli

$
0
0
Sweet Poli is a wonderful SouthIndian dessert that is prepared for any marriages in southern part of TamilNadu especially in Nagercoil. Poli goes very well with Paal Payasam. My younger sister Uma is expert in preparing this recipe and i tried this with her recipe. It turns out to be very good.

Sweet Sugar Poli
Sweet Sugar Poli

Preparation and Yield:
Preparation time15 mins
Cooking Time1 hour
Yield15
Recipe CategorySweets
Recipe CuisineSouth Indian

Ingredients:
Channa Dal(Kadalaiparuppu)1 Cup
Sugar1 Cup
Maida/All purpose flour2 Cups
Kesar PowderA Pinch
Raw Rice flour1 1/2 table spoon
Cardamom Powder1 Teaspoon
Ghee1/4 cup
Gingelly Oil2 table spoon


Sweet Sugar Poli
Sweet Sugar Poli


    • Pressure cook Channadal/Kadalai paruppu in a cooker and allow for 3 whistles.
    • Take the cooked channadal and strain the water and dry it in a towel
    • Grind the dried cooked channa Dal in a mixer to a fine powder
    • Add sugar to the ground powder
    • Heat a heavy bottomed pan, and add the ground powder - sugar mix and one table spoon of ghee .
    • Mix the dal and sugar in ghee for 2 mins. To this add cardamom powder and stir it evenly and remove from flame
    • Now the Puranam is ready for makig Poli
    • Mix the kesar powder in maida/All purpose flour and add some water and knead it well like a chapati dough.
    • To this add gingelly oil and knead the dough and allow it to rest for 1 hour
    • Take small balls of kneaded dough and roll it to a small circle using a rolling pin.
    • To this add equal quantity of puran and close the edges
    • Again roll it using raw rice flour.
    • Heat the thawa and cook the rolled poli by adding teaspoon of ghee.
  • We can make 15 polis in 1 cup of channadal

  • Now the delicious mouth-watering sweet poli is ready to serve.
    Sweet Sugar Poli
    Sweet Sugar Poli


Aval Karuvadam Recipe | Flattened Rice Fryums

$
0
0
Aval Karuvadam (Flattened Rice Fryums), a very crispy and spicy fryums and it is a very perfect accompaniment for any variety rice. Even with a simple rasam, this karuvadam is a great treat for us. A very simple fryum you could make with less effort in spring season. For Koozh vadam, Ommapodi vadam, a little expertise is needed. But for this, aval karuvadam, its simple and straight forward. We just need to plan to make fryums on a nice sunny day. Last week, it was fully sunny here and I made different fryums and I am happy to share this recipe with you today. I fried these Aval Karuvadam today and it was so crispy and yummy and I couldn't resist myself to post this today and share with you all. Try this yummy and munchy fryums and share your comments!!!

Aval Karuvadam Recipe | Flattened Rice Fryums


Preparation and Yield:
Preparation time2 hours
Cooking & Making Time 40 mins
Yield500gms
Recipe CategoryFryums
Recipe CuisineSouth Indian

Aval Karuvadam Recipe | Flattened Rice Fryums

Ingredients:
Aval / Poha / Flattened Rice4 Cups*
Sago / Sabudana / Jevvarasi1/4 Cup
Green Chilli8-10**
SaltTo taste
Hing1 teaspoon
Poppy Seeds2 tablespoon
Lemon 1/2
Sour Curd / Yogurt1/2 Cup
Chopped Coriander Leaves1/4 Cup

* 1 Cup = 250ml
** If you are a spice lover, you can use 10-12.
Aval Karuvadam Recipe | Flattened Rice Fryums


Method:
  1. Wash and soak the sago in water for 2 hours. After 2 hours, drain the water and add the sago to the sauce pan and add fresh water and keep stirring the sago till the sago turns like a koozh (porridge) and becomes translucent and shiny. Once the sago is cooked, switch off the flame and allow it cool off completely

  2. Rinse the aval twice and set that aside. Soak the poppy seeds in warm water for 10 minutes. 

  3. Take the green chillies, salt and hing in a mixer and grind it to a nice paste

  4. In a mixing bowl, add aval, cooked sago, soaked poppy seeds, ground green chilli paste, curd and mix everything well nicely. Squeeze the juice out of the lemon and filter it and add it to the mixed fryums mixture. Also add finely chopped coriander leaves and mix everything well nicely. You should be able to make small balls out of the mixture. If you feel the mixture is too dry,  sprinkle water little by little and make the mixture to thick and you should be able to make small ball out of it

  5. Spread a clean and nice white cloth or a plastic towel under Sun. If you are using a plastic paper, take a teaspoon of oil and water in a small bowl and sprinkle it on the plastic sheet and spread it nicely and then use it. Take a small gooseberry sized fryum mixture and make a small ball and keep it on the plastic sheet. Do not make the ball so tightly, then the inner portion wouldn't get dried up nicely. Let it be light weight hollow ball. Repeat this step for rest of the fryums mixture. Allow the karuvadam to dry nicely for 2-3 days. Everyday after sunset, take the karuvadam in a air-tight container just to hold its dryness. Once the fryums are nicely dried up, take the dried fryums to an air-tight container and fry them as and when you need. 

  6. When you need to fry them, heat up oil in  a heavy bottomed pan and when the oil is hot (The fryums should sizzle and rise up in the oil), drop these fryums gently into the oil and fry them till they are nicely crispy and turns golden brown color. Do not heat up the oil so much, that would burn up the fryums. Keep it in constant temperature till you fry all fryums you need. Remove the fried fryums and place it on a tissue to drain excess oil and then add it to a air-tight container and use it while serving.

  7. Crispy and Munchy Flattened Rice Fryums (Aval Karuvadam) is now ready!! Relish with your favourite rice!! Its even yummy to munch it with hot tea!!!
  8. Aval Karuvadam Recipe | Flattened Rice Fryums
    Aval Karuvadam Recipe | Flattened Rice Fryums

Kothimbir Vadi Recipe | Crispy Coriander Vadi Recipe

$
0
0
Kothimbir Vadi is a one of the popular Maharashtrian Starter Snack. It is a crispy snack made from coriander leaves and besan (Gram flour). A very appetizing and party snack! Besan flour along with onion, coriander leaves and spices are cooked and then deep fried in oil to crunchy, munchy fritters. Conventional Kothimbir Vadi is made only of coriander leaves, but, I have added peas, carrots to make it much tastier and richer. Instead of deep frying, we can also add oil to the cooked besan-coriander mix and bake it in oven. Here, I have used the conventional way of cooking. I will post the baking method soon. Lets see how to make this traditional Maharashtrian Kothimbir Vadi...


Kothimbir Vadi Recipe | Crispy Coriander Vadi Recipe


Preparation and Yield:
Preparation time5 mins
Cooking Time40 mins
Setting Time30 mins
Yield15
Recipe CategoryStarter
Recipe CuisineNorth Indian

Kothimbir Vadi Recipe | Crispy Coriander Vadi Recipe

Ingredients:
Coriander Leaves1 Cup*
Gram Flour / Besan1 Cup
Rice Flour2 tablespoon
Sour Curd1/2 Cup
SaltTo taste
Green Chilli1
Ginger1 inch Piece
Carrot1
Green Peas1/4 Cup
Onion1 small size
OilFor Deep Frying

* 1 Cup = 250ml

For Seasoning:
Oil1 tablespoon
Mustard Seeds1 teaspoon
Omam / Ajwain 1/2 teaspoon

Method:
  1. Wash, peel and grate the carrots and set them aside. Boil the peas and mash it coarsely and set that aside

  2. Take the green chillies and ginger to the mixer along with curd and grind it to a nice paste. Take a mixing bowl and add besan, rice flour and mix well

  3. To that mixing bowl, add salt along with ground green chilli-ginger and curd paste and mix everything well with a whisk. Make sure there are no lumps. If you have a hand blender, you can use that to churn the mixture. 

  4. Heat a pan with a tablespoon of oil and add mustard seeds. When the mustard seeds starts to sputter, add omam and saute it for a second. Then add finely chopped onions and saute them for couple of minutes. We don't need to saute the onions till they become brown color. We are going to fry the vadi in oil so we don't need to saute the onions nicely. Now add the besan batter to the pan and mix well in low flame

  5. Keep cooking the besan mixture till they become thick. Then add boiled peas, grated carrot and chopped coriander leaves to the pan and mix everything well.  We can also add sweet corn along with peas and carrots.

  6. Switch off the flame and take the besan mixture to a oil coated square or rectangular tin and pat it well with back of a spatula or spoon and nicely spread it. Set this tray aside for half an hour. Then flip the tray on a plate after 30 minutes. 

  7. Make square or rectangular pieces out of the cooked besan mixture. Now our vadis are ready to get fried in oil. Heat oil in a heavy bottomed pan. When the oil is hot, add a small piece of vadi to see if it sizzle in oil. Then gently drop 4-5 vadi in oil and fry them till they are crisp and turn golden brown color. Repeat the frying till all the vadi are fried.  Place the fried vadi on a tissue to drain excess oil

  8. Crispy and yummy Kothimbir Vadi is now ready to serve. Serve with green chutney or ketchup and enjoy the crunchy snack!!!
  9. Kothimbir Vadi Recipe | Crispy Coriander Vadi Recipe
    Kothimbir Vadi Recipe | Crispy Coriander Vadi Recipe

Kovakaai Thuvaran

$
0
0
This is yet another poriyal made using Kovakkai. My last post on the poriyalvarieties was Koviakkai Fry, which consume more oil for cooking as kovaikkai needs to be fried which is not very good for health. If you like kovaikkai and want to avoid oil while cooking, then you can try KovakkaiThuvaran. I would prefer Kovaikkaithuvaran as it is good for health compared to Kovaikkai Fry though it is even tastier. Serve this Kovakkai thuvaran with any Kuzhambu Varieties and enjoy your meal!!!


Kovakaai Thuvaran
Kovakaai Thuvaran


Preparation and Yield:
Preparation time15 mins
Cooking Time30 mins
Servings3
Recipe CategoryPoriyal
Recipe CuisineSouth Indian

Ingredients:
Kovakkai / Ivy Gourd / Tindora250gms
Turmeric Powder1/4 teaspoon
SaltTo taste

* 1 Cup = 250ml

For Grinding:
Grated Coconut2 tablespoon
Red Chilli
Cumin Seeds1/2 teaspoon


For Seasoning:
Oil1 tablespoon
Mustard Seeds1 teaspoon
Urid Dal1 teaspoon
Curry Leavesfew


Kovakaai Thuvaran
Kovakaai Thuvaran

Method:
  1. Wash and finely chop kovakkai in circles and pressure cook it with turmeric powder allowing for 2 whistles and keep it aside. We can even cook the kovakkai in stove top, which consumes more fuel. So I always prefer to cook kovakkai in pressure cooker. That makes the process much simpler. 

  2. Grind the grated coconut, red chilli, cumin seeds in a mixer without adding water. The ground spice mixture should be dry.

  3. Heat the oil in the pan, and add mustard seeds . When the mustard seeds start to sputter, add the urdhal and fry till it becomes golden brown color, then add broken curry leaves. Now add the cooked kovakkai along with salt. If there is  any water in the cooked kovakkai, keep the flame in medium and let all the water gets evaporated. 

  4. Next, add ground spice mixture to the pan and give a good toss so that kovakkai is nicely mixed with the spice mixture. Cook this thuvaram for couple of minutes and switch off the flame

  5. The yummy Kovakkaithuvaran is ready to serve
  6. Kovakaai Thuvaran
    Kovakaai Thuvaran

Keerai Kuzhambu

$
0
0
Spinach is one of the healthy greens we should often include in our diet. We should make a practice of including spinach atleast once a week. We can make many variety of dishes using spinach. Keerai Kuzhambu is one of the variety which is a very delicious main course with rice.


Keerai Kuzhambu
Keerai Kuzhambu


Preparation and Yield:
Preparation time15 mins
Cooking Time30 mins
Servings4
Recipe CategoryMain
Recipe CuisineSouth Indian

Keerai Kuzhambu
Keerai Kuzhambu


Ingredients:
Spinach 250gms / 1 Bunch
Turmeric Powder1/2 teaspoon
Tamarind1 small lemon size
SaltTo taste
Thurdal3/4 Cup
Hinga Pinch


For Grinding:
Red chilli5-6
Channa Dal1 tablespoon
Coriander Seeds1 tablespoon
Grated Coconut3 tablespoon
Oil1 teaspoon

For Seasoning:
Oil1 teaspoon
Mustard Seedsfew

Method:
  1. Soak tamarind in water and extract the juice

  2. Wash and pressure cook the thurdal with a pinch of turmeric in pressure cooker. Once the dal is cooked and pressure is released from cooker, take it out and mash it nicely and keep it aside

  3. Pluck the leaves from spinach and wash it nicely twice or thrice under running water. Chop the spinach finely and take it in a sauce pan and add 1/2 cup of water along with turmeric powder and allow the spinach to cook

  4. Heat another pan and add oil. Add the grinding ingredients except coconut and fry them till the dals turn golden brown color. Take the grinding ingredients to the mixer along with grated coconut

  5. Grind all these ingredients to a nice paste and set that aside. Meanwhile, spinach would have nicely cooked. Using a whisk or back of ladle or with Mathu mash the spinach nicely. Traditionally, we use Keerai Mathu to mash the keerai. But many of us are not having mathu nowadays so we can use whisk as an alternate. Now spinach is cooked and we are going to keep that aside

  6. In a sauce pan, add tamarind extract along with salt and hing and bring it to boil and allow it to boil till the raw smell of the tamarind. Then add the cooked and mashed spinach and stir well

  7. When the spinach-tamarind mixture starts to boil, add mashed dal and mix well. Then add the ground mixture and give a good stir and bring it to boil

  8. Meanwhile, in another pan, add oil and when the oil is hot, add mustard seeds and when the mustard seeds starts to sputter, switch off the flame and add the seasoned ingredients to the keerai kuzhambu and switch off the flame. 

  9. Yummy Keerai kuzhambu is now ready to serve with hot steaming rice!!! Relish Keerai Kuzhambu with toasted(Sutta) appalam.
  10. Keerai Kuzhambu
    Keerai Kuzhambu


Basil Chutney Recipe

$
0
0
Basil, a very flavourful and aroma rich herb. Basil is most known for its culinary uses. Besides, culinary use, it has lots of medicinal benefits too. In most of the Italian cuisine dishes, Basil will be an important ingredient. I have already shared the recipe of Basil Thogayal. 


This week, my friend, went to India for a vacation and she gave her basil pot to me to water it. Also she told me to use the basil leaves as she will back after couple of months only. So, I have used the freshly home grown basil leaves and prepared the chutney. I should call this as organic basil chutney as the basil leaves are fresh from my garden :-) (though I my friend has given it to me :-)). This is one of the simple chutney and it goes well with Idli / Dosa / Uthappam. This recipe is also shared by my friend who gave the basil leaves. She is a great cook. I love her innovations. I dedicate this recipe to her :-)


Basil Chutney Recipe


Preparation and Yield:
Preparation time5 mins
Cooking Time10 mins
Servings4
Recipe CategoryChutney
Recipe CuisineSouth Indian

Basil Chutney Recipe

Ingredients:
Basil Leaves1 Cup*
Mint Leaves1/4 Cup
Green Chilli2
SaltTo taste
Almonds5-6
Garlic Clove1
Tamarinda Pinch

* 1 Cup = 250ml
Basil Chutney Recipe

Method:
  1. Pluck the leaves from basil plant and wash it once or twice under running water

  2. Take it to the mixer along with other ingredients. Grind them all to a nice paste till they are smooth

  3. Take the ground chutney in a bowl and season it with mustard seeds. Serve the yummy Basil Chutney with Idli / Dosa and enjoy your dish!!!
  4. Basil Chutney Recipe
    Basil Chutney Recipe

Semiya Kulfi Recipe

$
0
0
In our childhood, we all would have tasted this yummy and tasty kulfi, may be we might have tasted semiya ice (Semiya Kuchi Ice :-)). I loved it and I used to eat it during school holidays. This is the first time, I am making it in home and believe me, my kids loved it so much. It so simple to make at home. Simple, way is to make Semiya Payasam and we can pour in popsicles mould and we can freeze it. I have used the similar method that we would prepare semiya payasam. But, a small inclusion of custard powder, made the payasam thick and and it gives a nice texture to the whole dish. It hardly takes time to make this kulfi, the setting time takes  4-5 hours, and finally you would love it. Lets see how to make this yummy and chill Semiya Kulfi...

Semiya Kulfi Recipe
Semiya Kulfi Recipe

Preparation and Yield:
Preparation time5 mins
Cooking Time20 mins
Yield8
Recipe CategoryMain
Recipe CuisineSouth Indian

Semiya Kulfi Recipe
Semiya Kulfi Recipe
Semiya Kulfi Recipe
Semiya Kulfi Recipe

Ingredients:
Whole Milk3 Cups* + 3 tablespoon
Sweetened Condensed Milk1 tin / 14oz
Semiya / Vermicilli1/4 Cup
Chopped Pistachios2 tablespoon
Custard Powder1 tablespoon

* 1 Cup = 250ml
Semiya Kulfi Recipe
Semiya Kulfi Recipe


Method:
  1. Heat a pan and add whole milk and bring it to boil. Keep stirring occasionally till the milk becomes thicker and reduced to 1/2 of the quantity. Then, add semiya to the pan and stir well

  2. Keep stirring occasionally till the semiya is cooked completely. Meanwhile, I diluted custard powder in milk and stirred it well so that there are no lumps and set that aside. I have used vannila flavoured custard powder. If you don't have custard powder, you can use corn flour and dilute it with milk

  3. When, the semiya is fully cooked, add condensed milk and keep the flame in low and allow the milk to boil for 5 minutes. Then add custard powder mixture and stir well. Adding custard powder thickens the whole mixture. Then add chopped pistachios and mix well

  4. Finally give a stir once and switch off the flame. Allow the kulfi mixture to cool off fully. Then pour the the kulfi mixture inside the kulfi mould 

  5. Close the kulfi moulds with the lid and put them inside the freezer and allow it set for 4-5 hours. After the kulfi is set, take it out from freezer and show the moulds under running water for couple of minutes and set it aside for couple of minutes and try to open the lid and you would have yummy and tasty kulfis all ready for you

  6. Serve the yummy and tasty Semiya Kulfi is now ready to eat!!!
  7. Semiya Kulfi Recipe
    Semiya Kulfi Recipe

Carrot Poriyal

$
0
0
Carrot poriyal, a healthy poriyal for any rice varieties. This recipe is slightly different from the traditional way of doing poriyal. Generally we cook the vegetable and then do the seasoning. I tasted this wonderful taste of carrot poriyal in one of my Telugu friends home and the variation made the dish an extraordinary taste. Especially many kids doesn't like to eat carrot poriyal but with this recipe having a variation from the traditional way would be liked by all. Lets get into the way to prepare this dish.


Carrot Poriyal
Carrot Poriyal


Servings4
Preparation Time5 mins
Cooking Time20 mins 

Carrot Poriyal
Carrot Poriyal

Ingredients:
Carrot1/2 Kg
Turmeric1/2 teaspoon
Saltto taste


Ingredients for Grinding:
Grated Coconut2 tablespoon
Roasted Gram Dal2 tablespoon
Red chilli 2
Cumin Seeds1/2 teaspoon

Ingredients for Seasoning:
Oil1 teaspoon
Mustard seeds1 teaspoon
Split Urid dal1 teaspoon
Curry leavesFew

Method:
  1. Wash the carrots in water and then pat it dry, peel the skin and grate all the carrots 
  2. Take a pan, add oil and when the oil is hot, add mustard seeds. When the mustard seeds starts to sputter, add split urid dal and fry till it becomes golden brown color.
  3. Add curry leaves and add the grated carrot and keep the flame medium
  4. Add turmeric and salt and mix well and cover it with a lid. We dont need to add water as the grated carrot would cook easily in steam
  5. Meanwhile, grind the grinding ingredients to a nice powder and keep it ready
  6. When the carrots are cooked nicely, add the ground curry powder and mix well and remove from flame
  7. The mouth-watering carrot poriyal is ready to serve with any rice dishes. Even we can mix plain rice with carrot poriyal along with a teaspoon of ghee and the taste is divine.
  8. Carrot Poriyal
    Carrot Poriyal


Lemon Pickle

$
0
0
Lemon Pickle is my all time favourite pickle. Got fresh limes from Indian store last night. Half of the limes, I made Sour Lime pickle and spicy lime pickle. We could also use lemon for this recipe. Its very simple to make and I always add only use less oil than the store bought lemon pickle still with proper refrigeration, the shelf life is very good. My kids love this spicy lemon pickle and they would love to eat more curd rice only because of this pickle :-). Lets see how to make this spicy Lemon Pickle..
Lemon Pickle
Lemon Pickle


Preparation and Yield:
Preparation time15 mins
Cooking Time5 mins
Yield250gms
Recipe CategoryMain
Recipe CuisineSouth Indian

Lemon Pickle
Lemon Pickle

Ingredients:
Lemon10
Salt50gms
Red Chilli Powder50gms
Turmeric Powder1/2 teaspoon
Fenugreek Powder1/4  teaspoon
Gingelly Oil2 tablespoon
Mustard Seeds1 teaspoon
Hing1/4 teaspoon


Lemon Pickle
Lemon Pickle

Method:
  1. Chop the lemon into slightly bigger pieces. Add the turmeric powder, salt and red chilli powder to the chopped lemon and stir it well and keep it aside for 1 day. The next day again stir the contents and keep it aside

  2. In the pan, pour the oil and add the mustard seeds. When the mustard seeds begins to sputter add the hing and fry for a second and add the seasoned items along with fenugreek powder to the lemon. Stir the lemon pieces frequently atleast twice a day for 4-5 days. After 6 days the mouth-watering lemon pickle will be ready and store it in a refrigerator

  3. Serve the spicy and tasty lemon pickle with curd rice and enjoy your dish.
  4. Lemon Pickle
    Lemon Pickle

Tips:
  • If we want to use the pickle immediately, fry the lemon pieces in the oil and then follow the above instructions
  • For any pickle hing and fenugreek powder are more important.

Cabbage Poriyal

$
0
0
Sturdy, abundant and inexpensive, cabbage is a longstanding dietary staple throughout the world and is so widely cultivated and stores so well that it is available throughout the year. In southindia cabbage is cooked in many different ways and one such common recipe - Cabbage Poriyal (muttaikose poriyal) is given below. We can make plain poriyal using cabbage but, adding peas enhances the taste. Peas and cabbage goes very well. so, I always prefer to add peas in cabbage poriyal. I know, this is a very simple poriyal, but it might be of good help to the beginners.
Cabbage Poriyal
Cabbage Poriyal

Preparation and Yield:
Preparation time15 mins
Cooking Time30 mins
Servings4
Recipe CategoryMain
Recipe CuisineSouth Indian

Cabbage Poriyal
Cabbage Poriyal

Ingredients:
Cabbage500gms
Green Peas1/4 Cup
Green Chilli1
SaltTo taste
Grated Coconut1 tablespoon


For Seasoning:
Oil2 teaspoon
Mustard Seeds1 teaspoon
Split Urid Dal1 teaspoon
Curry Leavesfew


Cabbage Poriyal
Cabbage Poriyal

Method:
  1. Finely Chop the cabbage and clean it in water and strain it and keep it aside. 

  2. Heat the oil in the pan, add mustard seeds and when the mustard seeds starts to sputter add the split urdhal and fry till it becomes golden brown and then add chopped green chilli along with curry leaves and saute them for couple of seconds. Then add chopped cabbage to the pan

  3. Add green peas and sprinkle little water and necessary salt and close the pan with a lid and keep the flame medium allow the cabbage poriyal to cook completely. When the cabbage is cooked add grated cocunut and mix it well and remove from flame

  4. The yummy cabbage poriyal is ready to serve
  5. Cabbage Poriyal
    Cabbage Poriyal

Viewing all 1833 articles
Browse latest View live