Quantcast
Channel: Subbus Kitchen
Viewing all 1833 articles
Browse latest View live

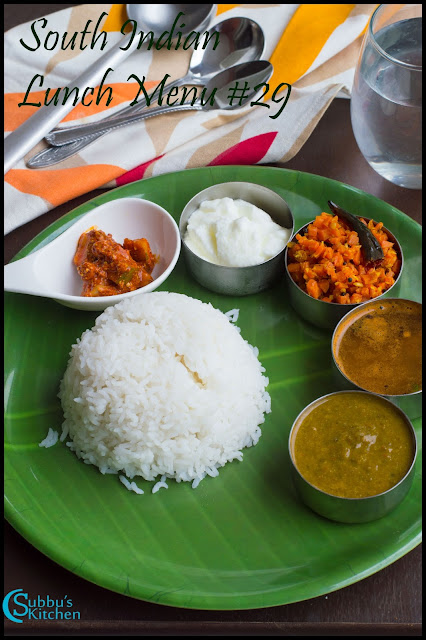
SouthIndian Lunch Menu #29 - Keerai Kuzhambu, Garlic Rasam, Carrot Poriyal,Rice, Curd and Pickle

$
0
0
This week, its healthy lunch menu. Spinach Kuzhambu with Carrot Poriyal, Garlic Rasam, Curd, pickle and rice. We all know all of these are healthy in their own way. Spinach is a very nutritional rich green that is fiber rich and we should cook spinach atleast once a week. Spinach kuzhambu is one of the tastiest kuzhambu variety. I want to have a healthy accompaniment for spinach kuzhambu, so, I selected Carrot Poriyal. This is one of the easiest poriyal variety which you can do it in no time. Then, instead of normal tomato dal rasam, I opted for garlic rasam. So over all my menu becomes nutrition rich and my family enjoyed it. 

Here, in this menu, spinach kuzhambu and garlic rasam needs grinding. So we need to fry the grinding ingredients and grind them and keep them aside that will ease the process. We need to spend little more time with Spinach in the initial plucking, cleaning and then it will take no time in cooking and the whole process would be done provided we cook the dal and ready with grinding ingredients. This is one of the quickest and yummy Lunch Menu your family would love to have!!! Have a great weekend!!! 


SouthIndian Lunch Menu #29 - Keerai Kuzhambu, Garlic Rasam, Carrot Poriyal,Rice, Curd and Pickle

Preparation and Yield:
Preparation time25 mins
Cooking Time1 hour and 10 mins
Servings4
Recipe CategoryMain
Recipe CuisineSouth Indian

Recipes:
Spinach Kuzhambuhttp://www.subbuskitchen.com/2009/06/keerai-kuzhambu.htmlCarrot Poriyal

Garlic Rasam


SouthIndian Lunch Menu #29 - Keerai Kuzhambu, Garlic Rasam, Carrot Poriyal,Rice, Curd and Pickle


Coconut Milk Masala Rice(Thengai Paal sandham)

$
0
0
Coconut Milk Masala Rice(Thengai Paal sandham), a tasty variety rice which is very delicious and a different   variety of rice. The flavour of coconut milk cooked with rice makes the taste dainty. 

Coconut Milk Masala Rice(Thengai Paal sandham)


Preparation Time30 mins
Cooking Time 30 mins
Servings4


Coconut Milk Masala Rice(Thengai Paal sandham)

Ingredients:
Basmati Rice1 Cup
Coconut1
Green Chillies2
Onion2
Peas1/2 Cup
Rice1 teaspoon
Chopped Ginger2 teaspoon
Ginger1 inch piece
SaltTo Taste

For Seasoning:
Fennel Seeds1 teaspoon
Cardamom2
Cinnamon Sticks1
Cloves2
Curry Leavesfew
Oil2 tablespoon

Coconut Milk Masala Rice(Thengai Paal sandham)

Method:
  1. Wash the rice and soak in water for atleast 30 mins
  2. Heat oil in a pan, add fennel seeds when the oil is hot. Add cinnamon sticks and cardamom and fry it till the fennel seeds starts to sputter

  3. Now add cloves and curry leaves and fry for a minute. Add chopped ginger and fry for 20 seconds

  4. Add chopped onions and a pinch of salt and fry it till it turns transparent. To this add peas and fry for another 20 seconds

  5. Grate the coconut and grind it in a mixer by adding water and squeeze it to extract milk. We need 2 cups of coconut milk to cook the rice. The coconut milk should be thin in consistency, we dont need thick milk. Drain the water from soaked rice and add the rice to the pan and fry for 2 minutes

  6. Add coconut milk and mix well. Keep the flame high and cook for 2 minutes. After 2 minutes add salt and mix gently. Keep in high flame till the water is absorbed completely 

  7. Keep the flame very low and cover it and cook for another 10 minutes. Finally the water would be absorbed completely and the rice will be cooked nicely and at the same time it would be fluffy. Remove the rice from flame

  8. The delicious and yummy coconut milk masala rice is ready to serve hot with onion raitha
  9. Coconut Milk Masala Rice(Thengai Paal sandham)
    Coconut Milk Masala Rice(Thengai Paal sandham)


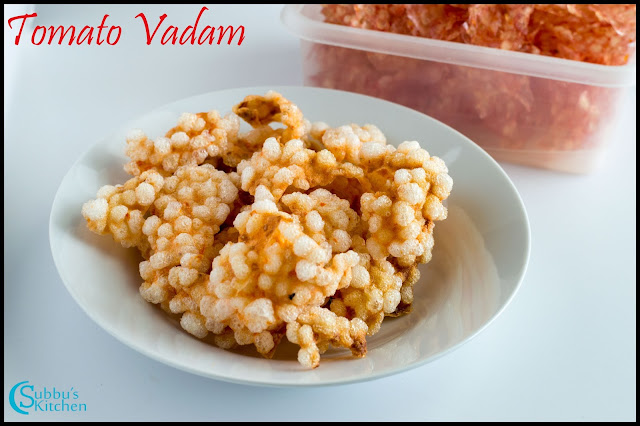
Tomato Sago Papad Recipe | Thakkali Jevvarasi Vadam Recipe | Tamatar Sabudana Papad Recipe

$
0
0
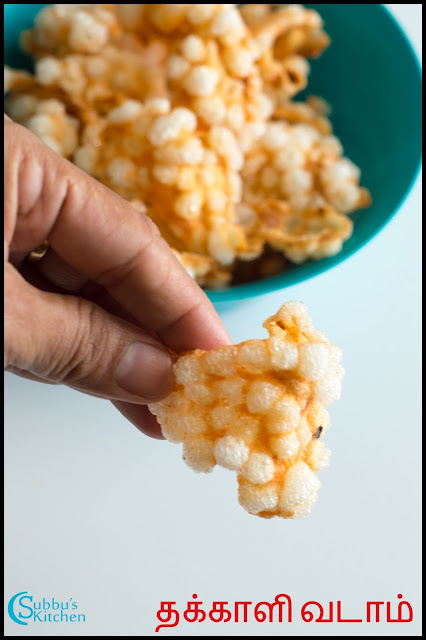
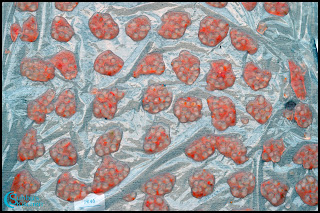
I saw this recipe in one of the magazine (Aval Vikatan I guess !-). My Mom and MIL used to make plain jevvarasi vadam which I learnt from them. But adding tomato to the conventional sago papad is something new to me. I have seen colorful papads in shops and I know they would have added food colors. But in this Tomato Papad, the tomato puree makes the magic. It gives a nice flavour to the papad and also adds a beautiful color to the papad. You can see my snaps and find out how the color is in unfried papad. But once we fry the color is not that much red, but the taste is awesome. Without any artificial colors, we are having a nice tomato flavoured sago papad. So, my next try would be mint-coriander flavoured sago papad. I will post the recipe soon... Lets see how to make this yummy, tangy and crunchy Tomato Sago Papad (Thakkali Jevvarasi Vadam Tamatar Sabudana Papad)

Tomato Sago Papad Recipe | Thakkali Jevvarasi Vadam Recipe | Tamatar Sabudana Papad Recipe

Preparation and Yield:
Preparation time8 hours
Cooking Time30 mins
Yield100gms
Recipe CategoryPapad
Recipe CuisineSouth Indian

Tomato Sago Papad Recipe | Thakkali Jevvarasi Vadam Recipe | Tamatar Sabudana Papad Recipe


Ingredients:
Sago / Sabudana / 1 Cup*
Tomato4
Green Chilli6-7
Ginger1 inch Piece
Lemon1
Water4 Cups
SaltTo Taste


Method:
  1. Soak the sago in water overnight or atleast 7-8 hours. After 8 hours, drain the water and take the sago in a heavy bottomed pan. 

  2. Before starting with the process, first take green chilli, ginger and salt in the mixer and grind them all to a fine paste. Set this aside

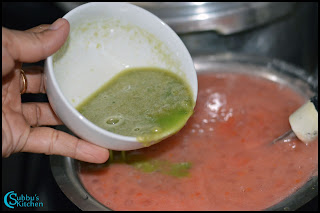
  3. Wash the tomatoes and chop them roughly and take them in a mixer and grind it to a nice puree. Keep this aside

  4. Add 4 cups of fresh water to the pan having sago and keep the pan on the flame and keep stirring till the sago becomes like a porridge. When the sago is nicely cooked, add the tomato puree and give a good mix

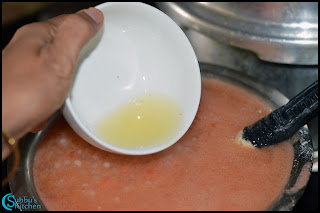
  5. Then add the ginger-green chilli-salt paste and stir well keeping the flame in medium. Stir for 7 minutes and then finally add lemon juice and give a good mix and switch off the flame. Now our Papad batter is ready. Allow it to cool off 5 minutes.

  6. Meanwhile, take clean plastic sheets or clean white cloth / dothi and spread it on the sunny area Keep some weights on all the corners of sheet / cloth to make sure they wont get carried away by the wind. When the papad batter is cool enough to handle with a ladle, use a small ladle or a big spoon to pour the batter in small circles on the sheet / cloth. Leave 2-3 inches of spaces between each papad and continue this till all the batter is used up. Allow the papad to dry in sun for 2-3 days or till they are nicely dried up and becomes crispy. If you take a papad and break it, it should break up with sound. If there is water in the papad, then the papad will burst in oil while deep frying. When the papad starts to become drier and drier, in the evening, take the dried papad and store it in air tight container till the next day when the weather becomes sunny.  Finally, when all the papad are dried nicely, store them in an air-tight container and use them as and when needed. 

  7. Heat oil in a pan and when the oil is nicely hot, add handful of tomato papad and depp fry them in oil on both the sides, till they are nicely crisp and crunchy. Store the fried Tomato Sago Papad in air-tight container and serve them with any rice varieties. We can have the papad as it is with a hot cup of coffee / tea. 

  8. Relish the crispy and yummy Tomato Sago Papad with rice and enjoy the taste!!!
  9. Tomato Sago Papad Recipe | Thakkali Jevvarasi Vadam Recipe | Tamatar Sabudana Papad Recipe
    Tomato Sago Papad Recipe | Thakkali Jevvarasi Vadam Recipe | Tamatar Sabudana Papad Recipe

Pakoda Kuzhambu Recipe

$
0
0
Pakoda Kuzhambu is one of the popular and tasty kuzhambu variety in Chettinad Cuisine. Bengal gram dal with spices and onions are made into yummy and crispy pakodas which are then added to tangy and masala rich kuzhambu. A very mouth-watering kuzhambu variety which has to be mixed with hot steaming rice. Any stir-fry veggie would be a nice combination, but personally, I like serving this yummy kuzhambu with papad / fryums. We can also make pakodas like we normally do with gram flour, rice flour, onion and spices. But making pakodas with channa dal would be much crispier and tastier than using flour. We can make the kuzhambu and pakoda in parallel which will make the whole process easier and quicker. Now, lets see how to make this yummy Pakoda Kuzhambu..

Pakoda Kuzhambu Recipe

Preparation and Yield:
Preparation time2 hours
Cooking Time40 mins
Servings4
Recipe CategoryMain
Recipe CuisineSouth Indian

Pakoda Kuzhambu Recipe

Ingredients for Pakoda:
Channa Dal / Bengal Gram Dal1/2 Cup*
Fennel Seeds1/2 teaspoon
Red Chilli2
SaltTo taste
Ginger1/2 inch piece
Garlic2 Cloves
Chopped Coriander Leaves1/4 Cup
Onion1 medium size
OilFor Deep Frying

* 1 cup = 250ml
Ingredients for Kuzhambu:
Tamarind1 small Lemon size
Onion1 medium size
Green Chilli1
Tomato2
Corainder Powder1/2 teaspoon
Sambar Powder1 tablespoon
SaltTo Taste
Chopped Coriander Leaves1 tablespoon


Ingredients for Grinding:
Grated Coconut1/4 Cup
Poppy Seeds1 teaspoon
Cumin Seeds1/2 teaspoon


Ingredients for Seasoning:
Oil1 tablespoon
Mustard Seeds1 teaspoon
Fennel Seeds1/2 teaspoon
Bay leaf
Cinnamon Stick1 inch piece
Cloves3


Pakoda Kuzhambu Recipe

Method for making Pakoda:
  1. Soak the channa dal in water for about 2 hours. After 2 hours, drain the water from channa dal and add the channa dal to the mixer along with garlic, ginger, red chilli, chopped coriander leaves, fennel seeds and salt 

  2. Grind them all to a coarse paste. Coarsely ground pakoda mixture will be crisper than the smooth mixture. So make sure you grind it coarsely. Take the coarsely ground pakoda mixture to the bowl and add chopped onions. 

  3. Mix the onions and pakoda mixture well. Heat oil in a pan for deep frying the pakodas. When the oil is hot, take small quantities of pakoda mixture and drop them in oil, 

  4. Deep fry the pakodas till they are crispier and turns golden brown color. Remove the fried pakados and place it in a bowl having tissue paper to drain the excess oil. Repeat the step for and fry the rest of pakodas. Now our pakodas are ready. Set them aside. Lets prepare the kuzhambu next.

Method for making Kuzhambu:
  1. Soak the tamarind in water and extract the juice

  2. Heat oil in a heavy bottomed pan. Add mustard seeds and fennel seeds. When the mustard seeds starts to sputter, add bay leaf, cinnamon stick, cloves and fry for few seconds. Then, add finely chopped ginger and garlic and fry them for 10 seconds. Next, add finely chopped onions,

  3. Saute the onions till they are translucent. Then add finely chopped tomatoes to the pan. Along with the tomatoes, add the slit green chilli, coriander powder, sambar powder and give a good mix. 

  4. Keep the flame in medium and allow the onion-tomato mixture to get cooked nicely. Next, add the tamarind water along with salt and mix well. Allow the tamarind mixture to boil for 5 minutes to get rid off the raw smell of the tamarind extract. 

  5. Meanwhile, take the grated coconut, poppy seeds and cumin seeds in a mixer and grind them to a nice paste by adding water. Set this aside till the tamarind mixture gets nicely cooked

  6. When the raw smell of the tamarind goes off, add the coconut paste and give a good stir. Adjust the consistency of the kuzhambu if needed by adding water. Finally add the deep fried pakodas and allow the kuzhambu to boil for 2 minutes and garnish with coriander leaves. Switch off the flame. If you are going to serve the kuzhambu later, then add the pakodas just 15 minutes before serving.

  7. Serve the Yummy Pakoda Kuzhambu with hot steaming rice and enjoy the chettinad style Pakoda Kuzhambu!!!
  8. Pakoda Kuzhambu Recipe
    Pakoda Kuzhambu Recipe

Restaurant Style Coriander Chutney Recipe

$
0
0
In, SouthIndian Restaurants Coriander Chutney is one of the main accompaniment served with Idli / Dosa / Uthappam. Generally, in most of the restaurants, coconut chutney is made and some quantity of that is taken and ground again with coriander leaves and served as coriander chutney. Basically, its as simple as that. Just a 2 step process, only the ingredients makes the magin and you will have a nice aroma rich restaurant style Coriander chutney to be served with Idli / Dosa. 


Restaurant Style Coriander Chutney Recipe


Preparation and Yield:
Preparation time10 mins
Cooking Time10 mins
Servings4
Recipe CategoryChutney
Recipe CuisineSouth Indian

Restaurant Style Coriander Chutney Recipe

Ingredients:
Coriander Leaves2 bunches / 2 Cups
Mint Leaves (Optional)1/4 Cup
Green Chilli2
SaltTo taste
Grated Coconut2 tablespoon
Ginger1 inch piece
Garlic Cloves2
Tamarind Paste1/4 teaspoon
Roasted Gram dal2 tablespoon


For seasoning:
Oil1 teaspoon
Mustard Seeds1 teaspoon


Restaurant Style Coriander Chutney Recipe

Method:
  1. Discard the stem and pluck the leaves from the coriander leaves bunch. Wash it thoroughly. Take the coriander leaves, coconut and rest of the ingredients to the mixer. Grind them everything to a nice paste by adding water little by little. Take the coriander chutney in a bowl . Finally season with mustard seeds. (I have added few curry leaves, but its optional.. if you like the flavour of curry leaves then you may want to add few curry leaves.)

  2. Serve the restaurant style Coriander Chutney with Idli / Dosa
  3. Restaurant Style Coriander Chutney Recipe
    Restaurant Style Coriander Chutney Recipe

Potato Podi Curry Recipe

$
0
0
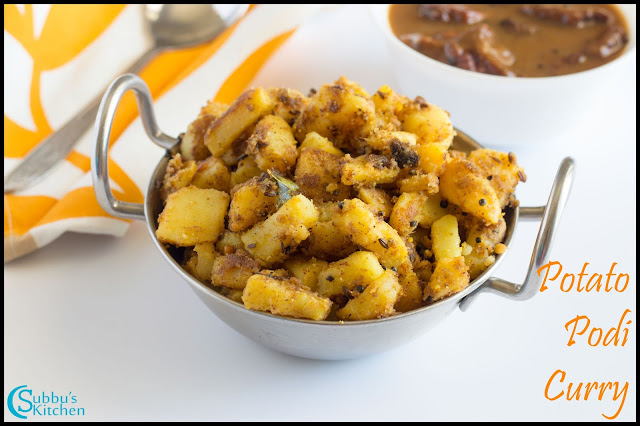
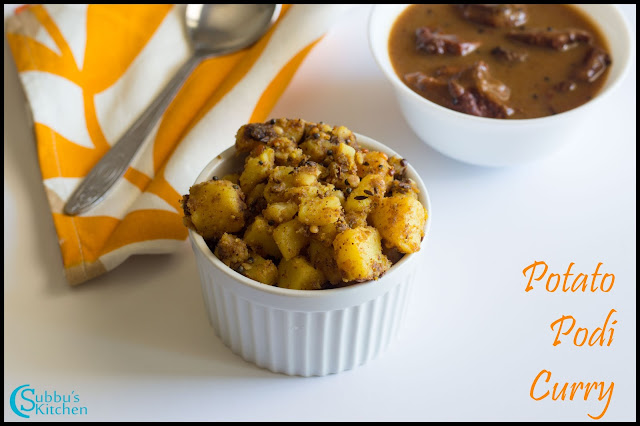
Potato curry are always all time favourite for many of us. Generally, most of us roast or stir-fry the potatoes and it would be a perfect yummy accompaniment for any rice varieties. Sometimes, I do make Potato Podimas. There is a curry powder which many of us prepare and store it and use it whenever we need. Curry powder help us in making many dishes. Here, in this recipe also, I have used the curry powder and prepare this yummy Potato Podi Curry. Try this little variation of Potato Podi Curry and your family would love it!!!


Potato Podi Curry Recipe


Preparation and Yield:
Preparation time10 mins
Cooking Time20 mins
Servings4
Recipe CategoryPoriyal
Recipe CuisineSouth Indian

Potato Podi Curry Recipe

Ingredients:
Potato4-5
Curry Powder1 tablespoon
Turmeric Powder1/2 teaspoon
SaltTo taste


For Seasoning:
Oil1 tablespoon
Mustard Seeds1/2 teaspoon
Urid Dal1/2 teaspoon
Split Urid Dal1 teaspoon
Curry Leavesfew
Potato Podi Curry Recipe

Method:
  1. Wash the potatoes thoroughly, peel it, and chop them into medium sized cubes and cook the potatoes till they are soft and tender. Do not over cook them, then they will become mushy. Strain the excess water if any and keep the cooked potatoes aside

  2. Heat oil in a pan, add mustard  seeds. When the mustard seeds starts to sputter, add cumin seeds and split urid dal and saute it till the dal becomes golden brown color. Then add curry leaves and saute for few seconds. Then, add cooked potatoes to the pan and toss them up

  3. Add curry powder and saute the potatoes well so that the curry powder are nicely coated and mixed up well. Keep in flame for couple of minutes and then remove from flame

  4. Serve the yummy Potato Podi Curry with any South Indian Main Courses and enjoy your meal!!!
  5. Potato Podi Curry Recipe
    Potato Podi Curry Recipe

Vengaya Pulithanni

$
0
0
Vengaya Pulithanni is one of the easiest and quickest kuzhambu variety. A bachelor friendly dish which is simple to make with less ingredients.  This is a simple kuzhambu and can be made ready in 10 mins. A very helpful dish especially when we are running out of time or just returned home from a long journey. The pulithanni will be of very thin consistency. We can add a teaspoon of gingelly oil with the rice and have this dish. 

Vengaya Pulithanni
Vengaya Pulithanni

Preparation and Yield:
Preparation time10 mins
Cooking Time20 mins
Servings4
Recipe CategoryMain
Recipe CuisineSouth Indian

Vengaya Pulithanni
Vengaya Pulithanni


Ingredients:
Tmarind1 lemon size
Onion
Sambar Powder1 tablespoon
SaltTo taste


For Seasoning:
Oil1 tablespoon
Mustard Seeds1/2 teaspoon
Curry Leavesfew

Method:
  1. Chop the onion in a big size. Soak the tamarind in water and extract the juice.

  2. Pour the oil in a pan and add the mustard seeds once the oil is hot. When the mustard seeds begins to sputter add the curry leaves and chopped onions and fry it till onion becomes light brown color. Add the tamarind extract along with salt

  3. Add the sambar powder and allow the tamarind extract to boil well.When the sambar powder raw smell goes away add 1 cup of water and adjust the salt and  switch off the flame.

  4. The vengaya pulithanni is ready to serve with plain rice. The pulithanni will be of very thin consistency. We can add a teaspoon of gingelly oil with the rice and have this dish.
  5. Vengaya Pulithanni
    Vengaya Pulithanni

Eggless Strawberry Cake Recipe | Strawberry Cake with Chocolate Frosting Recipe

$
0
0
Its my hubby's Birthday. I wanted to surprise him with homemade cake. I know he is not a great lover of cakes, but my kids are so after it so, I decided to make my kids favourite :-). When, I checked with my daughters, all of them gave a thumbs up for Strawberry cake as they love strawberries. So, I went to walmart and got fresh strawberries and started making this cake. My daughters helped me to make this cake. They are so excited that I let them help me. They really wanted to bake for their dad. So, We decided to make a 2 layer cake and I also got the store bought chocolate frosting to decorate the cake further. The cake was amazingly soft and yummy with strawberry chunks. Kids loved the chocolate frosting and waited patiently till their dad came from office and cut the cake. All of them really enjoyed the Eggless Strawberry Cake. I would like to share the recipe and I believe your kids too enjoy this delicious cake. 


Eggless Strawberry Cake Recipe | Strawberry Cake with Chocolate Frosting Recipe


Preparation and Yield:
Preparation time15 mins
Cooking Time40 mins
Servings8-10
Recipe CategoryBaking
Recipe CuisineIndian

Eggless Strawberry Cake Recipe | Strawberry Cake with Chocolate Frosting Recipe

Ingredients:
All purpose Flour1 Cup*
Finely Chopped Strawberries1 Cup
Baking Soda1 teaspoon
Baking Powder1/2 teaspoon
Salt1/4 teaspoon
Sugar1/2 Cup
Brown Sugar1/4 Cup
Flax Seeds Powder1 tablespoon
Butter 1/2 Cup
Curd / Yogurt1/2 Cup
Vannila Essence1 teaspoon
Halved Strawberries1/2 Cup**

* 1 Cup = 250ml
** For Decoration
Method:
  1. Pre-heat the oven to 350 degrees Fahrenheit. 
  2. Take a cake tin and grease it with butter and dust it with little flour and set it aside. Soak the flax seeds powder in 3 tablespoon of warm water and stir well and set that aside too

  3. In a mixing bowl, add all purpose flour, baking soda, baking salt and a pinch of salt and give a good mix. Also wash the strawberries well and chop them finely and measure 1 cup of strawberries and set them aside

  4. In another bowl, add yogurt, brown sugar, sugar and vannila essence.

  5. Mix everything well with a whisk. Add the flax seeds mixed with water, now that, this flax seeds mixture would have become a nice gel, this is a nice alternate for eggs. Give everything a good mix

  6. Meanwhile, soften the butter in microwave. Even, you could take the butter and keep it well ahead so that it would become soften.  Now add the flour to the wet batter 

  7. Stir well so that everything is nicely incorporated. Add chopped strawberries to the cake batter. 

  8. Mix everything well so that the strawberries are combined well with the batter. To this add the soften butter and give a good stir. Pour the batter into the cake tin and pat the tin so that there are no air pores. 

  9. I actually made twice the quantity of the above mentioned ingredients and baked 2 cakes. Place the tin in the oven and bake it for 35-40 minutes or till the toothpick comes out clean.  Take out the baked cake and allow it to completely cool off before you apply frosting. We can serve the cake as it is without frosting also. I actually prefer that as the frosting adds more fat to the cake. Using a bread knife or flat spatula, apply the frosting on top of one cake and then place the other cake on above the frosting applied cake. Then apply the frosting on the all over the layered cake. 

  10. Decorate the cake with halved strawberries. 

  11. Yummy Eggless Strawberry cake with chocolate frosting is now ready to slurp!!!
  12. Eggless Strawberry Cake Recipe | Strawberry Cake with Chocolate Frosting Recipe
    Eggless Strawberry Cake Recipe | Strawberry Cake with Chocolate Frosting Recipe


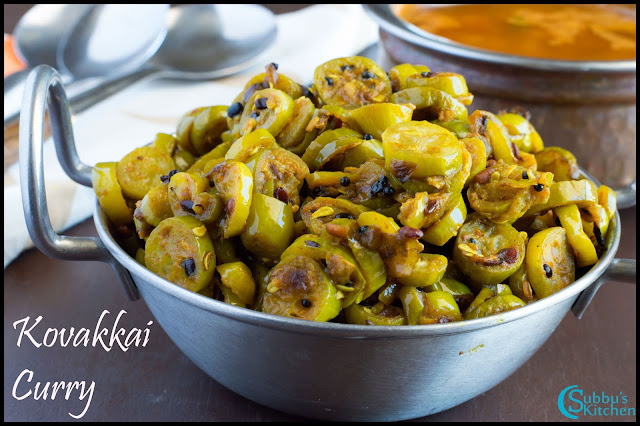
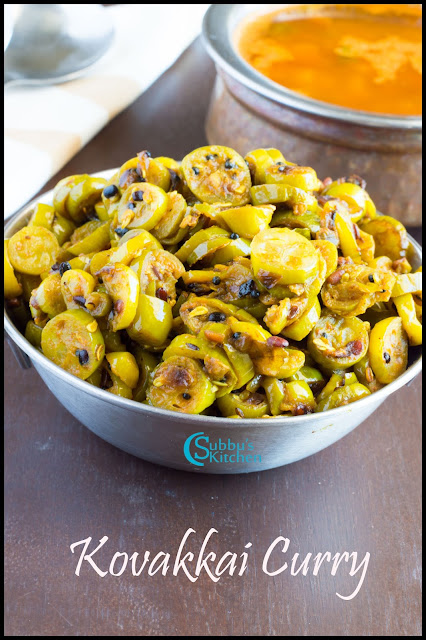
Kovakkai Curry

$
0
0
I born and bought up in the southern part of tamil nadu and i dont remember seeing kovakkai in those places and hence i never get a chance to cook/eat kovakkai during those days. But later when i came to chennai i happend to see kovakkai as a common vegitable and got a chance to taste kovakkai in some of my relatives home ... mmm.. its a yummy vegitable and i and my family really liked it and now it becomes one of the regular curry in our food. Kovakkai is not what I would call my most favourite vegetable, but it's allright enough eaten once a week. Kovakkai has a good medicinal properties too.. its low-calorie, rich in minerals and B complex and, best of all, its low-glycemic index makes it good for diabetics


Kovak'kai' is good for making curry.. not the kovai'pazham' . When you cut the kovakkai if you see more reddish color inside, then it wont be good. Slicing the kovaikkai also an interesting thing. Some like to cut in thin round slices as shown below and some like to cut it in vertical pieces. Both are good if it cooked properly. Allow some time to cook this vegitable in the low flame in the oil which gives an wonderful dish and i can guarantee that your family will love it. Try this yummy kovakkai Curry recipe and let me know.
Kovakkai Curry
Kovakkai Curry


Preparation and Yield:
Preparation time15 mins
Cooking Time40 mins
Servings4
Recipe CategoryMain
Recipe CuisineSouth Indian

Kovakkai Curry
Kovakkai Curry

Ingredients:
Kovakkai1/2 Kg
Onion
Sambar Powder1 tablespoon
SaltTo taste
Turmeric Powder1/4 teaspoon


For Seasoning:
Oil2 tablespoon
Mustard Seeds1/2 teaspoon
Curry Leavesfew


Method:
  1. Wash and finely chop kovakkai and take it in a vessel. Add turmeric powder and salt and pressure cooker them allowing 2-3 whistles. We can cook the kovakkai on stove top itself, but it is a time consuming effort. I always prefer to pressure cook them.

  2. Heat 1 tablespoon of oil in the pan, and add mustard seeds . When the mustard seeds start to sputter, add the urdhal and fry till it becomes golden brown color. Then add the curry leaves and saute for couple of seconds. Then, add the onions and a pinch of salt and saute the onions till they are light brown color.

  3. Now add the cooked kovakkai and add the sambar powder and adjust the salt. Add rest of oil and keep the flame in medium and allow the kovakkai to nicely fry in the oil along with the spices. The more the time you allow the kovakkai to fry in the oil the more crispier and tastier kovakkai curry you will get. Make sure that you dont overburn the kovakkai. Check it in regular interval.

  4. The yummy Kovakkai Curry is ready to serve
  5. Kovakkai Curry
    Kovakkai Curry

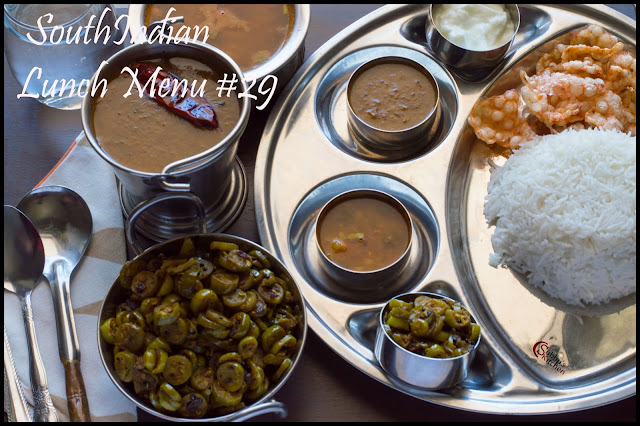
South Indian Lunch Menu #29 - Hotel Sambar, Pineapple Rasam, Kovakkai Curry, Curd, Rice and Papad

$
0
0
This week in lunch menu series, its special. Hotel sambar with Kovakkai Curry, Pineapple Rasam, curd, Rice and Papad. A very tasty lunch menu your family would enjoy for sure. A perfect weekend treat for our family. Restaurant style sambar are always special in their own way. A stir-fry veggie would be a best accompaniment. I chose Kovakkai curry and it would be a perfect sidedish for sambar. Instead of usual rasam, I made Pineapple rasam. The sweet-sourness of the pineapple with pepper touch gives a wonderful flavour to the rasam. Finally, Last but not least, curd, rice and papad. I made tomato vadam and my kids enjoyed the whole menu with tomato vadam. they love the papad so much. 


South Indian Lunch Menu #29 - Hotel Sambar, Pineapple Rasam, Kovakkai Curry, Curd, Rice and Papad


Preparation and Yield:
Preparation time15 mins
Cooking Time1 Hour
Servings4
Recipe CategoryMain
Recipe CuisineSouth Indian

Recipes:
Hotel SambarPineapple Rasam

Kovakkai CurryTomato Vadam

South Indian Lunch Menu #29 - Hotel Sambar, Pineapple Rasam, Kovakkai Curry, Curd, Rice and Papad

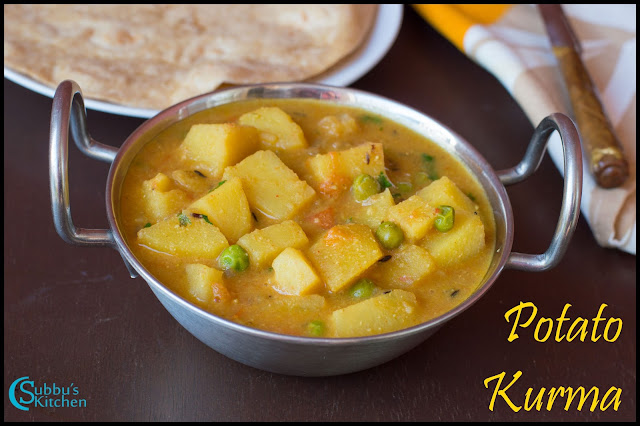
Potato Kurma Recipe

$
0
0
Potato Kurma, a very common kurma that my MIL and I do in my home regularly. I was surprised to see, I have missed to post this recipe. Though this recipe is same as normal kurma that we do with mixed veggies, still this would be helpful for the beginners who would like to try a gravy with Potato. A very tasty accompaniment for any Indian Breads!

Potato Kurma Recipe
Potato Kurma Recipe


Preparation and Yield:
Preparation time10 mins
Cooking Time30 mins
Servings3
Recipe CategoryVeg Gravy
Recipe CuisineNorth Indian

Potato Kurma Recipe
Potato Kurma Recipe

Ingredients:
Potato4-5 
Green Peas2 tablespoon
Turmeric Powder1/4 teaspoon
Red Chilli Powder1/2 teaspoon
SaltTo taste
Coriander Powder1 teaspoon
Onion1
Tomato2
Green Chilli1
Chopped Coriander Leaves2 tablespoon


For Grinding:
Grated Coconut3 tablespoon
Poppy Seeds1 tablespoon
Roasted Gram Dal1 tablespoon
Garlic Clove2
Ginger1 inch piece
Fennel Seeds1 teaspoon

For Seasoning:
Oil2 tablespoon
Cumin seeds1 teaspoon
Bay leaf1
Cinnamon Stick1/2 inch piece
Cloves2
Potato Kurma Recipe
Potato Kurma Recipe

Method:
  1. Take the grinding ingredients in the mixer and grind it to a smooth paste and set it aside. Heat oil in a pan, add baby leaf, cinnamon stick, cloves and saute it for couple of seconds. Then add cumin seeds and allow it to crackle

  2. Add chopped green chilli and finely chopped onions and saute them till the onions are nicely sauted and becomes golden brown. Then, we add chopped tomatoes and saute the tomatoes till they are mushy

  3. When the tomatoes are nicely mushy, add the ground masala paste and saute the masala paste for 2-3 minutes. 

  4. Then, add the chopped potatoes along with turmeric powder, salt, red chilli powder and coriander powder and mix well. Then add green peas and give everything a good mix

  5. Take everything in a vessel and add 1 cup of water and keep the vessel inside the pressure cooker and pressure cook it allowing it for 2-3 whistles. After the pressure is fully released, take out the vessel, give the kurma is a good mix and then finally garnish with chopped coriander leaves

  6. Now, the tasty Potato Kurma is now ready to serve!!!
  7. Potato Kurma Recipe
    Potato Kurma Recipe

Methi Sambar (Vendhaya Keerai Sambar)

$
0
0
Methi Sambar is one of the frequently made dish in my home. My kids show aversion to normal spinach, but when I make dishes using Methi leaves, they love it. The tender & greenish Methi always attract me and I frequently make Vendaya Keerai Thuvaran or this Methi Sambar or Methi dal.  Fenugreek leaves are very healthy greens to be included in our routine diet. Its very simple to even grow these leaves in our Patio or garden. We just need a deep tray with good composite. Wet the composite and sprinkle the fenugreek seeds. Add a cup of water daily and keep the tray in the place where you get good sun light. Slowly you can see small green leaves coming out of the sand and within 2 weeks, you would have fresh methi leaves. Try this Organic Methi Sambar and share your comments!
Methi Sambar (Vendhaya Keerai Sambar)

Preparation and Yield:
Preparation time10 mins
Cooking Time30 mins
Servings4
Recipe CategoryMain
Recipe CuisineSouth Indian

Methi Sambar (Vendhaya Keerai Sambar)

Ingredients:


Tamarind1 lemon size
Methi Leaves1 Cup
Baby Onions1 Cup
SaltTo Taste
Turmerica pinch
Thur dal1/2 Cup

For Grinding:
Red chillies8
Coriander Seeds3 teaspoon
Channa dal3 teaspoon
Grated Coconut2 tablespoon
Pearl Onions3
Oil2 teaspoon

For Seasoning:

Mustard Seeds1 teaspoon
Curry Leavesfew
Oil1 teaspoon


Methi Sambar (Vendhaya Keerai Sambar)

Method:
  1. Pressure cook Thur dal and mash it once cooked and keep it aside. 

  2. Soak tamarind in water for 5 minutes and extract the juice.

  3. Heat oil in the pan, add red chillies, coriander seeds and channa dal and fry till the dal turns golden brown colour. Take the fried grinding ingredients along with grated coconut and 2-3 pearl onions 

  4. Grind them all to a nice paste and set it aside.  Pluck and wash the methi leaves and chop them roughly and set it aside

  5. Heat the oil in the pan, and when the oil is hot add the mustard seeds. When the mustard seeds  starts to sputter, add curry leaves and fry for a second. Add the baby onions and fry for 2 minutes, add little water and cook the onions for couple of minutes. 

  6. When the onions are half-cooked, add methi leaves and mix well. Sprinkle some water and allow the methi and onion to cook completely. (Approximately 7-8 minutes in low to medium flame). Once its cooked, add the tamarind extract, turmeric and salt and let the mixture boils till the raw smell of the tamarind goes off.

  7.  Then, add the mashed dal and stir well. Then add the ground paste and give a good stir.

  8. Stir well and allow the mixture to boil in medium flame for 2-3 minutes and switch off the flame

  9. Now the Methi sambar is ready to serve with white rice.
  10. Methi Sambar (Vendhaya Keerai Sambar)
    Methi Sambar (Vendhaya Keerai Sambar)

Aadi Month Festivals and Events

$
0
0
Aadi month(July 17th - August 16th) is the 4th month of the Tamil Calender. The next six months from Aadi to Margazhi is the Dakshinayana punyakalam. It marks the beginning of the night of Devas. Traditionally, Aadi month is considered as inauspicious and most people avoid auspicious ceremonies during this period. But few important festivals are celebrated in this month. This month is special for Goddess Shakthi. Poeple worship Goddess and her different forms during this month to get her blessings for their wealth and happiness.


Auspicious days in Aadi Month:

AadiVelli (5 Friday's of Aadi Month):
  1. The 1st Friday of Aadi month is dedicated to Goddess Swarnambika, a form of Goddess Parvati.
  2. The 2nd Friday of Aadi month is dedicated to Goddess Kali, Offering your Prayers to the Goddess of Siddhi powers will bless you with Extraordinary Intelligence.
  3. The 3rd Friday is dedicated to Kalikambal, a form of Goddess Parvati, who bestows us with courage and health.
  4. The 4th Friday is dedicated to Kamakshi Amman, a form of Goddess Shakti. It is considered that offering special prayers on this day to Her will remove the obstacles in marriage, relationships, etc and will help us to be successful in life.
  5. The last Aadi Friday is dedicated to Lakshmi, the consort of Lord Vishnu and Varalakshmi Pooja will be observed on this day. This is a special day for all women. On this day, Goddess Lakshmi listens and fulfills the needs and desires of women, who earnestly pray to Her. It is said that if a woman earnestly prays to the Goddess on this day, she will invoke the blessings of Goddess for her entire family.

Many rituals are performed on Aadi Fridays and Tuesdays even on Sundays

Aadi Pirappu(17-Jul-2015): 
First day of this month Aadi, usually it falls on 16th or 17th of July. In 2015, it is on 17th July. People celebrate this day as Aadi pandigai especially newly-weds. Special puja is performed followed by a special food which includes delicous "Payasam(Kheer) with coconut milk", "Purana Poli" and Vadai. The new groom in the family is invited to the Brides house and the couple is gifted with new dresses and other presents and treated well with a feast.

Aadi Ammavasai:
No moon day in Aadi month is very special to offer Tarpan to our Ancestors. This year is on 14th august 2015

Aadi Pooram(16-08-2015):
The New moon day in Aadi month is celebrated as "Aadi Pooram". The day is also celebrated as the birthday of Aandal – Saint Poet who wrote Tiruppaavai and is also considered as a manifestation of the mother Goddess.

The 18th day of Aadi month is celebrated as Aadi perukku. Aadiperukku is a festival of fertility and people of Tamil Nadu especially women offer prayers. They wear new clothes and perform abhishekham for Kaveri amman.

Aadi Karthigai(08-Aug-2015):
Aadi Karthigai  – Festival dedicated to Lord Muruga.


Cauliflower Peas Curry Recipe | Cauliflower Dry Curry Recipe

$
0
0
Cauliflower dishes are always so scrumptious. We can make many variety of dry curry and gravies that would be perfect for any Indian Breads / Pulao etc. This Cauliflower Peas Dry curry is also a very tasty accompaniment for any Indian Breads / Pulao varieties. This is a simple and quick curry we can make with cauliflower. You will surely enjoy the taste of this dry curry.

Cauliflowers like other leafy vegetables, have a great chance of having lots of worms. So, we need to put the florets in hot boiling water to get rid of the worms. That is the only concern with cauliflower, other wise the taste would be awesome. Cauliflower dry curries and gravies would be a great treat for both veg and non-vegetarians. 

Cauliflower Peas Curry Recipe | Cauliflower Dry Curry Recipe


Preparation and Yield:
Preparation time10 mins
Cooking Time20 mins
Servings4
Recipe CategoryDry Curry
Recipe CuisineNorth Indian

Cauliflower Peas Curry Recipe | Cauliflower Dry Curry Recipe


Ingredients:
Cauliflower1 big size
Onion1 Big Size
Tomato 2
Turmeric Powder1/4 teaspoon
Red Chilli Powder1 teaspoon
Coriander Powder1 teaspoon
Garam Masala1/2 teaspoon
SaltTo taste
Green Peas2 tablespoon
Curry Leavesfew


For Seasoning:
Oil1 tablespoon
Cumin Seeds1 teaspoon


Cauliflower Peas Curry Recipe | Cauliflower Dry Curry Recipe

Method:
  1. Cut the florets from the cauliflower bunch. Heat a sauce pan full of water and bring it to boil and switch off the flame. Add the cauliflower florets to the boiling water and close it with lid. Let the florets stand in hot water till we prepare the masala.

  2. Finely chop the onions and set it aside. Heat oil in a pan. Add cumin seeds. When the cumin seeds starts to sputter

  3. Add chopped onion along with a pinch of salt and saute the onions. Add broken curry leaves and saute the onions till it becomes nicely brown. 

  4. Make puree of tomatoes and add it to the pan. Add turmeric powder and saute the tomato puree

  5. Now, add red chilli powder and coriander powder and allow the masala to cook in medium flame

  6. Then add garam masala and allow the masala to cook nicely. 

  7. Drain water from cauliflower and add the florets to the pan and give a nice toss

  8. Add salt and Sprinkle some water and cover the pan with a lid and allow the florets to cook for 5 minutes. Add green peas to the pan.

  9. Toss the pan so that peas are also nicely coated with spices. Then keep the an in low flame for another 10 minutes and then switch off the flame. Garnish with finely chopped coriander leaves.

  10. Yummy Cauliflower Peas Curry is now ready to serve! Relish with Indian Breads and enjoy the dish!
  11. Cauliflower Peas Curry Recipe | Cauliflower Dry Curry Recipe
    Cauliflower Peas Curry Recipe | Cauliflower Dry Curry Recipe

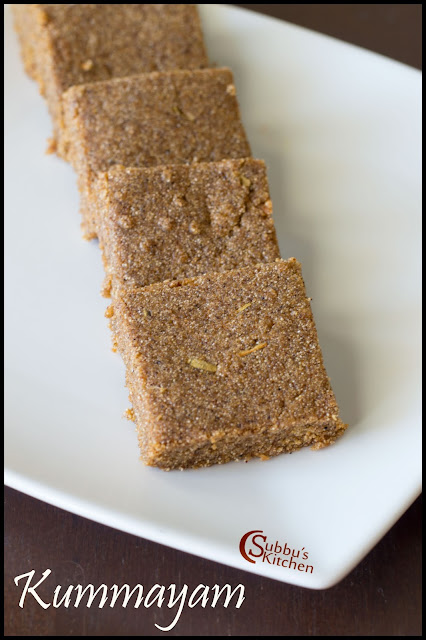
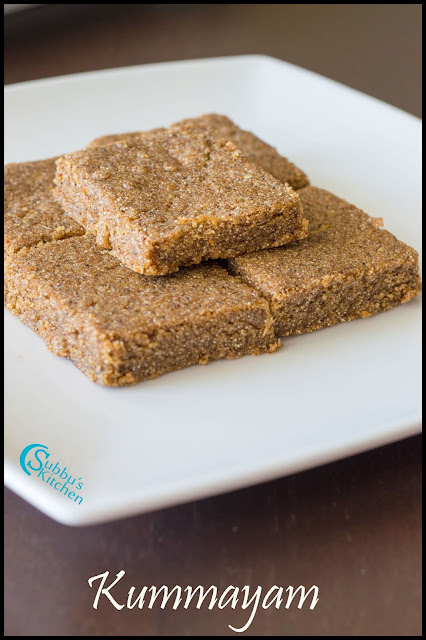
Kummayam Recipe

$
0
0
Kummayam is one of the neivedhyam dishes for Aadi Friday or Aadi Tuesday. Most of us generally make payasam as a neivedhyam for Aadi Friday / Tuesday. It is a very tasty dish prepared with green mong dal, urid dal, rice and jaggery.  This dish is very simple and very scrumptious to make. Lets plan to make this yummy Kummayam as a neivedhyam for this Aadi Friday / Tuesday for Goddess Parvati and get her blessings.

Kummayam
Kummayam


Preparation and Yield:
Preparation time5 mins
Cooking Time30 mins
Yield15
Recipe CategorySweet Varieties
Recipe CuisineSouth Indian

Kummayam
Kummayam

Ingredients:
Green Moong Dal1/2 Cup
Urid Dal1 tablespoon
Raw Rice2 tablespoon
Grated Jaggery1 Cup
Cardamom Powder1/2 teaspoon
Ghee3 tablespoon


Method:
  1. Heat a pan and dry fry green moong dal till it turns slight brown in color. Take the fried green moong to the mixer. Then add the urid dal to the pan and dry fry the urid dal till it turns slight brown. Add the urid dal to the mixer

  2. Finally, add rice to the pan and fry the rice till they are slight brown color. Add the fried rice also to the mixer. 

  3. Allow the fried ingredients to cool off and then grind them to a nice and smooth powder. Pass the ground kummayam podi through a nice sieve and get rid of the lumps to have a smooth kummayam podi. 

  4. In a small sauce pan add grated jaggery and add water to soak the jaggery and keep it in flame and allow the jaggery to dissolve completely. When the jaggery is dissolved, switch off the flame and set the jaggery syrup aside. In a pan, add half of the ghee and add the kummayam podi and fry the podi in ghee in low flame for 3-4 minutes. You would get a nice aroma

  5. Then add the jaggery syrup and mix everything well till the whole mixture becomes thick. Add remaining ghee and mix well and when the mixture becomes a one whole mass, then remove from flame

  6. Kummayam is now ready to serve. We can also put the mixture in a ghee greased plate and spread it evenly with a flat spatula and then cut them into pieces and serve them

  7. Yummy Kummayam is now ready for neivedhyam!
  8. Kummayam
    Kummayam


Kothavarangai Thuvaran | Cluster Beans Poriyal

$
0
0
Kothavarangai Thuvaran is one of the common poriyal in my kitchen every week. I love doing Kothavarangai Usili, but this thuvaran is the favourite dish for all. So, I prefer to do thuvaran instead of usili. This is a simple poriyal which you could do it quicker. Some bigger Cluster beans takes more time to cook, so I would prefer to cook the cluster beans in pressure cooker. Its a simple and tasty poriyal and would be a great accompaniment for any rice varieties.


Kothavarangai Thuvaran | Cluster Beans Poriyal


Preparation and Yield:
Preparation time10 mins
Cooking Time20 mins
Servings4
Recipe CategoryPoriyal
Recipe CuisineSouth Indian
Kothavarangai Thuvaran | Cluster Beans Poriyal


Ingredients:
Kothavarangai / Cluster Beans350gms
Turmeric Powder1/2 teaspoon
SaltTo taste


For Grinding:
Grated Coconut2 tablespoon
Red Chilli
Cumin Seeds1/2 teaspoon


For Seasoning:
Oil1 tablespoon
Mustard Seeds1 teaspoon
Urid Dal1 teaspoon
Curry Leavesfew
Red Chilli1

Kothavarangai Thuvaran | Cluster Beans Poriyal

Method:
  1. Wash and finely chop the cluster beans 

  2. Take the cluster beans in a vessel and add turmeric powder and salt and add 1/2 cup of water and pressure cook it allowing for 2-3 whistles. 

  3. Meanwhile, take the grinding ingredients in a mixer and grind it to a powder without adding any water

  4. Take the cooked cluster beans and drain any excess water and set it aside. Heat oil in a pan and add mustard seeds. When the mustard seeds starts to sputter, add urid dal and fry till it turns golden brown color. Then add broken curry leaves and red chilli and fry for couple of seconds

  5. Then add cooked cluster beans and give a good mix. Then add the ground spice powder to the pan. Adjust the salt if needed

  6. Give everything a good mix and switch off the flame. Take the thuvaran in a serving bowl.

  7. The yummy Kothavarangai Thuvaran is now ready to serve!
  8. Kothavarangai Thuvaran | Cluster Beans Poriyal
    Kothavarangai Thuvaran | Cluster Beans Poriyal

Idly Upma

$
0
0
Idli Upma / Masala Idli is one of the simplest and conventional breakfast dish. I generally use the leftover idlis from the breakfast and make Masala Upma out of it and have it for evening snack. After tasting this yummy dish, my granddaughter  prefer to have this for her lunch box instead of the regular idli as this is more delicious than our regular idlis. So for her nowadays I am making this masala idli regularly with fresh idli without waiting for leftover!!!
Idly Upma
Idly Upma

Preparation Time10 mins
Cooking Time 10 mins
Servings4 persons

Idly Upma
Idly Upma

Ingredients:

Steam Cooked Idli12
Onion1 big size
Red Chilli Powder / Idli Milagai Podi2 teaspoon
Turmeric Powder1/4 teaspoon
SaltTo Taste


For Seasoning

Cooking Oil1 teaspoon
Mustard seeds1 teaspoon
Split Urid seeds1/2 teaspoon
Channa seeds1/2 teaspoon
Curry leavesfew
Green Chilli1

Method:
  1. For Idli Upma, we need left over idlis which are not hot. Take the left over idlis and crumble them and keep it aside. 

  2. Finely chop the onion and green chilli and keep it aside. Heat oil in a pan, and add mustard seeds. When the mustard seeds starts to sputter, add urdhal and channa dal and fry till it turns brown color. 

  3. To this add chopped green chilli and curry leaves and fry for 10 seconds. Then add chopped onions with a pinch of salt and saute the onions till it turns transparent. 

  4. Add turmeric powder to the sauted onions. Now add the idly crumble and mix gently. 

  5. Also add Idli Milagai Podi and toss them well so that the spice powder gets nicely coated to the cooked idlis. Adjust the salt and keep the idli upma in flame for 5 minutes and then switch off the flame

  6. Serve hot with chutney and enjoy the dish!
  7. Idly Upma
    Idly Upma

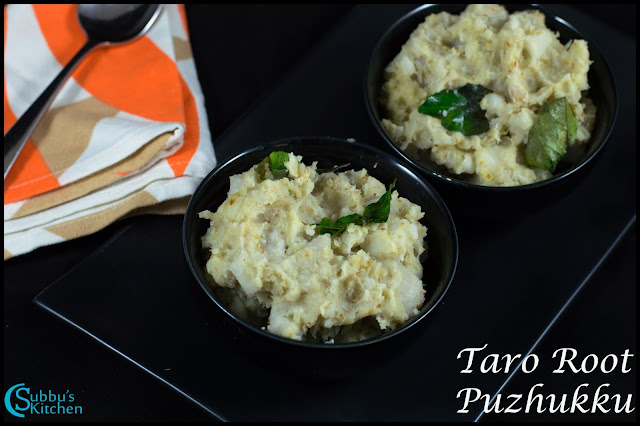
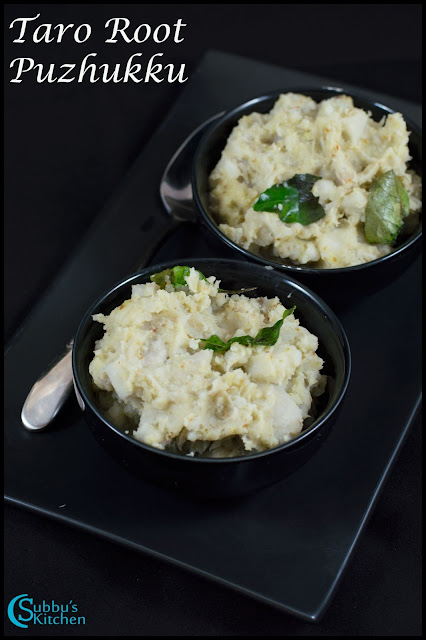
Seppankizhangu Puzhukku

$
0
0
Puzhukku is a popular recipe from Kerala Cuisine. It is a traditional Kerala dish with root vegetables.  Especially, on Thiruvadhirai, they used to make puzhukku with multiple root veggies. I always like with taro root. Most of the time, we always do stir-fry with Tara root, but this puzhukku is a unique variation with taro root. Seppangkizhangu Puzhukku is a good side dish for any kuzhambu varieties. 


Seppankizhangu Puzhukku


Preparation and Yield:
Preparation time10 mins
Cooking Time30 mins
Servings4
Recipe CategoryPoriyal
Recipe CuisineSouth Indian
Seppankizhangu Puzhukku

Ingredients:
Taro Root / Seppangkizhangu350gms
SaltTo taste


For Grinding:
Grated Coconut2 tablespoon
Red Chilli
Green Chilli
Cumin Seeds1/2 teaspoon


For Seasoning:
Coconut Oil1 tablespoon
Curry Leavesfew


Method:
  1. Wash and Steam cook the seppankizhangu in cooker and peel the skin and keep it aside

  2. Grind the cocunut, green chilli, red chilli and jeeragam and dry grind it.

  3. In a heavy bottomed pan add the cooked seppankizhangu and add little water, salt and when the mixture starts to boil add the ground powder. Fianally add the cocunut oil and broken curryleaves

  4. The delicious seppankizhangu puzhukku is ready to serve
  5. Seppankizhangu Puzhukku
    Seppankizhangu Puzhukku

Maddur Vada Recipe

$
0
0
Maddur vada is a popular dish from the town of Maddur in Karnataka. We can make this vada instantly and it is a perfect evening time snack. If you are health conscious, then you can alternate maida with wheat flour. I am going to show how to make Maddur vada using 2 different methods. First I, will show how to make this dish using conventional method of Deep frying then I will show how to bake these vadas on Oven. I prefer baking though it is time consuming. But it is a healthy option compared to deep frying as the baking method consumes less oil. The video shown below will explain both the methods. You could also see the instructions given below in text to understand the recipe. 
Maddur Vada Recipe
Maddur Vada Recipe
Click on the link below for the Recipe in the Video format.


Preparation and Yield:
Preparation time5 mins
Cooking Time30 mins
Yield16 Vada
Recipe CategorySnacks
Recipe CuisineSouth Indian

Ingredients:
Maida / All Purpose Flour1 Cup*
Rawa / Semolina1/2 Cup
Rice Flour1/3 Cup
SaltTo taste
Hinga Pinch
Finely Chopped Onions1 Cup
Finely Chopped Ginger1 teaspoon
Finely Chopped Green Chilli1 teaspoon
Finely Chopped Curry Leaves1 teaspoon
Finely Chopped Coriander Leaves1 teaspoon
OilFor Frying  + 2 tablespoon
Water1/4 Cup

* 1 Cup = 250ml
Deep Frying Method:
  1. Take a mixing bowl, add maida, semolina, rice flour, hing and salt and give a good mix
  2. Then add finely chopped onions, ginger, green chilli, curry leaves and coriander leaves. Again mix everything well
  3. Then add 2 tablespoon of hot oil and mix well. The hot oil is a main ingredient to have a crispy vada. We can also alternate hot oil with ghee.
  4. Add water little by little and mix well and knead it to a stiff dough. Cover the bowl and let the dough rest for about 15 minutes. 
  5. After 15 minutes, make lemon sized balls out of the dough, place it on a zipper cover, cover it with another zipper cover and press it with a back of a lid or bowl to make a round vada patti
  6. Take the vada patti and place it in a plate. In the same way, make the rest of vada in the same way. Now the vadas are ready to be fried in oil. 
  7. Heat oil in a pan, When the oil is hot, you can add a pinch of dough to see if it sizzles right away. 
  8. Add 3-4 vada gently into the oil. Do not put more vadas, give room to the vadas to get fried nicely. You can notice the vadas start to come up and float after a while. This is the right time to flip them off. Flip them and allow them to fry till they are crispy and turns golden brown color. While frying the vadas, keep the flame in medium high. Very high flame will change the color of the vada quickly, but would not have cooked the inner side of the vada
  9. Now the vada are nicely brown, gently remove them using a slotted spatula and place them in a bowl having a tissue. The excess oil, if any would be absorbed by the tissue. In the same way, fry all the vada.
  10. Now our crispy and tasty Maddur Vada are ready to serve!
Baking Method:
  1. Before baking, prepare the dough as described in the above method from steps 1-6.
  2. Pre-heat the oven to 350 degrees F or 180 degrees C 
  3. Take a cooking tray and line it with aluminium foil and place the vada patties. Spray cooking oil on each vada 
  4. Place the tray inside the oven and bake it till they are golden brown color and crispy. It took almost 40 minutes in my oven to bake the vadas
  5. My Baked Maddur Vada are ready to serve!
Maddur Vada Recipe
Maddur Vada Recipe


Rawa(Sooji/Semolina) Dosai | Restaurant Style Crispy Rava Dosa Recipe

$
0
0
Rava dosa is a popular South Indian Dosa variety made with semolina. Almost all restaurants in SouthIndia have this recipe on their menu.  This is a delectabaly crispy dosa that can be prepared instantly without the usual fermentation process. There are many variations in Rawa Dosa with respect to the ingredients and measurements used and I am giving here the one that I normally use. Serve the crispy and tasty Rava dosa with your favourite dippings. I personally prefer serving with Idli Podi. We can also serve with Idli sambar or any of your favourite chutneys.

Rawa(Sooji/Semolina) Dosai | Restaurant Style Crispy Rava Dosa Recipe

Preparation and Yield:
Preparation time10 mins
Cooking Time30 mins
Yield20 Dosa
Recipe CategoryBreakfast
Recipe CuisineSouth Indian


Ingredients:
Rawa(Semolina)1 Cup
All purpose flour(Maida)1/2 Cup
Rice flour1 Cup
SaltTo taste
Cumin Seeds1 teaspoon
Green Chilli2
Whole Peppercorns1 teaspoon
Curry Leavesfew

Method:
  1. Mix rawa, Maida, rice flour in a bowl along with salt, cumin seeds, chopped green chillies and peppercorns and chopped curry leaves
  2. Add water and make this to a thin batter. The batter should be like a thin butter milk. Keep adding water till the batter becomes absolutely thin in consistency. If we keep the batter aside, we can notice the top layer is so watery and the bottom layer is so thick. So mix the batter well each time before you pour the batter in tawa
  3. Heat a thawa and sprinkle little water and it the water sizzles, then the tawa is in perfect hot. Now, Pour a ladle of  batter in the tawa. You can see the dosa will have lots of small holes as the batter is so thin. The rawa dosa will not be in a perfect circle shape. So don't worry about shape.
  4. Add a teaspoon of ghee / oil around the dosa and keep the flame in medium and allow the dosa to cook till it is crispy and the bottom part becomes nicely golden brown. Since the rawa dosa is thin, we don't need to flip it to cook the other side
  5. Once the dosa is cooked completely, remove it slowly using the spatula
  6. The Crispy and yummy rawa dosa is ready to serve with any type of chutneys'
  7. Rawa(Sooji/Semolina) Dosai | Restaurant Style Crispy Rava Dosa Recipe
    Rawa(Sooji/Semolina) Dosai | Restaurant Style Crispy Rava Dosa Recipe


Viewing all 1833 articles
Browse latest View live