October 31, 2015, 12:00 am
My
sambandhi make this recipe very well. This is also one of the spicy, crispy, easy to make recipe.
Ribbon Pakoda/Nada is a very simple, easy to do
snacks on any
occasion. This is given as seer bakshnam for many auspicious occasions like marriages, seemandham etc. Homemade rice flour is best for this ribbon pakoda as it will give a nice texture and crispy taste. But we can very well use store bought rice flour too. Here, I have given recipe with homemade rice flour.
Preparation and Yield:
| Preparation time | 1.5 Hour |
| Cooking Time | 1 hour |
| Yield | 1.5 Cups |
") |
| Ribbon Pakoda(Nada Recipe) |
Ingredients:
| Raw Rice | 4 Cups |
| Channa dal | 1 Cup |
| Moong dal | 1 Cup |
| Salt | To Taste |
| Red Chilli Powder | 1 Teaspoon |
| Butter | 2 tablespoon |
| Oil | For Frying |
Accessories Required:
| Ribbon Pakoda Press |
| Ribbon Pakoda Mould |
") |
| Ribbon Pakoda(Nada Recipe) |
Method:
- Rinse the raw rice in water atleast couple of times. Then add fresh water to the raw rice to soak them well and leave the raw rice to get soaked for atleast an hour. After an hour, drain the water from rice and spread it in a clean white towel to get it dried.
- Meanwhile, Heat the pan and add channadal and fry for some time till the dal is hot. Keep it aside. Add moongdal and fry for some time till the dal is hot. Keep it aside
- Mix Rice and dals and grind to a nice powder it in rice mill. If you are living abroad or you are planning to do smaller quantities, then you can grind the rice and dals in the mixer itself. First grind the dry roasted dals in the mixer to a fine powder. Pass the ground dal powder through the sieve to get rid of lumps. Grind the dals in batch and do the sieving process to get nice and smooth dal powder. Now, Grind the rice in the mixer to a nice powder. Normally we don't get any lumps.
- But we should sieve it couple of time to get a smooth rice flour. If we get any lumps while we sieve, again add the lumps of rice flour to the mixer and grind it again to a smooth flour and again sieve it. Repeat the sieve process again and again till we get a smooth and nice rice flour. If we have good sunny weather, then we can spread the ground smooth rice flour in a newspaper and keep it in sun to dry the rice flour nicely.
- Now mix the dal flour and the rice flour nicely and take it in a mixing bowl. To the flour, add red chilli powder, salt, butter and hing
- Add water and make the flour into a chapati like dough. Heat oil in a heavy bottomed pan, and when the oil is hot add a little piece of dough to check for the hotness. When the dough raises immediately then the oil is ready for frying. Put 1 hand full of dough in a press, and close the press with ribbon pakoda mould. Squeeze the dough to a big circle. Deep fry the ribbon padoka/Nada in low flame till it is crisp and turns light golden brown color and the bubbles starts to suppress and also the sizzling sound will come down. This is the right stage. Do not keep the flame high as it will change the color quickly but the nada would not be crispy.
- Take it out and place it in a oil strainer with a paper towel to remove excess oil and allow it to cool. Repeat the step for the rest of the dough. Store it in a air tight container and serve.
- The delicious ribbon padoka/Nada is ready to serve.
") |
| Ribbon Pakoda(Nada Recipe) |
↧
November 1, 2015, 12:00 am
Mullu Thenguzhal (Mullu Muruku) or Magizhambpoo Murukku is one of the crispy, easy to make recipe. We can do this quickly with store bough rice flour. But I have given here the conventional method of doing this magizhampoo murukku. This traditional murukku is prepared for manuy auspicious occasions and festivals. For marriages, seemandham, and many other events, this magizhampoo murukku is kept as seer dish. For Diwali festival, it is a tradition in my family to make magizhampoo murukku along with ribbon pakoda (nada).
Preparation and Yield:
| Preparation time | 1.5 Hour |
| Cooking Time | 1 hour |
| Yield | 1.5 Cups |
 |
| Mullu Thenguzhal Recipe | Mullu Muruku Recipe | Magizhampoo Murukku Recipe |
Ingredients:
| Raw Rice | 4 Cups |
| Channa dal | 1 Cup |
| Moong dal | 1 Cup |
| Salt | To Taste |
| Butter | 2 tablespoon |
| Oil | For Frying |
* 1 Cup = 250ml
 |
| Mullu Thenguzhal Recipe | Mullu Muruku Recipe | Magizhampoo Murukku Recipe |
Accessories Required:
 |
| Mullu Thenguzhal Recipe | Mullu Muruku Recipe | Magizhampoo Murukku Recipe |
Method:
- Rinse the raw rice in water atleast couple of times. Then add fresh water to the raw rice to soak them well and leave the raw rice to get soaked for atleast an hour. After an hour, drain the water from rice and spread it in a clean white towel to get it dried.
- Meanwhile, Heat the pan and add channadal and fry for some time till the dal is hot. Keep it aside. Add moongdal and fry for some time till the dal is hot. Keep it aside
- Mix Rice and dals and grind to a nice powder it in rice mill. If you are living abroad or you are planning to do smaller quantities, then you can grind the rice and dals in the mixer itself. First grind the dry roasted dals in the mixer to a fine powder. Pass the ground dal powder through the sieve to get rid of lumps. Grind the dals in batch and do the sieving process to get nice and smooth dal powder. Now, Grind the rice in the mixer to a nice powder. Normally we don't get any lumps.
- But we should sieve it couple of time to get a smooth rice flour. If we get any lumps while we sieve, again add the lumps of rice flour to the mixer and grind it again to a smooth flour and again sieve it. Repeat the sieve process again and again till we get a smooth and nice rice flour. If we have good sunny weather, then we can spread the ground smooth rice flour in a newspaper and keep it in sun to dry the rice flour nicely.
- Now mix the dal flour and the rice flour nicely and take it in a mixing bowl. To the flour, add salt, butter and hing
- Add water and make the flour into a chapati like dough. Heat oil in a heavy bottomed pan, and when the oil is hot add a little piece of dough to check for the hotness. When the dough raises immediately then the oil is ready for frying. Put 1 hand full of dough in a press, and close the press with one star mould. Squeeze the dough to a big circle followed by swirls. Deep fry the mullu thenkuzhal in low flame till it is crisp and turns light golden brown color and the bubbles starts to suppress and also the sizzling sound will come down. This is the right stage. Do not keep the flame high as it will change the color quickly but the mullu thenkuzhal would not be crispy.
- Take it out and place it in a oil strainer with a paper towel to remove excess oil and allow it to cool. Repeat the step for the rest of the dough. Store it in a air tight container and serve.
- The deliciousmullu thenkuzhal is ready to serve.
 |
| Mullu Thenguzhal Recipe | Mullu Muruku Recipe | Magizhampoo Murukku Recipe |
↧
↧
November 1, 2015, 7:24 am
Motichoor Ladoos are one of the most popular Sweet sold in most of the mithai shop in India. Till last year, I was looking for the boondhi ladle that has tiny holes. But many shops told that specific tiny holed boondhi ladle is available only in North India. Then when I had a casual talk with one of my friend who is a Maharashtrian, she advised me to use the usual perforated ladle and then grind the ladoo mixture to a coarse paste. Though the ladoo doesn't look like the motichoor ladoo we get it in shops, still the coarse and nutty texture has the same flavour and taste and my family enjoyed this ladoo very much. The orange color of this ladoo make the ladoos look more appealing and appetizing.For most of the festivals, we would love to share the sweets we made with our family, friends and relatives. This is one such best sweet that can be given as a gift to all our friends and relatives.
 |
| Motichoor Ladoo Recipe |
Preparation and Yield:| Preparation time | 15 mins |
| Cooking Time | 1 hour |
| Yield | 18-20 |
| Recipe Category | Sweet |
| Recipe Cuisine | North Indian |
 |
| Motichoor Ladoo Recipe |
Ingredients for Boondhi & Ladoo:
| Besan / Gram Flour | 1 Cup* |
| Rice Flour | 1 tablespoon |
| Ghee | 1 tablespoon |
| Baking Salt / Baking Soda | 1/4 teaspoon |
| Orange Food Color | 1/4 teaspoon |
| Broken Cashews | 1 tablespoon |
| Sliced Almonds | 1 tablespoon |
| Oil | For Frying Boondhis |
| Milk | 2 tablespoon |
* 1 Cup = 250ml
Ingredients for Sugar Syrup: | Sugar | 1 Cup* |
| Water | 1 Cup |
| Cardamom Powder | 1/2 teaspoon |
| Orange Food Color | 1/4 teaspoon |
| Rose Water | 1 teaspoon |
| Lemon Juice | 1 tablespoon |
 |
| Motichoor Ladoo Recipe |
Method for making Boondhi Batter:
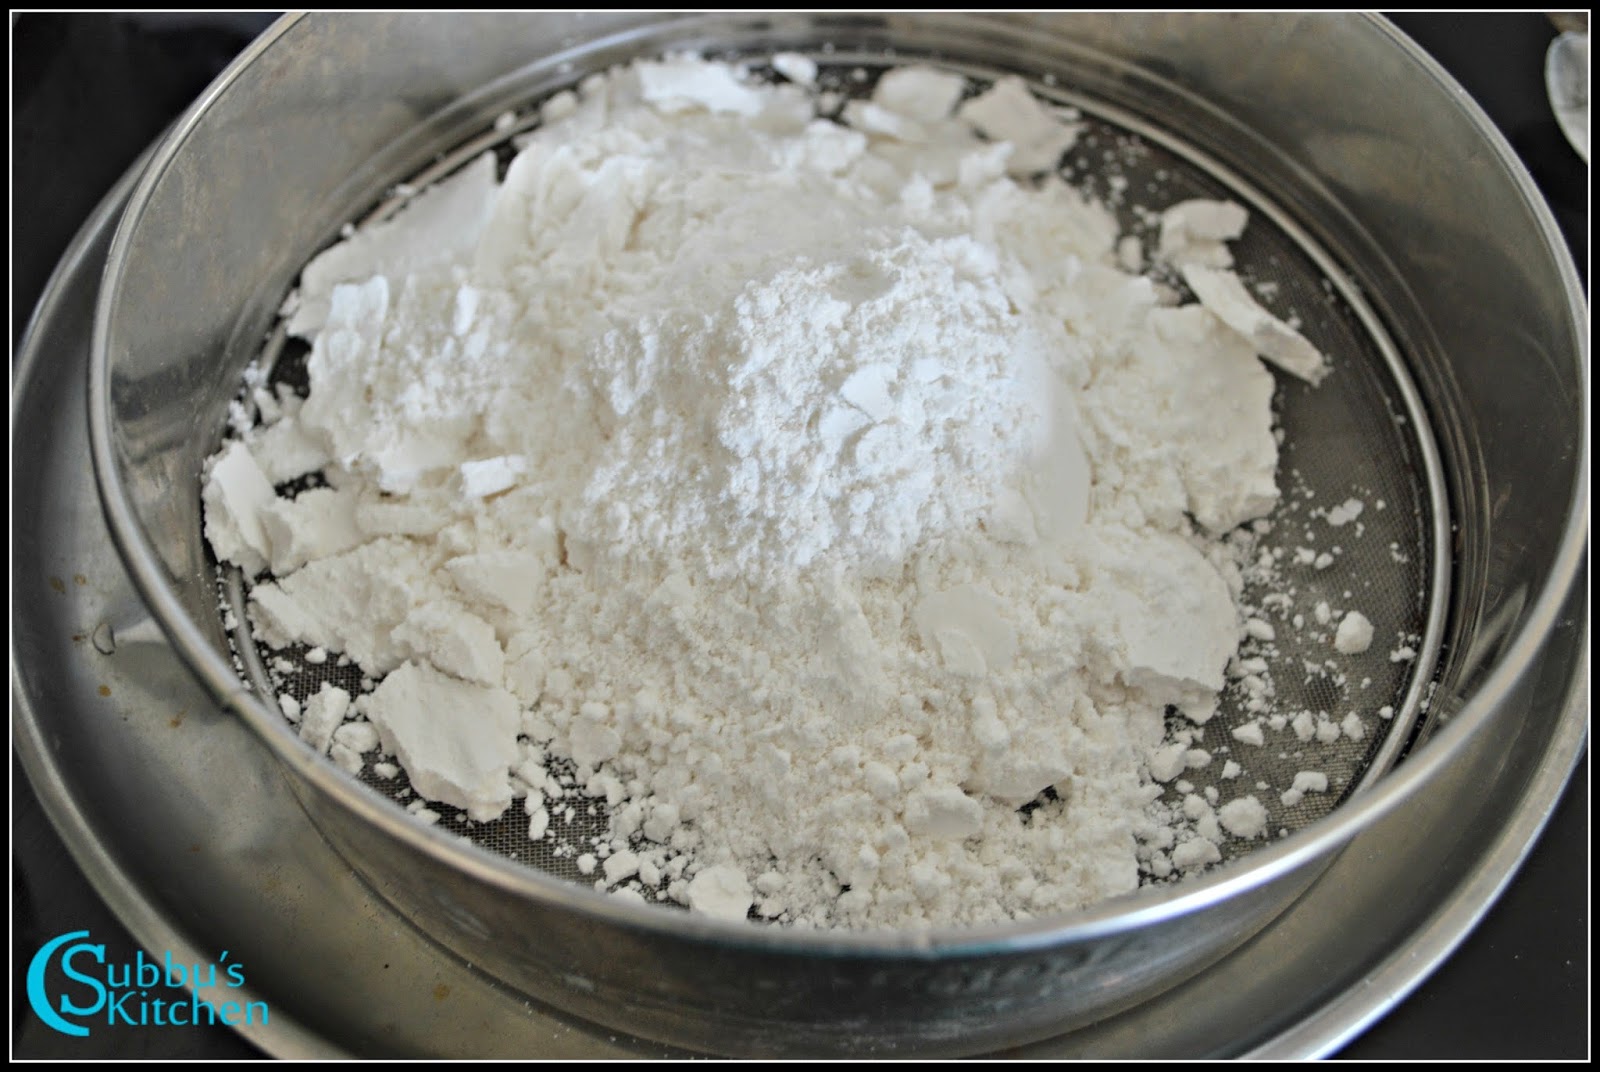
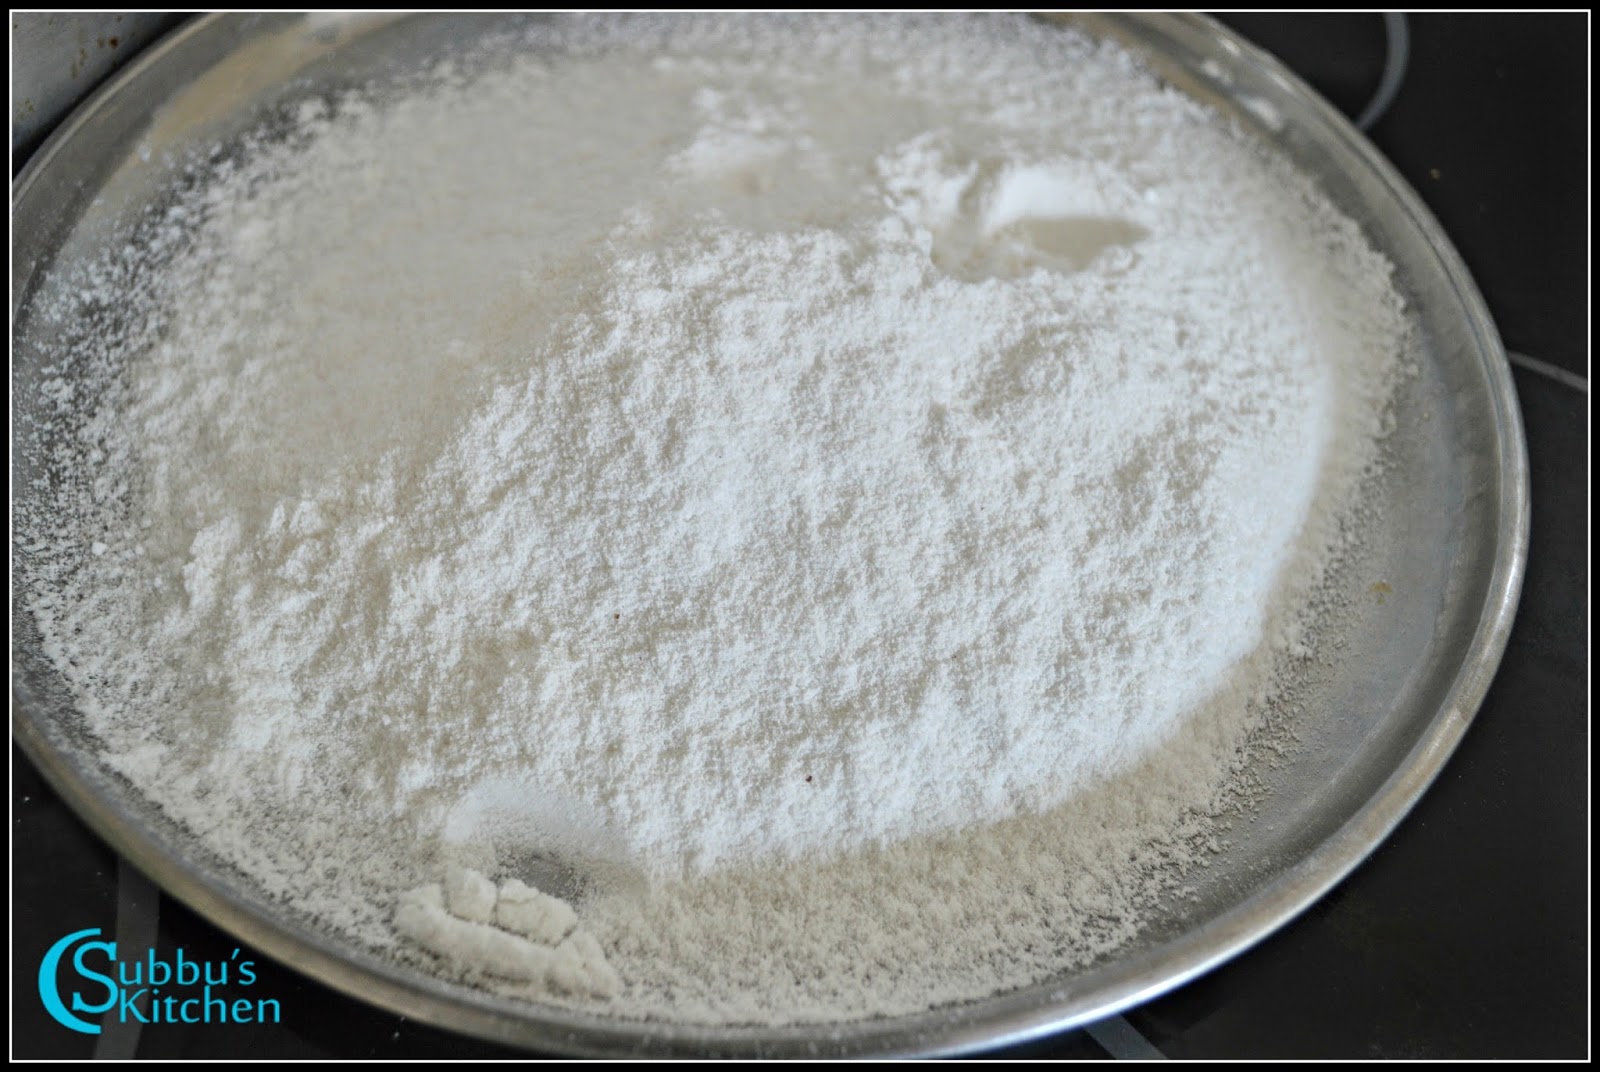
- Sieve the gram flour to get rid of lumps. Take a mixing bowl, add a cup of gram flour.
- Then, add the baking soda and rice flour and give a good mix with a whisk or you can also sieve them all together to make sure they all are nicely mixed up. The baking soda aerate the mixture and helps the boondhi to puff up in the oil
- To the mixing bowl, now, add orange food color and ghee and then mix everything well
- Then add water little by little and make it to a batter. The batter should be like a dosa batter. The batter should not be very thin or very thick.
- Now the boondhi batter is ready. Set this aside
Method for making Sugar Syrup:
- Heat a pan and add the sugar. Add a cup of water and allow the sugar to get dissolved in water
- Keep stirring the sugar till you get a one-string consistency. When you take a drop of sugar syrup and rub between your thumb and point finger, it should form a string. That is the correct consistency. Switch off the flame
- Add cardamom powder, food color, rose water and stir well. Finally add lemon juice and give a good stir. The lemon juice prevents the sugar syrup to get crystallize upon cooling. Even adding lemon juice, if the sugar syrup gets crystallized, then no need to worry, just before adding the boondhis to the syrup, we can warm the sugar syrup
- Set this sugar syrup aside
- Heat oil in a pan, hold a perforated ladle or boondhi ladle a little high from the pan and pour the boondhi batter on the ladle and then gently rub or pat the ladle so that the small drops of batter starts to drop in oil.
- Add 1 or 2 ladle of batter at a time. Do not populate the oil with more boondhis then the boondhis will stick with one another. Also, if you get a tail in each boondhi, no need to worry, any way we are going to grind the boondhi at last
- Allow the boondhi to deep fry in oil. Keep the flame in medium while frying and when the bubbles stop, take the boondhis out of the oil and place it in a paper towel to drain excess oil. Repeat the process for rest of the batter.
- Now the boondhis are ready.
- Warm up the sugar syrup if it is very thick. Add the fried boondhis along with half of cashews and almonds and mix well.
- Once they are little cooled, take them to the mixer jar. Warm the milk and add it to the boondhi. the boondhis will be dry thats the reason we are adding milk. We can also boil water and add it instead of using milk
- Give a couple of pulse and make it to a coarse mixture. Add rest of the nuts and mix well
- Take the coarsely ground ladoo mixture in a bowl. Make lemon sized balls out of the ladoo mixture. Initially these ladoos are sticky but these ladoos will become firm upon cooling
- The yummy Motichoor ladoos are ready to serve! You can keep it in an air-tight container and consume it within 3-4 days. You can refrigerate for more shelf life.
 |
| Motichoor Ladoo Recipe |
↧
November 3, 2015, 9:08 am
Jangri is a very yummy and traditional sweet variety.
Jangri is one of the popular sweet dish available in most of sweet shops in India. We can see many people buying Jangri from the sweet stalls especially for Diwali and other festivals. This is a very simple and easy to make sweet dish at home with all simple ingredients. We just need little patience to get the right shape, otherwise this is one of the easiest dish to make at home.
| Yield | 20 |
| Preparation Time | 1 hour |
| Cooking Time | 1 hour |
 |
| Jangri |
Ingredients:
| Urdal | 1 cup |
| Raw Rice | 2 teaspoon |
| Sugar | 3 Cups |
| Oil | For Frying |
| Kesar color(Saffron Color) | 1/4 teaspoon |
| Orange Essence | 4 Drops |
 |
| Jangri |
Method:
- We can buy Jangri cloth that is available in the shop. Also we can use thick plastic cover. In the bottom middle of the cover, heat the needle and insert the needle in middle of the cover to make a small hole. Soak the urdal and raw rice in water for 1 hour
- After an hour, Rinse the urdal and rice and grind it in grinder by adding very little water like we do for medhuvadai
- Take 1 handful of urdal flour and put it in plastic cover. First take a plate and try to squeeze the cover to make jangri pattern. We need to make one circle and then followed by small circles to make a flower like design. Try once or twice in the plate before trying directly in the oil just to be confident enough to proceed with. Heat oil in heavy bottomed pan. When the oil is hot enough, squeeze the plastic cover(like we do it using mehandi cone) so that the urdal flour comes out of the small hole in the plastic cover. Rotate your hand to squeeze the urdal flour in hot oil like a small circle with flower like design just we practised on a plate.
- Let the urdal flour gets fried in oil. When the jangri turns golden brown color and becomes cripsy, remove from flame. Repeat the steps for the remaining urdal flour.
- Heat another heavy bottomed pan, add sugar. Add water so that sugar dissolves in water. Stir the sugar syrup continuously until the syrup is sticking in hands. Now add organge essence and kesar powder and stir it well. Switch off the flame. To prevent the sugar syrup to get crystallized, we can add a teaspoon of lemon juice. If the sugar syrup gets crystallized after some time we can again keep in low flame and add a tablespoon of water and make it dilute again.
- To this sugar syrup, add 5-6 fried jangri and mix it well so that the jangris get dipped in sugar syrup. Leave this for 5-10 mins and then take those jangris out of sugar syrup and place it in a plate. Repeat the steps for the rest of fried jangris
- The delicious tasty Jangri is ready to serve for any occassion especially for the festival of lights(Diwali)
 |
| Jangri |
↧
November 4, 2015, 12:00 am
Seven Cups Cake is a delicious sweet and an easy sweet!. As the name indicates we are going to take 7 equal quantities of the below ingredients and we are going to make a tasty Seven Cups Cake. Very easy to make in less time and a very good dish for Diwali and other festivals.
") |
| Seven cups cake (7 cup cake) |
Especially when we are planning to share our homemade sweets with our friends and relatives, we need to make more quantities and this is one of the dish which gives more pieces of cake and also simple to make. Some sweets like rasgulla, jangri are little complex and also sticky. So we all look for some hassle free and simple dish and Seven Cups Cake is the perfect dish. The ingredients used in this dish are all simple and easily available in our kitchen. I always prefer to make this yummy cake and distribute to my friends and relatives. Lets see how to make this yummy cake!
") |
| Seven cups cake (7 cup cake) |
| Yield | 35 pieces |
| Preparation Time | - |
| Cooking Time | 30 mins |
") |
| Seven cups cake (7 cup cake) |
Ingredients:
| Gram Flour/KadalaiMavu | 1 Cup |
| Clarified butter/Ghee | 1 Cup |
| Grated Cocunut | 1 Cup |
| Milk | 1 Cup |
| Sugar | 3 Cups |
*1 Cup = Cup can be of any measure. I have used 1 cup = 250 ml, which gives an yield of about 35-40 pieces.
") |
| Seven cups cake (7 cup cake) |
Method:
- Take a plate and grease the plate with ghee and keep it aside. Fry the Gram Flour with a teaspoon of ghee. Stop the frying when you get a nice aroma (may be for 2-3 mins) . Don't let the color of the Gram Flour change. Switch off the flame. To the fried gram flour, add coconut
- Add the sugar to the pan. Add a cup of milk and mix all the above ingredients in a pan
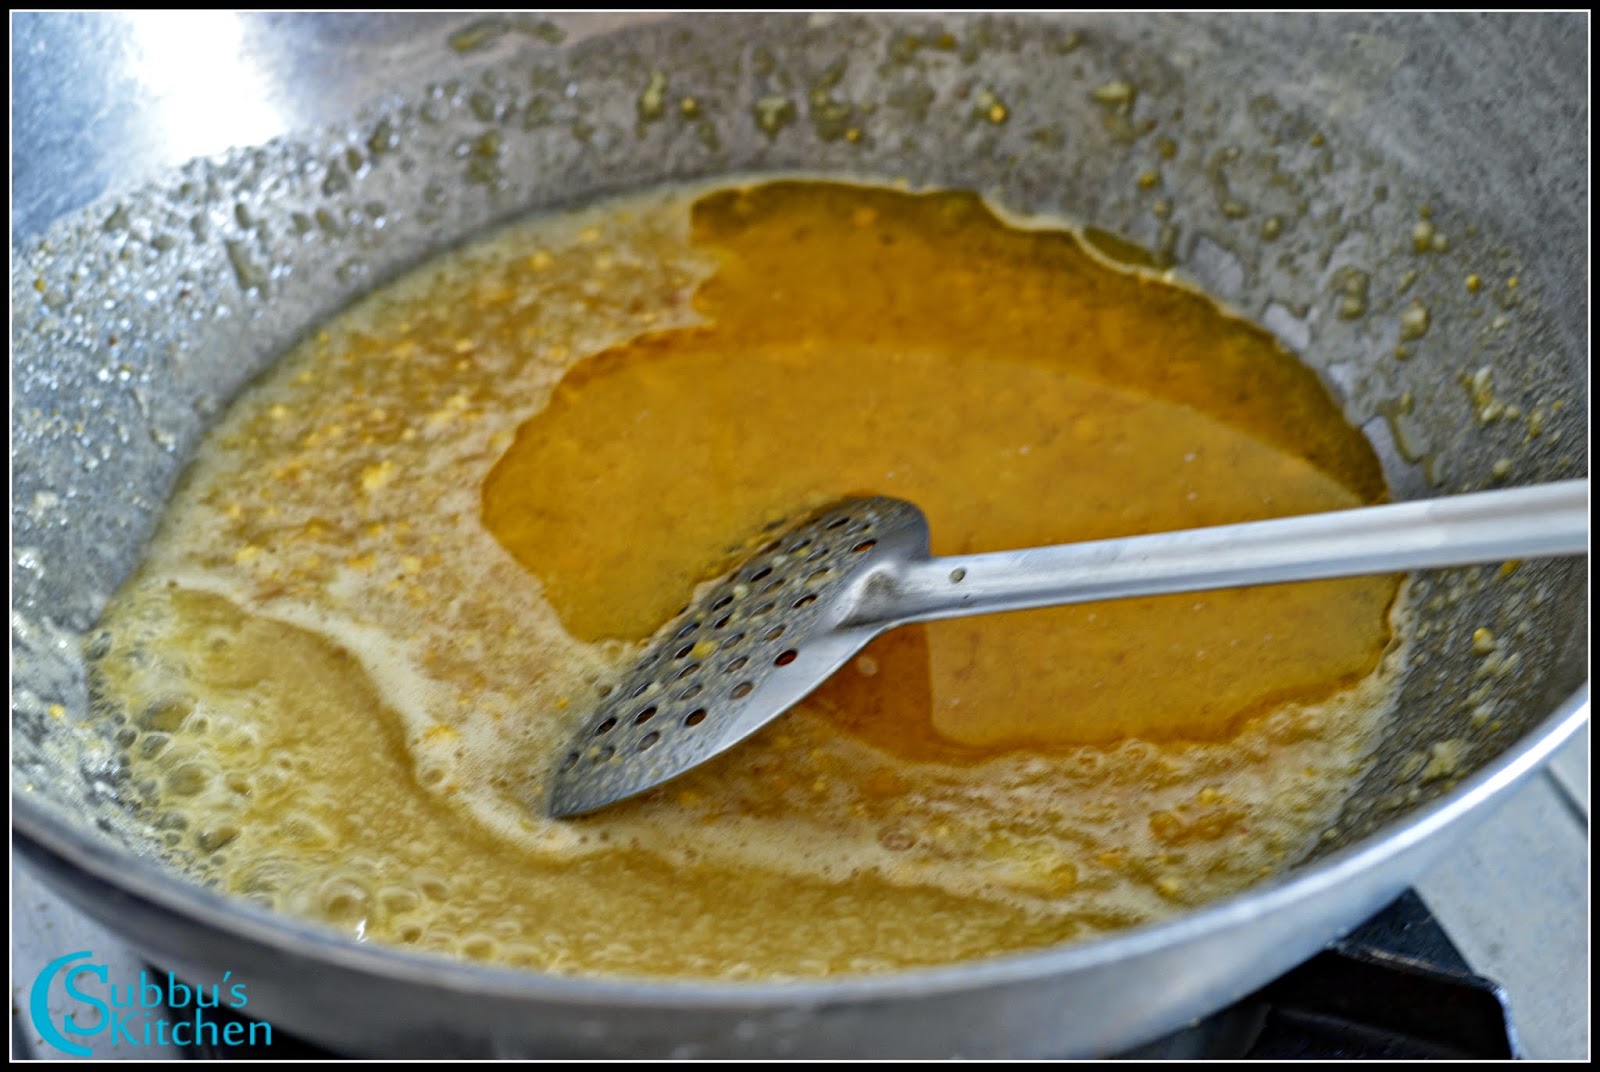
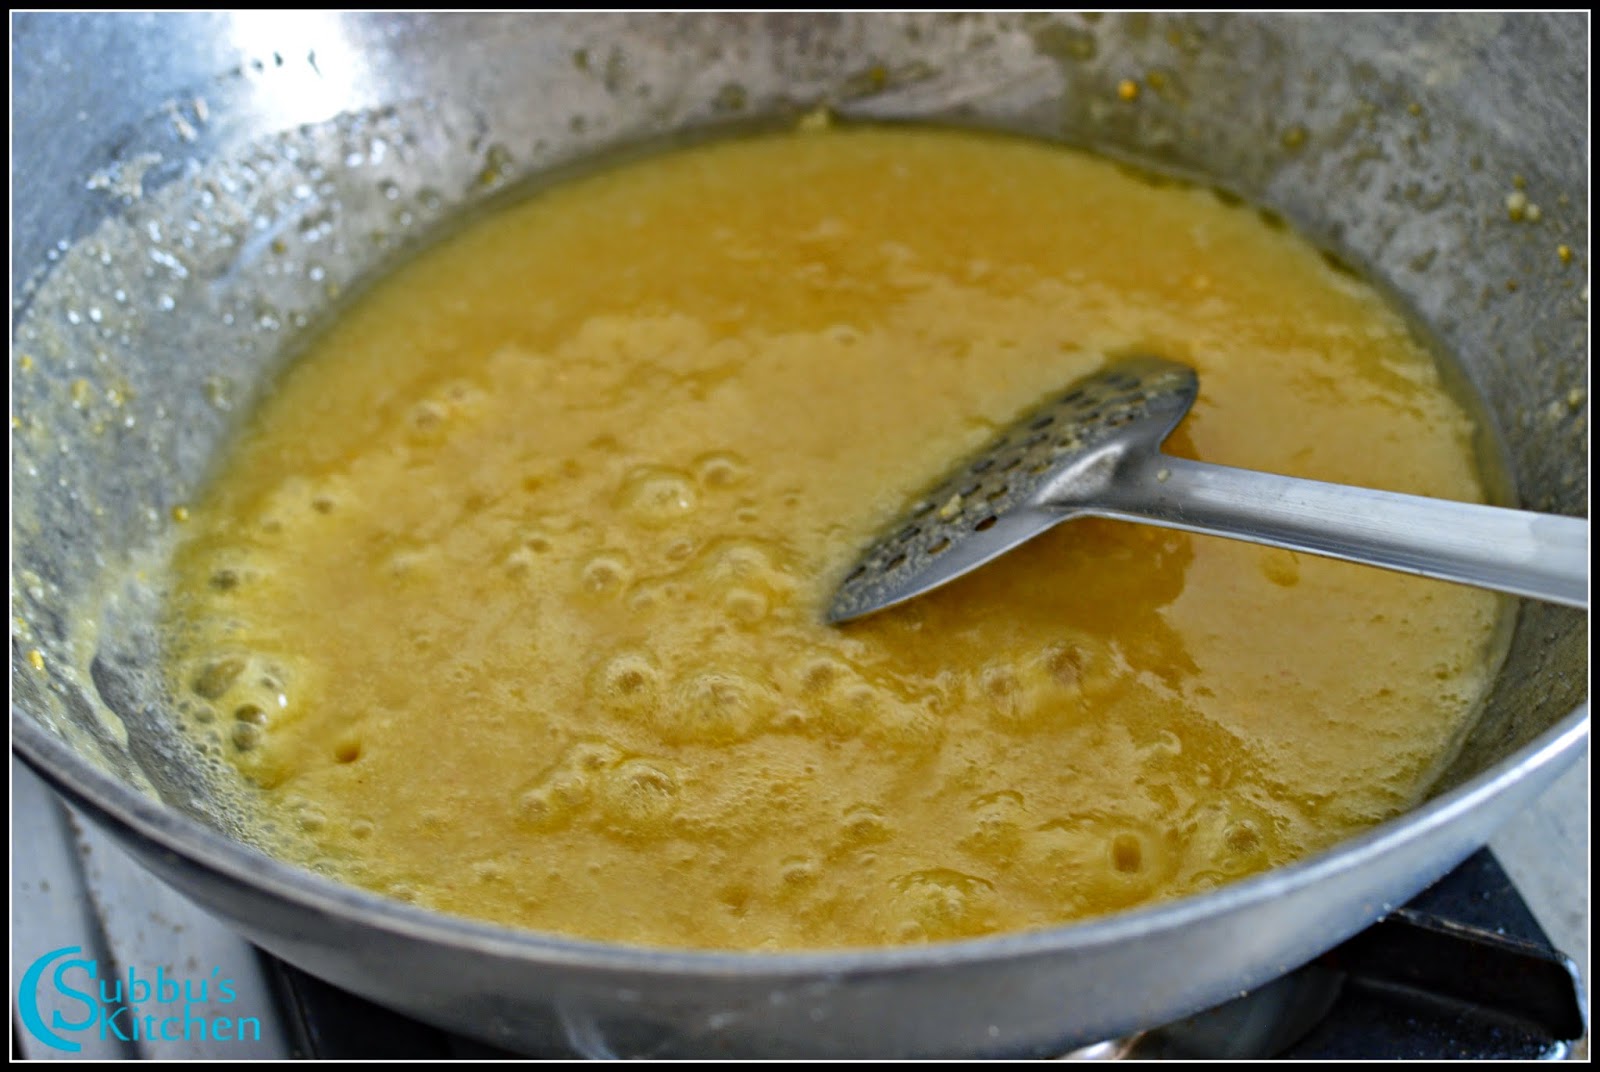
- Finally add the cup of ghee and mix well. Heat the pan and stir the ingredients continuously by keeping the flame medium to low. Keep stirring it.
![]()
![]()
- In about 10 - 15 minutes, when the cake starts to leave the sides of the pan without sticking, then that is the right stage to remove the cake from the flame. There will be a formation of forth on the cake mixture and at the same time the cake starts leaving the sides of the pan without sticking. Note - This is the right consistency when you need to switch off the flame and transfer the content into the greased plate. Otherwise, the mixture will break into small tiny pieces. Pour the cake mixture into the greasy plate. Level the cake in the greasy plate using a flat spatula so that it is evenly spreaded. Leave the cake mixture to cool off in the plate. Now using a knife gently put vertical lines. Again cut the cake diagonally so that we get diamond shape cake pieces. Remove the diamond shaped seven cup cakes gently and store it in a air tight container
- The mouth-watering seven cups cake is ready to serve
") |
| Seven cups cake (7 cup cake) |
↧
↧
November 5, 2015, 12:00 am
Okkarai is a famous traditional South
Indian sweet dish that is made on the
auspicious day of Diwali. I still remember my older days where in my mom prepares only Okkarai and Vadai for Diwali. Probably we weren't afford to make other sweets and snacks during those days. Still in now a days in many brahmin families
Okkarai is one of the mandatory sweet which is prepared on the auspicious day of diwali. This simple dish
Okkarai needs only less expensive ingredients and readily available
materials in any house. Lets see how to prepare this yummy sweet dish now...
Preparation and Yield:| Preparation time | 10 mins |
| Cooking Time | 1 hour |
| Yield | 250gms |
") |
| Okkarai (Diwali Okkarai) |
| Channa Dal/Kadalai Paruppu | 1 Cup |
| Grated Jaggery | 1 Cup |
| Grated Coconut | 2 tablespoon |
| Cardamom powder | 1/4 Teaspoon |
| Cashew Nuts | Few |
| Ghee | 2 tablespoon |
![]() |
| Okkarai Ingredients |
Method:- Dry fry the Channa Dal (KadalaiParuppu) in a pan till it turns into golden brown color. Take the dry roasted Dal into the vessel and add water and pressure cook it allowing 2-3 whistles.
- Once the dal is cooked, drain the excess water using a striner and spread the cooked and strained channa dal in a clean white towel for 5 minutes just to ensure the dampness is absorbed by the towel
- Take the dried, cooked channa dal to the mixer and grind it to a nice powder. Take the ground channadal powder along with the grated coconut and keep it ready. Lets start with our jaggery suryp now.
- Take the grated jaggery in a vessel and add 1/4 cup of water and keep it in flame. Let the jaggery gets dissolved in water completely. Remove the vessel from flame and strain the jaggery juice to a pan to get rid of all sand or dust particles in jaggery
- Keep the pan in flame and bring the jaggery suryp to boil. When the syrup starts to thicken, if you take a drop of syrup and rub between your fingers, it should stick. This consistency is enough. We don't need string or stone consistency for okkarai. To the syrup, add the grated coconut and mix well. Then add the ground channa dal powder and give a good stir. Slowly the channadal mixture starts to cumble and becomes soft like puttu.
- Add 1 tablespoon of ghee and keep the flame very low and occasionally mix the okkarai. Heat another pan, add a teaspoon of ghee and roast the broken cashews till they turn golden brown color. Add the roasted cashews and cardamom and mix well.The okkarai breaks down into smaller pieces and it should be soft. When we take the small pieces in hand and make into ball then this is the right stage to remove the okkarai out off the flame.
- The delicious Okkarai is ready to serve
- The delicious Diwali Okkarai is now ready. Get set ready to Welcome Diwali!
") |
| Okkarai (Diwali Okkarai) |
↧
November 7, 2015, 4:15 pm
Mysorepak is a rich and popular sweet in southern india. Most of us buy mysorepak from sweet shops during festivals thinking this is very hard to make at home. But this is one of the simple and easy sweet you can make under 30 minutes and you will have 20-25 pieces. A rich and delectable sweet to share with your friends and relatives. I have already shared the recipe of krishna sweet mysorepa in my blog. That method needs lots of ghee which melts in our mouth. This version is the crispier version of mysorepak. in this version going to use less ghee and the muysorepak is crunchy and tasty!
 |
| Mysorepak |
Preparation and Yield:
| Preparation time | 5 mins |
| Cooking Time | 30 mins |
| Yield | 25 |
| Recipe Category | Sweet |
| Recipe Cuisine | South Indian |
 |
| Mysorepak |
Ingredients:
| Gram Flour / Besan | 1 Cups* |
| Ghee | 1 Cup |
| Sugar | 2 Cup |
*1 Cup = 250ml
 |
| Mysorepak |
Method:
- Take a tray and grease it with ghee
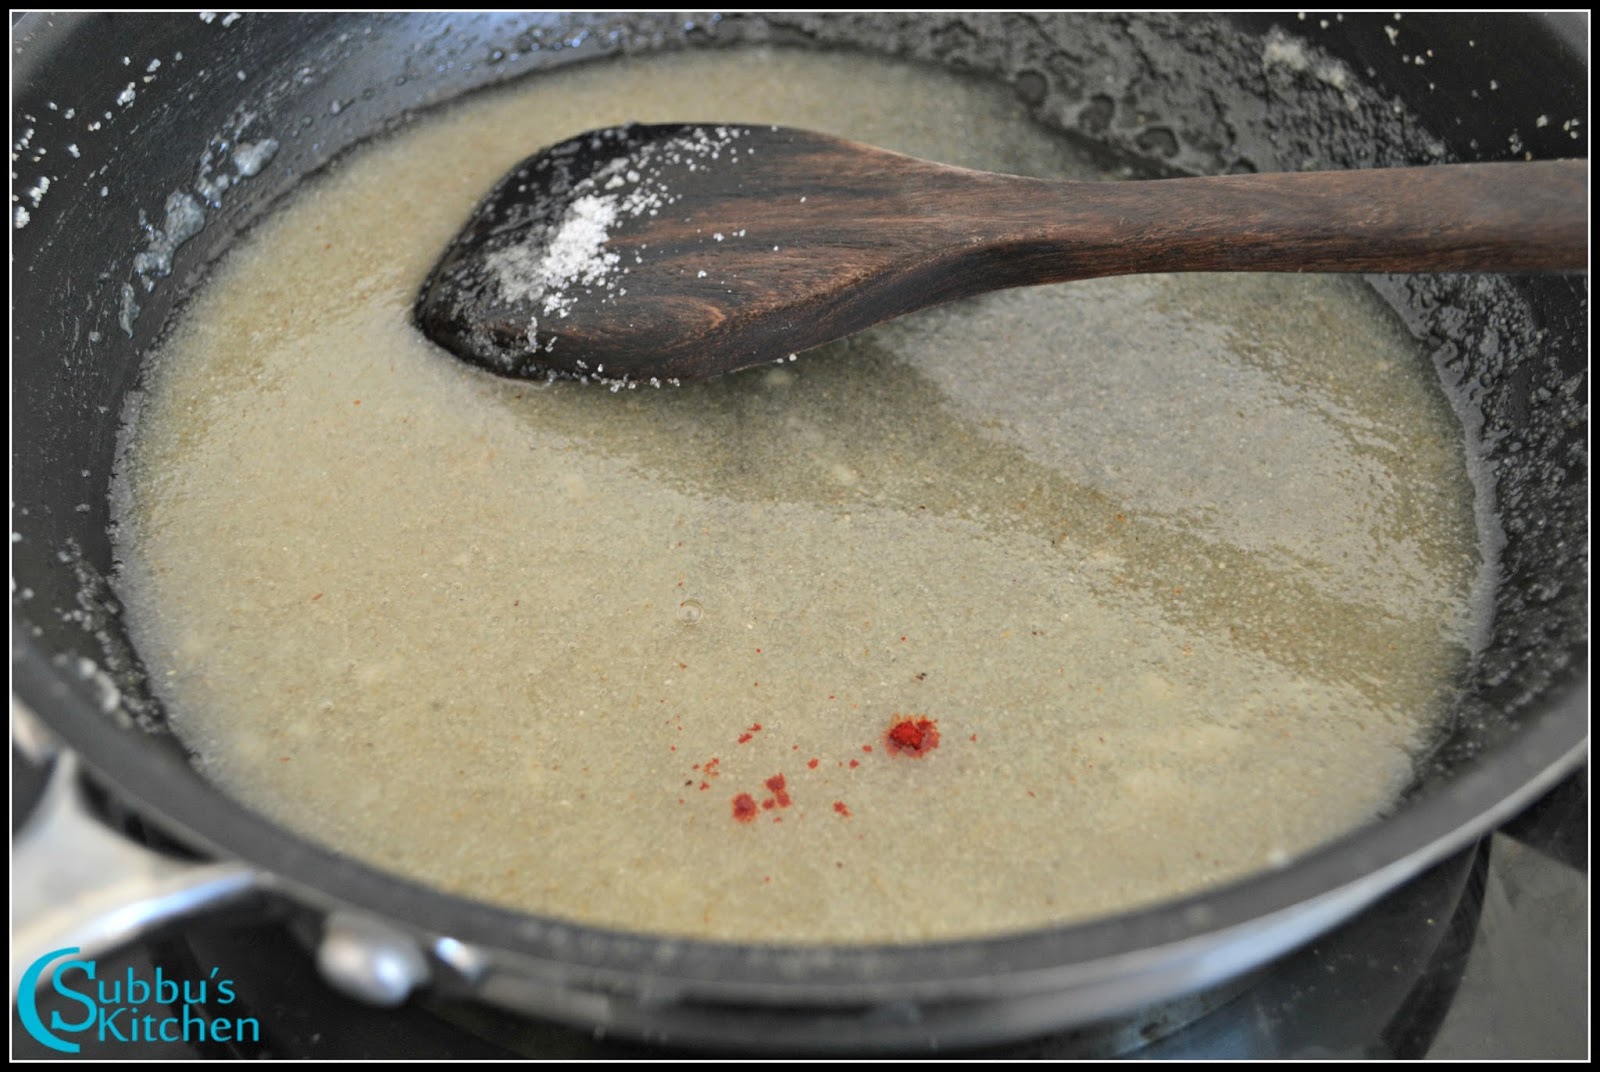
- Heat a pan, add ghee and allow it to melt. Add besan flour little by little and stir well so that there are no lumps. When the besan are nicely mixed with ghee the mixture starts to rise up like milk. When we boil milk, it starts to bubble up and rise up, in the same way, the besan and ghee mixture starts to rise up, this is the time, you need to switch off the flame and remove the pan and keep the mixture aside. If you overcook the mixture, you will have the burning smell of ghee.
- In another pan, add 2 cups of sugar and add water to soak the sugar.When the sugar gets dissolved nicely, stir nicely till you get a one string consistency. When you take a drop of syrup and rub between your thumb and pointer, one string should be formed. You can refer the video for this consistency.
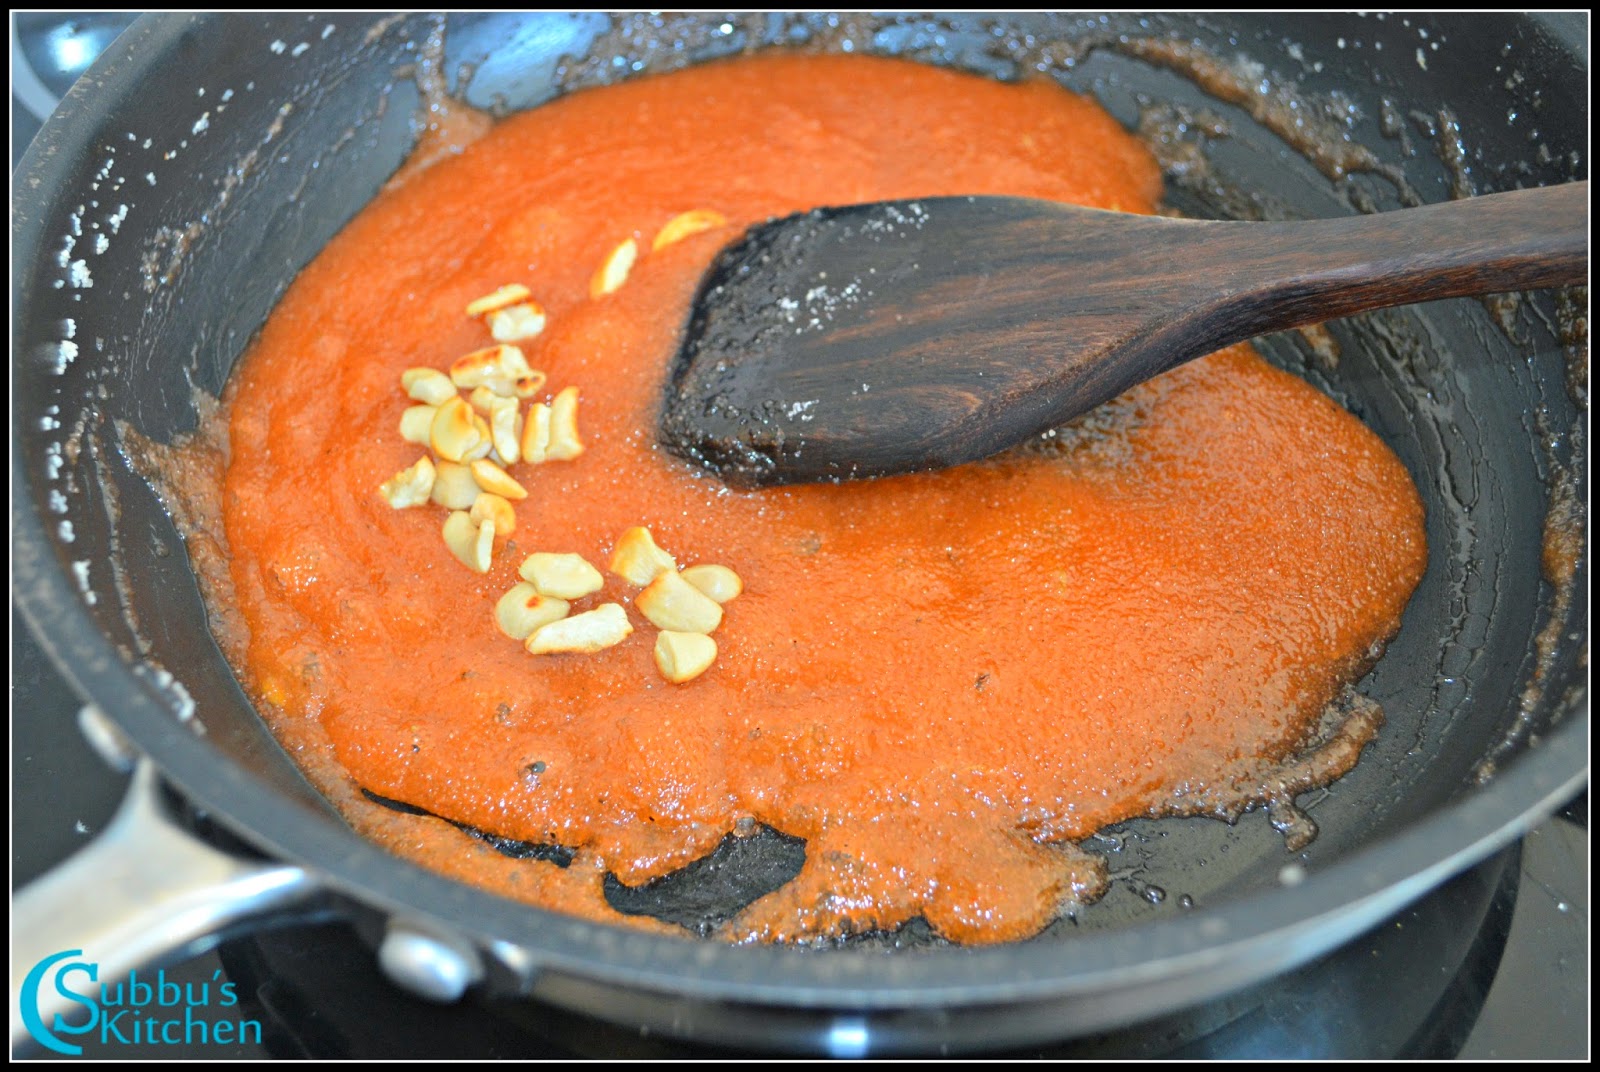
- Once the one string consistency reached, slowly add the besan and ghee mixture and stir continuously till the besan, ghee and sugar and nicely mixed up and incorporated well.
- Slowly the mixture starts to thicken up and starts to roll up and doesn't stick to the sides of the pan. A frothy or foamy layer starts to form on top the mixture, the whole mixture starts to rise up like boiling milk. Immediately switch off the flame and pour the mixture on to the tray and pat it with backside of the ladle
- You can sprinkle a teaspoon of sugar on the patted mixture. Allow it to cool for a minute and then cut into square of diamond shaped pieces
- The crunchy and delicious Mysorepak is ready!
 |
| Mysorepak |
↧
November 8, 2015, 12:00 am
Rawa (Sooji) Kesari is one of the traditional sweet variety in every Indian Kitchen. It is one of the simplest sweet dish to learn and do easily even for teens. Rava kesari is the first sweet recipe I learnt from my mom during my collage days. Very quick and instant sweet dish to treat our family and guests. We all prepare this Rava kesari for many occasions including festivals, events or simple parties.
 |
| Rava Kesari Recipe | Sooji Kesari Recipe | Semolina Kesari Recipe |
Preparation and Yield:| Preparation time | - |
| Cooking Time | 15 mins |
| Servings | 4 |
 |
| Rava Kesari Recipe | Sooji Kesari Recipe | Semolina Kesari Recipe |
Ingredients:
| Rava / Sooji / Semolina | 1 Cup |
| Sugar | 2 Cups |
| Water | 3 Cups |
| Ghee | 2 tablespoon |
| Cashew Nuts | 5 |
| Cardamom Powder | a Pinch |
| Kesar (Saffron) Colour | a Pinch |
 |
| Rava Kesari Recipe | Sooji Kesari Recipe | Semolina Kesari Recipe |
Method:
- Pour little ghee in a pan and keep it in flame and fry the cashew nuts till they become golden brown colour and keep it aside in a plate. To the pan, add the Rava and fry for sometime in the ghee till it becomes red color and we get a nice aroma
- Add water to another sauce pan and bring it to boil. Add the hot boiling water to the Rava in the pan and stir well and keep the flame low and allow the Rava to cook.
- When the Rava is cooked, add sugar to the pan and mix well. Adding sugar, makes the rawa to get diluted again, so do not panic, keep the flame low and keep stirring till the rava again starts to thickening.
- Add cardamom powder and kesar color and mix well. Finally add ghee and stir it evenly and add the cashew nuts and switch off the flame
- The mouth-watering Rava / Sooji Kesari is ready to serve.
 |
| Rava Kesari Recipe | Sooji Kesari Recipe | Semolina Kesari Recipe |
↧
November 13, 2015, 5:54 pm
Paratha, Indian flat bread are so delicious and healthy. We can make Parathas with many different veggies and greens and make it healthier. I personally like spinach paratha because its one way to make my kids eat spinach without much trouble. This time, I wanted to make Basil Paratha. Freshly grown basil in my garden always tempts me to make some basil recipes. So, instead of regular spinach paratha, I used fresh basil leaves. Wow! they are awesome. The basil leaves gives a lovely aroma and flavour to the whole dish. We can serve these basil paratha with dal/ gravy or ant raitha of your choice and enjoy the dish!
Preparation and Yield:| Preparation time | 15 mins |
| Cooking Time | 30 mins |
| Yield | 15 |
| Recipe Category | Indian bread |
| Recipe Cuisine | North Indian |
 |
| Basil Paratha Recipe |
Ingredients:
| Wheat flour | 2 Cups* |
| Basil Leaves | 1 Cup |
| Green Chilli | 1 |
| Salt | To taste |
| Cumin Powder | 1/2 teaspoon |
| Coriander Powder | 1/2 teaspoon |
| Ajwain / Carom seeds | 1/4 teaspoon |
| Ghee / Butter | 2 tablespoon |
 |
| Basil Paratha Recipe |
Method:
- Wash the basil leaves thoroughly and roughly chop it and keep it aside
- In a mixing bowl, add 2 cups of wheat flour. Add the chopped basil leaves. To this now, we need to add cumin powder, coriander powder, ajwain, salt, chopped green chilli and mix everything well
- Add water little by little and knead the flour to a nice and smooth dough
- Cover the dough and set this aside for 10 minutes. After 10 minutes, make lemon sized balls out of the dough
- Dust each dough ball with some flour and then using a rolling pin, roll them to a paratha, a little thicker than the roti. In the same way, roll the rest of the dough balls
- Heat a tawa, th tawa should be very hot to cook the parathas, Add a rolled paratha, apply ghee or butter and cook them on both the sides for 30-40 seconds till you get bubbles.When the paratha is nicely cooked, take it out of the pan. In the same way, cook the rest of the parathas
- The delicious and healthy Basil parathas are now ready. Serve with your favourite dipping and enjoy this delicious dish!
 |
| Basil Paratha Recipe |
↧
↧
November 16, 2015, 10:26 am
Kothamalli thogayal, is a very easy aromatic and yummy thogayal variety. Coriander leaves are very healthy greens. Most of us use coriander leaves for garnishing. Sometimes our kids doesn't like to see chopped coriander leaves added in rasam, sambar or other gravies. Thogayal is one easy dish to make them eat this healthy greens. This thogayal is a great kids lunch box dish too. We just need to dry grind the thogayal and then add the seasoning and mix with cooked fluffy rice and there you go! You will have a nice aromatic and tasty kothamalli thogayal rice ready to for packed lunch! I have published another version of this kothamalli thogayal which is a spicier version and mostly used as pickle. This is a mild version for kids!
Preparation and Yield:| Preparation time | 10 mins |
| Cooking Time | 20 mins |
| Servings | 4 |
| Recipe Category | Thogayal |
| Recipe Cuisine | South Indian |
 |
| Kothamalli Thogayal Recipe | Coriander Leaves Thogayal |
Ingredients:
| Coriander Leaves | 4 Cups* |
| Channa dal | 3 tablespoon |
| Urid Dal | 3 tablespoon |
| Red Chilli | 2 |
| Hing | a Pinch |
| Grated Coconut | 1/4 Cup |
| Tamarind | 1 small gooseberry size |
| Salt | To taste |
| Oil | 1 tablespoon |
*1 Cup = 250ml
 |
| Kothamalli Thogayal Recipe | Coriander Leaves Thogayal |
Method:
- Wash the coriander leaves thoroughly to get rid off sand or other dust particles. Roughly chop the coriander leaves and set it aside
- Heat a pan and add oil. When the oil is hot, add the channa dal and urid dal and fry them in oil till they turn light golden brown color
- Then add the red chillies , hing, tamarind and grated coconut and fry them all for a minute. We can also use tamarind paste instead of raw tamarind
- Switch off the flame and add the washed and chopped coriander leaves and saute them in the heat of the pan for couple of minutes
- Allow the fried ingredients to cool off completely before grinding
- Once the ingredients are cooled off, add all these ingredients to the mixer jar. Add salt and grind all these ingredients to a coarse paste. Mostly we don't need to add any water, but if you feel the ingredients are not getting crushed up, you can sprinkle some water and grind it to a coarse paste
- Take the ground thogayal in a bowl. You can mix the thogayal with rice and enjoy the thogayal. If you wish to make it for lunch box, then season the thogayal with mustard seeds, urid dal and cashews and then mix with rice
- The delicious Kothamalli Thogayal is now ready to serve!
 |
| Kothamalli Thogayal Recipe | Coriander Leaves Thogayal |
↧
November 17, 2015, 5:28 pm
Ven Pongal is one of the easy, delicious and popular SouthIndian Breakfast dish. A very delectable dish made with rice, moong dal, ghee and mild spices. A very quick breakfast to make. No expertise needed. Ven Pongal is usually served with gotsu, sambar or chutney. Usually few dishes are very popular in marriages. We always wonder the taste of few dishes in marriage catering. Pongal is one such dish. For marriages, the caterers need to make pongal in very larger quantity. So their preparations are usually very simple and straight forward. In this pongal recipe also, you can find how easily they concoct this dish. Lets get started!
Preparation and Yield:| Preparation time | 15 mins |
| Cooking Time | 40 mins |
| Servings | 4 |
| Recipe Category | Main |
| Recipe Cuisine | South Indian |
 |
| Kalyana Ven Pongal Recipe |
Ingredients:
| Raw Rice | 1 Cup* |
| Moong Dal | 1/4 Cup |
| Water | 3.5 Cups |
| Milk | 1 Cup |
| Salt | To Taste |
| Cumin Seeds | 1 teaspoon |
| Whole black peppercorns | 1 teaspoon |
| Finely chopped Ginger | 1 teaspoon |
| Hing | a Pinch |
| Curry Leaves | few |
| Ghee | 2 tablespoon |
| Cashews | few |
 |
| Kalyana Ven Pongal Recipe |
Method:
- Heat a pan and dry fry the rice for couple of minutes. We don't need to fry the rice till it sputter or become red. Just fry them for couple of minutes as it will help the rice to get nicely cooked. Take the fried rice in a veseel. Again keep the the pan in the flame. Add moong dal and dry fry it till it turns slight golden brown color. Take this roasted dal to the vessel having roasted rice
- Wash thoroughly the rice and dal. Then, add 3.5 cups of water and 1 cup of milk. Milk is optional. We can add 4.5 cups of water instead. But milk gives a nice flavour. Most of us add milk for sweet pongal.
- Add cumin seeds, peppercorns, finely chopped ginger, curry leaves, hing and salt and give a good mix. Keep the vessel inside the pressure cooker and pressure cook it for 5-6 whistles. We want the rice and dal to be nice and mushy. After the pressure is fully released, take out the vessel, With the back of a ladle or with a whisk, nicely mash the cooked rice and dal.
- Heat a pan and add ghee. Then add the broken cashews and fry the cashews in ghee till it turns golden brown color. Then add broken curry leaves and Switch off the flame. Finally add the mashed dal and rice
- Mix everything well.
- The delicious Kalyana Ven Pongal is now ready to serve!
Optional - Along with Cahsew you can also temper the Cumin Seeds, curry leaves, few more pepper corns and add with the cooked pongal.
 |
| Kalyana Ven Pongal Recipe |
↧
November 19, 2015, 1:13 pm
Thanksgiving is almost here, Cranberry season started. Fresh cranberries are always tempting me. I love making cranberry chutney and cranberry thokku. Thokku is a spicy and tangy thick gravy made out of cranberries. A very simple and easy to make, yet delicious thokku. We can mix the thokku with rice or best served with curd rice.
Preparation and Yield:| Preparation time | 5 mins |
| Cooking Time | 20 mins |
| Yield | 250gms |
| Recipe Category | Pickle |
| Recipe Cuisine | South Indian |
 |
| Cranberry Thokku Recipe |
Ingredients:
| Cranberry | 350gms |
| Tamarind | 1 small gooseberry size |
| Turmeric Powder | 1/4 teaspoon |
| Red Chilli Powder | 2 teaspoon |
| Salt | To taste |
| Fenugreek Powder | 1/4 teaspoon |
| Gingelly Oil | 2 tablespoon |
| Mustard Seeds | 1 teaspoon |
| Curry Leaves | few |
 |
| Cranberry Thokku Recipe |
 |
| Cranberry Thokku Recipe |
Method:
- Soak the tamarind in water and squeeze out the tamarind extract
- Wash the cranberries to get rid off dust or any sand. Keep this aside. Heat gingelly oil in a pan, add mustard seeds when the oil is hot, add mustard seeds. When the mustard seeds starts to sputter, add hing and broken curry leaves and saute it for few seconds
- Then, add the cranberries, stir-fry the cranberries in medium flame for 3-4 minutes. Add turmeric powder and keep stirring till it gets mushy
- When the cranberries becomes mushy, add tamarind extract along with salt and red chilli powder. Keep stirring occasionally till the whole mixture becomes thick like a pulp. Then finally add the fenugreek powder and mix well and switch off the flame
- Take the Cranberry Thokku in an air-tight container and keep refrigerated for more shelf life
- Serve the cranberry thokku with hot rice along with a teaspoon of gingelly oil. Or you can relish this delicious cranberry thokku with curd rice!
 |
| Cranberry Thokku Recipe |
↧
November 20, 2015, 3:55 pm
Sometimes, the simple and quick dishes are most tastier than the most complex or time consuming dishes. One such dish is the cabbage dry curry. Fresh cabbages cook in no time. Adding little Indian spices and stir-fry them, we will have delicious dry curry ready in no time. This cabbage dry curry is a perfect accompaniment for roti or any rice varieties.
Preparation and Yield:| Preparation time | 5 mins |
| Cooking Time | 20 mins |
| Servings | 4 |
| Recipe Category | Poriyal |
| Recipe Cuisine | South Indian |
 |
| Cabbage Stir-fry | Cabbage Dry Curry Recipe |
Ingredients:
| Grated or thinly sliced cabbage | 1/2 Kg |
| Sliced Carrots | 1 Cup |
| Onion | 1, thinly sliced |
| Tomato | 1, thinly sliced |
| Red Chilli Powder | 1/2 teaspoon |
| Turmeric Powder | 1/4 teaspoon |
| Coriander Powder | 1 teaspoon |
| Garam Masala | 1/2 teaspoon |
| Salt | To Taste |
| Finely chopped coriander Leaves | 1 tablespoon |
 |
| Cabbage Stir-fry | Cabbage Dry Curry Recipe |
Method:
- Heat oil in a pan, add mustard seeds. When the mustard seeds starts to sputter, add cumin seeds.
- Add thinly sliced onions, along with pinch of salt. turmeric powder, coriander powder and garam masala and saute the onions till they turn transparent
- When the onions turn transparent, add the grated cabbage and sliced carrots and stir-fry in high flame for couple of minutes. Then close the pan with a lid and allow the veggies to cook completely till they are soft and tender
- When the veggies are completely cooked, add sliced tomatoes and garnish with coriander leaves
- The delicious Cabbage Dry curry is now ready to serve!
 |
| Cabbage Stir-fry | Cabbage Dry Curry Recipe |
↧
↧
November 25, 2015, 3:01 pm
Fresh and aroma rich mint leaves are very healthy. Adding the fresh mint leaves to rasam enhances the flavour and also would be a variation from the usual tomato rasam. Many of us love to have rasam as a soup. We can either mix the rasam with rice or drink the rasam after a heavy meals. This mint rasam would be very nutritious and good for our stomach and helps in digestion. We can either saute the mint leaves along with the seasoning or we can grind it. If we grind the mint leaves, the rasam will rich aroma which some of us might not like. So we can saute it and make the rasam little mild. Try this version of the mint rasam and share your experience!
Preparation and Yield:| Preparation time | 10 mins |
| Cooking Time | 20 mins |
| Servings | 4 |
| Recipe Category | Main |
| Recipe Cuisine | South Indian |
 |
| Mint Rasam Recipe |
Ingredients:
| Tamarind | 1 gooseberry size |
| Thoor Dal | 1 tablespoon |
| Mint Leaves | 1 Cup |
| Tomato | 1 |
| Salt | To taste |
| Hing | a generous pinch |
| Curry Leaves | few |
For Grinding: | Thoor Dal | 2 teaspoon |
| Coriander Seeds | 2 teaspoon |
| Pepper | 1 teaspoon |
| Cumin Seeds | 1/2 teaspoon |
For Seasoning: | Ghee | 1 teaspoon |
| Mustard Seeds | 1 teaspoon |
| Curry leaves | few |
 |
| Mint Rasam Recipe |
Method:
- Pressure cook the thoor dal with a pinch of turmeric powder and mash the cooked dal and set it aside
- Soak the tamarind in warm water and extract the juice and keep it aside
- Heat a pan and dry fry the grinding ingredients till the dal turns light brown color.
- Take the roasted ingredients to a mixer jar and grind it to a smooth powder
- Take a vessel and add the tamarind extract. Add chopped tomatoes, hing, salt and curry leaves and keep the vessel in flame and allow the tamarind to boil for 5 minutes to get rid off raw smell of tamarind.
- After 5 minutes, add the tamarind extract and stir well. Allow the rasam to boil in medium flame for 10 minutes. Then add the mashed thoor dal and mix well. Add 2 cups of water and stir well and allow the rasam to become frothy.
- Meanwhile, in heat ghee in another pan. Add mustard seeds and when the mustard seeds starts to sputter, add curry leaves, mint leaves and saute the mint leaves in ghee for 3 minutes. Switch off the flame. Add the seasoned ingredients to the rasam and switch off the flame. Do not allow the rasam to boil, then the aroma would be lost.
- The delicious Mint Rasam is now ready to serve! Serve with rice or drink the rasam after a rich meal and enjoy the taste!
 |
| Mint Rasam Recipe |
↧
November 30, 2015, 2:43 pm
Potato Stew is a very easy and simple dish of Kerala that goes well with Appam, Poori, Chapathi, Puttu, Idiyappam, or even with plain bread. Recently, I tasted this in my friend's house. She served this yummy potato stew with brown rice Idiyappam and it tasted divine. My MIL used to grind the coconut and add the coconut paste to this stew, but my friend told that its conventional to use the coconut milk instead of grinding and adding the coconut paste. So, this time, I tried adding coconut milk and it turned out so yummy. Also, instead of adding only potato, I enriched with peas, carrot and beans to make it much healthier.
 |
| Kerala Style Potato Stew Recipe |
Preparation and Yield:| Preparation time | 5 mins |
| Cooking Time | 30 mins |
| Servings | 5 |
| Recipe Category | Main |
| Recipe Cuisine | South Indian |
 |
| Kerala Style Potato Stew Recipe |
Ingredients:
| Potato | 3 |
| Onion | 2 |
| Green Chilli | 3 |
| Carrot | 1 |
| Beans | 10 |
| Green Peas | 1/4 cup |
| Chopped ginger | 1 tablespoon |
| Curry Leaves | few |
| Coconut Oil | 1 tablespoon |
| Peppercorns | 1 teaspoon |
| Pepper Powder | 1/4 teaspoon |
| Thin Coconut Milk* | 2 Cup |
| Thick Coconut Milk* | 1 Cup |
| Salt | To Taste |
* I have used the store bought coconut milk available in the tin. For thin coconut milk, i took a cup of coconut milk from the tin and added a cup of water.
For Seasoning:
| Oil | 1 tablespoon |
| Cinnamon Stick | 1 inch stick |
| Cloves | 3 |
| Bay Leaf | 1 |
| Cardamom | 2 |
 |
| Kerala Style Potato Stew Recipe |
Method:
- Heat a heavy bottomed pan and add oil. Add whole garam masalas and saute them in oil. To that, add the peppercorns, slit green chillies, curry leaves and chopped ginger and saute them all till you get a nice aroma out of the masala
- Then, add the thinly sliced onions and saute them in oil till they turn translucent. When the onions are translucent, then add chopped potatoes, carrot, beans and peas and stir-fry in high flame for couple of minutes
- Then add thin coconut milk along with salt and cook the veggies till they are nicely tender and soft
- When the veggies are cooked completely, add the thick coconut milk and mix well. When the stew starts to boil, add coconut milk along with chopped curry leaves and pepper powder and mix well
- The delicious Kerala Style Potato Stew is now ready to serve! Relish with your roti, idiyappam or appam and enjoy the dish!
Please click here for the other version of the Potato stew recipe |
| Kerala Style Potato Stew Recipe |
↧
December 2, 2015, 1:58 pm
Want an easy and delicious tea time snack for a nice evening? How about trying Pori upma? Its really very easy and quick to make and yet very yummy and healthy. Most of us have puffed rice all time in our home as it is very easy to make bhel puri or just give the plain pori for kids as a snack. Using the same puffed rice, adding few more veggies and make it a little healthier and also tasty. Try this Pori Upma and share your comments!
Preparation and Yield:| Preparation time | 10 mins |
| Cooking Time | 20 mins |
| Servings | 4 |
| Recipe Category | Snack |
| Recipe Cuisine | South Indian |
 |
| Pori Upma| Puffed Rice Upma Recipe | Maramaralu Upma |
Ingredients:
| Puffed Rice (Pori) | 4 Cups* |
| Onion | 1 |
| Carrot | 1 |
| Green Peas | 2 tablespoon |
| Peanuts | 2 tablespoon |
| Green Chilli | 2 |
| Lemon Juice | 1 teaspoon |
| Chopped ginger | 1 teaspoon |
| Salt | To taste |
| Chopped Coriander Leaves | 1 tablespoon |
*1 Cup = 250ml
For Seasoning: | Oil | 1tablespoon |
| Mustard Seeds | 1 teaspoon |
| Cumin Seeds | 1 teaspoon |
| Split Urid dal | 1 teaspoon |
| Curry leaves | few |
 |
| Pori Upma| Puffed Rice Upma Recipe | Maramaralu Upma |
Method:
- Heat a pan and add peanuts and dry roast them till they are hot in medium flame. Set this aside and allow it to cool. 'Take the puffed rice in a colander and wash it thoroughly under running water and then squeeze it and drain the water and keep the puffed rice aside
- Heat a pan and add oil, add mustard seeds and cumin seeds and when they starts to sputter, add urid dal and roast them till they are golden brown color. Then add the chopped green chilli and curry leaves. Then, add the chopped onions and ginger and saute them till the onions turns translucent.
- Then add the chopped carrot and green peas and stir-fry for couple of minutes. Add turmeric powder and salt and add 1/4 cup of water and allow the veggies to cook completely.
- Peel the peanuts and add it to the mixer jar and give a pulse to grind them coarsely. Set this aside. When the veggies are cooked, add the washed and squeezed puffed rice to the pan and give a good mix
- Garnish with coriander leaves and switch off the flame. Squeeze 1/2 lemon and mix well.
- Finally add ground peanuts and mix well and take it to a serving bowl
- Serve the delicious Pori Upma with hot coffee / tea.
 |
| Pori Upma| Puffed Rice Upma Recipe | Maramaralu Upma |
↧
December 6, 2015, 2:43 pm
Set Dosa, a popular breakfast served in most fast food or tiffin centers in Southern India. A set of soft and thick spongy dosas are served together with coconut chutney and sagu. In Tamilnadu ,generally set dosas are served with vadacurry or getti chutney. This combo is so popular and an integral dish in many restaurants. set dosa is very simple to make at home. The bater needs fermentation as the dosas will be very soft and spongy.
Preparation and Yield:| Preparation time | 2 hours |
| Fermentation Time | 12 hours |
| Cooking Time | 30 mins |
| Servings | 4 |
| Recipe Category | Main |
| Recipe Cuisine | South Indian |
 |
| Set Dosa Recipe |
Ingredients:
| Parboiled Rice / Idli Rice | 2 Cups* |
| Urid Dal | 1/2 Cup |
| Aval/Poha | 1 Cup |
| Fenugreek Seeds | 3/4 teaspoon |
| Salt | To taste |
| Oil | For cooking dosa |
*1 Cup = 250ml
Method:
- Take a mixing bowl, add rice, dal, aval, fenugreek seeds and wash thoroughly and then add water to soak them all together. Keep this aside for 2 hours
- After 2 hours, drain water from the dal and rice and add half of the quantity to the mixer jar and grind it to a fine and smooth paste by adding water little by little
- Grind the rest of the rice and dal til you finish to a smooth batter. Let this batter sit aside for 12 hours or overnight for the batter to get fermented
- After 12 hours, the batter would have nicely fermented and increases its quantity. Add salt and give a nice stir
- Heat a tawa and when the tawa is nicely hot, pour 1 to 2 ladles of batter and spread it to a thick and small dosa. Apply a teaspoon of oil for the dosa to cook.
- You can small pores in the dosa. Flip it to other side and cook for another 30 seconds . Apply oil in other side also. Remove the cooked dosa from the tawa and continue this process till you finish the batter
- Serve the spongy and soft Set Dosa with Vegetable Sagu or coconut chutney and enjoy this dish
 |
| Set Dosa Recipe |
↧
↧
December 7, 2015, 2:09 pm
Mixed vegetable saagu is one of the popular accompaniment for Set dosa, poori and many more dishes. Saagu is rich creamy gravy with a wonderful blend of spices. A healthy and delicious accompaniment for a wonderful morning. Set dosa with Saagu is a popular breakfast combo in almost all restaurants in Karnataka. A rich and healthy side dish for a morning breakfast. I love relishing this yummy Saagu with roti and also with set dosa. Try this simple but healthy mixed vegetable saagu sna share your comments!
Preparation and Yield:| Preparation time | 5 mins |
| Cooking Time | 20 mins |
| Servings | 2 |
| Recipe Category | Main |
| Recipe Cuisine | South Indian |
 |
| Mixed Vegetable Sagu Recipe | Saagu Recipe |
Ingredients for Masala:
| Coriander Seeds | 1 tablespoom |
| Fennel seeds | 1 teaspoon |
| Red Chilli | 2 |
| Peppercorns | 1/2 teaspoon |
| Cumin Seeds | 1/2 teaspoon |
| Cinnamon Stick | 1 inch piece |
| Cloves | 4 |
| Cardamom | 3 |
| Poppy Seeds | 1 teaspoon |
| Grated Coconut | 2 tablespoon |
| Chopped Ginger | 1/2 teaspoon |
| Garlic cloves | 2 |
For Gravy: | Onion | 1 bigsize |
| Green Chilli | 1 |
| Mixed Vegetables (carrot, peas,beans,capsicum,potato etc) | 2 Cups * |
| Turmeric powder | 1/2 teaspoon |
| Salt | To taste |
| Oil | 1 tablespoon |
| Butter | 2 tablespoon |
| Chopped Coriander Leaves | few |
* 1 Cup = 250ml
 |
| Mixed Vegetable Sagu Recipe | Saagu Recipe |
Method:
- Heat a pan and add all the grinding ingredients except coconut and dry roast them till all the whole garam masala is nicely roasted. Take the roasted ingredients in the mixer jar. Again place the pan on the flame and dry roast the coconut and take it to the mixer jar
- Add garlic and ginger and grind them all to a smooth paste by adding little water. Keep the ground paste aside
- Heat a heavy bottomed pan, addoil, when the oil is hot, add onions and chopped green chilli and saute the onions till they are translucent
- When the onions are sauted well, add butter and then add the mixed veggies and stir-fry in hight flame for couple of minutes
- Then add turmeric powder and salt and mix well. Add the ground paste and also add1.5 cups of water and mix everything well. Switch off the flame and take this gravy to the vessel and pressure cook it allowing for 3-4 whistles.
- After pressure is released, take out the cooked Saagu and garnish with fresh coriander leaves
- Serve the delicious and healthy Mixed vegetable Saagu with Roti, Set dosa or poori and enjoy the dish!
 |
| Mixed Vegetable Sagu Recipe | Saagu Recipe |
↧
December 8, 2015, 4:47 pm
Aloo bread pakora, bread stuffed with spicy potatoes, coated with gram flour and deep fry. This is one of the favorite and special street food in Delhi. A perfect tea time snack. We can make break pakoras plain also without filling. Aloo bread pakora is crunchy outside, spicy and soft inside. generally served as an appetizer for parties. The spice potato filling along with crunchy bread outercover makes this snack a very perfect evening time snack with hot tea / coffee
 |
| Aloo Bread Pakora Recipe | Bread Bajji Recipe | Bread Pakora Recipe |
Preparation and Yield:| Preparation time | 15 mins |
| Cooking Time | 40 mins |
| Servings | 5 |
| Recipe Category | Snacks |
| Recipe Cuisine | South Indian |
 |
| Aloo Bread Pakora Recipe | Bread Bajji Recipe | Bread Pakora Recipe |
Ingredients for Filling:
| Potato | 3 medium size |
| Green Chilli | 2 |
| Ginger | 1 inch piece |
| Mustard Seeds | 1 teaspoon |
| Cumin Seeds | 1/2 teaspoon |
| Salt | To Taste |
| Oil | 1 teaspoon |
| Turmeric Powder | 1/4 teaspoon |
Ingredients for Batter & Pakora:
| Gram Flour / Besan | 1 Cup* |
| Rice Flour | 1/2 Cup |
| Hing | a Pinch |
| Red Chilli Powder | 1 teaspoon |
| Ajwain / Carom Seeds | 1/2 teaspoon |
| Salt | To Taste |
| Oil | 1 teaspoon |
| Bread Slices** | 4 |
* 1 Cup = 250ml
 |
| Aloo Bread Pakora Recipe | Bread Bajji Recipe | Bread Pakora Recipe |
** Take thick bread like sandwich breads and not the fresh soft breads they will become soggy when we dip in gram flour batter
Method:
- Boil the potatoes and peel them and mash them nicely and set this aside
- Take the ginger and green chilli to the mixer jar and grind it to a smooth paste and set this aside. Heat a pan and add oil. When the oil is hot, add mustard seeds. When the mustard seeds starts to sputter, add cumin seeds and allow it to sputter
- Add mashed potatoes along with salt, turmeric and green chilli paste and mix them all well. Now our filling is ready
- Lets make the batter now. Take a mixing bowl and add the gram flour. Add rice flour along with hing, red chilli powder, salt, ajwain and mix them all well. Add water little by little and make it to a batter like dosa batter. It should not be very watery and also not thick like idli batter.
- Take 2 bread slices and to one bread, add 1 tablespoon of filling and spread it evenly on one bread. Take another bread and cover this filling bread and then you can cut them into triangular places
- Heat oil in a pan. Add each bread one by one and dip it inside the batter. Coat it properly on both the sides and drop it gently into the oil. Deep fry the bread pakoras till they are crispy and turns golden brown color
- Serve the crispy and tasty Aloo Bread Pakora with ketchup or green chutney and enjoy this lovely snack!
 |
| Aloo Bread Pakora Recipe | Bread Bajji Recipe | Bread Pakora Recipe |
↧
December 11, 2015, 4:30 pm
Traditional nei appam we make for festivals like krishna jayanthi, karthigai deepam, are made with rice. But we can also make delicious appam using semolina. This semolina based appam is crispy outside and soft and fluffy inside. This is also one of the neivedhyam dish many people make for festivals. This semolina appam( Rava Appam) is simpler and easy to make. Kids especially love this yummy sweet. I should have published this recipe well before, during Krishna Jayanthi or Thirukarthigai festivals. But somehow, I missed it. As Margazhi month is approaching, I made this video today. As there are lots of auspicious days in this auspicious month Margazhi, this is one of the neivedhyam dish we can make. Preparation and Yield:| Preparation time | 1 hour | | Cooking Time | 40 mins | | Yield | 30 Appam | | Recipe Category | Sweet | | Recipe Cuisine | South Indian |
 | | Rava Appam Recipe | Semolina Jaggery Appam Recipe |
Ingredients: | Rava / Semolina / Sooji | 1 Cup* | | Jaggery | 1 Cup | | Wheat Flour | 1/2 Cup | | Cardamom | 3-4 | | Grated Coconut | 2 tablespoon | | Baking Soda | 1/8 teaspoon | | Ghee | 2 tablespoon | | Banana | 1 (Optional) |
 | | Rava Appam Recipe | Semolina Jaggery Appam Recipe |
Method: - Take a mixing bowl and add semolina. Add water just to soak the semolina and leave it aside for 1 hour
- After 1 hour, drain the water and add the soaked semolina to the mixer jar, Add jaggery and cardamom pods and grind them all to a nice and smooth batter. The batter should be the consistency of dosa batter.
- Pour the batter to the mixer jar. Add wheat flour and mix it well with a whisk to make sure there are no wheat flour lumps. Then, add the grated coconut and give a good mix.
- Finally add the baking soda and give a one final gentle mix. Do not beat or hardly mix the batter after adding baking soda. Keep the paniyaram pan on the flame. Keep the flame in medium high.
- Add ghee to each mould and then using a small ladle add batter to each of the mould. Cook the appam on both the sides till they are turning golden brown color. Repeat the step for rest of the batter
- The Delicious Rava Appam are now ready to serve!
 | | Rava Appam Recipe | Semolina Jaggery Appam Recipe |
|
↧
")
")


")


")
")
")
")


")
")


")