Quantcast
Channel: Subbus Kitchen
Viewing all 1833 articles
Browse latest View live

Ribbon Pakoda(Nada Recipe)

$
0
0
My sambandhi make this recipe very well. This is also one of the spicy, crispy, easy to make recipe. Ribbon Pakoda/Nada is a very simple, easy to do snacks on any occasion. This is given as seer bakshnam for many auspicious occasions like marriages, seemandham etc. Homemade rice flour is best for this ribbon pakoda as it will give a nice texture and crispy taste. But we can very well use store bought rice flour too. Here, I have given recipe with homemade rice flour.
Ribbon Pakoda (Nada Recipe)

Preparation and Yield:
Preparation time1.5 Hour
Cooking Time1 hour
Yield1.5 Cups

Ribbon Pakoda(Nada Recipe)

Ingredients:
Raw Rice4 Cups
Channa dal1 Cup
Moong dal1 Cup
SaltTo Taste
Red Chilli Powder1 Teaspoon
Butter1/2 Cup
OilFor Frying


Accessories Required:
Ribbon Pakoda Press
Ribbon Pakoda Mould

Ribbon Pakoda(Nada Recipe)


Method:
  1. Rinse the raw rice in water atleast couple of times. Then add fresh water to the raw rice to soak them well and leave the raw rice to get soaked for atleast an hour. After an hour, drain the water from rice and spread it in a clean white towel to get it dried. 

  2. Meanwhile, Heat the pan and add channadal and fry for some time till the dal is hot. Keep it aside. Add moongdal and fry for some time till the dal is hot. Keep it aside

  3. Mix Rice and dals and grind to a nice powder it in rice mill. If you are living abroad or you are planning to do smaller quantities, then you can grind the rice and dals in the mixer itself. First grind the dry roasted dals in the mixer to a fine powder.  Pass the ground dal powder through the sieve to get rid of lumps. Grind the dals in batch and do the sieving process to get nice and smooth dal powder. Now, Grind the rice in the mixer to a nice powder. Normally we don't get any lumps.

  4. But we should sieve it couple of time to get a smooth rice flour. If we get any lumps while we sieve, again add the lumps of rice flour to the mixer and grind it again to a smooth flour and again sieve it. Repeat the sieve process again and again till we get a smooth and nice rice flour. If we have good sunny weather, then we can spread the ground smooth rice flour in a newspaper and keep it in sun to dry the rice flour nicely.

  5. Now mix the dal flour and the rice flour nicely and take it in a mixing bowl. To the flour, add red chilli powder, salt, butter and hing 

  6. Add water and make the flour into a chapati like dough. Heat oil in a heavy bottomed pan, and when the oil is hot add a little piece of dough to check for the hotness. When the dough raises immediately then the oil is ready for frying. Put 1 hand full of dough in a press, and close the press with ribbon pakoda mould. Squeeze the dough to a big circle. Deep fry the ribbon padoka/Nada in low flame till it is crisp and turns light golden brown color and the bubbles starts to suppress and also the sizzling sound will come down. This is the right stage. Do not keep the flame high as it will change the color quickly but the nada would not be crispy. 

  7. Take it out and place it in a oil strainer with a paper towel to remove excess oil and allow it to cool. Repeat the step for the rest of the dough. Store it in a air tight container and serve.

  8. The delicious ribbon padoka/Nada is ready to serve.
  9. Ribbon Pakoda(Nada Recipe)
    Ribbon Pakoda(Nada Recipe)


Kara Kara Buttons Recipe | Crispy Buttons Recipe

$
0
0
Kara Kara, Muru Muru Buttons, a crispy snack which is so simple to make with all available ingredients at home. A very easy and quick to make dish. No hassle with press and mould. Crispy buttons are made with rice flour and dals. Using homemade rice flour gives a nice texture to the dish, but we can very well use store bought rice flour. Store bought rice flour gives a little more reddish color to the dish. We even do this dish as an evening snack and enjoy with tea / Coffee. Try this simple dish for this Diwali and enjoy the snack!


Kara Kara Buttons Recipe | Crispy Buttons Recipe


Preparation and Yield:
Preparation time10 mins
Cooking Time1 hour
Yield250gms

Kara Kara Buttons Recipe | Crispy Buttons Recipe

Ingredients:
Homemade Rice Flour1 Cup**
Urdal1 teaspoon
Channadal / Bengal Gram dal1 teaspoon
Moong dal1 teaspoon
Red Chilli Powder1/2 teaspoon
Hinga Pinch
Grated Coconut2 teaspoon
SaltTo taste
OilFor Deep Frying


Kara Kara Buttons Recipe | Crispy Buttons Recipe

Method:

  1. Take the dals in a vessel. Rinse them in water and pressure cook them allowing 3-4 whistles. We need nicely mashed dal. Once the dal is cooked, mash it nicely and keep it aside

  2. Take a mixing bowl and add rice flour, mashed dal, salt, red chilli powder, hing, grated coconut and mix well. Add water little by little and knead it to a nice and stiff dough

  3. Take a clean white towel and spread it on the floor. Make small gooseberry sized balls out of the dough place it in the towel. Using your thumb, press each ball in the middle to make it flat like a button. Do not press too much. The buttons should be small and little thick.

  4. Repeat the step for the rest of the dough. Let the buttos dry for couple of minutes in the towel. Meanwhile, heat oil in a pan, when the oil is hot enough, gently add 10-12 buttons to the oil.

  5. Deep fry the buttons in low flame till they are crispy and turn to golden brown color. Keep the flame low while frying, because the buttons are little thick and hence needs more time to deep fry them.  Take the crispy buttons out of the oil and keep in paper towel to drain the excess oil. 

  6. Serve the yummy and crispy Buttons with hot coffee/ tea and enjoy!
  7. Kara Kara Buttons Recipe | Crispy Buttons Recipe
    Kara Kara Buttons Recipe | Crispy Buttons Recipe

Okkarai (Diwali Okkarai)

$
0
0
Okkarai is a famous traditional South Indian sweet dish that is made on the auspicious day of Diwali. I still remember my older days where in my mom prepares only Okkarai and Vadai for Diwali. Probably we weren't afford to make other sweets and snacks during those days. Still in now a days in many brahmin families Okkarai is one of the mandatory sweet which is prepared on the auspicious day of diwali. This simple dish Okkarai needs only less expensive ingredients and readily available materials in any house. Lets see how to prepare this yummy sweet dish now...

Okkarai (Diwali Okkarai)

Preparation and Yield:
Preparation time10 mins
Cooking Time1 hour
Yield250gms

Okkarai is a traditional sweet made during Diwali
Okkarai Sweet (Diwali Okkarai)

Ingredients:
Channa Dal/Kadalai Paruppu1 Cup
Grated Jaggery1 Cup
Cardamom powder1/4 Teaspoon
Cashew NutsFew
Ghee2 tablespoon

Okkarai Ingredients


Method:
  1. Dry fry the Channa Dal/KadalaiParuppu in a pan till it turns into golden brown color. Take the dry roasted Dal into the vessel and add water and pressure cook it allowing 2-3 whistles.

  2. Once the dal is cooked, drain the excess water using a striner and spread the cooked and strained channa dal in a clean white towel for 5 minutes just to ensure the dampness is absorbed by the towel

  3. Take the dried, cooked channa dal to the mixer and grind  it to a nice powder. Take the ground channadal powder along with the grated coconut and keep it ready. Lets start with our jaggery suryp now.

  4. Take the grated jaggery in a vessel and add 1/4 cup of water and keep it in flame. Let the jaggery gets dissolved in water completely. Remove the vessel from flame and strain the jaggery juice to a pan to get rid of all sand or dust particles in jaggery

  5. Keep the pan in flame and bring the jaggery suryp to boil. When the syrup starts to thicken, if you take a drop of syrup and rub between your fingers, it should stick. This consistency is enough. We don't need string or stone consistency for okkarai. To the syrup, add the grated coconut and mix well. Then add the ground channa dal powder and give a good stir. Slowly the channadal mixture starts to cumble and becomes soft like puttu.

  6. Add 1 tablespoon of ghee and keep the flame very low and occasionally mix the okkarai. Heat another pan, add a teaspoon of ghee and roast the broken cashews till they turn golden brown color. Add the roasted cashews and cardamom  and mix well.The okkarai breaks down into smaller pieces and it should be soft. When we take the small pieces in hand and make into ball then this is the right stage to remove the okkarai out off the flame.

  7. The delicious Okkarai is ready to serve

  8. The delicious Diwali Okkarai is now ready. Get set ready to Welcome Diwali!
Okkarai is a traditional sweet made during Diwali
Okkarai  Sweet


Instant Jalebi Recipe | Jalebi Recipe without Yeast

$
0
0
Jalebi is a very traditional and popular sweet dish in Northern Parts of India. Always there is a little confusion about Jalebi and Jangri. Jalebi is made out of Maida (All Purpose flour) batter and Jangri is made out of urdal batter. Its much simple compared to jangri as it doesn't requires any soaking of dals and grinding the same. The conventional method of making Jalebi is to prepare the maida batter with curd and keep it overnight for the batter to ferment. Then over the period of time, people start using yeast to make the batter ferment instantly. But now with Eno Fruit Salt, we can avoid fermentation process overnight and also the yeast. Just adding eno salt makes the jalebi puff up nicely in the oil. Try this Instant Jalebi method for this Diwali and treat your family and friends with traditional and popular sweet! Lets see how to make Instant Jalebi now...

Instant Jalebi Recipe | Jalebi Recie without Yeast
Instant Jalebi Recipe | Jalebi Recie without Yeast 


Preparation and Yield:
Preparation time10 mins
Cooking Time45 mins
Yield15 Jalebi

Instant Jalebi Recipe | Jalebi Recie without Yeast
Instant Jalebi Recipe | Jalebi Recie without Yeast 

Ingredients:
Maida / All Purpose Flour1 Cup*
Corn Flour2 teaspoon
Vinegar 1/2 teaspoon
Curd2 teaspoon
Eno Fruit Salt1 teaspoon
Water1/2 Cup + 1 tablespoon
OilFor Deep Frying
Ghee2 tablespoon
Yellow food colora Pinch

*1 Cup = 250ml

For Sugar Syrup:
Sugar1.5 Cup*
Water2/3 Cup
Lemon Juice2 tablespoon


Instant Jalebi Recipe | Jalebi Recie without Yeast
Instant Jalebi Recipe | Jalebi Recie without Yeast 

Method :

  1. First lets prepare out sugar syrup. Add sugar to the pan and keep it in flame, Add water and allow the sugar to get dissolved in water

  2. When the sugar syrup starts to boil, keep the flame in medium and stir continuously till you get a one-string consistency. When you rub a drop of sugar syrup in your fingers, you can see a string getting formed between your fingers. When your syrup reaches one-string consistency, add the lemon juice and stir well and remove from flame. Adding lemon juice prevents the crystallisation of the sugar syrup. 

  3. Take a mixing bowl, add maida, corn flour and curd and give it a good mix. 

  4. Add vinegar and water and mix well. Add yellow food color and give a good stir

  5. Finally add eno salt and mix well. After adding eno salt, you can see the batter starts to be frothy. Now our batter is ready

  6. Heat oil in a pan. I have added 2 tablespoon of ghee just to get a nice flavour. But this is optional. I have used empty ketchup bottle to pour the batter. 
  7. The empty ketchup bottle has an opening in the middle of its lid which will help us to make nice swirls in jalebis easily. We can also use zipper cover with a small hole made using hot needle. But I personally feel ketchup bottle is much more easier than zipper cover. We can get these empty ketchup bottles in any kitchen appliances stores easily. Pour the batter in the ketchup bottle and close it with the lid. When the oil is hot enough, keep the flame medium and turn the ketchup bottle upside down and squeeze it to form nice and round swirls in the oil. 

  8. Deep fry the jalebi in low flame on both the sides till it becomes crispy. 

  9. Remove the crispy jabeli and place it in paper towel for a minute and then add it to the sugar syrup. Nicely coat the both sides of the jalebi with sugar syrup and soak it for a minute and then remove the sugar syrup coated jalebi in another plate. Repeat the process for the rest of the batter and prepare jalebis in the same way

  10. The mouth-watering Jalebis is now ready to serve! Slurp!
  11. Instant Jalebi Recipe | Jalebi Recie without Yeast
    Instant Jalebi Recipe | Jalebi Recie without Yeast 

Nippatalu Recipe | Andhra Thattai Recipe

$
0
0
Nippatalu or Andhra Thattai is a popular Indian snack especially in Southern Part of India. It is a very crunchy and tasty snack. There are many variations to this recipe, and this is one method of doing Nippatulu It is made of rice flour along gram flour and maida along with peanuts and roasted gram dal. Very simple savoury to make for any occasions or simply during evening hours. There is no hassle of using any press and mould. In tamilnadu, we make thattai using rice flour and urid dal flour. We also make tattai using parboiled rice and roasted gram dal. Nippatalu is more or less same as our thattai but only slight variations. We can easily make this crispy and crunchy snack for  this Diwali and enjoy the taste!


Nippatalu Recipe | Andhra Thattai Recipe

Preparation and Yield:
Preparation time10 mins
Cooking Time45 mins
Yield20-25

Nippatalu Recipe | Andhra Thattai Recipe

Ingredients:
Rice Flour2 Cups**
Maida / All purpose flour1/4 Cup
Besan / Gram flour1/2 Cup
Roasted Peanuts2 tablespoon
Roasted Gram dal2 teaspoon
Cumin Seeds2 teaspoon
Curry Leavesfew
SaltTo taste
OilFor Deep Frying

* 1 cup = 250ml
Nippatalu Recipe | Andhra Thattai Recipe

Method:

  1. In a mixing bowl add all the ingredients other than oil and mix well. Add water little by little to make a soft and smooth dough

  2. Make small lemon sized balls out of the dough. Take each ball and place it on a greased plastic paper. Then cover it with another plastic cover and place a flat lid or bowl on top of the ball

  3. Press the lid or bowl to make a thin circle like thattai. We are using lid or bowl to get all thattai in same shape. We can also use hands to press the dough balls to make thattai. But using lid or bowl to press will make all the thattai looks even and same thickness. Repeat this step for the rest of the dough

  4. Using a fork prick each thattai in few places. This will prevent the bubbles forming up in hot oil. Let the thattai gets dried up for few minutes. Meanwhile, heat oil in a pan and when the oil is hot enough, keep the flame in medium and add 3-4 thattai in oil. Deep fry them till they are crispy and the sizzling sound starts to suppress. Remove the crispy nippatalu from oil and place it in paper towel to drain excess oil. Repeat the same step till all the nippatalu are fried.

  5. Tasty and crispy Nippatalu (Andhra Thattai) is now ready to serve!
  6. Nippatalu Recipe | Andhra Thattai Recipe
    Nippatalu Recipe | Andhra Thattai Recipe

Mullu Thenguzhal Recipe | Mullu Muruku Recipe | Magizhampoo Murukku Recipe

$
0
0
Mullu Thenguzhal (Mullu Muruku) or Magizhambpoo Murukku is one of the crispy, easy to make recipe. We can do this quickly with store bough rice flour. But I have given here the  conventional method of doing this magizhampoo murukku. This traditional murukku is prepared for manuy auspicious occasions and festivals. For marriages, seemandham, and many other events, this magizhampoo murukku is kept as seer dish. For Diwali festival, it is a tradition in my family to make magizhampoo murukku along with ribbon pakoda (nada). 


Mullu Thenguzhal Recipe | Mullu Muruku Recipe | Magizhampoo Murukku Recipe

Preparation and Yield:
Preparation time1.5 Hour
Cooking Time1 hour
Yield1.5 Cups

Mullu Thenguzhal Recipe | Mullu Muruku Recipe | Magizhampoo Murukku Recipe

Ingredients:
Raw Rice4 Cups
Channa dal1 Cup
Moong dal1 Cup
SaltTo Taste
Butter2 tablespoon
OilFor Frying


* 1 Cup = 250ml

Mullu Thenguzhal Recipe | Mullu Muruku Recipe | Magizhampoo Murukku Recipe

Accessories Required:
 Press
One Star Mould

Mullu Thenguzhal Recipe | Mullu Muruku Recipe | Magizhampoo Murukku Recipe

Method:
  1. Rinse the raw rice in water atleast couple of times. Then add fresh water to the raw rice to soak them well and leave the raw rice to get soaked for atleast an hour. After an hour, drain the water from rice and spread it in a clean white towel to get it dried. 

  2. Meanwhile, Heat the pan and add channadal and fry for some time till the dal is hot. Keep it aside. Add moongdal and fry for some time till the dal is hot. Keep it aside

  3. Mix Rice and dals and grind to a nice powder it in rice mill. If you are living abroad or you are planning to do smaller quantities, then you can grind the rice and dals in the mixer itself. First grind the dry roasted dals in the mixer to a fine powder.  Pass the ground dal powder through the sieve to get rid of lumps. Grind the dals in batch and do the sieving process to get nice and smooth dal powder. Now, Grind the rice in the mixer to a nice powder. Normally we don't get any lumps.

  4. But we should sieve it couple of time to get a smooth rice flour. If we get any lumps while we sieve, again add the lumps of rice flour to the mixer and grind it again to a smooth flour and again sieve it. Repeat the sieve process again and again till we get a smooth and nice rice flour. If we have good sunny weather, then we can spread the ground smooth rice flour in a newspaper and keep it in sun to dry the rice flour nicely.

  5. Now mix the dal flour and the rice flour nicely and take it in a mixing bowl. To the flour, add  salt, butter and hing 

  6. Add water and make the flour into a chapati like dough. Heat oil in a heavy bottomed pan, and when the oil is hot add a little piece of dough to check for the hotness. When the dough raises immediately then the oil is ready for frying. Put 1 hand full of dough in a press, and close the press with one star mould. Squeeze the dough to a big circle followed by swirls. Deep fry the mullu thenkuzhal in low flame till it is crisp and turns light golden brown color and the bubbles starts to suppress and also the sizzling sound will come down. This is the right stage. Do not keep the flame high as it will change the color quickly but the mullu thenkuzhal would not be crispy. 

  7. Take it out and place it in a oil strainer with a paper towel to remove excess oil and allow it to cool. Repeat the step for the rest of the dough. Store it in a air tight container and serve.

  8. The deliciousmullu thenkuzhal is ready to serve.
  9. Mullu Thenguzhal Recipe | Mullu Muruku Recipe | Magizhampoo Murukku Recipe
    Mullu Thenguzhal Recipe | Mullu Muruku Recipe | Magizhampoo Murukku Recipe


Seven cups cake (7 cup cake)

$
0
0
Seven Cups Cake is a delicious sweet and an easy sweet!. As the name indicates we are going to take 7 equal quantities of the below ingredients and we are going to make a tasty Seven Cups Cake. Very easy to make in less time and a very good dish for Diwali and other festivals.

Seven cups cake (7 cup cake)

Especially when we are planning to share our homemade sweets with our friends and relatives, we need to make more quantities and this is one of the dish which gives more pieces of cake and also simple to make. Some sweets like rasgulla, jangri are little complex and also sticky. So we all look for some hassle free and simple dish and Seven Cups Cake is the perfect dish. The ingredients used in this dish are all simple and easily available in our kitchen. I always prefer to make this yummy cake and distribute to my friends and relatives. Lets see how to make this yummy cake!
Seven cups cake (7 cup cake)

Yield 35 pieces
Preparation Time-
Cooking Time30 mins 

Seven cups cake (7 cup cake)


Ingredients:
Gram Flour/KadalaiMavu1 Cup
Clarified butter/Ghee1 Cup
Grated Cocunut1 Cup
Milk1 Cup
Sugar3 Cups
*1 Cup = Cup can be of any measure. I have used 1 cup = 250 ml, which gives an yield of about 35-40 pieces.

Seven cups cake (7 cup cake)

Method:
  1. Take a plate and grease the plate with ghee and keep it aside. Fry the Gram Flour with a teaspoon of ghee. Stop the frying when you get a nice aroma (may be for 2-3 mins) . Don't let the color of the Gram Flour change. Switch off the flame. To the fried gram flour, add coconut

  2. Add the sugar to the pan. Add a cup of milk and mix all the above ingredients in a pan

  3. Finally add the cup of ghee and mix well. Heat the pan and stir the ingredients continuously by keeping the flame medium to low.  Keep stirring it.

  4. In about 10 - 15 minutes, when the cake starts to leave the sides of the pan without sticking, then that is the right stage to remove the cake from the flame. There will be a formation of forth on the cake mixture and at the same time the cake starts leaving the sides of the pan without sticking. Note - This is the right consistency when you need to switch off the flame and transfer the content into the greased plate. Otherwise, the mixture will break into small tiny pieces. Pour the cake mixture into the greasy plate. Level the cake in the greasy plate using a flat spatula so that it is evenly spreaded. Leave the cake mixture to cool off in the plate. Now using a knife gently put vertical lines. Again cut the cake diagonally so that we get diamond shape cake pieces. Remove the diamond shaped seven cup cakes gently and store it in a air tight container

  5. The mouth-watering seven cups cake is ready to serve
  6. Seven cups cake (7 cup cake)
    Seven cups cake (7 cup cake)

Diwali Snacks - 10 Simple and Delicious Diwali Snacks

$
0
0
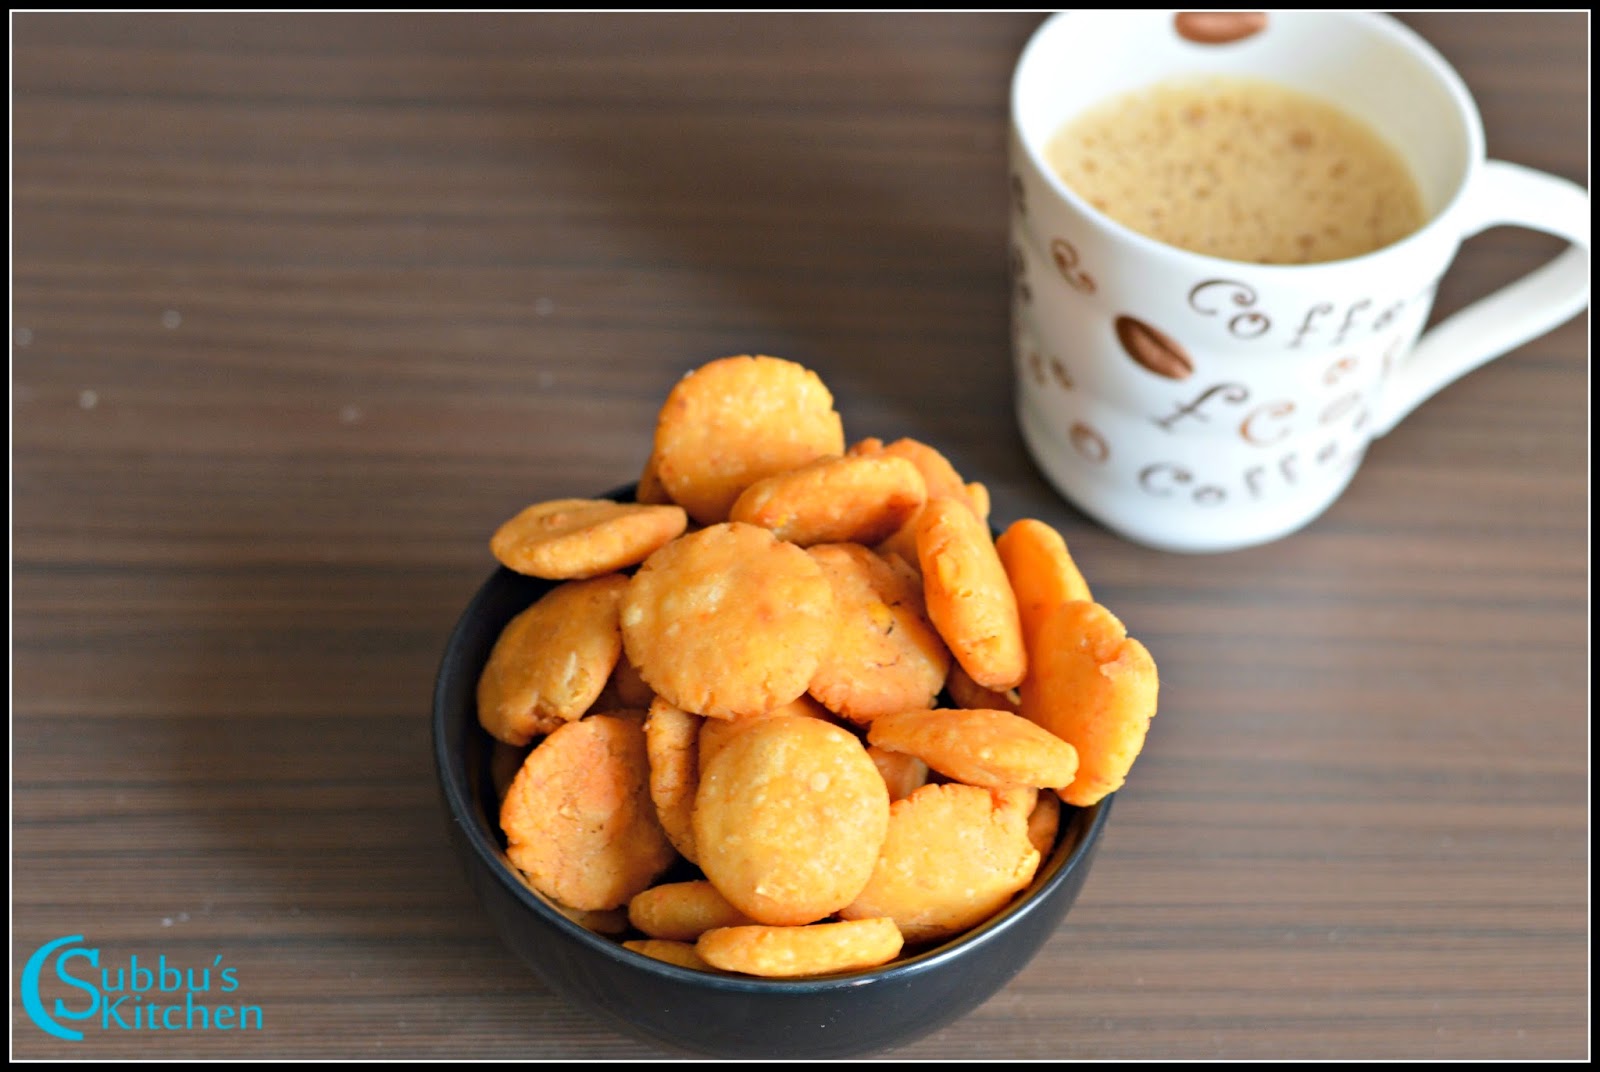
Diwali, a very important festival for all of us. When we think of Diwali, the first thing comes to our mind is New dress, crackers and most important is the Sweets and Snacks. We start our planning well before, may be a atleast a week before to decide what sweets and snacks we are going to prepare for this Diwali. But nowadays I am seeing many of us are busy in our work and not finding enough time to make homemade sweets and snacks and just buying the store bought sweets and snacks. I have come up this article to motivate all women to make home made sweets and snacks which are much healthier and affordable. 
Here, In this post. I have given 10 simple and crunchy snacks you can easily do at home. There are few parameters that I have considered to categorize these recipes as simple. Lets see the parameters now
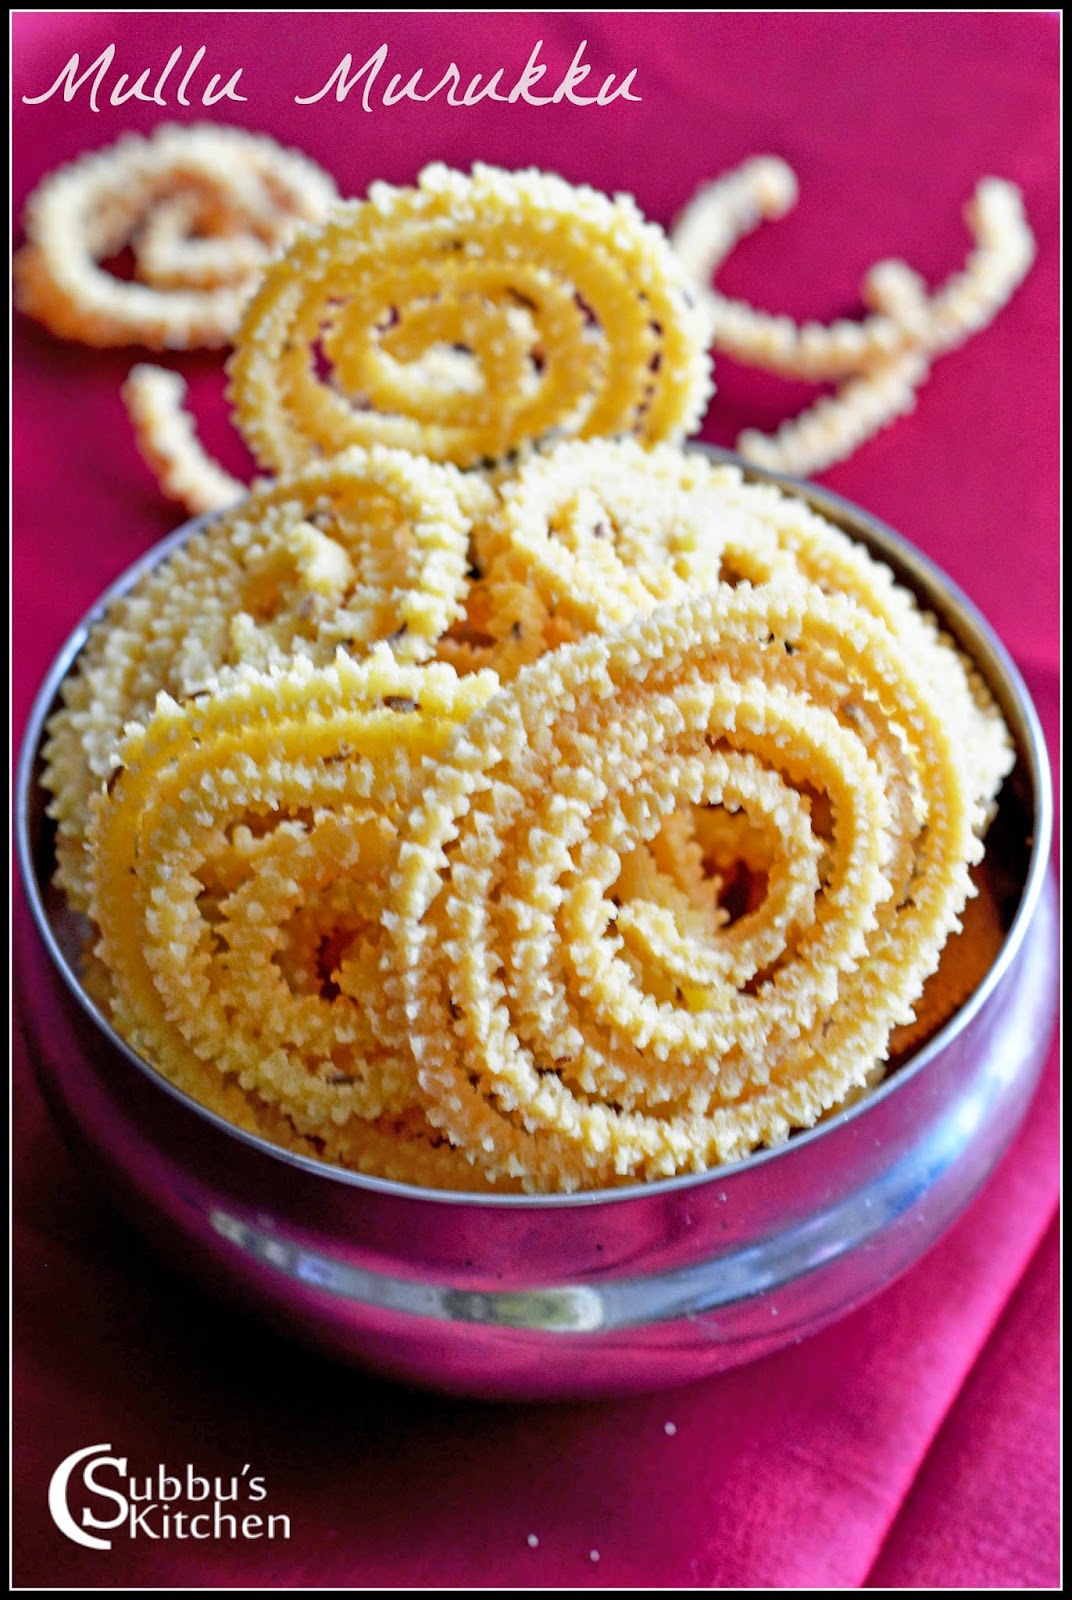

1. Press and Mould: 

For most of the murukku varieties, we need press and mould. We can get press and mould in most of the kitchen utensils shop in India easily. The press comes with 10-12 different types of mould with which we can make many different and delicious snacks. Even when I stayed in UK, I was able to get this press and mould in Indian Shops. So if we have press and mould, then these are some of the simple recipes you can plan to do for this Diwali


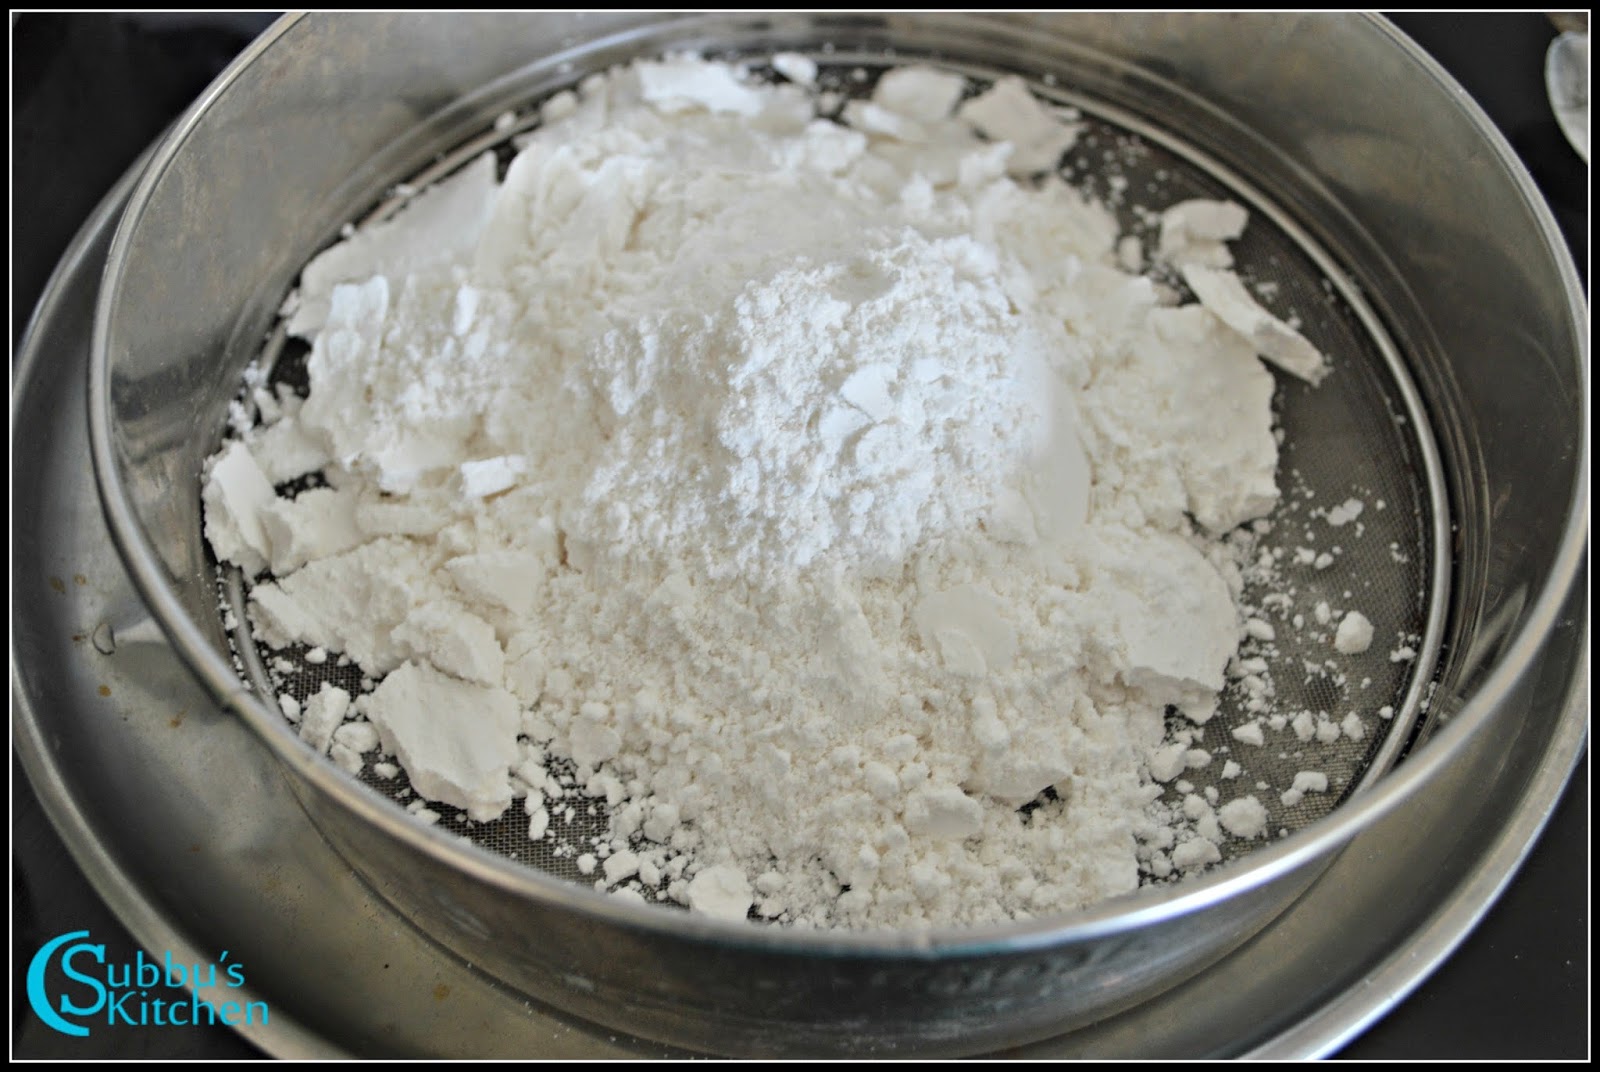
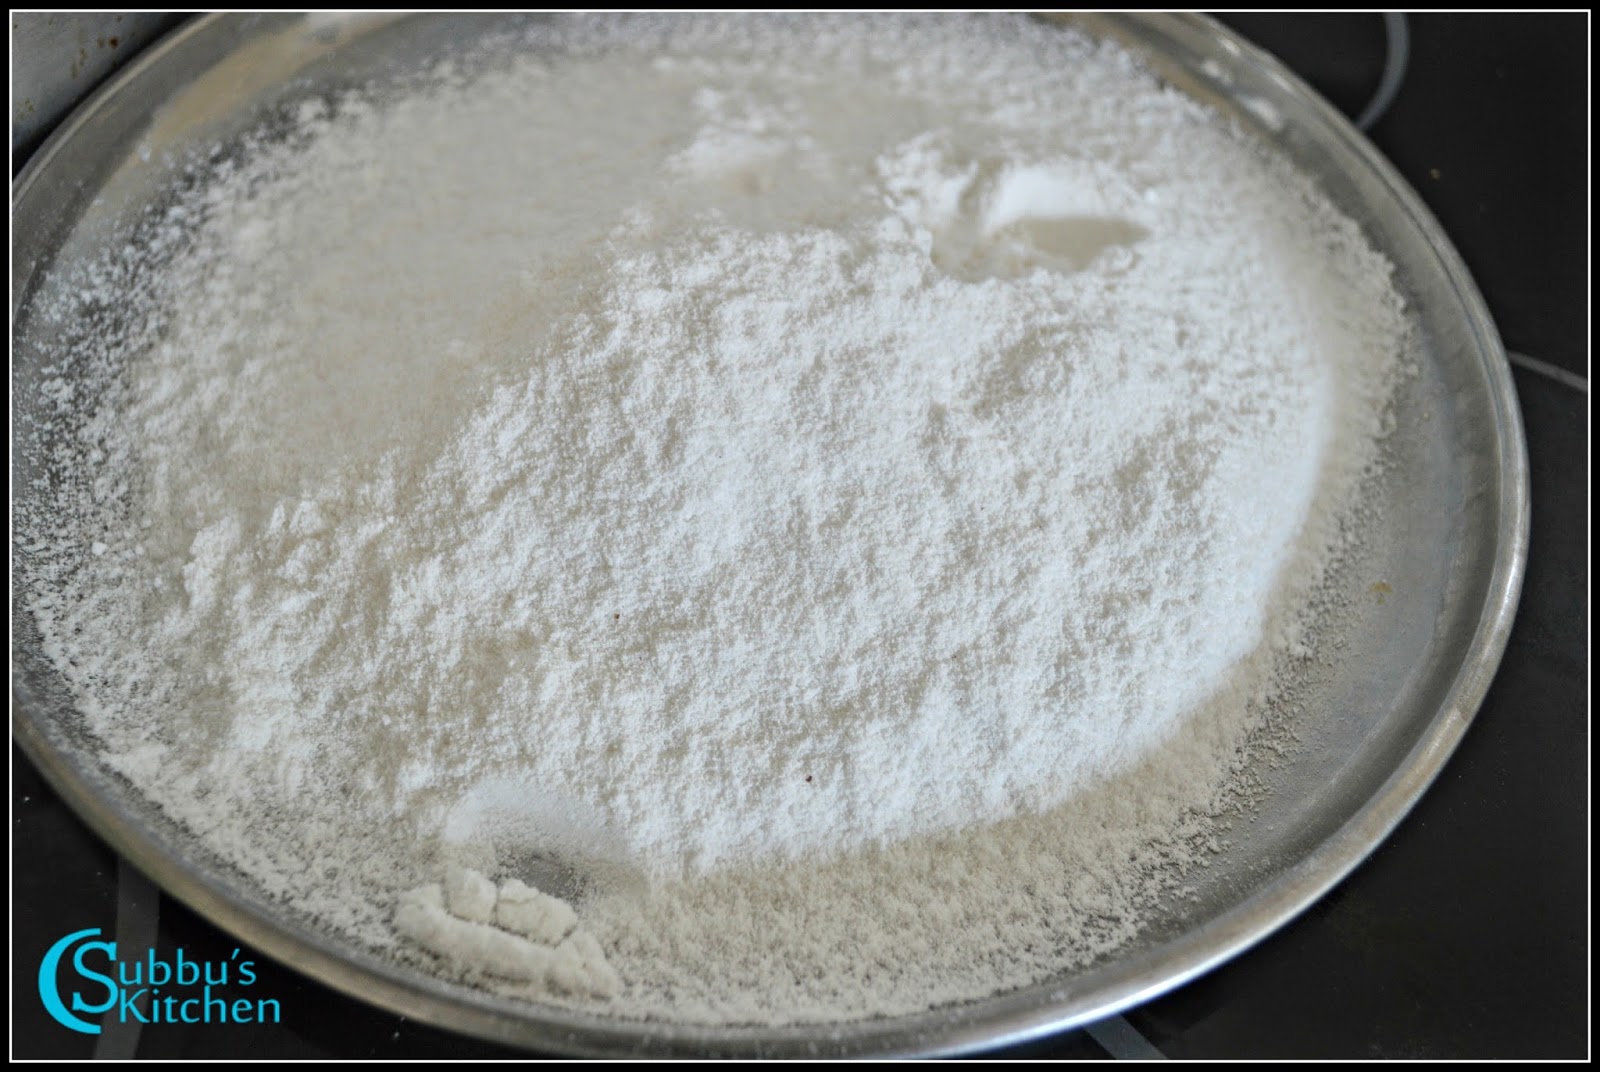
2. Readily available Rice flour, Besan flour:

Most of the crisps need rice flour and besan or gram flour. So if we have the flours on hand, then preparing murukku would be very simple. We can very well use store bought rice flour. But store bought rice flour makes the murukku more reddish in color than the home made rice flour. So we should plan to make these flour handy before starting with these snacks. If we are living in India, we have rice mills around us and we can prepare more quantities of  flour in rice mill easily. If you are living abroad, then no need to worry, either you can use store bought flours or just spend couple of hours more to grind the required flours at home. Though, I stay in chennai, I usually prepare all flours at home only with my mixer. 


3. Straight forward procedure:

The dishes, I have shared are simple and easy to follow procedures. There are no hassle of getting shapes or complexity like kai murukku.  


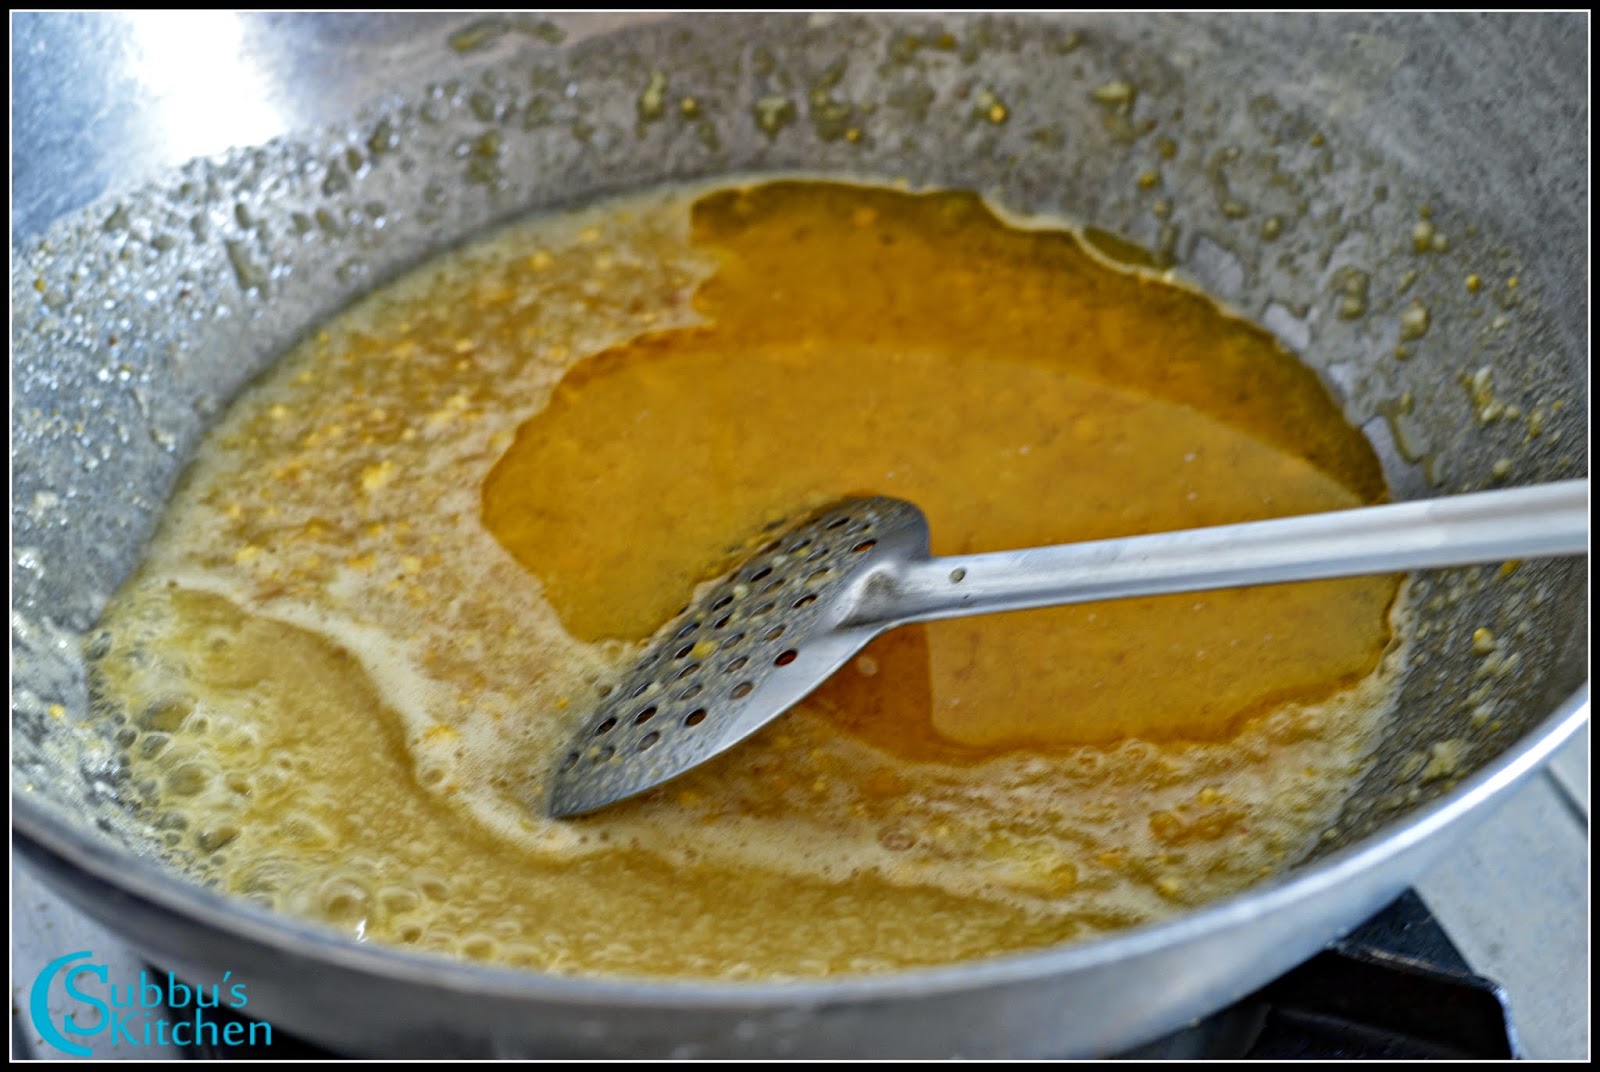
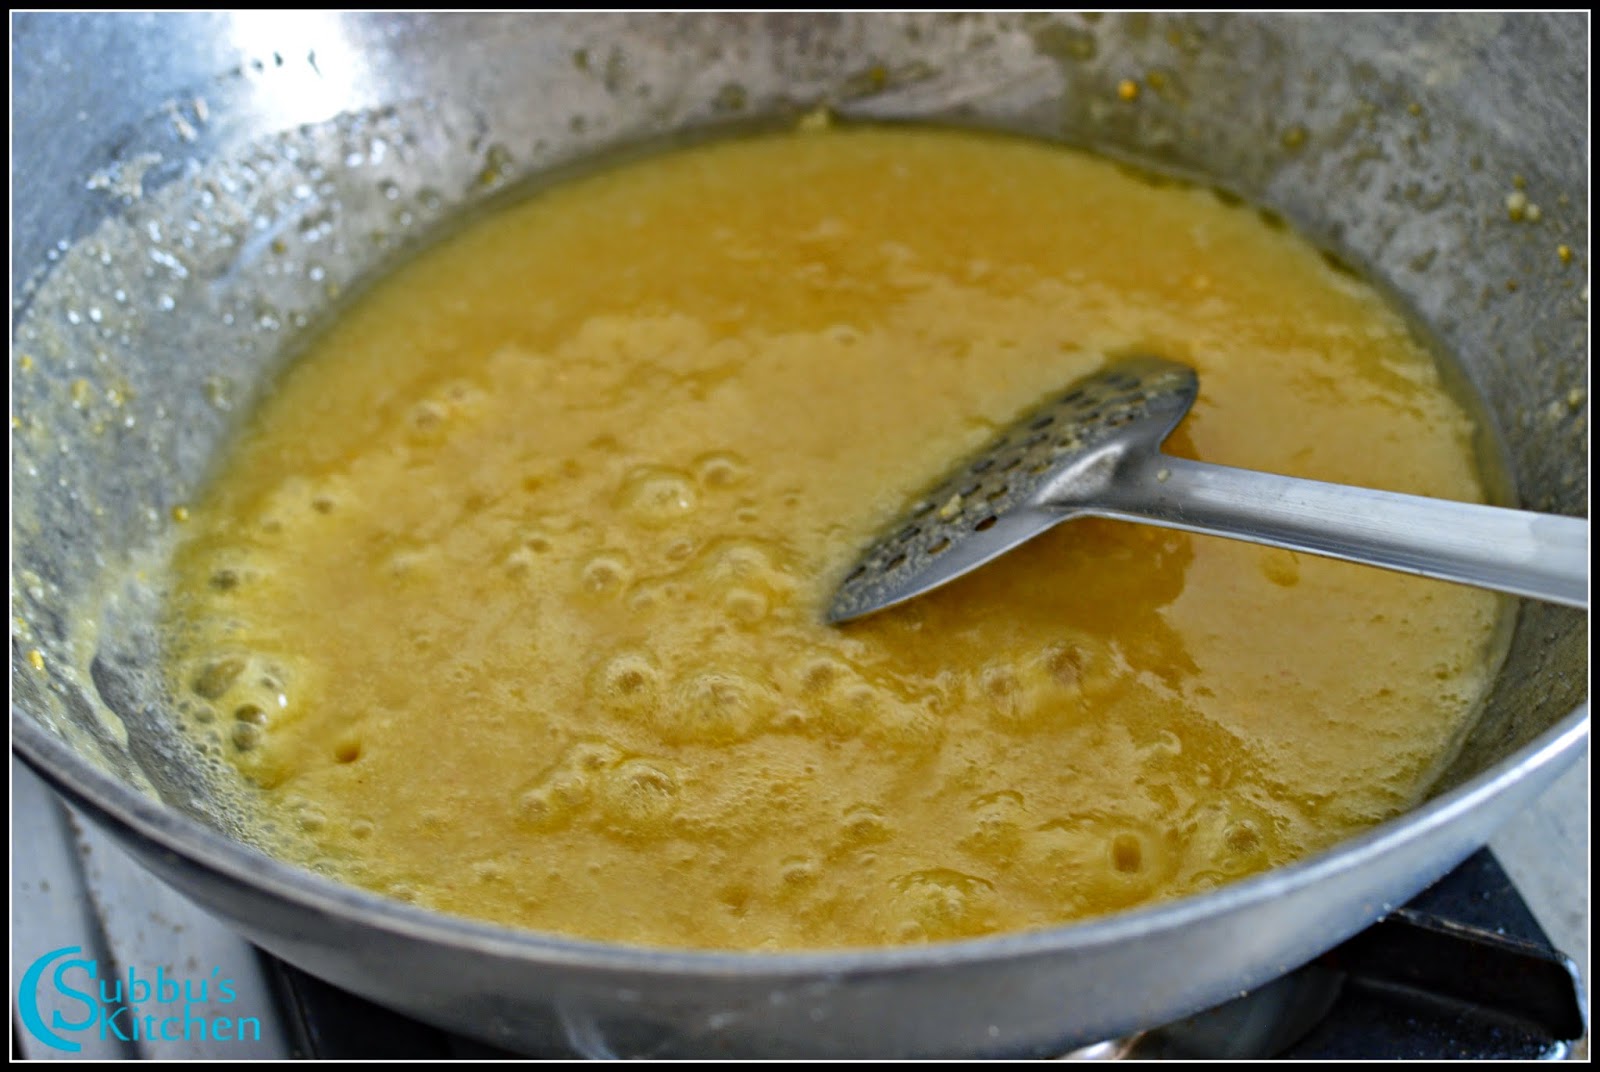
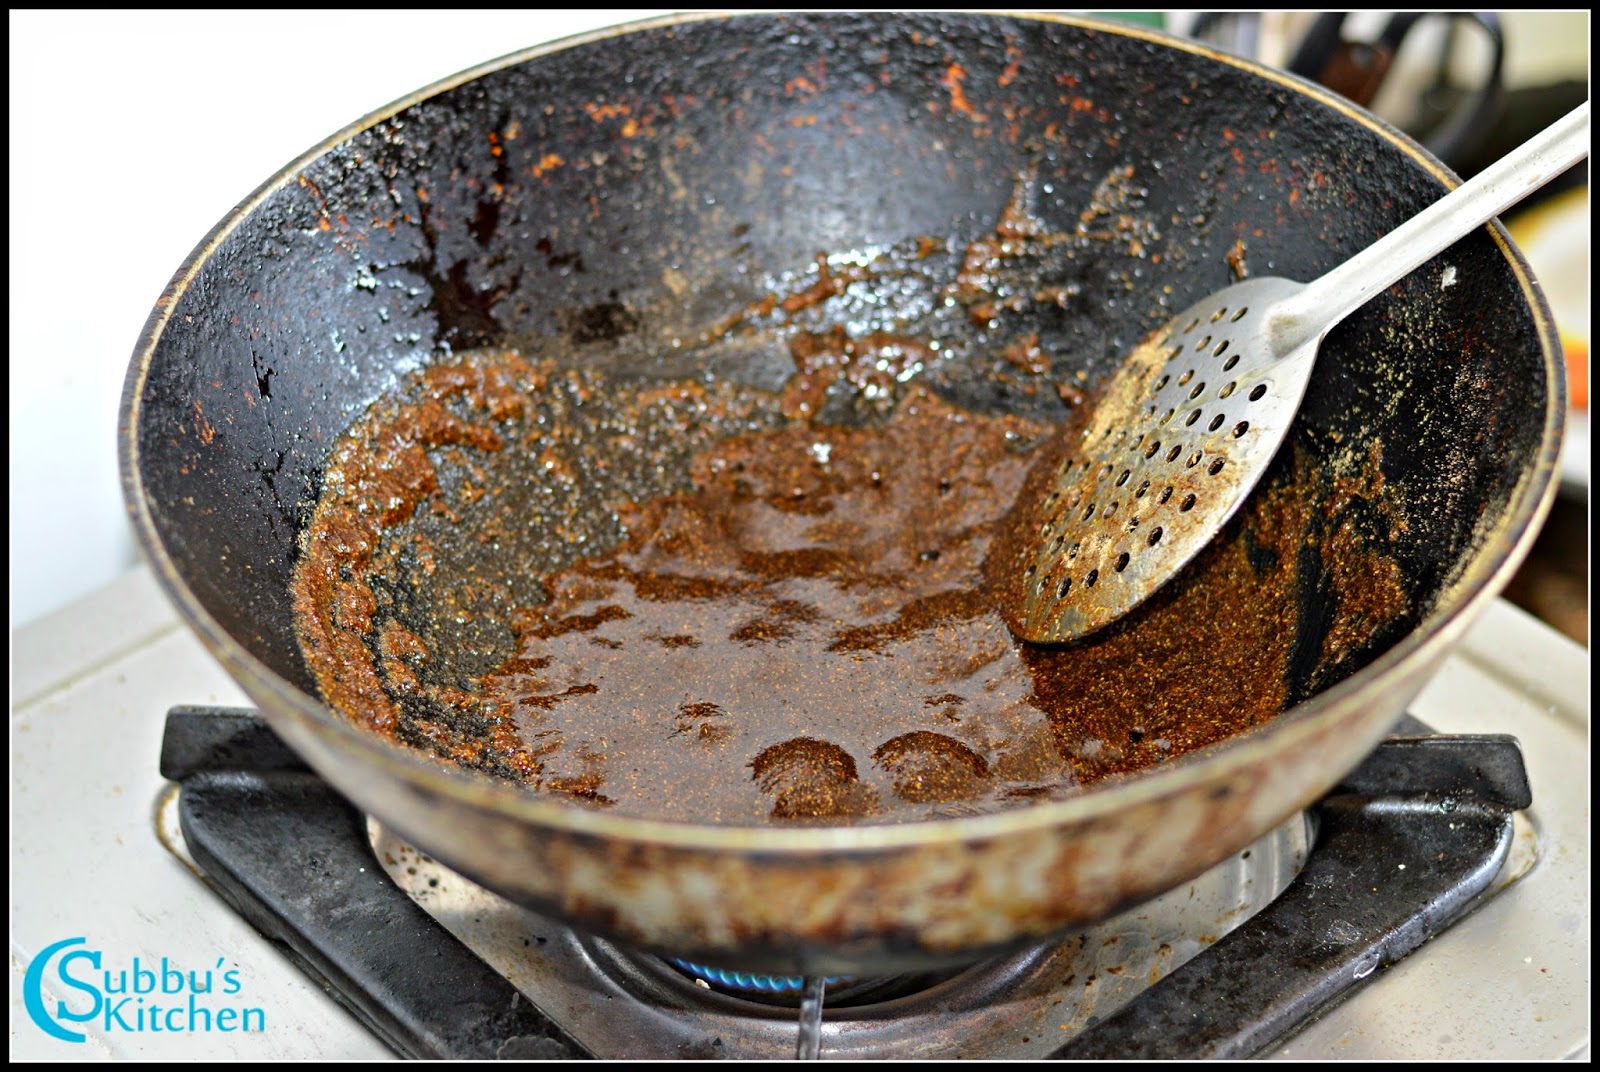
For any snacks we need little patience in deep frying. Deep frying the snacks in low flame obviously takes more time, but if we keep the flame high, then the snacks will not be crispy but turns golden brown color quickly. So we need more patience in deep frying.

Lets see what all simple dishes we could make at home:


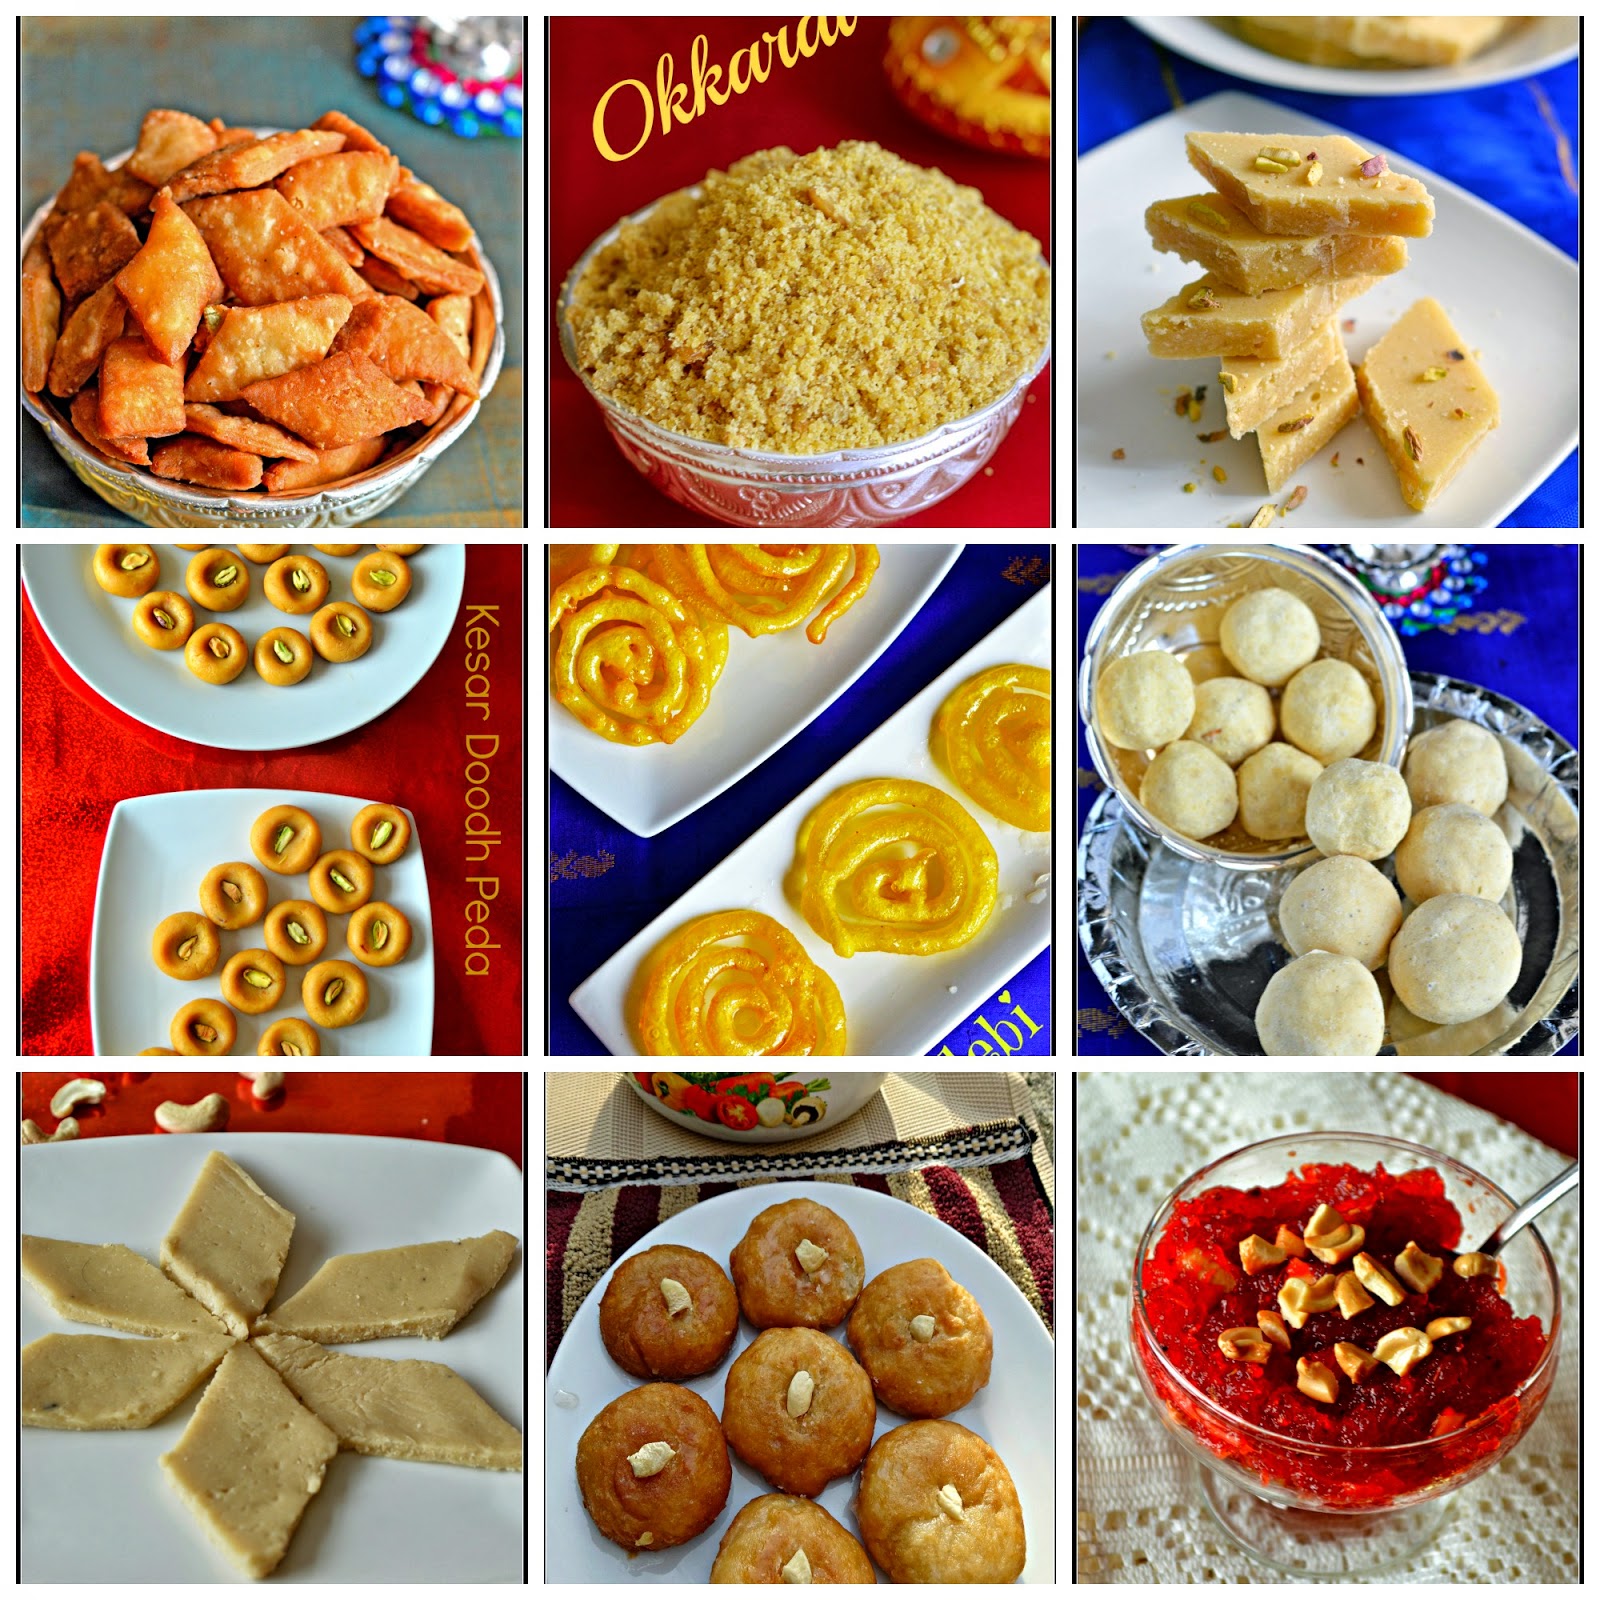
5  Simple Dishes With Nazhi (Press and Mould):

Ribbon PakodaThenkuzhal

Mullu MurukkuKarasev

Ommapodi


5 Simple Dishes without Press and Mould

NippataluCirspy Buttons

Ring MurukkuSpicy Thukkada

Karaboondhi

For other collection of Diwali Snacks Click Here


Diwali Sweets - 10 Scrumptious and Easy Diwali Sweets

$
0
0
Sweets are one of the most important aspect for Diwali Festival. I have seen many of my friends who plan to get badhusha, jangri, mysorepak from shops when they can easily make these in home itself. Kaju Katli is the most expensive sweet in any sweet shop. Kaju Katli is one of the easy recipe which we can make at home within 20 minutes. Why to go to sweet shops if we can do most of these easily and instantly at home?


Easy Diwali Sweets 

Here I have shared 10 simple and scrumptious Sweet Dishes which could be done easily and quickly in our kitchen. There are few parameters with which I have categorized them into simple dishes. 

1. Readily available ingredients:
For some sweets the conventional method takes more time. Instead we could use readily available products such as condensed milk, Khova, etc. With the availability of few other ingredients such as enosalt, vinegar, we can skip the fermentation process and prepare delicious sweet dishes instantly. With these products handy, these below recipes are easily doable and never go wrong

2. Simple procedures:
Some of the traditional sweet dishes are straight forward like maladu, sweet diamond cuts, okkarai, seven cup cakes etc. There are no hassles in understanding the procedures or doing these recipes. 

3. Easy and affordable ingredients:
All these dishes mentioned below uses either the ingredients that are readily available in our kitchen or its available in store in a much affordable prices. Kaju (Cashew) is the only ingredient which is quite costly. But I have mentioned here because of its simple procedure. Also you get more quantities of all these dishes with much less effort and they are easy to share and distribute to your friends and relatives. 

Disclaimer: Please note, all these dishes, eventhough simple, need careful attention and patience.

OkkaraiMaladu

Instant JalebiInstant Doodh Beda

Seven Cups CakeDiamond Cuts

Kaju KatliBadusha

Pumpkin HalwaPineapple Kesari

Diwali Sweets - 10 yummy Sweets under 20 minutes

$
0
0
Most of the Women nowadays are professionals working for long hours. Making homemade sweets and snacks for Diwali is challenge for them. Because most of the dishes especially sweets need more time for preparation and also great expertise. For a beginner, mysorepak would be little complex. Most of us have a perception that sweets need more expertise. Yes, it is true for some dishes but there are few sweet dishes that may not go wrong even for the beginners and also those dishes take only less time to concoct. So, I have planned to give here some of the easy and yummy sweets that can be done within 20 minutes. 
Easy Sweet Dishes under 20 minutes

There are few parameters that I have considered in grouping them  "under 20 mins recipes" category.

1. Condensed Milk
Conventional method of making few sweets such as palkhova, need more effort especially with reducing the quantity of milk to 1/4th of its original quantity.  Because of the effort and complexity, many of us are preferring to buy the sweets from shop. But, Nowadays we are getting condensed milk that makes our life easier especially in making sweets that need more working with milk. So with the condensed milk in hand, some of the given recipes are quite simple and straight forward and we can finish off the whole process under 20 minutes.

2. No Cooking Dishes:
There are few dishes like Maladu, Rawa Laadu, dates ladoo and few other ladoo varieties which doesn't need cooking and are very simple and quick dishes. No worries about syrup consistencies, no hassle with milk or cheese. All these ladoos can be done within 20 minutes and are so delicious. These ladoos are geat dishes for sharing with our friends and relatives too

3. Simple Procedure:
Few dishes like Kaju Katli, Seven cups Cake and coconut burfi are very easy dishes with simple procedures. Kaju (Cashew) an expensive ingredient but making Kaju Katli is very simple and we get more pieces of katli at home. 1kg of Kaju Katli is around 1000Rs. now, just getting a 250gms of cashews, we can make around 30 pieces of kaju katli and the process is so simple that you may never go wrong.

Lets see the dishes which we can make "Under 20 mins"


Thenkuzhal Recipe

$
0
0
The literal translation of Thenkuzhal into english is "Tubes of Honey". I dont know to be honest why the name Thenkuzhal for this recipe because it is not a sweet recipe. Neverthless, it is a very good crispy evening snacks and in our home we make this for many festivals. As you know during festival days, we used to share the snacks and sweets to the friends and relatives and we can not afford buying them from the shops. So usually we make them in our home and thenkuzhal is one of the common recipe.

Thenkuzhal Recipe
Thenkuzhal Recipe


My dear readers living in abroad, if you dont have the thenkuzhal nazhi (thenkuzhal press & mould) then you can not make this recipe, but please make sure that you get one nazhi when you visit india next time.


Preparation and Yield:
Preparation time10 mins
Cooking Time45 mins
Yield20-25


Thenkuzhal Recipe

Ingredients Thenkuzhal Recipe:

Rice Flour2 Cups
Urdhal 3 Tablespoon
SaltTo Taste
Cumin Seeds1 Teaspoon
HingA Pinch
OilFor Frying
Butter1 tablespoon

Accessories Required:
Thenkuzhal Press
Thenkuzhal Mould

Thenkuzhal Recipe


Method:
  1. Break the cumin seeds. You can put this in a mixer and grind it for a second. Don't make it into a nice powder. Dry fry the urdhal in a pan and grind it in a mixer to a nice powder. Sieve the urdal powder to get a smooth and nice flour. Mix the rice flour, urdhal powder, cumin seeds powder, salt, butter and hing in a vessel. 

  2. Add water little by little and knead the flour into a soft chapati like dough. Heat oil in a heavy bottomed pan, and when the oil is hot add a little piece of dough to check for the hotness. When the dough raises immediately then the oil is ready for frying. Put 1 hand full of dough in a press, and close the press with Thenkuzhal mould. Squeeze the dough to a big circle.

  3. Deep fry the Thenkuzhal in low flame till it is crisp and turns golden brown color. Take it out and place it in a oil strainer with a paper towel to remove excess oil and allow it to cool. Store it in a air tight container and serve.

  4. The delicious Thenkuzhal is ready to serve.
  5. Thenkuzhal Recipe
    Thenkuzhal Recipe

Laddu Recipe | Boondi Ladoo Recipe

$
0
0
Laddu (Boondi Ladoo) is my favourite sweet. Very common sweet in any South Indian home. It is one of the important sweet dish for Diwali festival and other auspicious occasions like marriages.  It is very simple to make and very delicious. It is a very popular dish among kids too because of Chota Bheem :-) My twin daughters were very happy when I made this at home, they started telling Chota Bheem Ladoo! We can very quickly make this recipe with simple ingredients that is always available at any kitchen. For marriages or other auspicious events Ladoo is the main Seer Bakshanam. Lets see how to make this yummy Ladoos :-)


Laddu Recipe | Boondi Ladoo Recipe

Preparation and Yield:
Preparation time5 mins
Cooking Time45 mins
Yield25 Ladoos

Laddu Recipe | Boondi Ladoo Recipe

Ingredients:
Gram Flour2 Cups
Rice Flour1 tablespoon
Salta Pinch
Cooking Soda / Bicarbonate of Soda1/4 teaspoon
Kesari Powder(Yellow)1/2 teaspoon
Sugar3 Cups
Cardamom Powder1 teaspoon
Cashew nuts2 teaspoon
Cloves10
Oil or GheeFor Frying
Ghee1 teaspoon
Water1 1/2 Cups

Accessories Needed:

Bhoondi Ladle

Laddu Recipe | Boondi Ladoo Recipe

Method to prepare Sugar Syrup
  1. Heat another pan simultaneously and add 11/2 cup of water and sugar and keep it in medium-high flame and stir continuously

  2. When the sugar dissolves completely, stir the syrup in low flame till it forms a soft ball consistency. You can test the syrup consistency by adding a teaspoon of syrup to a bowl of water and if you are able to roll like a soft ball, then the consistency is reached.

  3. Now add kesari powder, cardamom powder to the syrup and stir well. Switch off the flame


Method for making Ladoo:

  1. Mix the gram flour and rice flour and sieve it in a strainer to avoid lumps. Add salt and cooking soda and give a good mix. 

  2. Add water little by little and mix the flour well to make a batter. The batter should be like dosa batter. Heat a pan, add oil/ghee and keep it in medium flame till it is hot. Drop a single drop of gram flour batter into the oil and see if it comes up immediately in the oil. This is the correct heat to prepare bhoondi. Take 1 ladle of gram flour batter and hold the bhoondi ladle above the oil and pour the gram flour batter and gently tap the boondi ladle so that the flour batter drops evenly in the oil.

  3. Fry the boondhi till they are 3/4 fried. We don't need to fry them till they are crispy. 

  4. Add it to the sugar syrup immediately.  The sugar syrup should be warm when you add the boondhi to the syrup. Do no bring the syrup again to boil. Just warm it up.  Repeat the same for remaining gram flour batter and add the boondhi to the sugar syrup. In another pan, add ghee and roast the broken cashews, raisins and cloves till the cashews turn lightly golden brown.

  5. Add these roasted nuts to the boondhi syrup and give it a good mix. Mix the bhoondi well in sugar syrup and allow it for 10 mins so that the bhoondi's are soaked well in the sugar syrup. Take the bhoondi in a plate and allow it to become little warm so that we can take it in hand and press it to make small balls of laddu. Once the bhoondi becomes little warm, take 1 handfull of bhoondi and press it well to make it to medium sized laddu's.

  6. Repeat the same for remaining bhoondi

  7. The delicious laddu is ready to serve.
  8. Laddu Recipe | Boondi Ladoo Recipe
    Laddu Recipe | Boondi Ladoo Recipe


Coconut Milk Murukku Recipe

$
0
0
Coconut milk murukku, a slight variation from other varieties. The wonderful flavour of the murukku together with rice, gives a nice blend to the batter and the taste of the murukku is extraordinary. This is one of the conventional method of preparing coconut milk murukku. Very simple procedure and you may never go wrong in making these scrumptious murukku. Try this new variety of murukku for this Diwali!


Coconut Milk Murukku Recipe
Coconut Milk Murukku Recipe 


Preparation and Yield:
Preparation time1 hour
Cooking Time1 hour
Yield30-35

Coconut Milk Murukku Recipe
Coconut Milk Murukku Recipe 

Ingredients:
Parboiled Rice2 Cups**
Coconut Milk1 Cup
Urdal Powder2 teaspoon
SaltTo taste
Cumin Seeds1/2 teaspoon
OilFor Deep frying

* 1Cup = 250ml

I have given the instant method of making these murukku at the end of this post. 

Method:
  1. Rinse and Soak the rice in water for atleast 1 hour. Take the coconut milk in a vessel and heat it in low flame. When the coconut milk starts to boil, remove from flame and allow it to cool. 

  2. Grind the rice in a mixer or grinder by adding the coconut milk at regular intervals and grind it to a smooth paste. The batter should be thick. So don't add the coconut milk at once. Add it at regular intervals and see if the batter is thick. Add salt, cumin seeds and mix well. Take a press and mould (I have used one-star mould), and add one-handfull of the ground rice batter. In a clean white cloth, using a press and mould, squeeze the batter and make the murukku. Allow the murukku to dry for atleast 5 minutes in the cloth. 

  3. Meanwhile, heat a pan of oil, when the oil is hot enough, keep the flame medium. Gently remove the murukku from the cloth and add it to the pan. We can add 3-4 murukku in one batch depending upon the oil we have added to the pan. Deep fry the murukku on both the sides till they turn cripy and golden brown color. Remove the murukku from oil and place it in a strainer or paper towel to drain excess oil. Repeat  the step for rest of the batter.

  4. The crispy and crunchy coconut milk murukku is ready to serve!
  5. Coconut Milk Murukku Recipe
    Coconut Milk Murukku Recipe 
    Instant Method:
    Some of us think that the procedure given above is time consuming. For them I have given here the instant method here
    1. You can use the store bought rice flour.
    2. You can use store bought coconut milk powder.
    3. Just warm up the store bought coconut milk and mix with the rice flour little by little and make it to a soft and smooth dough. 
    4. Heat oil in a pan and using a press and mould squeeze out the dough to make murukku. 
    5. Deep fry the murukku till they are crispy and golden brown
    6. Instant coconut milk murukku is ready to serve!

Diwali Snacks - 5 Simple and crunchy Snacks within 30 minutes

$
0
0
Like Sweets, Snacks are the integral part of Diwali. There are many different varieties of snacks we can make, but some are time consuming and some needs more expertise. Many of you will be searching the web for some easy snacks which will never go wrong and also the snacks which need less time and effort. Here are few recipes which doesn't need much of your time or effort but very traditional and crunchy snacks. Try these easy snacks for this Diwali and relish with your family.


5 Easy Diwali Snacks under 30 minutes
There are few parameters which I have considered to group them as easy and quick recipes

1. Store bought rice and gram flour:
Store bought rice flour and gram flour are the simple and affordable ingredients which makes our effort simple in making crunchy and yummy snacks. 

2. Simple Procedure and techniques:
All these dishes given below are very simple with easy to follow straight-forward procedures and techniques. No hassle with grinding flours or concentrating on the shapes of the snacks. Even the beginners can find these dishes very simple to make and we don't need any prior experience or rich expertise

Disclaimer:
We need little patience in making these dishes. We need to deep fry the dishes in low flame till they are crispy. If we speed up the process by keeping the flame high, then the color of the snack will become dark red quickly but the snacks may not be crunchy. 

Now lets see the simple snacks which can be done under 30 minutes:
KaraboondiKarasev

OmmapodiThenkuzhal

Chakli

For other collection of Diwali Snacks Click Here


Moongdal Murukku Recipe | Paithamparuppu Murukku Recipe

$
0
0
This is another crunchy murukku made with moongdal flour and rice flour. This is also one of the quickest crunchy murukku which is quite simple and easy to make. All we need to rice flour which can be either homemade or store bought and moong dal. Both the major ingredients are easily available in every kitchen and we don't need any special ingredients. A delicious snack for any festival or event or even for simple evening snack.  Try this crunchy Moongdal Murukku

Moongdal Murukku Recipe | Paithamparuppu Murukku Recipe
Moongdal Murukku Recipe | Paithamparuppu Murukku Recipe 


Preparation and Yield:
Preparation time10 mins
Cooking Time45 mins
Yield250gms

Moongdal Murukku Recipe | Paithamparuppu Murukku Recipe
Moongdal Murukku Recipe | Paithamparuppu Murukku Recipe 

Ingredients:
Homemade Rice Flour**4 Cups*
Moong Dal1/2 Cup
Butter2 tablespoon
SaltTo taste
Cumin Seeds1/2 teaspoon
Hing1/4 teaspoon
OilFor Deep Frying

*1 Cup = 250ml
** We can also use store bought rice flour
Moongdal Murukku Recipe | Paithamparuppu Murukku Recipe
Moongdal Murukku Recipe | Paithamparuppu Murukku Recipe 

Method:
  1. Grind the moong dal to a nice powder in a mixer. Sieve the moong dal flour twice to get a nice and smooth flour

  2. Moong dal flour is ready. To this we need to add rice flour


  3. Add the rice flour, cumin seeds, hing, butter and give it a good mix, so that the butter is nicely mixed with the flours. Add water little by little to make a smooth and stiff dough. Heat oil in a pan. Take the press and mould. I have used single star mould. Take one handful of dough and put it in the press and cover it with the lid. 


  4. When the oil is hot enough, squeeze the press to make murukku. Deep fry the murukku in low flame till they are golden brown color and becomes crispy. Gently take out the fried murukku from oil and keep it in a strainer or paper towel to drain the excess oil.


  5. The crispy moongdal murukku is now ready to serve. You can break it and store it in a air-tight container.
  6. Moongdal Murukku Recipe | Paithamparuppu Murukku Recipe
    Moongdal Murukku Recipe | Paithamparuppu Murukku Recipe 


Deepavali Marundu Recipe | Diwali Legiyum Recipe

$
0
0
Deepavali Marundu,is an important dish for Diwali. For Diwali, we would have made many sweets and snacks. All sweets and snacks  tempt us to have more. Having more sweets and snacks upset our stomach causing indigestion. To overcome this difficulty, our elders have formed a custom of making a healthy legiyum, (we call it as 'Deepavali Marundu') which is prepared using different roots like Sitharathai, Adimadhuram, Thipili, Parangi pattai, pepper, cumin seeds, sukku and panavellam. These ingredients are readily available in all Nattu Marundu Kadai in TamilNadu. If you are staying abroad, you can prepare the legiyum using this method. The procedure given below is the conventional method of making Legiyum. This is the legiyum which is prepared for the newly Delivered Mom. So learning how to make this legiyum is very good for every women.


Deepavali Marundu Recipe | Diwali Legiyum Recipe


Preparation and Yield:
Preparation time10 mins
Cooking Time15 mins
Servings5

Deepavali Marundu Recipe | Diwali Legiyum Recipe


Ingredients:
Sukku1 inch Piece
Sitharathai1 inch Piece
Adhimadhuram1 inch Piece
Omam1/2 teaspoon
Pepper1 teaspoon
Cumin seeds1/2 teaspoon
Parangi Pattai1 inch Piece
Kandanthipilli5 small pieces
Arisi Thipilli5 small Pieces
Panavellam50gms
Ghee1 tablespoon
Pure Honey1 tablespoon


Method:

  1. First lets get ready with our ingredients. Take all the roots, sukku, sitharathai, adhimathuram, parangi pattai, kandanthipilli, arisi thipilli, pepper, ajwain, cumin seeds and dry roast it individually till they are hot and then take them to the mixer

  2. Grind it to a nice powder in the mixer. Sieve the ground powder twice, to get smooth powder 

  3. Now our legiyum powder is ready. Take the honey, ghee and palm sugar. Break the palm sugar and keep it ready

  4. Take a bowl, add broken palm sugar and add water to soak it. Keep it in flame and allow the jaggery to dissolve. Then pass the jaggery juice through the strainer to get rid of sand or other dust particles. Again add the strained jaggery juice to the pan and allow it to boil, till it becomes sticky and thick. 

  5. Now add ground powder to the jaggery juice and mix well. Add ghee and stir continuously, till the mixture gets thickend and starts leaving the sides of the pan. If you take a small quantity and try to roll, it should roll like a ball. Remove from flame 

  6. The healthy Deepavali Marundu is ready to serve!
  7. Deepavali Marundu Recipe | Diwali Legiyum Recipe
    Deepavali Marundu Recipe | Diwali Legiyum Recipe

Sesameseeds(Yellu) Kuzhambu

$
0
0
Yellu(Sesame Seeds) kuzhambu is one of my favourite kuzhambu. The conventional method of making ellu kuzhambu is little different from other kuzhambu varieties. My mom used to make this kuzhambu by frying the coconut directly in the fire instead of pan. The direct frying of coconut in fire without adding any oil gives a nice flavour to the kuzhambu along with the nice aroma of sesame seeds. I have given here the conventional method, but we can also do this quickly by frying the grated coconut in the pan and then grinding it with other spices. Many of us are now using induction based hob, especially, people staying abroad, they can fry the grated coconut in the pan itself. But if we have conventional gas stove, then we can surely try this traditional method of making this yummy Sesame Seeds (Ellu) kuzhambu

Sesameseeds(Yellu) Kuzhambu


Preparation and Yield:
Preparation time10 mins
Cooking Time25 mins
Servings4-6

Ingredients:

Black Yellu(Sesame Seeds)3tablespoon
Red chilli5
Thur daal1 tablespoon
Urdal1 tablespoon
Chopped big size coconut5 pieces (each 1 inch piece)
Tamarind1 small lemon size
SaltTo Taste


For Seasoning:

Oil1 teaspoon
Mustard seeds1 teaspoon

Sesameseeds(Yellu) Kuzhambu

Method:
  1. Soak the tamarind in water and extract the juice and keep it aside

  2. Dry fry the Yellu(Sesame Seeds) in a pan till it starts to sputter and add this to mixer

  3. Grind the fried sesame seeds to a nice powder. Keep it aside. We will be adding this to kuzhambu only at the last. Hold the coconut piece with a tong and fry the coconut pieces in flame directly till it turns golden brown color. Take all the fried coconut pieces to the mixer

  4. Pour some oil in pan and fry the red chilli, and the daals and fry it till the daal turns golden brown color.  

  5. Add these to mixer and grind it to a paste. Heat the pan and add oil. To this add mustard seeds and when the mustard seeds starts to sputter, add curry leaves and fry for a second. To this add tamarind extract , salt and allow the tamarind mixture to boil till raw smell goes off. 

  6. Now add the ground paste and allow the kuzhambu to boil. Finally add sesame seeds powder and mix well and switch off the flame.

  7. The yummy Yellu(Sesame Seeds) kuzhambu is ready to serve with rice
  8. Sesameseeds(Yellu) Kuzhambu
    Sesameseeds(Yellu) Kuzhambu

Andhra Tomato Capsicum Rice Recipe | Andhra Thakkali Kudamilagai Sadham Recipe

$
0
0
Tomato Capsicum Rice is a popular dish in many parts of AndhraPradesh. As we all aware, Andhra cuisine are popular for its spiciness.  If we are spice lovers, then we will surely enjoy this dish. But adding more spice is optional. We can add mild spice and enjoy this dish. Instead of doing plain tomato rice, this would be a different variety and surely a big treat for us. Try this yummy Andhra Tomato Capsicum rice and share your comments and suggestions.
Andhra Tomato Capsicum Rice Recipe | Andhra Thakkali Kudamilagai Sadham Recipe


Preparation and Yield:
Preparation time30 mins
Cooking Time30 mins
Servings5

Andhra Tomato Capsicum Rice Recipe | Andhra Thakkali Kudamilagai Sadham Recipe

Ingredients:
Basmati Rice1 Cup*
Tomato3
Green Capsicum1
Onion1
Green Chilli3
Potato1
Green Peas1/4 Cup
Chopped Ginger1/4 teaspoon
Curry Leavesfew
Green Cardamom1
Bay Leaf1
Oil1 tablespoon
Cinnamon Stick1 inch Piece
Cloves2
Turmeric Powder1/4 teaspoon
Chopped Coriander Leaves1 tablespoon
Water2 cups
SaltTo taste

* 1 Cup = 250ml


Andhra Tomato Capsicum Rice Recipe | Andhra Thakkali Kudamilagai Sadham Recipe

Method:
  1. Rinse the basmati rice in water and soak it in water for half an hour. Chop the onions, tomatoes, capsicum and green chillies finely and keep it aside. Wash and peel the potato and chop it into cubes. Heat a pan and add oil. 

  2. When the oil is hot, add bay leaf, cinnamon stick, cardamom, cloves, curry leaves and chopped green chillies and fry for a minute. Add the chopped ginger and fry for a second

  3. Then, add chopped onion along with a pinch of salt and saute it till they turn translucent. Then add chopped tomatoes and add saute the tomatoes.

  4. Add the turmeric powder, green peas and then potato cubes and mix well. 

  5. When the tomatoes are half-cooked, add chopped capsicum and give it a good stir. Drain the water from the basmati rice and add it to the pan.

  6. Stir fry the rice for 3 minutes in high flame. Add chopped coriander leaves to the pan

  7. Finally add 2 cups of water and allow it to boil. When 3/4th of the water is evaporated, keep the flame low and cover the pan with a lid till they rice is cooked fully and becomes fluffy. Do not stir the rice frequently, then the rice would become mushy. Remove the yummy tomato capsicum rice from flame

  8. The delicious Andhra Tomato Capsicum Rice is now ready to serve with any raitha!
  9. Andhra Tomato Capsicum Rice Recipe | Andhra Thakkali Kudamilagai Sadham Recipe
    Andhra Tomato Capsicum Rice Recipe | Andhra Thakkali Kudamilagai Sadham Recipe

Poori with Masala

$
0
0
No introduction is required for Poori masala. It is one of the favourite dish for most of us. Its my granddaughter's favourite breakfast. A very popular breakfast dish in most of the restaurants in India. This is having much less calories compared to the breakfast prepared with raw rice since it is made with atta. Deep frying the pooris are little unhealthy for us, but if we have it once a while then it should not be a problem. Poori Masala is a very perfect combination though we can have other side dishes too for Poori.
Poori with Masala
Poori with Masala

Preparation and Yield:
Preparation time10 mins
Cooking Time30 mins
Servings3

Poori with Masala
Poori with Masala


Ingredients for Poori:

Wheat Flour(Atta)2 Cups*
Rawa(Semolina)2 tablespoon
SaltTo Taste
Warm Milk/Water1 Ladle
WaterAs needed
Oil1/4 Litre

* 1 cup = 250ml
Ingredients for Masala:

Potato4 big size
Onion1
Tomato1
SaltTo Taste
Mustard Seeds1 teaspoon
Green Chilli2
Channa dal1 teaspoon
Coriander Leavesfew
Turmeric Powder1/4 teaspoon
Gingelly Oil1 tablespoon

Poori with Masala
Poori with Masala

Method to prepare Masala:
  1. Pressure cook the potatoes and once cooked, allow it to cool and then  remove the skin 

  2. Crumble the potatoes into small pieces. Finely chop the onion and tomato and green chilli and keep it aside. In a heavy bottomed pan, add gingelly oil and add mustard seeds when the oil is hot. When the mustard seeds starts to sputter, add channa dal and fry until it becomes golden red color. Now add turmeric powder, along with chopped green chillies, tomato and onion

  3. Saute it till tomato and onion are cooked completely. Now add cooked potato pieces and mix it well along with salt

  4. Add required water and make the consistency little thin so that it will be like gravy. Finely garnish with chopped coriander leaves.

  5. The delicious Potato masala is ready to serve with Poori
Method to make Poori
  1. Take the rawa in a pan, add hot milk/water and leave it for 5 mins. To this add wheat flour(Atta) along with maida, salt and water and knead it to a tight dough

  2. Make small balls of the wheat flour. Take one ball of wheat flour and roll it to 4-5 inch poori using a rolling pin. The same way make other balls of wheat flour

  3. In a heavy bottomed pan, pour the oil and when the oil is hot, gently put the rolled dough. Immediately start flickering hot oil over the top of it with a spatula so that it will swell up like a ball. This should take only a few seconds. Flip the poori over and cook the other side until golden brown.

  4. Yummy poori is ready to serve with Masala.
  5. Poori with Masala
    Poori with Masala

Bittergourd Thokku Recipe | Pagarkai Thokku Recipe

$
0
0
During Travel, many of us feel home sick mainly due to the outside food. When we are travelling or going for a vacation the first thing that comes to our mind is food. Especially, with little children travelling with us, we will be more cautious. Because of the Home food, Nowadays, many of us prefer to stay in self-catering cottages and try to carry all homemade mix like Paruppu Podi, Pulikachal mix etc. So homemade thokku will be very helpful for us and we can easily make white rice and mix with this thokku and eat happily. Bitter gourd thokku is one such travel friendly recipe. It has a shelf life of 1 week to 10 days if preserved properly. Lets see how to make this yummy thokku.


Bittergourd Thokku Recipe | Pagarkai Thokku Recipe


Preparation and Yield:
Preparation time10 mins
Cooking Time30 mins
Yield100gms

Bittergourd Thokku Recipe | Pagarkai Thokku Recipe

Ingredients:
Bitter Gourd2
Sambar Powder1 tablespoon
Tamarind1 lemon size
SaltTo taste
Grated Jaggery1 tablespoon
Hinga Pinch
Turmeric Powdera Pinch

* 1 Cup = 250ml
For Seasoning:
Oil2 tablespoon+2 teaspoon
Mustard Seeds1 teaspoon
Fenugreek Seeds1/2 teaspoon
Omam / Ajwain Seeds1/2 teaspoon
Curry Leaves1 few

Method:

  1. Saok the tamarind in water and extract the juice

  2. Finely chop the bittergourd and keep it aside. Heat oil in a pan, add mustard seeds. When the mustard seeds starts to sputter, add fenugreek seeds and ajwain and fry for 10 seconds. Then add curry leaves and saute it for 10 seconds. Now, add sambar powder and fry in the oil for 10 seconds

  3. Then add the chopped bitter gourd and stir well to coat the sambar powder and then fry in the oil keeping the flame in medium. 

  4. When the bittergourd are stir-fried in the oil nicely, then add tamarind extract. Add turmeric powder and salt and allow the tamarind extract to boil till the raw smell of the tamarind extract goes off. Keep the flame low and allow the whole mixture to get thicken and becomes like a thokku. When the whole bittergourd mixture becomes only 1/4th of the quantity, then add grated jaggery and mix well. Switch off the flame. Allow the thokku to cool off and then store it in a air tight container. On top of the thokku add 2 teaspoon of oil and then close the container with the lid. The Top oil layer of the thokku is the preservative and it helps in preserving the thokku and extends its shelf life. When you are using, take the thokku from the bottom without using the oil. The Oil is mandatory for the shelf life of the thokku.

  5. The delicious bittergourd thokku is now ready to serve! 
  6. Bittergourd Thokku Recipe | Pagarkai Thokku Recipe
    Bittergourd Thokku Recipe | Pagarkai Thokku Recipe

Viewing all 1833 articles
Browse latest View live