Quantcast
Channel: Subbus Kitchen
Viewing all 1833 articles
Browse latest View live

Pakarkaai Pitlai (Bitter gourd Pitlai)

$
0
0
Pakarkaai Pitlai (Bitter gourd Pitlai) is a famous kuzhambu in Kerala and some parts of Kanyakumari district. Many of us hate to eat Bitter gourd because of the obvious reason of its bitter taste. But Bitter gourd is a healthy vegetable. It is good for stomach. It has the ability to lower the blood glucose in diabetics. So It is better to take bitter gourd at regular intervals. Instead of deep fry, we can shallow fry the bitter gourd and use it in Pitlai.


Servings4
Preparation Time5 mins
Cooking Time30 mins 

Pakarkaai Pitlai (Bitter gourd Pitlai)


Ingredients :
Bitter gourd2
Thur Dal1/2 Cup
Curry LeavesFew
Tamarind1 small Lemon size
SaltTo Taste


For Grinding:
Grated Coconut1/2 Cup
Red Chillies8
Coriander Seeds3 Teaspoons
Urdal2 Teaspoon
Channa dal2 Teaspoon
Pepper1/4 Teaspoon
Oil2 Teaspoon

For Seasoning:
Oil1 teaspoon
Mustard Seeds1 teaspoon

Method:
  1. Soak the tamarind in water and extract the juice
  2. Pressure cook the thurdal and smash it and keep it aside
  3. Pour the oil in the pan and fry the red chillies, coriander seeds, urdhal, channa dal and pepper till the dals turn golden brown color. Take the fried ingredients in a mixer

  4. To the pan, add grated coconut, curry leaves, Hing and fry till it turns golden red color. Cool this and take it in the mixer

  5. Grind the above ingredients to a fine paste and keep it aside

  6. Finely chop the bitter gourd and keep it aside. Pour the oil the in the pan and add chopped bitter gourd 

  7. Shallow fry the bitter gourd in medium flame to avoid the bitter taste. Take this aside in a plate.

  8. Pour the oil the in the pan and add mustard seeds once the oil is hot. When the mustard seeds begins to sputter, add curry leaves and fry for 2 seconds. Add tamarind extract and salt and allow it to boil for 5 minutes to get rid off the raw smell of tamarind. To this add the fried bitter gourd pieces.

  9. Finally add the ground paste and smashed dal and when the Bittergourd(Paavakaai) Pitlai starts boiling switch off the flame.

  10. The yummy and tangy Pakarkaai Pitlai (Bitter gourd Pitlai) is ready to serve with hot rice.

  11. Pakarkaai Pitlai (Bitter gourd Pitlai)
    Pakarkaai Pitlai (Bitter gourd Pitlai)


Bisibelabath (Sambar Rice)

$
0
0
Bisibelabath is one of my favourite rice variety. Bisibela bath is originally a karnataka recipe and the tamil version of bisibela bath is more of a customized version of the original one and often referred as sambar rice. My mom cooks bisibela bath very well and the same recipe is given below. Try it out and let me know.


Preparation and Yield:
Preparation time15 mins
Cooking Time40 mins
Servings3


Bisibelabath (Sambar Rice)

Ingredients:
Raw Rice1 Cup*
Thur dal1/2 Cup
Tamarind1 lemon size
Onion **1
Drumstick1
Beans10
Carrot2
Potato1
Capsicum1
Turmeric 1/4 teaspoon
Hinga Pinch
Chopped Coriander leaves1 tablespoon
Cashews10
Sambar Powder1 teaspoon

*1 Cup = 250ml
**Baby onions is preferable than normal onions
For Grinding:
Oil1 teaspoon
Coriander Seeds1 tablespoon
Channa Dal2 teaspoon
Red Chilli5
Fenugreek seeds1/4 teaspoon
Cumin seeds1/2 teaspoon
Cinnamon Stick1 inch stick
Cloves3
Cardamom1
Grated Coconut1/2 Cup


For Seasoning:
Ghee1 teaspoon
Mustard Seeds1/2 teaspoon
Curry Leavesfew


Bisibelabath (Sambar Rice)

Method
  1. Soak the tamarind in the water and extract the tamarind juice.

  2. Cook one cup of rice with half cup of thur dhal and pinch of turmeric. Add little more water than the usual water that you add for cooking the normal rice and allow one more whistle in the cooker. This is to make sure that the rice/dhal mixture is cooked properly. Cut the vegitables lengthwise (as we do for Aviyal) and cook them and keep it aside. For drum stick we can remove the outerskin and keep only the inner stuffs.

  3. Cut the onion finely and keep it aside. Heat the thawa and add one spoon of Oil. Once the Oil gets heated, then add red chilli, dhaniya, channa dhal, fenugreek (vendhayam) seeds, cumin seeds (Jeera), and fry them till the colour of the dal changes to light brown. Switch off the flame and allow the mixture to cool. Add grated coconut, cloves, cinnamon and cardamom to the fried grinding ingredients

  4. Grind the mixture in the mixer to a nice paste and keep it aside.

  5. Add the tamarind juice to the cooked vegetables and keep in flame. Also add sambar powder, Asefotodia, salt and allow the mixture to cook in the low flame for about 5 minutes.

  6. Add the ground masala to the tamarind and vegetable mixture and boil for 5 minutes. Finally garnish with chopped coriander leaves and remove from flame. 

  7. Heat the thawa and add a spoon of oil. Add the mustard and once the mustard started to sputter then add curry leaves. Add the onion and fry till its color changes to light brown. Then add these seasoned ingredients to the bisibelabath mixture. 

  8. Take the cooked rice+dal and slightly mash it with a ladle. Add the bisibelabath mixture to the cooked rice and dal and mix well. Finally garnish with roasted cashews and mix well

  9. The yummy Bisibelabath is now ready to serve with onion Raitha or just papad or chips.
  10. Bisibelabath (Sambar Rice)
    Bisibelabath (Sambar Rice)

Puli Inji

$
0
0
Puli inji is my all time favourite. Its main ingrediants are Ginger, Green Chilli, Tamarind and Jaggery. Puli Inji can be enjoyed every day, as a tangy accompaniment to a simple meals. It takes very little cooking time and can be prepared very easy. This dish is specifically for spice lovers. We can just mix puli inji with plain rice and a spoon of gingelly oil or we can also have this as a pickle. This is also one of the travel companion dish.


Puli Inji
Puli Inji

Preparation and Yield:
Preparation time10 mins
Cooking Time20 mins
Servings4

Ingredients:
Ginger50gms 
Tamarind 1 lemon size
Green Chillies10
Turmeric Powder1
Grated Jaggery1 tablespoon
SaltTo Taste


For Grinding:
Urdal / Urid dal1 tablespoon
Fenugreek seeds1/2 teaspoon
Curry Leavesfew


For Seasoning:
Gingelly Oil1 tablespoon
Mustard Seeds1 tablespoon
Channa dal / Bengal Gram dal1 teaspoon
Hinga Pinch


Method:
  1. Soak the tamarind in water and extract the juice and keep it aside

  2. Finely chop the ginger and green chillies and keep it aside. Heat the pan and dry fry the urdhal,vendhayam and curryleaves and fry it till the dhal changes its color to light brown 

  3. Grind these in a mixer to a fine powder. In the pan pour the gingelly oil and add the mustard seeds. When the mustard seeds begins to sputter add the channadhal and hing and fry it till the dhal becomes red color

  4. Now add the chopped ginger and green chillies and fry till the ginger becomes brown color. Now add the tamarind extract, turmeric powder and salt and let the mixture boils for sometime.

  5. Finally add the ground powder and add the grated jaggery and when the mixture starts to boil, switch off the flame

  6. Now the tasty Puli inji is ready to serve with plain rice

    Puli Inji
    Puli Inji


    Note :
      We can also grind the green chillies and ginger to a fine paste and add it to the saute it in oil and then add tamarind extract. This is another version.

Paruppu Purana Poli

$
0
0
Paruppu Purana Poli is a traditional sweet dish prepared during festivals like Bogi and Avani Avittam. Apart from festivals, I used to make this yummy sweet dish often because my first Grand daughter likes it so much. It is always a pleasure to make for our kids especially when they like it so much. Many of us think doing Poli is a very tough task, but believe me if we enjoy and do it, then I bet, it is very simple and very scrumptious too. A very soft and delicious sweet dish. In my mom-in-law's native, for events like marriages tey serve the purana poli and add generous amount of ghee as topping and also serve payasam on top of it.
Preparation and Yield:
Preparation time30 mins
Cooking Time45 mins
Yield12
Recipe CategorySweet Varieties
Recipe CuisineSouth Indian

Purana Poli
Purna Poli

Ingredients for OuterCover:
Maida / All purpose flour1 Cup
Turmeric Powder1/4 teaspoon
Gingelly Oil2 tablespoon
Salta Pinch


Ingredients for Puranam:
Channa Dal1/2 Cup
Grated Jaggery1/2 Cup
Grated Coconut2 tablespoon
Cardamom4


Paruppu Purana Poli
Paruppu Purana Poli

Method:
  1. Cook the channa dhal in pressure cooker till it is soft.
  2. Grind the channa dhal along with grated cocunut and cardamon without adding water to fine paste
  3. Then add the jaggery to the mixer and give a pulse and mix it with the ground dal paste. Puranam is ready now.

  4. Mix the maida with oil and turmeric and add little water. The dough should be like chapati dough. Keep it aside for atleast 30 mins.
  5. Make small balls from the dough. 

  6. Spread each ball like Poori using hand. Or you can also place the ball of dough in a plastic sheet greased with oil
  7. Cover the ball of dough with another cover greased with oil. 

  8. Place a flat plate on top of the ball of dough and press it nicely to get a thin poori

  9. Now, keep the purnam in the middle of the rolled puri

  10. Close the puri with stuffed puranam and remove the excess dough

  11. Again using a plate or using hand spread the stuffed poli dough in such a way that the puranam is spread evenly

  12. Then heat a pan and add the rolled poli in the pan and add little ghee and cook one side. 

  13. Turn other side and add some ghee and cook it. Remove the cooked poli from pan. Repeat the same for the remaining poli dough
  14. The delicious Purana Poli is ready to serve hot.
Purna Poli


Paneer Tikka Recipe on Stove Top | Paneer Tikka using Tawa

$
0
0
Paneer tikka is an Indian dish made from yogurt and spice marinated Indian cottage cheese and veggies are grilled in oven or on stove top. Paneer Tikka is an Easy-to-Cook and Delicious Dish for Snacks and Starters. I m going to explain the process of making on Stove top using a normal tawa or broad pan. A very scrumptious dish for any parties!


Preparation and Yield:
Preparation time2 hours or overnight
Cooking Time20 mins
Yield8 Paneer Kebobs
Recipe CategoryMain
Recipe CuisineNorth Indian

Paneer Tikka Recipe on Stove Top | Paneer Tikka using Tawa

Ingredients:
Paneer250gms
Green Capsicum
Red Capsicum1
Onion1
SaltTo taste
Crushed Kasoori Methi1 tablespoon
Red Chilli Powder *1 teaspoon
Garam Masala1/2 teaspoon
Yogurt / Curd1/4 cup*
Gram Flour1/4 cup
Butter2 tablespoon
Ajwain / Carom Seeds / Omam1/2 teaspoon
Oil1/4 cup
Turmeric Powder1/4 teaspoon
Ginger-Garlic Paste1 teaspoon
Lemon Juice1 teaspoon

Paneer Tikka Recipe on Stove Top | Paneer Tikka using Tawa


Method
:
  1. Heat a pan and add butter and when the butter melts, add the carom seeds and gram flour and saute the gram flour till it gives a nice aroma and becomes brown color.
  2. Take a mixing bowl, add the roasted gram flour to the mixing bowl, add curd, fennel seeds, red chillie powder, garam masala powder, crushed kasoori methi, salt, ginger-garlic paste and give a good mix. Heat up 2 tablespoon of oil and add turmeric powder and mix well and add this to the mixing bowl and give a good mix
  3. Add paneer, chopped cpasicum, red and green, cubed onions, and mix well so that all of them are nicely coated
  4. Finally add a teaspoon of lemon juice and mix well. Keep this aside for atleast 2 hours or even overnight. The more you keep the marinated mixture, the more the flavours gets nicely incorporated with the paneer and veggies.
  5. Soak the skewers in warm water for 10-15 minutes. This is just to make sure the skewers doesn't get burnt when we keep them in oven or tawa. If you are using a metal skewer, then you can ignore this step
  6. After 2 hours, take a skewer, insert a marinated paneer followed by onion, green capsicum and red capsicum. Repeat this pattern one more time in the same skewer. Prepare the rest of skewers in the same way.  
  7. Heat a tablespoon of oil in a pan, place 2-3 skewers in a pan. Pour some oil on top of the each skewer and allow them to cook nicely in all sides. Flip the skewer on all sides so that all the sides are evenly cooked. You can see the paneer and veggies are nicely cooked and they become crispy. The gram flour and hot oil, give a nice crunchy taste to the paneer and veggies.
  8. Remove the skewers from the pan and add the next batch
  9. Serve the yummy and crispy Paneer Tikka with green chutney. We can also use these Paneer Tikkas and make delicious Paneer Tikka Masala
  10. Paneer Tikka Recipe on Stove Top | Paneer Tikka using Tawa
    Paneer Tikka Recipe on Stove Top | Paneer Tikka using Tawa

Milagu Adai(Thirukarthigai Adai)

$
0
0
In our families Milagu Adai also one of the neyvedhyam for Thirukarthigai. As per the mythological story a princes has to leave an elephant which she considered as her brother when she gets married and move to her husbands place. So for every Thirukarthigai/Karthigai deepam occasion, elephant lamp(Gajalakshmi vilaku) and she will prepare tender coconut, elephant leg size milagu Adai, and few more dishes and keep them as neivedhyam for this festival.


Milagu Adai(Thirukarthigai Adai)
Milagu (Karthigai) Adai

Preparation Time2 hours
Cooking Time 20 mins
Servings8-10 Adai

Ingredients:
Raw Rice*1 cup
Urdhal1/4 cup
Gram dhal1/4 cup
Thur dharl1/4 cup
Pepper1 teaspoon
SaltTo  Taste
HingA pinch
Grated Coconut2 table spoon
Curry LeavesFew

* for neyvedhyam we always use Raw rice. But for normal occasion  you can use Parboiled Rice.
Milagu Adai(Thirukarthigai Adai)

Method:
  1. Soak the rice with all the  dhals in water for 2 hours to 3 hours.
  2. Drain the rice and dhals and grind it in mixer to a coarse paste. The adai flour should not be very smooth. ransfer this to a bowl and mix the pepper salt, hing, curry leaves and grated coconut.
  3. The consistency should be slightly thicker than our normal dosa batter.

  4. Heat the thawa and pour 1 ladle of flour and spread evenly and cook the adai on both the sides till the adai is crisp

  5. Serve the tasty adai along with Jaggery.
  6. Milagu Adai(Thirukarthigai Adai)
    Milagu Adai(Thirukarthigai Adai)


Kalyana Rasam

$
0
0
Kalyana Rasam has a wonderful taste and flavor. I always wonder the speciality of rasam being served in Marriages. It has a unique taste with tangy and spice well balanced. The flavour of pepper makes this a big hit. Normally when we do tomato dal rasam, we put the rasam powder and make the tamarind juice boil well to get rid off the raw smell of rasam powder. Here in kalyana rasam, we add the spice powder only at the end which makes it very tasty. Lets see the recipe now.

Kalyana Rasam / Marriage Rasam
Preparation Time5 mins
Cooking Time 20 mins
Servings3-4

Ingredients:
Tamarind1 small gooseberry size
Tomato3
Thur dal1 tablespoon
SaltTo Taste
Curry leavesfew
Hinga small pinch

Ingredients For Grinding:
Ghee1 teaspoon
Coriander Seeds2 teaspoon
Thur dal2 teaspoon
Pepper1 teaspoon
Red Chillies1
Cumin Seeds1/2 teaspoon

Ingredients For Seasoning:
Mustard Seeds1 teaspoon
Ghee1 teaspoon
Kalyana Rasam
Kalyana Rasam


Method:

  1. Soak the tamarind in water and extract the juice
  2. Pressure cook the thur dal and smash it nicely and keep it aside
  3. Heat a pan, add ghee and add the grinding ingredients except cumin seedsand fry it till the dal turns golden brown color. 

  4. Remove the fried ingredients from flame and add it to mixer and also add cumin seeds

  5. Grind the ingredients to a fine powder and keep it aside

  6. Add the tamarind juice to a vessel along with 1 chopped tomatoes, salt, curry leaves and hing

  7. Grind the other tomatoes in a mixer to puree 

  8. Add the tomato puree to the tamarind juice extract and mix well and keep in flame 

  9. Allow the rasam to boil till the raw smell of the tamarind goes off, add smashed dal and mix well and add 2 cups of water and keep in flame and allow in flame for another 5 minutes

  10. Finally add the ground powder and mix well and when the rasam gets the froth, remove from flame

  11. Heat another pan, add ghee and add mustard seeds and when the mustard seeds starts to sputter, add it to the rasam. Garnish it with coriander leaves and serve hot with rice

  12. The yummy and spicy kalyana rasam is ready to serve
  13. Kalyana Rasam / Marriage Rasam

Chakka Varatti Recipe | How to make Jackfruit Halwa

$
0
0
Chakka Varrati (Jackfruit Halwa) is an authentic and most popular kerala delicacy made from ripened jackfruit. Chakka is a malayalam word for jackfruit and Chakkavarati is a perserved pulp made out of jackfruit, jaggery and ghee. Generally the chakkavariety is made during jackfruit season and perserved for making chakka pradaman.
My mom-in-law used to make this with a whole jackfruit and it takes quite longer time to finish the jam.  There are a slight variations to do this same recipe. Some of them saute the jackfruit in ghee till they are soft and tender and then add the jaggery syrup without making pulp. Few people, make a single string consistency of jaggery syrup and add the pulp. But all these tastes the same and the shelf life is same in any method. I learnt this recipe from my Mom-in-law and so, I am used to this method. Try this way of making Chakka Varatti and you will surely enjoy the dish. We can serve the chakka varati as other halwa.  Just warm the chakka varati before serving.  Authentic Chakka pradaman is made using this chakka varati only.


Preparation and Yield:
Preparation time15 mins
Cooking Time1 hour
Yield200gm
Recipe CategorySweet
Recipe CuisineSouth Indian

Chakka Varatti Recipe | How to make Jackfruit Halwa
Ingredients:
Jack fruit Pieces10 big pieces / 3 cups of finely chopped jackfruit pieces
Grated Jaggery1 Cup*
Ghee1/4 Cup
Cardamom Powder1/2 teaspoon
Sukku Powder / Dry Ginger Powder1/4 teaspoon
Cashewsfew

*1 Cup = 250ml
Method:

  1. Deeseed the jackfruits and chop them finely and take it in a vessel 

  2. Add little water and pressure cook the chopped jackfruit till they are nicely cooked. Allow 3-4 whistles. We can also saute the chopped jackfruit pices in ghee in a heavy bottomed pan till they are cooked and mushy. But that process will take more time than pressure cooking method. So, I prefer to pressure cook. 

  3. Once the pressure is released from the cooker, we can strain any excess water and allow it to cool and then grind it to get a nice and smooth pulp. Measure the pulp. For 1 measure of pulp we need to add 1 measure of grated jaggery. I got a cup of pulp so, I took 1 cup of grated jaggery. Keep this pulp aside

  4. Heat a sauce pan and add the grated jaggery and add 1/4 cup of water and stir well till the jaggery gets nicely dissolved in water. Strain this jaggery juice to get rid of sand or dust particles.

  5. Heat a pan and add the strained jaggery juice and bring it to boil. Add the jackfruit pulp and mix well. Keep stirring till they are nicely incorporated and becomes thicker

  6. When the mixture becomes thicker, add ghee at regular intervals and keep stirring in low flame till all the ghee are nicely incorporated with the jackfruit and jaggery mixture. When the mixture started to roll like a ball without sticking to the sides of the pan, add the cardamom powder and sukku powder and mix well

  7. Finally add ghee roasted cashews and give a good mix. You can check the consistency of the chakka varatti by taking a small quantity of halwa in your wet hands and try to make a ball. If you are able to make a ball, then switch off the flame. Take the chakka varatti in a serving bowl


  8. You can preserve the chakka varatti by keeping in air-tight container. This has a longer shelf life. We can serve or use it as an when we need. 
Chakka Varatti Recipe | How to make Jackfruit Halwa

Onam Sadya (Onam Festival Lunch Menu) - Sambar, Rasam, Puliseri, Eriseri, Olan, Kalan, Aviyal, Kadamba thoran, Kadala Paruppu Pradaman, Pal Payasam, Thayir Pachadi, Rice and Pappad

$
0
0
Onam Sadya, is the grand feast prepared on the auspicious occasion of Onam Festival. Sadya is a variety of vegetarian dishes traditionally served in Banana Leaf in Kerala. A normal Sadya can have about 24-28 dishes served as a single course. The main dish is the plain Boiled Rice which is served with Sambar, Rasam, Puliseri along with Eriseri, Olan, Kalan, Aviyal, Thoran, Pachadi, Puliinji and 3-4 different varieties of Payasam / Pradaman.The most common ingredients in all the dishes are rice, coconut and coconut oil as they are abundant in Kerala. Coconut milk is used in some dishes and coconut oil is used for frying and also as an ingredient in others.  Conventionally, the meal may be followed by vettila murukkan, chewing of betel leaf with lime and arecanut. This helps digestion of the meal and also cleanses the palate.


I have included most of the traditional and important dishes in Sadya. In my Sadya, I have included Plain Boiled Rice, Sambar, Rasam, Puliseri, Eriseri, Olan, Kalan, Aviyal, Thoran, Ladysfinger Thayir Pachadi, Kadalaparuppu Pradaman, Pal Payasan, Nei Paruppu and Papad. There are atleast 4 different variety of payasam/pradaman done for Sadya. I have given below many different payasam varieties and also individual recipes in Menu. This menu would surely be a richer Sadya for this Onam.


Onam Sadya (Onam Festival Lunch Menu) - Sambar, Rasam, Puliseri, Eriseri, Olan, Kalan, Aviyal, Kadamba thoran, Kadala Paruppu Pradaman, Pal Payasam, Thayir Pachadi, Rice and Pappad


Some Special Recipes for Onam:

Chakka VarattiChakka Pradaman

Eriseri

SambarPuliseri

Kalyana RasamAviyal

OolanKalan

Nei AppamSemiya Payasam

Paruppu VadaiPuli Inji


Onam Sadya (Onam Festival Lunch Menu) - Sambar, Rasam, Puliseri, Eriseri, Olan, Kalan, Aviyal, Kadamba thoran, Kadala Paruppu Pradaman, Pal Payasam, Thayir Pachadi, Rice and Pappad

Chakka Pradaman Recipe | Chakka Pradaman with Chakka Varatti Recipe

$
0
0
Chakka Pradaman is a traditional payasam of Kerala. It is a mouth-watering dessert that makes the taste buds tingling. Usually this is prepared for Onam Sadhaya. The main ingredients of chakka prathaman are chakka varattiyathu and jaggery.Chakka varattiyathu is made by cooking finely chopped pieces of Chakka Chula (the edible yellow part of jackfruit) with ghee and jaggery (or sugar) at a high temperature until it becomes thick like halwa. Once this paste is ready, it can be kept for a long time without losing its taste. To make the prathaman, the 'chakka varattiyathu' is cooked with Cooconut milk and additional jaggery.The dish is usually served hot. It is made more often in Kerala than in other south Indian states. For chakka varatti recipe, you can click on the link given here


Preparation and Yield:
Preparation time10 mins
Cooking Time30 mins
Servings4
Recipe CategoryDessert
Recipe CuisineSouth Indian

Chakka Pradaman Recipe | Chakka Pradaman with Chakka Varatti Recipe

Ingredients:
Chakka Varatti1 Cup*
Grated Jaggery1 Cup
Grated Coconut2 Cups
Cardamom Powder1/2 teaspoon
Cashews5-6
Raisins1 tablespoon
Chopped Coconut Bits1 tablespoon

* 1 Cup = 250ml
Chakka Pradaman Recipe | Chakka Pradaman with Chakka Varatti Recipe

Method:
  1. First heat a pan and add a teaspoon of ghee and fry the coconut pieces till they are golden brown color. Take these roasted coconut pieces aside
  2. In the same pan, heat another teaspoon of ghee and roast the raisins followed by cashews and all these aside
  3. Keep a sauce pan on the flame and add the grated jaggery. Add 1/4 cup of water to the grated jaggery and allow it to completely dissolve. Keep this aside
  4. Take the grated coconut in a mixer jar and add 1/2 cup of water and grind it nicely and then squeeze out the ground coconut  to get thick coconut milk (Onnam Paal). Set this milk aside
  5. Take the squeezed ground coconut again in  the mixer jar and add a cup of water and grind it again nicely and the squeeze out the milk. This is the medium thick coconut milk ( Rendam Paal)
  6. Finally, add 2 cups of water to the mixer jar and grind it nicely. Squeeze out the milk and extract thin coconut milk and discard the ground coconut. This is 3rd coconut milk (Poonam Paal)
  7. Heat a heavy bottomed pan, add the 3rd coconut milk which is very thin in consistency and bring it to boil.
  8. To the pan, now, strain the jaggery juice and give a good stir. Then add the chakka varatti and keep stirring till all the chakka varatti are nicely dissolved in the coconut milk mixture.
  9. Then, add the medium thick, 2nd coconut milk and allow the mixture to boil for 10 minutes in medium flame. Add cardamom powder and mix well
  10. After 10 minutes, add the thick coconut milk and keep the flame very low and give a good stir so that the thick milk is nicely incorporated with the jaggery and chakka varatti mixture.
  11. Garnish the payasam with roasted cashews, raisins and coconut bits and switch off the flame
  12. The delicious Chakka Pradaman is now ready to serve!
  13. Chakka Pradaman Recipe | Chakka Pradaman with Chakka Varatti Recipe
    Chakka Pradaman Recipe | Chakka Pradaman with Chakka Varatti Recipe

Varalakshmi Vratham/Varalakshmi Pooja

$
0
0
Varalakshmi Pooja is an important pooja performed by many women in the states of Andra and Tamilnadu. This year Varalakshmi Viratham is on 28th Aug 2015.

Varalakshmi Pooja is celebrated on the friday, before the full moon day, in the Tamil Month Sravana (July-August). Varalakshmi is yet another form of Lord Vishnu’s consort, Lakshmi, the goddess of wealth. Varalakshmi is believed to be the one who grants boons (Varam).

Varalakshmi Pooja can be performed any woman with no restriction of caste or creed. The legend of Varalakshmi Vratham is that Goddess Varalakshmi appeared in a woman devotee named Charumathi’s dream and expressed her satisfaction in the woman’s devotion towards the Goddess.


Varalakshmi Vratham / Varalakshmi Pooja


During this auspicious day, married women gets up early in the morning and decorate their front yards with rangolis. Later they take oil bath and wear new cloths and jewellery. Also they start preparing neivedhyam for the pooja and decorate the kalasam. Every women who has the ritual to perform this viratham will have the Varalakshmi face(Amman mugham) in Silver. As a conclusion to the festivities, they sing praises of the goddess and also invite another married woman to don the role of Lakshmi and offer them sweets. That evening, the neighbours are invited to the home and offered tamboolam. Together they sing hymns in praise of goddess Varalakshmi.

Decorating Varalakshmi Amman
In a thambalam(Plate), plantain leaf(Vazhaiilai) is laid and over the leaf, put 1 cup of raw rice and spread it evenly. Keep a silver pot(Sombu) and decorate the sivler pot with sandal and kumkum. The silver pot is filled with rice or water, coins, turmeric, betel leaf and a nut. Take a coconut rub it with turmeric keep that Over the silver pot, on the top of the coconut, decorate with karugumani bangles and cover the silver pot with blouse piece. Now place the Varalakshmi face over the coconut and tie it tightly in the back of the coconut to avoid falling. Decorate the Amman Mugham with different colors of flowers and gold chains. Decorating amman with Panju thiri malai is very auspicious. Now decorate a small table with thoraman and maaviali(Mango tree leaf) and place the thamabalam inside the table. On the day of varalakshmi viratham, in the morning, we need to decorate the amman in thambalam first and in the entrance of house, we need to wet the floor and put kolam and place the amman thambalam in the kolam and we need to sing "Varalakshmi Ra Ve Ma Intiki" and slowly lift the amman thambalam and bring it to the Pooja room where the small table is ready with thoranam and maavilai and place it thambalam inside the table slowly and gently.

Preparation before Pooja:
We need to ensure the following items to be kept ready before starting the pooja as it not advisable to get up in the middle of pooja.
  1. Coconut
  2. Beetle leaf with nut
  3. 5 varieties of fruits if not at least banana
  4. Flowers( Especially lotus petals and Ganera(Sev arali poo) are very auspicious)
  5. Neivedhyam Items ( Annam (Rice with dal and ghee), Pacharisi Idly, Kozhakattai, Payasam, Vadai)
  6. Nonbu Saradu (Holy yellow rope with a small flower tied in the middle of each rope). This ninbu saradu has to be placed in Varalakshmi Amman's Feet
  7. A Tumber with water and a spoon
Perform Pooja
Pooja is available in the internet as well as we can get DVD's which can be played to perform the viratham. We can also call sastri(priest) who will perform this pooja at our home.

Vinayakar Pooja

Take a beetle leaf, and place it by the edge facing the north side. Take 2 teaspoon of turmeric and using little water make small mountain like mould which represent Lord Vinayakar. Place it in the middle of the beetle leaf and place some kumkum at the top of vinayakar and chant the following slokas by taking flowers and akshadhai.
  1. Om Sumugaya Namaha
  2. Om Yegathanthaya Namaha
  3. Om Kabilaya Namaha
  4. Om Kajakarnikaya Namaha
  5. Om Lambodharaya Namaha
  6. Om Vigadaya Namaha
  7. Om Viknarajaya Namaha
  8. Om Ganadhipaya Namaha
  9. Om Thumakedhave Namaha
  10. Om Ganadhakshaya Namaha
  11. Om Balachandraya Namaha
  12. Om Vakrathundaya Namaha
  13. Om Soorpakarnaya Namaha
  14. Om Heryrambaya Namaha
  15. Om Skandhapoorvajaya Namaha
  16. Om Mahaganapadhiye Namaha
Nanavidha Parimala Patra Pushpani samarpayami. We need to perform the above vigneshwara pooja and move the beetle leaf to the north side and then start with Varalakshmi Pooja.

Varalakshmi Pooja

There are many DVD's available in market, you can buy them and follow the instructions or we can call a priest(Sashtri) and perform the pooja. If you are living abroad and have a short time to perform viratham, then you can chant "Mahalakshmi Ashtothram" and put flowers for each sloka and finish the pooja.

After the pooja is done, we need to perform neivedhyam which is followed by maha deeparadhanai.

General Neivedhya Items for the pooja

SalyannamPlain white cooked rice
Kruthakula Payasam Paruppu Payasam(Dal Kheer)
MashapubamUlundhu vadai (Urid dal vada)
KudapubamAppam
LattugamPacharisi Idly
SanagamKondaikadalai Sundal(Chick peas sundal)
ModhagamKozhukattai
NalikerakandamCoconut break into half
KathalepalamBanana
PatharepalamIlandhapazham(Ber)
JambubalamNavarpazham(indian blackberry)
Peejapurapalam)Guva fruit
NarthapalamOrange/ sweet lime

Once the Neivedhyam and Deeparathanai is done, every women in the house including babies from 1 year should tie the nonbu saradu in their right hand. Generally, the elderly married women in the house ties the nonbu kayiru in her right hand with the help of her husband and she will in turn ties other nonbu kayiru to kanya(unmarried) girls at home. Everyone after they tie the knot in their hand ,they will pray to Varalakshmi godess to seek her blessings.

Saradu Katum Slokam
Before tying the knot, we need to do the following.

Take a tambalam and place coconut, fruits, beetle leaves with nuts, turmeric and give the thambalam to the women and chant the following sloka and tie the nonbu saradu

"Navathanthu Samayuktham Navakranthi Samanvitham
  Pathneeyam thakshanye hasthey thoragam harivallabey"

After saying these lines, we need to tie the knot to the first elder women in the family. We have to again  repeat the same for the rest of kanya girls in the family.

If we have invited Priest, we need to give him a thambalam with beetle leaves with nut, fruits, coconut, neivedhyam items and also his fees.

On this day day for the dinner, woman should not eat rice. They can eat light tiffin. Generally it is a tradition to eat the neivedhya items for dinner. My mom used to eat only pacharisi idly for dinner.

In the evening, We need to make fresh arathi and after lighting the deepam, and we should invite other married women and give them thambulam along with chick peas sundal. Generally in my young days, my mom used to do sundal the next day which we call it as Punar Poojai.

Punar Poojai:
Next day, we need to do Punar Poojai. We need to do neivedhyam(fruits) for Amman. We need to chant Lakshmi Ashtotharam and do deeparathanai. Chant the below mantra using flowers and akshatai

"Asmath Kumbath Sri Varalakshmem
  Yadhasthanam Pradhishtapayami
  So' Panarthey Kshemaya Punaragamanaya cha"

Chanting the above mantra, we need to put the flowers and akshatai in Amman's feet and gently move the kalasam to the north direction and we can sing Amman songs.

Before going to sleep, we need to take the Amman kalasam and keep it inside the rice drim(sack). We can use the coconut in the kalasam the next friday and make payasam.

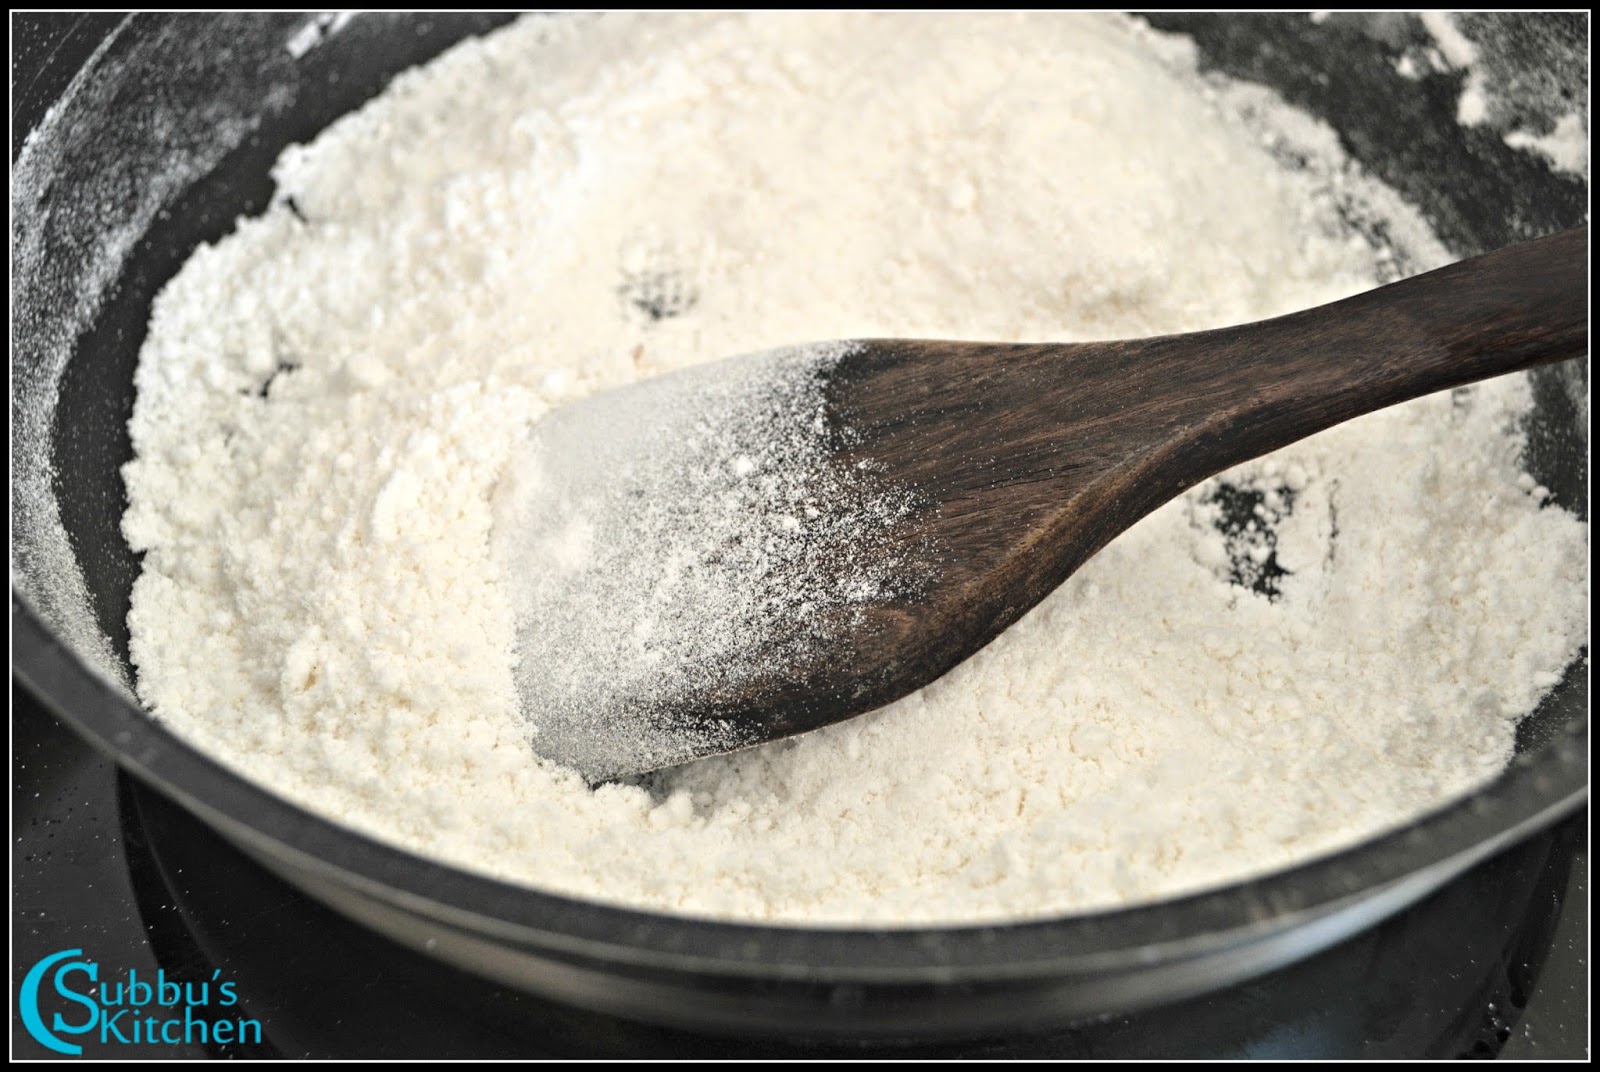
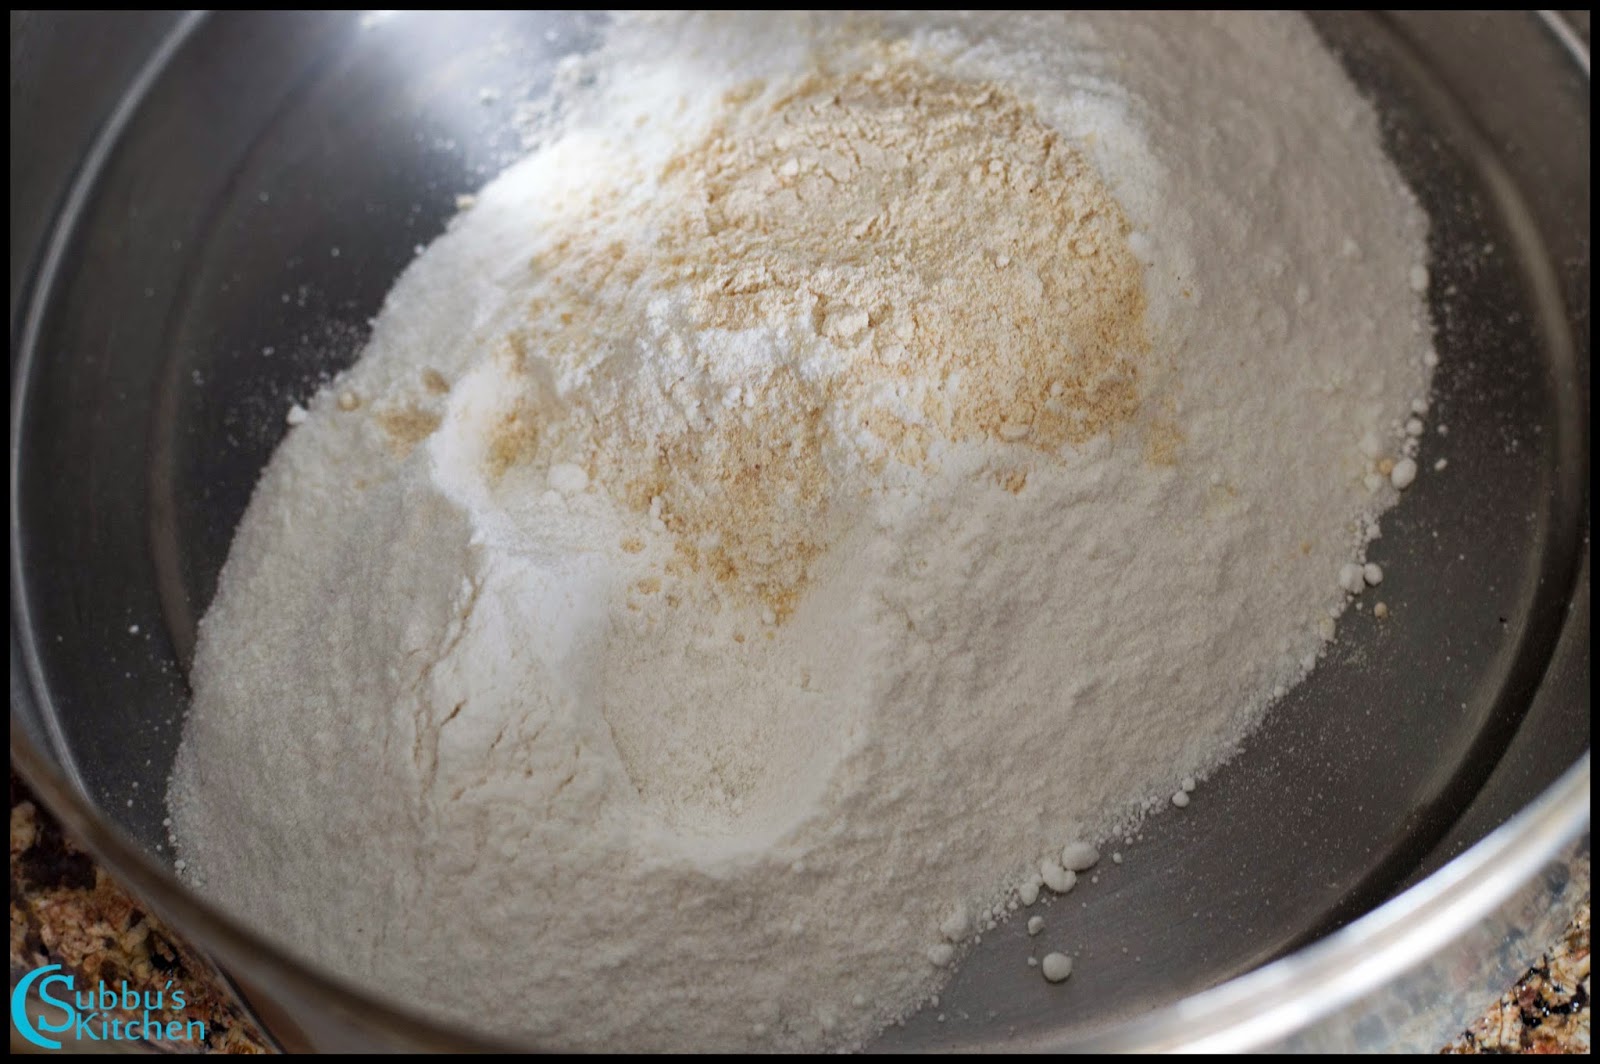
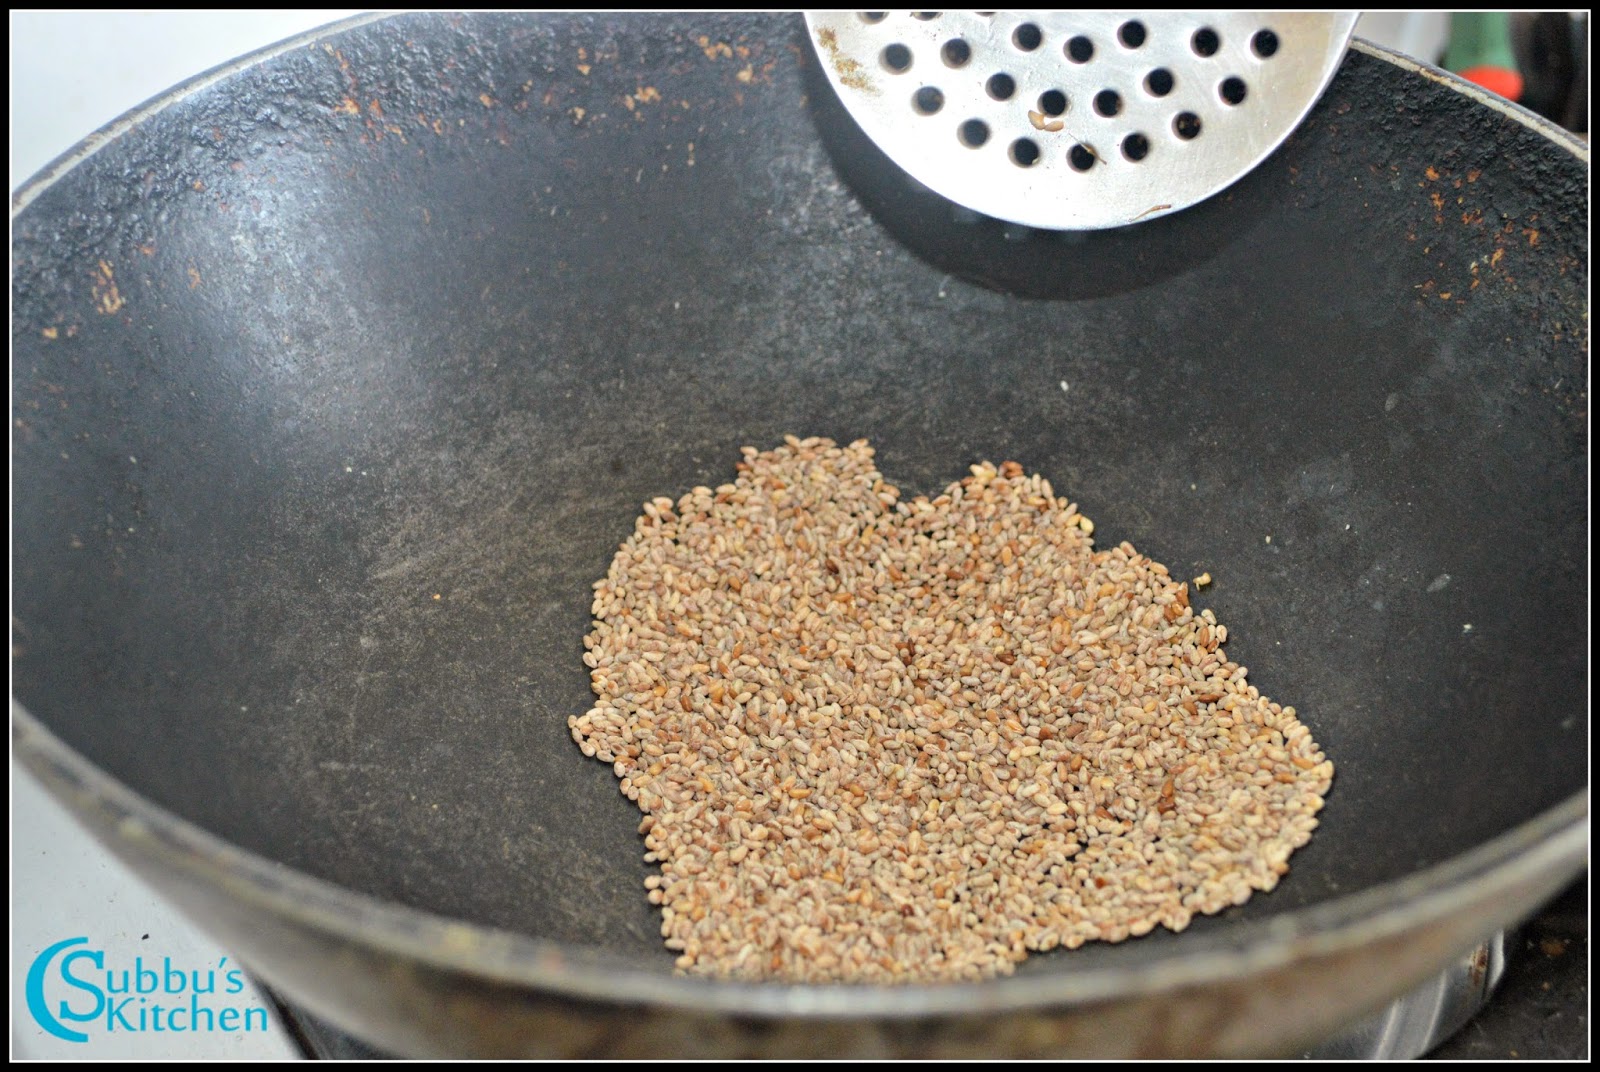
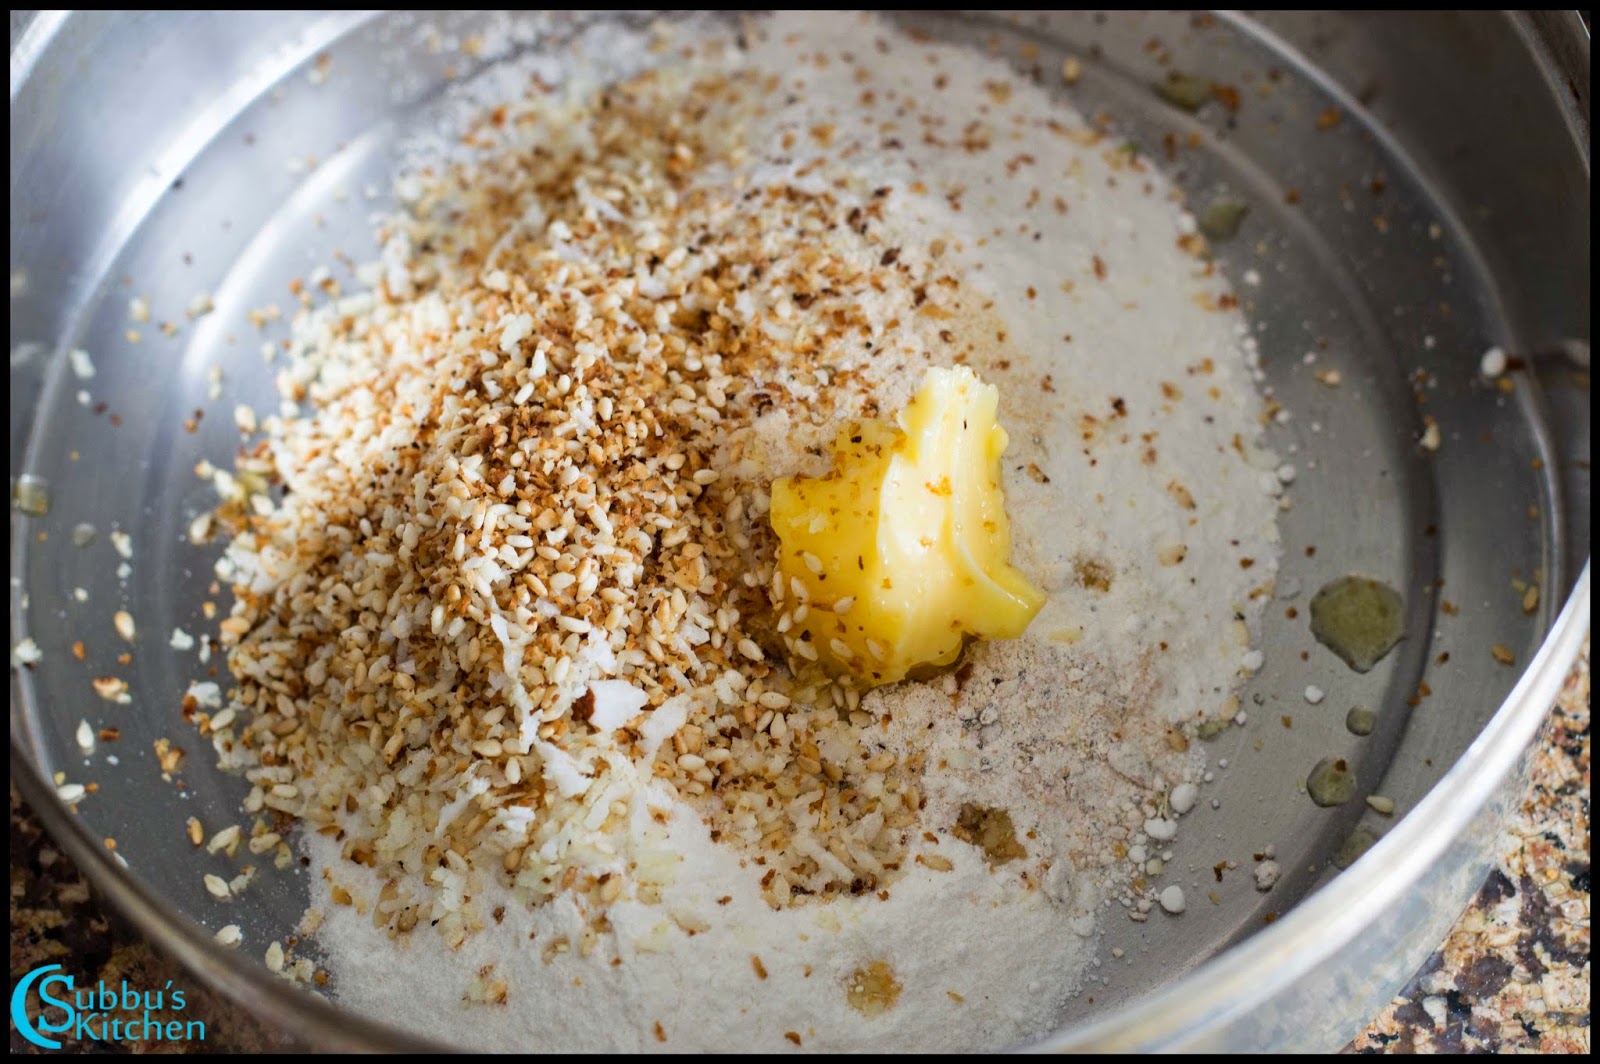
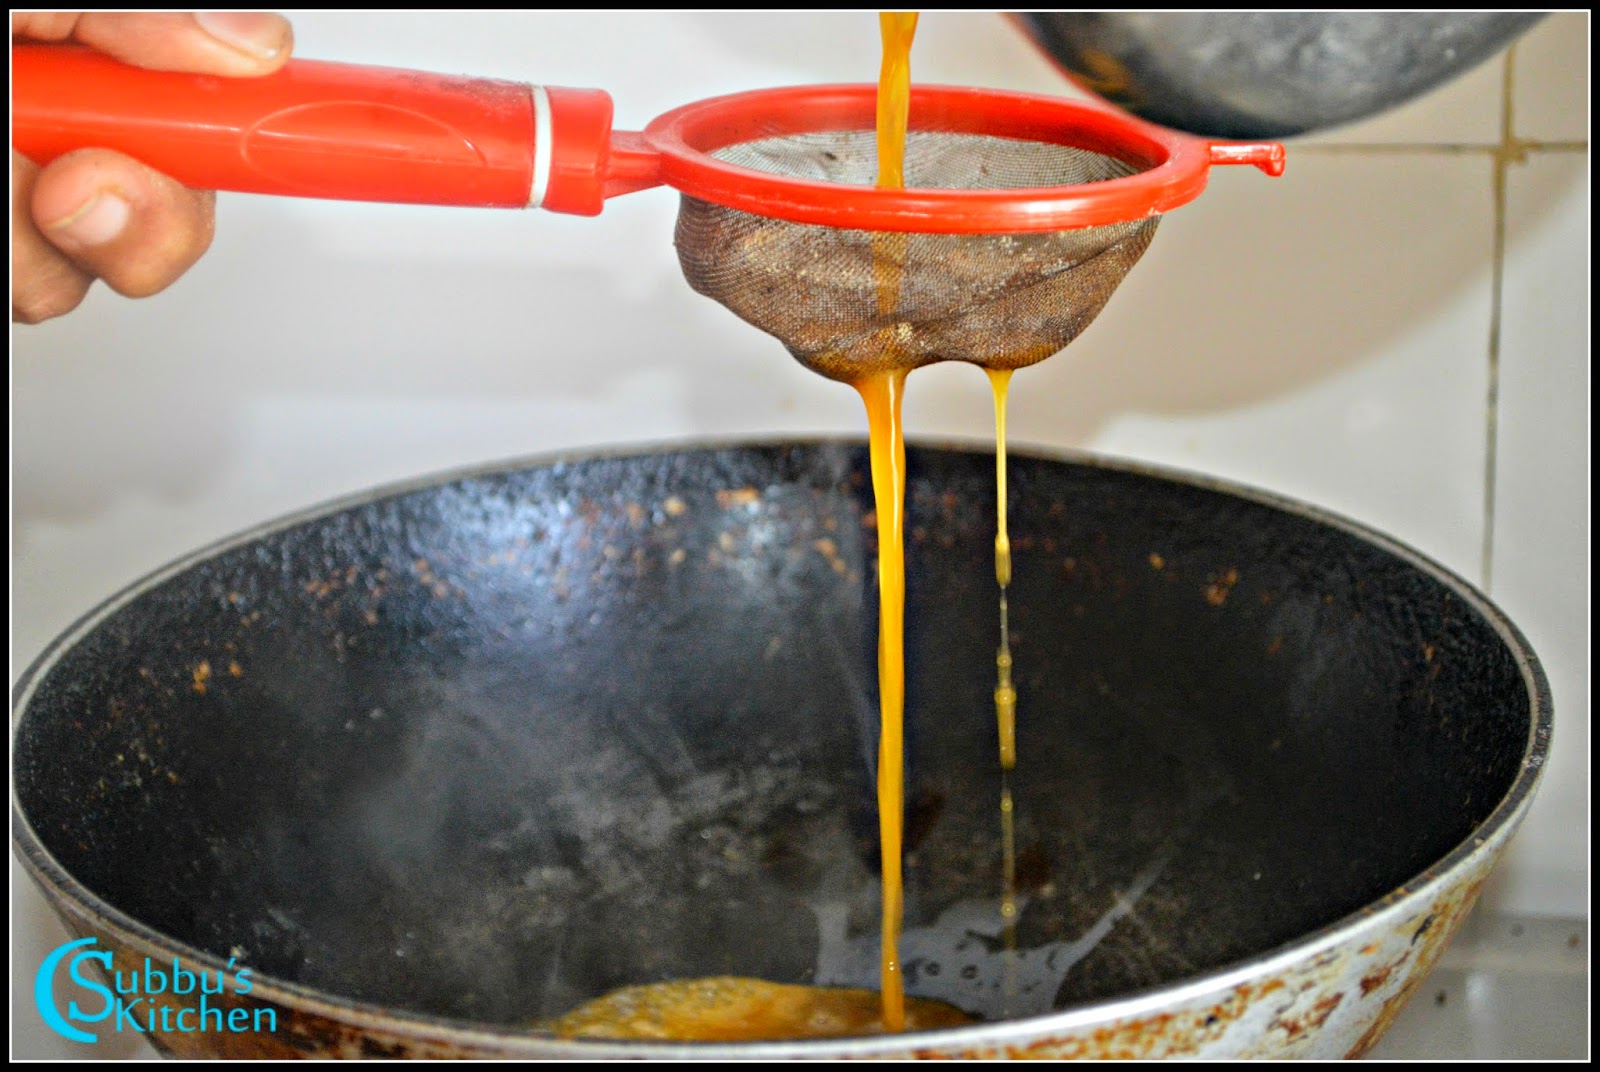
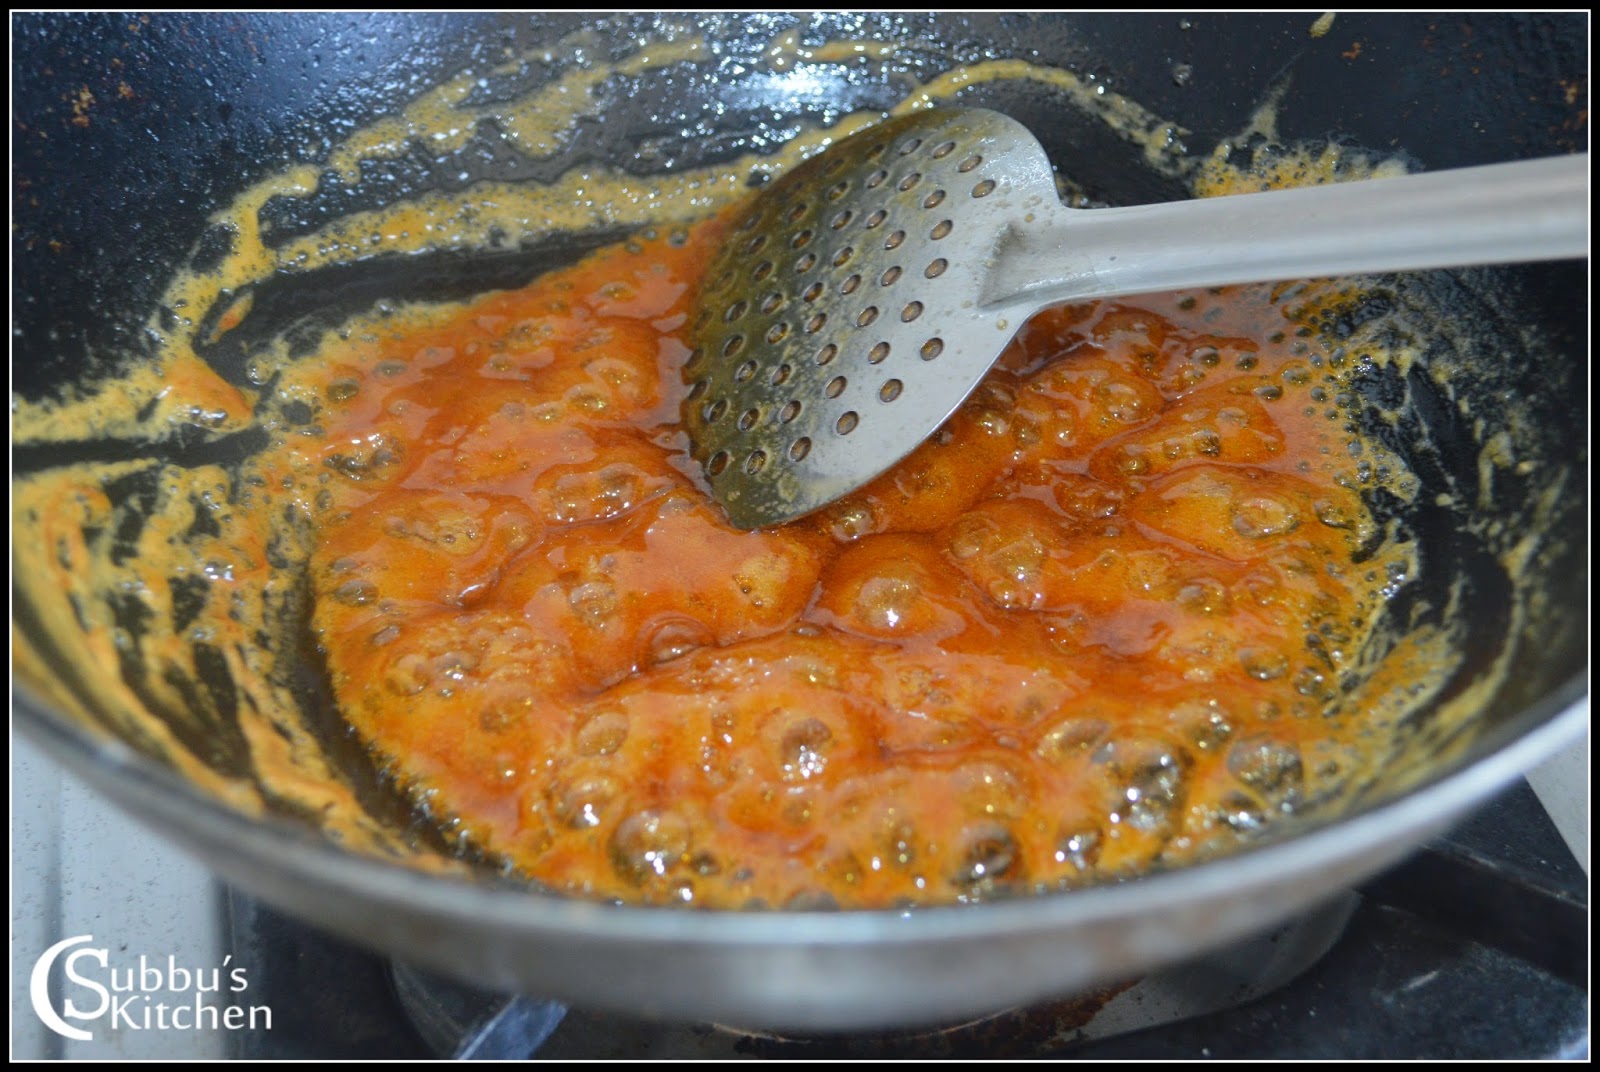
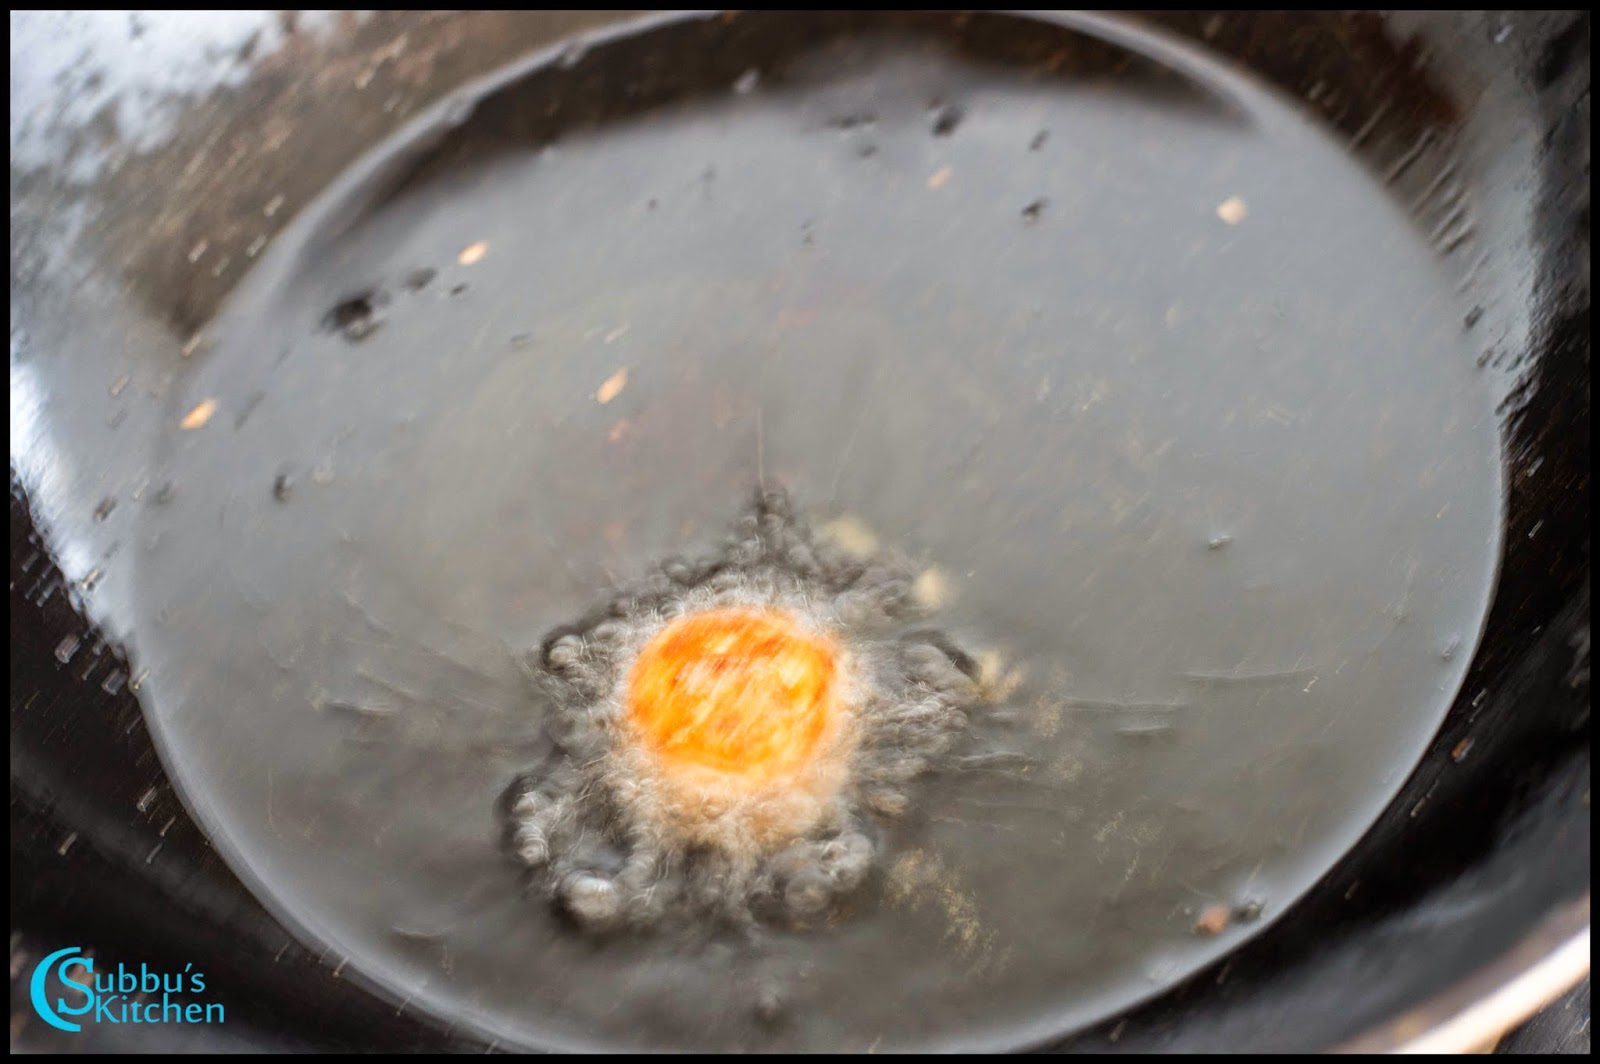
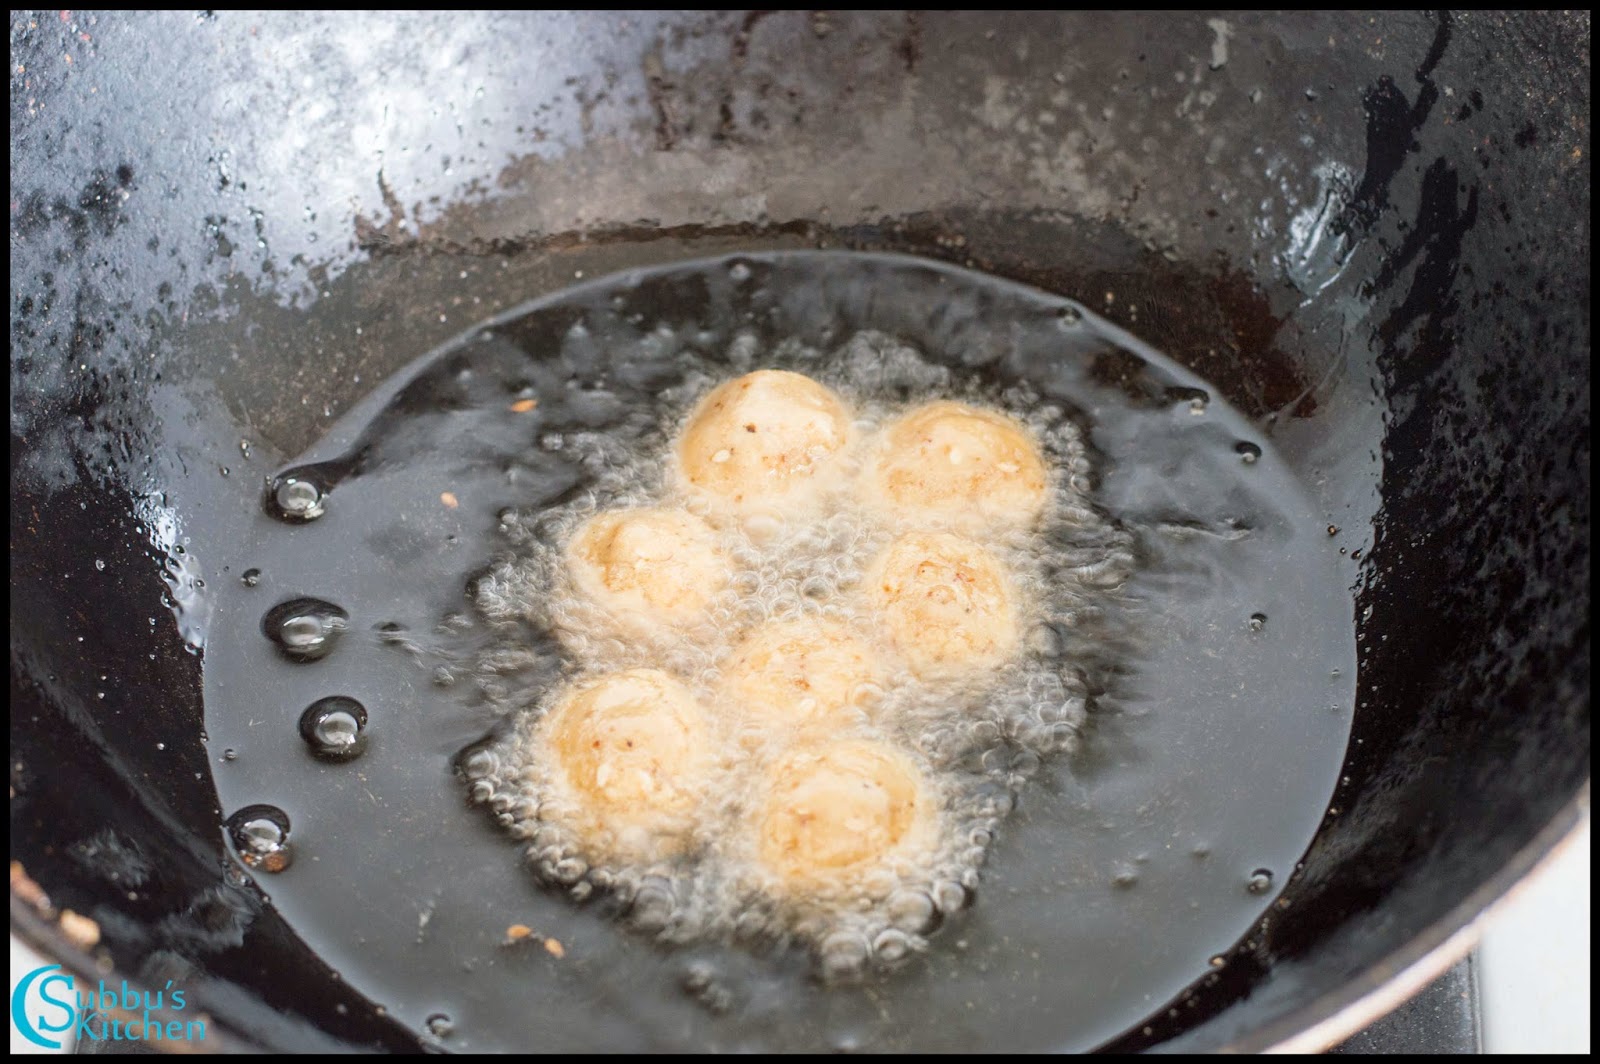
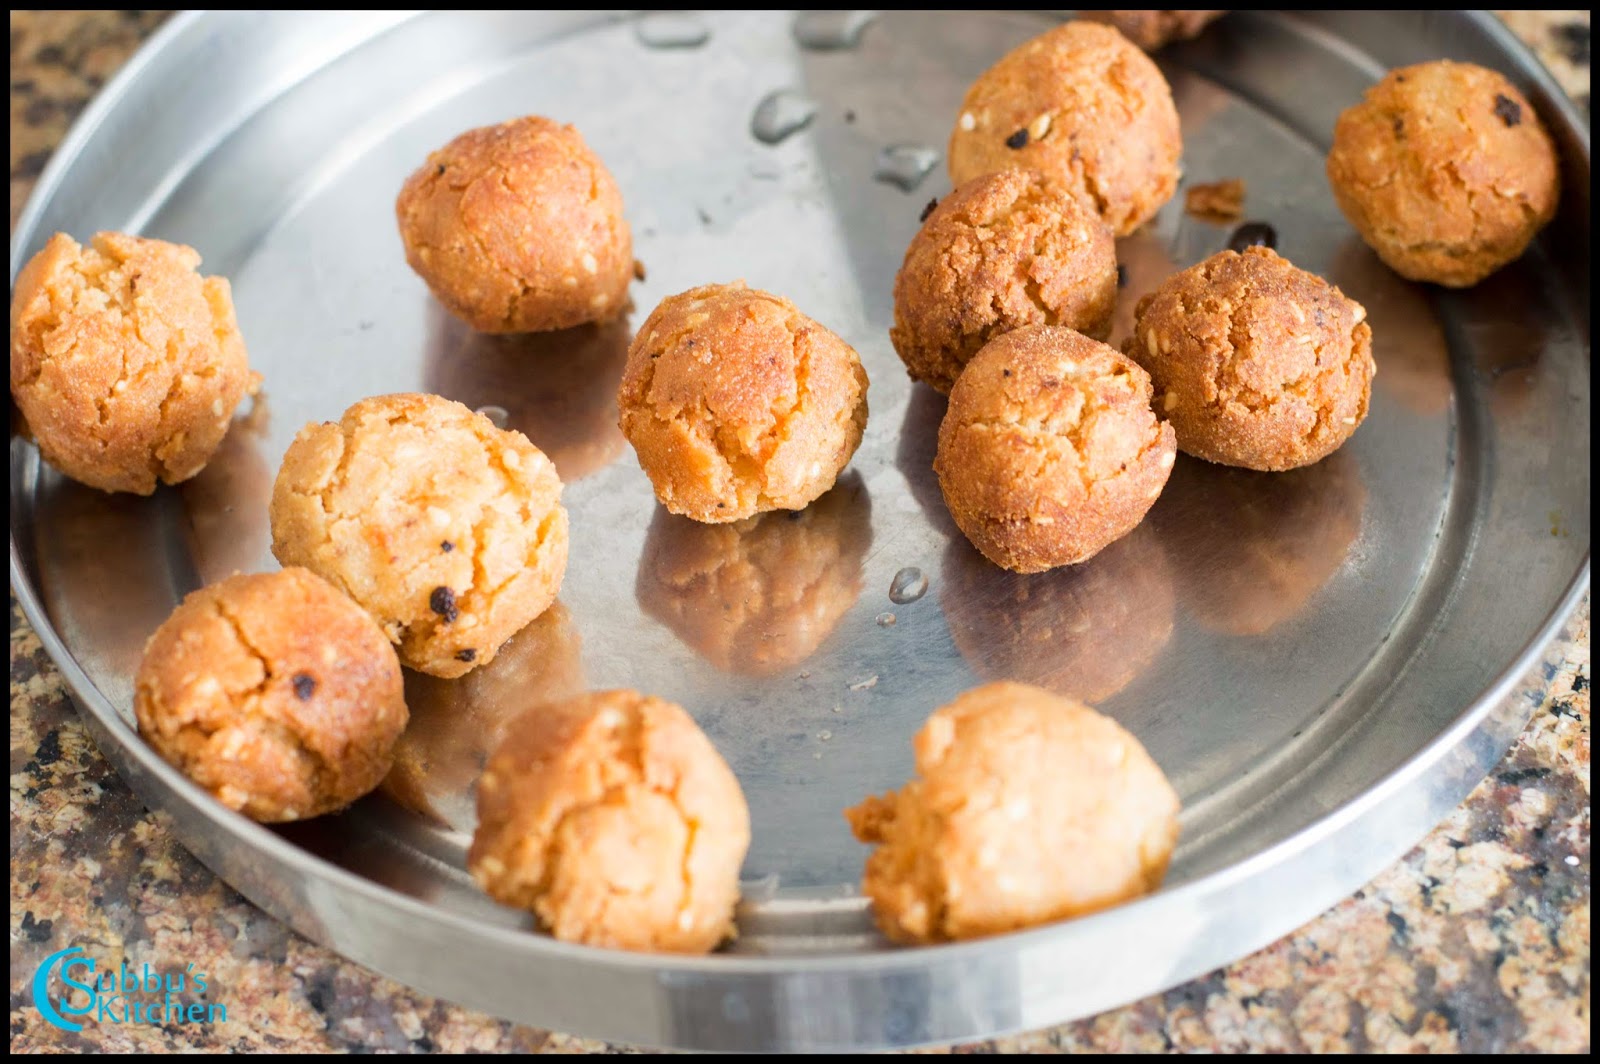
Recipes for Neivedhyam:

Pacharisi IdlyChick Peas SundalArisi Paruppu Payasam

KozhukattaiUlundhu Vadai


Varalakshmi Viratham Pooja - FAQs

$
0
0
I have been receiving lot of questions and comments based on my post on Varalakshmi Viratham Pooja. I tried to collate all the questions and provided the responses here. These are based on my best knowledge and the tradition that has been followed in our family. The tradition may vary across the families and I strongly recommend you to follow the traditions which are being followed in your family. The responses here are just for guidance only. 

Image Courtesy : www.giri.in


  1.                Can pregnant women perform this Pooja?
    a.       Till 5th month of pregnancy period, we can perform the pooja. After that, it is considered as theetu so not advisable to perform the pooja
    2.       When do we need to move the kalasam?
    a.       The next day we need to move the amman in north direction and keep milk as neivedhyam and then after 10 minutes, we can remove the kalasam and keep it in rice box
    3.       Do we need to put the Amman's face together with jewellery in the rice pot or only the coconut
    a.       Yes, along with the amman’s face, we keep the kalasam inside the rice pot. After we keep milk for neivedhyam in night, we need to move the amman along with kalasam inside the rice drum. The next day, we can remove the amman with kalasam and store it in their original places.
    4.       What can we do with the coconut and the rice in kalasam?
    a.       Generally we use the rice and coconut for making Krishna Jayanthi Neivedhyam dishes.
    5.       Where to keep the amman mugham after Pooja?
    a.       In the evening, we need to do neivedhyam again and in the night, we have to keep milk as neivedhyam and shift the amman mugham with the kalasam inside the rice bag / drum
    6.       Can we use the dolls for the vratham that are available in the market ? Can we reuse them next year?
    a.       Generally we use amman face made out of silver. Many of us also use coconut to decorate the amman face.  You can try using a coconut.
    7.       Can we start doing the Pooja all by ourselves?
    a.       If it is the first time, this viratham has to be started by an elderly women (MIL or Mom) who is already doing this Pooja. That's the tradition. But if you stay abroad without your close relation, then with your MIL or mom consent, you can take the Pooja from an elderly women near your house or from a priest.
    8.       What if I get period and not able to do the Pooja?
    a.       You can very well perform the whole Pooja the next friday
    9.       After decorating the amman and vefore starting the Pooja, if periods start, what needs to be done?
    a.       We can’t keep the decorated amman wait for a week. So you can ask your spouse to dismantle the amman and you can again redo the alankaram / decoration and make all neivedhyam dishes and perform the Pooja the next friday
    10.   Unfortunately, If someone in the family expired in the same year, can we do the Pooja?
    a.       As per the tradition, if someone in the family from husband’s side expired, then, we should not perform the Pooja that year. If it is from your side, then if it is more than 13 days and its your in-laws custom to perform the Pooja then you can continue.
    11.   What are the main neivedhyam dishes for this auspicious day?
    a.       Raw Rice Idly, Modak, Sundal, Paruppu Payasam, Vadai and Rice with dal. Some of us even make Nei Appam.

Coconut Poli Recipe | Thengai Poli Recipe

$
0
0
Coconut Poli (Thengai Poli) is a delicious Indian recipe served as a Dessert. Thengaai poli is another delicious variety of poli. Most of us make dal poli for Aavani avittam or bhogi pandigai. This coconut poli is a one of the main sweet available for sale in many Boli stalls and sweet shops in south india. Most of us like the pooranam we pepare for modak. we are going to make the same filling and stuff it inside the maida dough and make these delicious polis. Conventioally all variety of polis are made using all purpose flour. But now most of us are calorie specific and so, u can use half measure of maida and half measure of wheat flour also. I have  explained here the conventional way of making using maida.


Preparation and Yield:
Preparation time30 mins
Cooking Time20 mins
Yield10
Recipe CategoryDessert
Recipe CuisineSouth Indian

Coconut Poli Recipe | Thengai Poli Recipe

Ingredients for outercover:
Maida / All purpose flour1 Cup*
SaltA Pinch
Gingelly Oil2 tablespoon
Ghee2 tablespoon (for cooking polis)

*1 Cup = 250ml
Ingredients for filling
Grated Coconut1 Cup
Grated Jaggery1 Cup
Cardamom Powder1/2 teaspoon

Coconut Poli Recipe | Thengai Poli Recipe

Method for making outercover:
  1. Take a mixing bowl. Add a cup of maida and add a pinch of salt and mix well. Add water little by little and knead it to a nice and soft dough. 
  2. Add a tablepsoon of oil and knead the dough nicely for 5- 10 minutes. Add another tablespoon of oil and knead well again. Let this dough rest aside for 30 minutes. The kneading and adding oil makes the dough more softer and it would be easy for us to spread the maida with filling nicely and also helps to get softer polis
  3. Now the dough is ready
Method for making Puranam (Filling)
  1. Grind the grated coconut in a mixer by giving a pulse or two. This is to make sure the grated jaggery is smooth and does not have any chunks of coconut pieces. If the coconut is nice and smooth, the filling will not come out and we will have nice polis
  2. Heat a sauce pan and add the grated jaggery. Add 2 tablespoon of water and allow the jaggery to melt completely. Once the jaggery is completely melted, remove the sauce pan from the flame
  3. Keep another pan in flame and strain the jaggery juice to the pan. Bring the jaggery juice to boil
  4. Add the grated coconut to the pan and mix the jaggery and coconut well so that they are combined nicely. You can take a small quantity of puranam and check if you can roll it to a ball. This is the correct consistency to remove from the flame
  5. Now the puranam is all ready
Cooking Polis
  1. Take a plastic sheet and spread it nicely. Grease the sheet with oil nicely so that after spreading poli, it would be easier for us to remove from the sheet and add it to the pan. So grease the plastic sheet nicely
  2. Take a small lemon sized ball out of the dough and keep it on the greasy sheet. Grease your fingers with oil and spread the dough ball to a small circle. 
  3. Take a big lemon sized ball out of the puranam and place it on the spread dough and bring all the edges and cover the filling and seal it nicely
  4. Again using your greasy fingers pat the dough and spread it carefully to make sure the filling is not coming out and spread it to a circle like a chapati. Keep this aside. 
  5. In the same way make 3-4 batches of poli and cook them first
  6. Heat a pan, slowly remove the spread out poli from the plastic sheet and add it to the pan. Add a teaspoon of ghee around the poli and cook the poli in medium flame till you see small bubbles and the bottom part is cooked. 
  7. Flip the poli and allow it to cook on the other side. Apply little more ghee and allow the poli to cook
  8. Remove the cooked poli from the pan and place it on a plate. In the same way cook the rest of the spread polis.
  9. The delicious and tasty Coconut Poli is all ready to serve! Serve with ghee topping or warm milk topping and enjoy the dish. 
  10. Coconut Poli Recipe | Thengai Poli Recipe
    Coconut Poli Recipe | Thengai Poli Recipe

Avani Avittam (Upakarma)

$
0
0
Avani Avittam is a most important ritual for Brahmins. It is a ceremony of changing the sacred thread (poonal). I have been told by my father that the right name for this ritual is Upakarma and over a period of time it gets a name "Avani Avittam". It has been observed on different date by different brahmin communities. The dates for this year are given below


Rig veda avani avittam - 28th Aug 2015
Yajur veda avani avittam - 29th Aug 2015
Sama veda avani avittam - 15th Sep 2015

This is the only festival for the brahmin gents. Generally it comes in tamil month Aadi. Once the new moon day of Aadi month completes and full moon day comes, yajur avani avittam will come. For Rig veda brahmins it comes in the day prior to full moon day and that day should be a chathurthi day. In some occasions, both will fall on the same day. For sama veda brahmins, avani avittam will come on the day of vinayaka chaturthi or the previous day.

Even for the younger boy kids, the brahmins will put the sacred poonal which they call as "kalla poonal". First avani avittam after the sacred thread ceremony(Upanayanam) is called as "Tala Avani Avittam" and for this occassion, for homam, we use jaggery payiru sundal and appam for neivedhyam.

On this auspicious occasion bachelor brahmin gents should take head bath. They have to do "samitha-dhanam" and then do "kamokarshith" japam. After this, they can have breakfast and then again take batch and do "maha sangalpam" and then followed by change of sacred thread (poonal). Maha sangalpam meant to clean the sins of the brahmin. After this, they have to do "kandarishi tharpanam."

For Married gents, the same will follow except "samitha-danam". Since the gents do Rishitharpanam on that day, we have to have light tiffen for the dinner. After the gents change their sacred thread (poonal), we have to take aarathi and invite them into our home.

As per tradition, those who has wear poonal has to chant "Gayathri Mantram" 144 times daily during morning, afternoon and evening. Chanting "Gayathri Mantram" removes our sorrow and make us healthier. But nowadays due to the busy schedule, gents are not able chant the mantra for 144 times.

The next day we call as "Gayathri Japam". On that day, the gents who got their Poonal changed on Avani Avittam should take bath in the morning and should chant "Gayathri Mantram" 1008 times. We need to make Payasam on Gayathri Japam day.

Special Recipes:

Nei Appam Paruppu Vadai

Coconut PoliPurana Poli

Aval PayasamFestival Lunch Menu


Lunch Menu

There are no hard rule for the particular item to be made for lunch. We usually make one Payasam, Sweet, Vadai, Pachadi, Curry, Koottu, Kuzhambu and Rasam. People in northern tamil nadu usually make Moor kuzhambu for all the festivals. But in our family we make Sambar. For your easy reference, I have given two menus for your reference.

Ada Pradaman Recipe | Palada Pradaman Recipe

$
0
0
Ada Pradaman is a Traditional dessert made specially during Kerala festivals of Onam & Vishu. onam celebration feels oncomplete without ada pradaman. This delicious pradaman is made from rice, jaggery and coconut milk.  I have usd the store bought rice ada for quick preparation, however yoi can use homemade fresh ada to make it even more delicious. I got this rice ada from Nilgiris shop in chennai. Try this creamy pudding for this onam.


Preparation and Yield:
Preparation time15 mins
Cooking Time20 mins
Servings4
Recipe CategoryDessert
Recipe CuisineSouth Indian

Ada Pradaman Recipe | Palada Pradaman Recipe

Ingredients:
Palada / Rice Ada1 Cup*
Grated Jaggery1 Cup
Thin Coconut Milk2 Cups
Thick Coconut Milk1/2 Cup
Cardamom Powder1/2 teaspoon
Cashewsfew
Finely chopped Coconut bits1 tablespoon
Ghee1 tablespoon


Ada Pradaman Recipe | Palada Pradaman Recipe


Method:
  1. I have taken grated coconut from 2 medium sized coconut and grind it in the mixer jar by adding 1/4 cup of warm water and squeeze out thick coconut milk.  Take the residue of the coconut again in the mixer jar and add 2 cups of water water and squeeze out thin coconut milk and set these aside 
  2. Add 3 cups of water in a sauce pan. Bring it to boil and add the rice ada to the boiling water and close the pan with the lid and switch off the flame. Let this ada be in hot water for 15 minutes for it to get completely cooked.
  3. Meanwhile, heat a pan, add a ghee and add the coconut bits and roast that in ghee till the coconut turns golden brown in color. Take thi saside
  4. Heat again a teaspoon of ghee and roast the cashews till they are golden brown in color. Take these aside
  5. Heat a sauce pan and add the jaggery and 1/2 cup of water and allow it to dissolve completely in water
  6. After 15 minutes, drain the water and rinse the cooked ada in cold water so that the stickiness will be get ridden off. Keep this aside ready
  7. Heat a heavy bottomed pan, add the thin coconut milk and add the rice ada to the pan and bring them to boil.  Strain the jaggery juice to the pan and stir well.
  8. Allow the coconut milk to boil in medium flame for 10 minutes. Then add the cardamom powder and stir well
  9. Add the thick coconut milk and keep the flame really low till you stir well and everything is completely incorporated. Finally garnish with roasted coconut bits and cashews
  10. Switch off the flame. The yummy and tasty Ada Pradaman is all ready to serve! Relish this dainty Palada Pradaman and enjoy your Onam!
  11. Ada Pradaman Recipe | Palada Pradaman Recipe
    Ada Pradaman Recipe | Palada Pradaman Recipe


Milagu Kuzhambu

$
0
0
I can't think of any other kuzhambu other than Milagu kuzhmbu during the raining day!. Its a spicy-tangy one. White rice with a tea spoon of ghee / Gingelly oil, Paruppu thugayal, jeera rasam and a fried appalam is a perfect meal on the winter days. I usually make it in thick consistency, so that i can store it in fridge and use upto 2 weeks. Its a perfect dish for the travel too.
Preparation time10 mins
Cooking Time25 mins
Servings4-6

Milagu Kuzhambu
Milagu Kuzhambu

Ingredients :

Tamarind1 big lemon size
Jaggery1 teaspoon
Saltfor taste
Cooking Oil1 tablespoon

For Grinding :

Red chilli6
Black peppercorns1 1/2 teaspoon
Channa dhal2 teaspoon
Urud dhal2 teaspoon
Coriander Seeds2 teaspoon
Hing A pinch
Curry Leaves10-15 leaves

For Seasoning :

Cooking Oil1 tablespoon
Mustard Seeds1 teaspoon
Curry leavesfew
Hinga pinch

Milagu Kuzhambu
Milagu Kuzhambu

Method
  1. Soak Tamarind in one cup of water and extract the juice and set aside.

  2. Heat the pan and add 1/2 teaspoon of oil and fry the red chillis first. When the colour of the red chilli changed to light brown, add peppercorns, urud dal, channa dal, coriander seeds and hing and fry on medium heat. Add the curry leaves at the final stage and fry once and take them into a mixer.

  3. Add little water (may be 1/2 cup first) and grind it to a fine paste. If required add more water while grinding. But make sure that you don't add too much water and make the ground paste too watery. Heat the pan and add 1 table spoon of Oil. Once the oil get heat, add the mustard seeds. On sputtering add the curry leaves & a pinch of hing. 

  4. Add the Tamarind extract juice along with salt and allow it to boil for 5 minutes to so that the raw smell of the tamarind goes off. Then ground paste and stir well and keep the flame low and allow the kuzhambu to boil in low flame for atleast 10 minutes. 

  5. When the kuzhambu comes to a thick consistency, remove from flame. I would prefer to have it as thick, as i can store it in fridge and consume upto 2 weeks.

  6. Serve this with white rice and a spoon of Gingelly oil with Appalam.
  7. Milagu Kuzhambu
    Milagu Kuzhambu
Note:
To make milagu kuzhambu travel friendly as a paste, add the tamarind to the grinding ingredients and grind it to a thick paste by adding 1 cup of water. Then cook the tamarind-spice paste in low flame and allow the quantity to further reduce to half of its quantity. This simple way, makes the kuzhambu a thick paste and hence it has a long shelf life.

Uppu Seedai / Salt Seedai

$
0
0
Uppu Seedai (Salt Seedai) is another important and traditional neivedhyam dish for krishna jayanthi festival. In my childhood days, my mom used to prepare 5-6 batches of dough and me and my sister with my dad had helped my mom in rolling the dough into small balls. My dad has lots of patience and he used to roll it into very small ball and small balls are actually very crunchy than the bigger balls. It is a bit of tiresome process to make uppu seedai but the end result would be very delicious. We used to think why mom is making 5-6 batches but later we could see we have more seedai so that we could enjoy the delicious and crispy seedai atleast for a week. 

I know many people who are very scared of doing this uppu seedai. Many of us have a bitter experience in doing uppu seedai as sometimes it may burst while frying in the oil. The steps looks simple, but some points we need to keep it in my mind while preparing the dough to avoid bursting.  There are many reasons why it is getting burst in the oil. Please refer my notes for how to Avoid Uppu Seedai(s) from bursting in hot oil. 


Preparation and Yield:
Preparation time30 mins
Cooking Time1 Hour
Yield250 gms

Uppu Seedai / Salt Seedai

Ingredients:

Urdhal powder1 measure (example laddle)
Homemade Rice Flour11 measure (example 11 ladle)
Butter1 table spoon
Gram Dal (optional) 1 table spoon
Grated Coconut2 table spoon
SaltTo Taste
Hing1/2 teaspoon
OilFor Frying + 2 tablespoon


Uppu Seedai / Salt Seedai


Method :
  1. Soak the gram dal(channa dal) in water for 10 minutes. 
  2. Homemade rice flour is the best option for seedai than the store bought rice flour. The ratio of rice flour to urid dal flour is 11:1 (I have used ladle, so for 11 ladles of rice flour, we need to add 1 ladle of urid dal flour. You can use cup, tumbler or even spoon). We need to use the right ratio other wise the seedai will not turn out good. The more uriddal flour, seedai would be dark colour. Lesser urid dal flour results in very light color. So please maintain the ratio. Pass the rice flour and urid dal flour through the sieve atleast twice to make sure they are perfectly smooth. Take a bowl and add the flours along with butter, grated coconut, hing, salt and the soaked and drained gram dal and mix well with your hand so that all are nicely mixed up

  3. Then sprinkle water little by little and knead them to a smooth and stiff dough. Do not add more water and make the dough sticky. The dough should be stiff. Then grease your fingers and palm with oil and take small quantity of dough and roll it to a tiny ball. Do this for rest of the dough. Allow the seedai dough balls in the newspaper or plastic sheet for atleast 5-10 minutes. 

  4. Heat oil in a pan. Check if the oil is hot enough to raise the seedai immediately by dropping a seedai. When it raises immediately, then our oil is ready. Take the tiny dough balls in batches. Do not overload the oil with more seedai. Drop 20-30 balls at a time and deep fry them till they turn golden brown color and crispy. Remove the crispy seedai from the pan and place it in a paper towel to drain excess oil. Repeat the step for the rest of the seedai balls. 

  5. Now the crispy, crunchy and tasty Uppu Seedai is now ready for neivedhyam or for serving!
Uppu Seedai / Salt Seedai

How to avoid the bursting of seedai while frying ?
  1. Smooth Flour :  The rice flour and urdal flour should be very nice and smooth. We need to pass the flours through the sieve atleast twice to get smooth flour. This will prevent breaking of seedai while frying in oil. Sometimes if the flour is wet or if it is not smooth, there may be chances of bursting of seedai while frying in oil which is very dangerous. So we should be cautious while doing seedai. 
  2. Soft Balls: We just need to roll the dough to the soft ball and not a very rigid ball as the air particles inside the dough try to come out while frying and if the ball is very rigid, it may burst in oil.
  3. Dry Balls: After making small balls, leave it in the newspaper / plate to dry before dropping in oil. The wetness or the moisture in the ball tend to burst. 
Uppu Seedai / Salt Seedai

Vella Seedai Recipe | Sweet Seedai Recipe

$
0
0
Vella Seedai or sweet Seedai is one of the important neivedhyam dish for Krishna Jayanthi festival and Thirukarthigai festival. This is one of the trickiest dish. Even for more experienced people, sometimes it wouldn't be a successful attempt. Every time is an experience with this sweet seedai. Beginners may find it difficult in their first attempt. For beginners, you can see this another method for sweet seedai which will be easy for them for their first attempt. The other method of making sweet seedai would not be crispy. We just need to prepare adhirasam dough but make small balls out of it and make seedai. So you may not go wrong in that. 
Coming to this method... This is the conventional method of making Sweet Seedai (Vella Seedai). Though the method is little tricky, if we practice then we would simply love this method as the vella seedai would be very sweet as well as crunchy. We don't have the hassle of any string consistency of the jaggery. Its just the dough consistency we need to be cautious to prevent the seedai from getting dissolved or burst. So now lets focus on how to make this yummy and crunchy vella Seedai.


Vella Seedai Recipe | Sweet Seedai Recipe


Preparation and Yield:
Preparation time5 mins
Cooking Time30 mins
Yield15 Seedai

Vella Seedai Recipe | Sweet Seedai Recipe
Ingredients:
Homemade Rice Flour1 Cup*
Uriddal Flour1 tablespoon
Butter1 tablespoon
Grated Jaggery1/2 Cup
Sesame Seeds1 teaspoon
Grated Coconut1 tablespoon
Cardamom Powder1/4 teaspoon
OilFor Deep Frying

* 1 Cup = 250ml


Vella Seedai Recipe | Sweet Seedai Recipe

Method:
  1. Prepare the rice flour as given in the link here. Heat a pan and dry roast the rice flour in low flame for couple of minutes. Do not fry the rice flour till they become over burnt. Just heat the flour till they are hot and if you take a pinch of rice flour you should be able to draw or put little kolam. Take the roasted rice flour in a mixing bowl along with uriddal flour. Dry roasting is an important step in vella sedai preparation. Do not use freshly ground rice flour as it contain some moisture which will make the seedai to burst. You can also use store bought rice flour. IF you are using store bought rice flour, then dry roast it for couple of minutes and then sieve it and again dry roast it for another couple of minutes without burning the rice flour. 

  2. Take a pan, add sesame seeds and grated coconut and dry fry them till they become golden brown color. Add these fried sesame seeds and grated coconut to the rice flour along with butter. The butter should be in room temperature. Mix everything well.

  3. Take grated jaggery in a bowl and add water just to soak the jaggery. I have added 2 tablespoon of water. Allow the jaggery to boil till it is dissolved. Pass this jaggery juice through a strainer to get rid of sand and other impurities

  4. Add the strained jaggery juice to a pan and keep in flame till it comes a rolling boil. We don't need any string or solid consistency. Add this jaggery juice to the rice flour and mix the rice flour well with a ladle or spoon. Make it to a right dough. If the dough is loose and soft then the seedai will dissolve in hot oil. So when you get a tough pliable dough then stop adding the jaggery syrup. Sometimes we might end up with dry dough where we may need to again sprinkle warm water and make it little soft. If the dough is too dry, then also the seedai will start to dissolve in oil. I have add 2 teaspoon of water to make the dough little soft.

  5. Make gooseberry sized balls out of the seedai dough. Keep it aside for few minutes before dropping in hot oil. Heat oil in  a pan. When the oil is hot enough, just drop a single seedai ball into the oil and in low flame deep fry them. Check if the seedai is not getting dissolved or not getting burst in the oil. If it does we may need to alter the seedai mixture. 
      • If the seedai is getting dissolved, it may be because of very dry ball and in that case, we need to sprinkle warm water little by little and make the dough little soft
      • If the dough is already very soft, then sprinkle rice flour little by little and mix well. 
      • If the seedai is bursting, then it may be due to the very coarse  rice flour or uriddal flour. 

  6. When you are sure that the seedai is not getting dissolved or burst, then drop 4-5 seedai in one batch and in low flame deep fry them till the seedai are crispy and light golden brown color. 

  7. Remove the crispy seedai from flame and place it in a paper towel to drain the excess oil

  8. Yummy and crispy vella seedai is now ready for neivedhyam or for serving.
  9. Vella Seedai Recipe | Sweet Seedai Recipe
    Vella Seedai Recipe | Sweet Seedai Recipe


Coconut Seedai

$
0
0
Seedai is one of the important Neivedhyam dish we make for Krishna Jayanthi. Coconut seedai is a traditional dish made in our home every year for Krishna Jayanthi. Unlike, salt seedai, which should be done cautiously, this coconut seedai doesn't have the fear of bursting. A very simple to make seedai with a rich flavour of coconut. We need to make these seedai with our hand pressure only with the moisture of the freshly grated coconut. A very crispy and yummy snack. These seedai are hard to bite. We need to just put them in mouth and slowly enjoy the flavour of coconut and eventually it will crumble and you can enjoy the taste of the coconut seedai!


Preparation and Yield:
Preparation time30 mins
Cooking Time1 Hour
Yield20 Seedai

Coconut Seedai
Coconut Seedai
Ingredients:

Urdhal powder1 teaspoon
Homemade Rice Flour1 Cups
Grated Coconut1/3 Cup
SaltTo taste
Hing1/4 teaspoon
OilFor Frying + 2 tablespoon

Coconut Seedai
Coconut Seedai

Method:
  1. First prepare the homemade rice flour using this link
  2. Along with this homemade rice flour, add urdhal powder (dry fry the urdhal (without oil) in a pan and make a fine powder. Sieve before using it.), grated coconut, hing and salt and mix it well
  3. Now with the hand pressure make small balls of mixture and keep it aside in a plate. Try not to add water to make the balls. You should be able to make the balls with the moisture from the coconut.
  4. Heat the oil in the pan, and once the oil is hot, add 8-10 coconut seedai balls at a time and deep fry it till it becomes golden color. Repeat the process for the rest of the flour
  5. Now the delicious coconut seedai is ready for neivedhyam and for serving
Note : 1. Make all the balls first and then go for deep fry. This will allow the balls to dry in the air for some time.
2. If the mixture becomes very dry and if you are not able to make a ball, then you can sprinkle little water on it and make the balls. If you add more water, then it will create a problem when you put the ball in the oil.

Coconut Seedai
Coconut Seedai

Gokulashtami / Krishna Jayanthi

$
0
0
Gokulashtami (Sri Krishna Jayanthi) celebrates with great pomp and show, the birth of Lord Krishna who was born more than 5000 years ago in the 28th year of Dwapur Yug. It is one of the most celebrated festivals for Hindus not only in India but also, all over the world. Janmashtami is about the joy, people all over the world feel for their beloved Lord Krishna. Gokulashtami (Sri Krishna Jayanthi) falls on 8th day after Avani Avittam function. Normally on this auspicious occassion people will fast from the morning and during the sunset, they will do pooja for Lord Krishna by offering lots of sweets and neivedhyams. Butter is favourite for Lord krishna and hence people will offer milk, curd, buter, Aval, fruits and some more sweets to God on this special day. During Krishna's childhood, he is fond of butter and he will steal the butter from pots which will spill out in the floor and when he walks, it forms a nice palm prints. So keeping this in mind, the devotees will draw small footprints from the entrance of house to the pooja room.


On the evening during the sunset, devotees will do pooja for Lord Krishna and offer the Lord with butter,fruits,vella seedai, Cocunut Seedai , Uppu Seedai, Appam, Thattai,Aval and some more delicious foods.

Salt SeedaiSweet Seedai

Coconut SeedaiThenkuzhal

ThattaiChakli

Nei AppamAval Puttu

Sweet AvalAval Kesari


Click the link below for the Krishna Jayanthi Recipes


Krishna Jayanthi / Gokulashtami
Viewing all 1833 articles
Browse latest View live